
Subscribe to Our Youtube Channel
Related Manuals for Linear Nice 5MP Series


Summary of Contents for Linear Nice 5MP Series
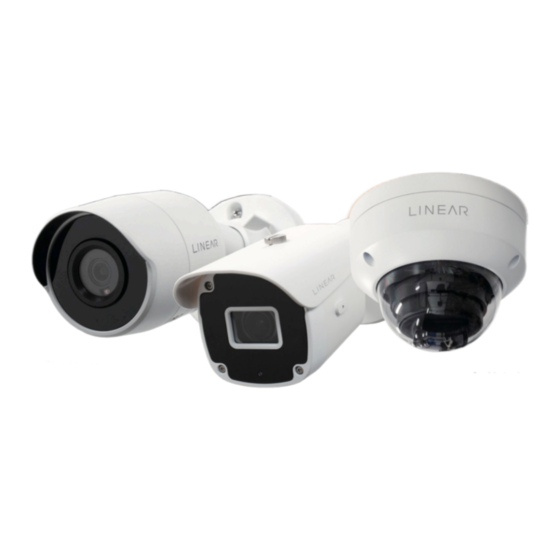
- Page 1 Fixed Lens Fixed Lens -&- Motorized Bullet Camera Varifocal Lens Dome Camera Motorized Varifocal Lens Bullet Camera IV400 Smart Surveillance Cameras | 5MP SERIES User Manual...
- Page 2 Nortek Security & Control LLC Carlsbad, CA www.linear-solutions.com...
-
Page 3: Table Of Contents
........................5 1.1 Abbreviations ............................... 5 1.2 Key Concepts ..............................5 1.3 Prerequisites ............................... 6 2. Introduction to Linear IV400 Management Application ................ 6 2.1 Need of the Application ............................. 6 2.2 Features ................................6 2.3 Technical Specifications ............................ 7 2.4 Camera Types... - Page 4 Motion Detector �����������������������������������������������������������������������������������������������������������������������������������31 Camera Tamper Detector ���������������������������������������������������������������������������������������������������������������������32 Intrusion Detector ���������������������������������������������������������������������������������������������������������������������������������33 Line Cross Detector ������������������������������������������������������������������������������������������������������������������������������34 Loiter Detector �������������������������������������������������������������������������������������������������������������������������������������35 Object Left/Removed Detector �������������������������������������������������������������������������������������������������������������36 Object Classification ����������������������������������������������������������������������������������������������������������������������������37 7.5 Storage ................................38 7.6 Network ................................39 Static Setting ����������������������������������������������������������������������������������������������������������������������������������������39 DHCP (Dynamic Host Configuration Protocol) Settings �������������������������������������������������������������������������40 Port Configuration ��������������������������������������������������������������������������������������������������������������������������������41 SMTP/Email �����������������������������������������������������������������������������������������������������������������������������������������42 FTP ������������������������������������������������������������������������������������������������������������������������������������������������������43...
-
Page 5: Abbreviations & Key Concepts
Smart Surveillance 1. Abbreviations & Key Concepts 1.1 Abbreviations Table 1: Description of Abbreviation IP Cam Internet Protocol Camera Network Time Protocol Daylight Saving Time DHCP Dynamic Host Configuration Protocol Domain name server Constant Bitrate Variable Bitrate Frames per second MJPEG Motion JPEG SMTP... -
Page 6: Prerequisites
• Make sure your camera is always connected to a PoE LAN connection. • Web browser (Firefox/Chrome/Safari/Microsoft Edge). 2. Introduction to Linear IV400 Management Application An Internet Protocol camera (IP) camera is a digital video camera that receives data and sends image data via the LAN or WAN using Internet Protocol. -
Page 7: Technical Specifications
Smart Surveillance 2.3 Technical Specifications The technical specifications are listed in the following table. Understanding the technical specifications will help you technically know your camera better. Model IV400- 5DFW IV400-5DVW IV400-5BFW IV400-5BVW 5MP Fixed Lens Dome 5MP Varifocal Lens Dome 5MP Fixed Lens Bullet 5MP Varifocal Lens Bullet Product Description... -
Page 8: Camera Types
2.4 Camera Types There are four types of camera available: Fixed Dome, Motorized Varifocal Dome, Fixed Bullet and Motorized Varifocal Bullet. Fixed Dome Camera Images for Illustration Figure 1: Fixed Lens Dome Camera The following figure shows front view and rear view of the camera. Figure 2: Front View of Fixed Figure 3: Rear View of Fixed Lens Dome Camera... -
Page 9: Motorized Varifocal Lens Dome Camera Images For Illustration
Smart Surveillance Motorized Varifocal Lens Dome Camera Images for Illustration Figure 4: Motorized Varifocal Lens Dome Camera The following figure shows front view and rear view of the camera. Figure 5: Front View of Motorized Figure 6: Rear View of Motorized Varifocal Lens Dome Camera Varifocal Lens Dome Camera... -
Page 10: Fixed Lens Bullet Camera Images For Illustration
Fixed Lens Bullet Camera Images for Illustration Figure 7: Fixed Bullet Camera The following figure shows front view and rear view of the camera. Figure 8: Front View of Fixed Lens Figure 9: Rear View of Fixed Lens Bullet Camera Bullet Camera... -
Page 11: Motorized Varifocal Lens Bullet Camera Images For Illustration
Smart Surveillance Motorized Varifocal Lens Bullet Camera Images for Illustration Figure 10: Motorized Varifocal Lens Bullet Camera The following figure shows front view and rear view of the camera. Figure 11: Front View of Motorized Figure 12: Rear View of Motorized Varifocal Lens Bullet Camera Varifocal Lens Bullet Camera... -
Page 12: Software Specifications
2.5 Software Specifications Computer must be installed with any of the following browser. • Web browser (Firefox/Chrome/Safari/IE/Microsoft Edge). 3. Getting Started 3.1 Accessing the IV400 camera in any Web Browser using HTTPS or HTTP Protocol: 1. Start your computer system, and launch any installed browser. 2. -
Page 13: Logging Into The Application
To log into the system, follow these steps: 1. Launch any web browser, enter the IV400 camera (IP) then press Enter. 2. Enter valid User Name & Password on the Login page (Default User Name = admin / Default Password = linear). 3. Click the Submit button. -
Page 14: Changing The Password
4. After authorizing provided credentials, the Change Password login screen will be displayed. Figure 16: Change Password 3.3. Changing the Password To change the default password provided: 1. Enter new password in Password and Confirm Password fields. 2. Click Update. Figure 17: Update Password Notes: •... -
Page 15: Live View (Home/Landing Page)
Smart Surveillance 4. Live View (Home/Landing Page) Figure 18: Live View (Homepage) 1. Live View Streaming: Monitor the camera's Live Streaming video. 2. Full Screen: Click (Live View lower right) to access Live View full-screen. To exit Full Screen Live View, move your mouse to the top of the screen and click the X icon, press the Esc key or click (extreme bottom-right side) of screen. -
Page 16: Event Lists Section
5. Streams: Select a desired stream (“Stream 2” or “Stream 1”). Once selected, adjust options for resolutions with encoding type supported by the IV400 camera. If any encoding type [for example: H265 with higher resolution(5MP)] is not supported on Web browser UI, a warning prompt will appear on the Live View screen. -
Page 17: Settings
Smart Surveillance 3. To sort event data, hover your mouse over the Event Type filter. Select or deselect desired checkboxes, then select Apply. Only selected events type will be displayed. 6. Settings Configure various system settings to customize the live streaming experience. 6.1 System >... - Page 18 1. Edit Camera Name: Click the Edit icon adjacent to Camera Name. The Edit Camera Name pop-up appears on-screen. Enter the new name, and then click Save. Figure 23: Edit Camera Name Figure 24: FDFR License 2. FDFR License Validation: Enter a FDFR License key, then select Submit to validate the license.
-
Page 19: System > Time
Smart Surveillance Figure 25: Set Date and Time via NTP 6.2 System > Time Set the Date & Time for the IV400 camera. There are three methods available. 1. NTP - Network Time Protocol (NTP) synchronizes computer clocks by periodically querying an NTP Server. -
Page 20: System > Maintenance
2. Manual: Manually Set the Date and Time by clicking on Date ( ) & Time ( ) and using the popup menus. 3. Sync with Computer: Click the checkbox to synchronize the camera's date and time with the computer's operating system. Figure 26: Set Date and Time Manually Select Save to keep the updated date and time settings. - Page 21 Smart Surveillance 1. IV400 Camera Upgrade: This feature allows you to upgrade the firmware of your Network Camera. To upgrade the firmware: a. Download the latest firmware file from the link provided in the release document. The file is in <IV400-NORK-xxxxxxx>.dat file format. b.
-
Page 22: System > Logs
Diagnostics Logs: These logs help discover the root cause of any failure on the camera. To store log in local system: Click Download, confirm the download then click Save to store the log on the computer. Please share this encrypted log file with Linear technical support for further troubleshooting. -
Page 23: Camera
Smart Surveillance 7. Camera 7.1 Camera > Video Set various configuration related to Video settings. Figure 29: Video Settings Adjust settings such as Encoding Type, Resolution, Bitrate Type, FPS and Quality. View three qualities of video streams, dictated by internet speed. Click Save when finished. •... -
Page 24: Camera > Audio
5. Bit Rate: Bit rate is defined by kilobits per second (Kbps). The higher the bit rate, the better the video quality. • Constant Bit Rate: Select this option to perform live streaming at constant bit rate, regardless of network bandwidth available. •... -
Page 25: Camera > Image
Smart Surveillance 7.3 Camera > Image General Enable overlay for Date and Time and Video Analytics. Night Vision options are available, as well as an option to Flip the Live View display. When finished making revisions, click Save. Figure 30: Image Settings Preview Window: Previews the Live View display. -
Page 26: Image Quality
Image Quality Use the sliders to adjust image quality settings, or use the pull-down menu to select a White Balance setting. When finished making revisions, click Save. Figure 31: Image Quality 1. Preview Window: Previews Live View. 2. Brightness: Adjust the overall lightness or darkness of the image. When set to the lower side, contrast is provided to highlight areas and the medium tone is made darker. -
Page 27: Exposure
Smart Surveillance Exposure A photograph's exposure determines how light or dark an image appears when captured by camera. The IV400 has various available exposure camera settings. When finished making revisions, click Save. Figure 32: Image Exposure 1. Preview Window: It is actual preview of Live View-Image. 2. -
Page 28: Privacy Mask
10. Shutter Speed: A camera's shutter speed determines when the camera sensor will be open or closed to incoming light. The shutter speed specifically refers to how long this light is permitted to enter the camera. A faster shutter speed means a shorter exposure time. Excessively fast shutter speeds can cause a moving subject to appear unnaturally frozen. -
Page 29: Events
Smart Surveillance 7.4 Events General Adjust settings for various general event options. Events are generated whenever there is change in scene where the camera is focusing. For example, someone tampering with a camera, an object is detected in the scene, motion is detected or if someone is dwelling or loitering in the scene. - Page 30 6. Camera View: Set the camera view as Horizontal, Overhead or Angled. The camera estimates the angle in which event generation will be more accurate. 7. Ignore Area: This option is defined for the area of the scene that does not come under region of interest.
-
Page 31: Motion Detector
Smart Surveillance Motion Detector Motion detection is a monitoring algorithm that detects motions that triggers the surveillance camera to begin capturing an event. An advanced motion detection surveillance system can analyze the type of motion to determine if it warrants an alarm. Figure 35: Motion Detector To enable camera Motion Detector: 1. -
Page 32: Camera Tamper Detector
Camera Tamper Detector Camera Tamper Detector is a setting within the IP camera that will send a notification when the camera has been tampered with. The alert signals your video management system to monitor recorded events. Light Change: Light ON and Light OFF events are generated according to the light condition in the scene. -
Page 33: Intrusion Detector
Smart Surveillance Intrusion Detector New Zone (Red) New Zone (Yellow) Figure 37: Intrusion Detector To enable Intrusion detector: 1. Toggle Intrusion Entered/Exited events ON or OFF. 2. Class Validation: Click check box to filter the intrusion validation based on classification as a Human, Pet or Vehicle. -
Page 34: Line Cross Detector
Line Cross Detector Line Crossing detects a moving object that crosses over a defined line. The entry/exit direction can be defined. The line can be drawn in any direction. Event notifications can be sent when a line is crossed in a specific direction, or a count can be maintained to determine entry/exit counts. Figure 39: Line Crossing Detector To enable Line Cross Detector: 1. -
Page 35: Loiter Detector
Smart Surveillance Loiter Detector The Loitering event detects objects standing or lingering in a selected area. This event detection is based on Loitering Detector Time. It can be deployed indoors/outdoors, day or night, at any venue. Figure 40: Loiter Detector To configure Loitering Detector settings for camera: 1. -
Page 36: Object Left/Removed Detector
Object Left/Removed Detector Object Left/Removed Detector identifies if an object is left or removed from the scene. Object Left detects if an object that has been left unattended for too long a period of time. It looks for objects that are not part of the normal scene. Object Removed can detect and alert when a specific object has been removed from the scene. -
Page 37: Object Classification
Smart Surveillance Object Classification Object Classification uses Deep Learning AI technology to monitor for Humans, Vehicles or Pets. The camera will notify only when an object of interest is detected, According to motion of any object (Human, Vehicle or Pet), an event is generated. Figure 42: Object Classification To enable Object Classification: To configure Object Classification settings for camera, click the Human Detector, Vehicle Detector... -
Page 38: Storage
7.5 Storage This feature allows storage of the “live streaming data or event data” in .mp4 format on an external SD Card and explains how to manage the local storage on the Network Camera. If the SD Card setting is enabled, avoid using FTP for video storage to avoid load (heavy data) processing. -
Page 39: Network
Smart Surveillance 7.6 Network This section explains how to configure a wired network connection for the Network Camera. Select this option when the Network Camera is deployed on a local area network (LAN) and is intended to be accessed by local computers. It's necessary to configure the server settings so that the Network Camera will know the action to take (such as where the server sends media files) when any event is generated. -
Page 40: Dhcp (Dynamic Host Configuration Protocol) Settings
Figure 51: Network-DHCP DHCP (Dynamic Host Configuration Protocol) Settings DHCP is a dynamic network management protocol used to assign an Internet Protocol (IP) address to any device or node on a network, so they can communicate using IP. Select this option to obtain an available dynamic IP address assigned for the IV400 Camera. DHCP can be used to initially setup a surveillance system, but it is recommended that surveillance and access control systems have permanent static IP Addresses. -
Page 41: Port Configuration
Smart Surveillance Port Configuration This feature allows mapping new ports to HTTP, HTTPS for accessing the IV400 web interface, as well as mapping new port for RSTP (to perform live streaming using third party media player like VLC) instead of default ports. Figure 52: Network-Port Configuration To configure Network Port Configuration settings: 2. -
Page 42: Smtp/Email
SMTP/Email Send event notification alerts via Email whenever an event is generated by the IV400 Camera. Figure 53: Network-SMTP/Email To configured the SMTP/Email for IV400 Camera: 1. Enter all required data in each field as mentioned above (see below). 2. Click Save. All event alert or data will be sent via email to respective recipient email address SMTP Email: Enter the valid sender email address. -
Page 43: Ftp
Smart Surveillance This feature allows you to send video (events data) to an FTP Server whenever any event is generated by the IV400 camera. Also new folder (Folder Name: Mac ID of IV400 Camera) gets created on FTP server which will have recorded event data as per ‘<Date><Timestamp> with 6 seconds .mp4 clips each. -
Page 44: Http Post
HTTP Post Send event notification alerts data to an HTTP Server whenever an event is generated. Network-HTTP Post To configure the HTTP Post for IV400 Camera: 1. Enter the server URL. 2. Click Save. All event alert or data will be uploaded to the HTTP Server in json format. HTTP Server URL: Enter the URL of the HTTP server to receive event data. - Page 45 Smart Surveillance Add User: Admin can add new user (see below): Figure 56: Add User 1. Click Add User. 2. Enter the Username. 3. Select User Type (Admin, Operator or User) 4. Enter Password. 5. Click Save. The newly added user will be listed on the user list (see Figure 57, next page). Figure 57: Listed Users...
- Page 46 Change Password Figure 57: Change User Password 1. Click the Change Password icon ( ) visible under Actions. 2. Enter a New Password. NOTE: Password must contain minimum 8 characters, with at least 1 letter and 1 numeric character. 3. Confirm New Password. 4.
-
Page 47: Https
Smart Surveillance HTTPS Generate an SSL certificate (if required). It will be valid for next 10 years (Validity 3650) from "date of issue". By default, HTTP and HTTPS protocol is supported by the IV400 camera. If required, HTTP can be disabled by clicking the ON/OFF toggle switch. NOTE: The IV400 Camera has a Self-signed HTTPS certificate by default. -
Page 48: Logging Out
Figure 60: Generate New SSL Certificate To generate valid SSL Certificate: 1. Click the Generate Certificate option. 2. Enter the required details for Organization, Organization Unit, City/Locality, State/Province and Country. 3. Click the Generate button. A newly generated certificate will be issued and replace the existing HTTPS certificate. -
Page 49: Faqs
Smart Surveillance 9 FAQs Question How to access web UI of camera? Answer Open any web browser, and enter the camera IP address to access the IV400 camera web UI (default: 192.168.0.230). Question What are the supported internet browsers? Answer Mozilla Firefox, Google Chrome, Microsoft Edge and Safari. -
Page 50: Troubleshooting
Check ignore area settings, ignore area should not mask entire area of the active area window. 11 Customer Support USA & Canada Toll Free: 800-421-1587 or call 760-438-7000 www.linear-solutions.com 10030158 Rev-A ©2022 Nice North America LLC. Linear is a registered trademark of Nice North America LLC. All rights reserved.
Need help?
Do you have a question about the Nice 5MP Series and is the answer not in the manual?
Questions and answers