Endress+Hauser Cerabar M PMC51 Operating Instructions Manual
Process pressure / differential pressure, flow / hydrostatic
Hide thumbs
Also See for Cerabar M PMC51:
- Technical information (134 pages) ,
- Operating instructions manual (48 pages) ,
- Brief operating instructions (32 pages)
Table of Contents
Advertisement
Advertisement
Chapters
Table of Contents

Related Manuals for Endress+Hauser Cerabar M PMC51


Summary of Contents for Endress+Hauser Cerabar M PMC51
- Page 1 Operating Instructions Cerabar M PMC51, PMP51, PMP55 Deltabar M PMD55 Deltapilot M FMB50/51/52/53 Process pressure / Differential pressure, Flow / Hydrostatic Cerabar M Deltabar M Deltapilot M BA00382P/00/EN/13.10 71123275 Valid from software version: 01.00.zz...
- Page 2 – The documentation is supplied with the device. Instruction – Wiring – The documentation can also be found on the – Local operation documentation CD supplied. – Commissioning – The documentation is also available on the Internet. See: www.endress.com Download Endress+Hauser...
-
Page 3: Table Of Contents
Maintenance....92 Exterior cleaning ......92 Endress+Hauser... -
Page 4: Safety Instructions
Operating Instructions. The installation regulations, connection values and safety instructions listed in this Ex document must be observed. The documentation number of the related Safety Instructions is also indicated on the additional nameplate. • Ensure that all personnel are suitably qualified. Endress+Hauser... -
Page 5: Notes On Safety Conventions And Icons
Connecting cable immunity to temperature change Indicates that the connecting cables have to withstand a temperature of 85°C at least. > t 85°C Safety instructions Observe the safety instructions in the associated Operating Instructions. Endress+Hauser... -
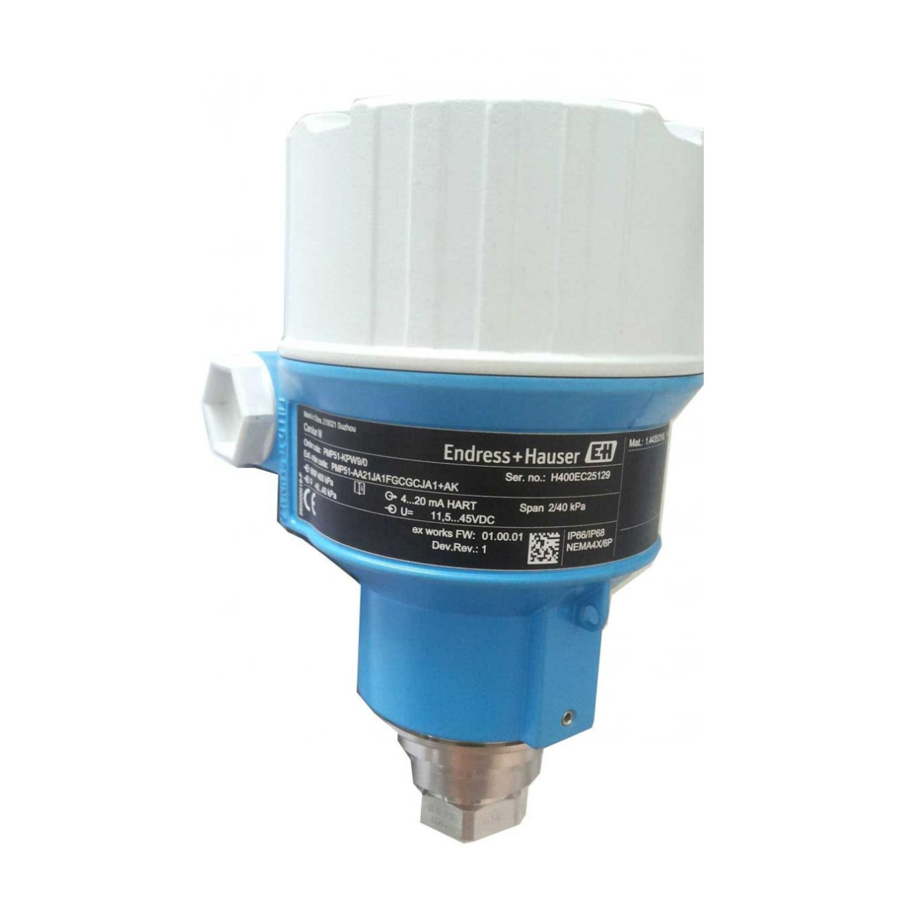
Page 6: Identification
12 ID number of notified body with regard to Pressure Equipment Directive (optional) 13 Approvals 14 Degree of protection 15 Wetted materials 16 Deltabar M: Cable entry; Deltapilot M: Wetted materials 17 Approval-specific information 18 Software Revision 19 Device Revision Devices suitable for oxygen applications are fitted with an additional nameplate. Endress+Hauser... - Page 7 Devices for use in hazardous areas are fitted with an additional plate. Ta>60°C: t>80°C Install per drawing Dat.: P01-xMx5xxxx-18-xx-xx-xx-002 Fig. 4: Additional nameplate for devices for use in hazardous areas, or devices with a CSA and FM approval Approval-specific information Endress+Hauser...
-
Page 8: Scope Of Delivery
The devices comply with the applicable standards and regulations as listed in the EC Declaration of Conformity and thus comply with the statutory requirements of the EC Directives. Endress+Hauser confirms the conformity of the device by affixing to it the CE mark. -
Page 9: Installation
See Technical Information for Cerabar M TI00436P / Deltabar M TI00434P / Deltapilot M TI00437P. Installation conditions 3.2.1 Dimensions For dimensions, please refer to the Technical Information for Cerabar M TI00436P / Deltabar M TI00434P / Deltapilot M TI00437P, "Mechanical construction" section. See also ä 2, "Overview of documentation". Endress+Hauser... -
Page 10: Installing Cerabar M
• For PMP55, please refer to Section 3.3.2 "Installation instructions for devices with diaphragm seals – PMP55", ä 12. • Endress+Hauser offers a mounting bracket for installing on pipes or walls. ä 15, Section 3.3.5 "Wall and pipe mounting (optional)". - Page 11 The siphon reduces the temperature to almost the ambient temperature. Pressure measurement in liquids ➀ ➁ P01-PMx5xxxx-11-xx-xx-xx-005 Fig. 7: Measuring arrangement for pressure measurement in liquids Cerabar M shutoff device • Mount Cerabar M with shutoff device below or at the same level as the tapping point. Endress+Hauser...
- Page 12 • Vibration-free (in order to avoid additional pressure fluctuations) • Not in the vicinity of heating or cooling lines • Insulate if the ambient temperature is below or above the reference temperature • With a bending radius of 100 mm (3.94 in). Endress+Hauser...
- Page 13 115 P01-PMx5xxxx-11-xx-xx-xx-008 Endress+Hauser recommends the use of temperature isolators in the event of constant extreme medium temperatures which lead to the maximum permissible electronics temperature of +85°C (+185°F) being exceeded. To minimize the influence of rising heat, Endress+Hauser recommends the device be mounted horizontally or with the housing pointing downwards.
- Page 14 £ • P01-PMx5xxxx-11-xx-xx-xx-010 Fig. 12: Maximum permitted insulation height, here indicated on a PMP55 with a flange PMP55 70°C (158°F) Ambient temperature (T Process temperature (T Max. 400°C (752°F), depending on the diaphragm seal filling oil used (see TI00436PEN) Endress+Hauser...
- Page 15 Cerabar M, Deltabar M, Deltapilot M / 4...20 mA HART Installation 3.3.5 Wall and pipe mounting (optional) Endress+Hauser offers a mounting bracket for installing on pipes or walls (for pipes from 1 " up to 2" diameter). P01-xMx5xxxx-06-xx-xx-xx-001 Please note the following when mounting: •...
- Page 16 Mount the housing on a wall or pipe using the mounting bracket (item 7). When mounting on a pipe, tighten the nuts on the bracket uniformly with a torque of at least 5 Nm (3.69 lbs ft). Mount the cable with a bending radius (r) 120 mm (4.72 in). Endress+Hauser...
- Page 17 Setscrew See the "Welding recommendation" table below Endress+Hauser recommends welding on the diaphragm seal as follows for the "XSJ - Prepared for diaphragm seal mount" version in feature 110 "Process connections" in the order code up to, and including, 40 bar sensors: the total welding depth of the fillet weld is 1 mm (0.04 in) with an outer diameter of 16 mm (0.63 in).
-
Page 18: Installing Deltabar M
• Install the impulse piping with a monotonic gradient of at least 10%. • Endress+Hauser offers a mounting bracket for installing on pipes or walls ( ä 23, "Wall and pipe-mounting (option)"). Installation position for flow measurement... - Page 19 • Mount the Deltabar M below the measuring point so that the impulse piping is always filled with liquid and gas bubbles can run back into the process piping. • When measuring in media with solid parts, such as dirty liquids, installing separators and drain valves is useful for capturing and removing sediment. Endress+Hauser...
- Page 20 • Mount the Deltabar M below the lower measuring connection so that the impulse piping is always filled with liquid. • Always connect the low-pressure side above the maximum level. • When measuring in media with solid parts, such as dirty liquids, installing separators and drain valves is useful for capturing and removing sediment. Endress+Hauser...
- Page 21 • Always connect the low-pressure side above the maximum level. • A condensate trap ensures constant pressure on the low-pressure side. • When measuring in media with solid parts, such as dirty liquids, installing separators and drain valves is useful for capturing and removing sediment. Endress+Hauser...
- Page 22 • Mount the Deltabar M below the measuring point so that the impulse piping is always filled with liquid and gas bubbles can run back into the process piping. • When measuring in media with solid parts, such as dirty liquids, installing separators and drain valves is useful for capturing and removing sediment. Endress+Hauser...
- Page 23 Installation 3.4.2 Wall and pipe-mounting (option) Endress+Hauser offers a mounting bracket for installing the device on pipes or walls. A bracket with mounting accessories is included with the device if ordered. Note! When using a valve block, the block's dimensions must be taken into account.
- Page 24 Cerabar M, Deltabar M, Deltapilot M / 4...20 mA HART Typical installation arrangements PMD55, H2 PMD55, V1 P01-PMD55xxx-17-xx-xx-xx-001 A: Installation for horizontal impulse pipes; H2 version B: Installation for vertical impulse pipes; V1 version 1: Deltabar M; 2: Adapter; 3: Mounting bracket Endress+Hauser...
-
Page 25: Installing Deltapilot M
ä 40, Section "Function of the operating elements" or ä 56, Section 6.4 "Position zero adjustment". • The local display can be rotated in 90° stages. • Endress+Hauser offers a mounting bracket for installing on pipes or walls. ä 15, Section 3.3.5 "Wall and pipe mounting (optional)". 3.5.1... - Page 26 • In the case of devices for hazardous areas, comply strictly with the safety instructions when the housing cover is open. • The length of the extension cable or the probe rod is based on the planned level zero point. The top of the probe should be at least 5 cm (1.97 in) below this. Endress+Hauser...
- Page 27 Seal for flange mounting ➀ ➁ P01-FMD7xxxx-11-xx-xx-xx-002 Fig. 17: Mounting the versions with a flange Process isolating diaphragm Seal Warning! The seal is not allowed to press against the process isolating diaphragm as this could affect the measurement result. Endress+Hauser...
- Page 28 Cerabar M, Deltabar M, Deltapilot M / 4...20 mA HART 3.5.6 Wall and pipe mounting (optional) Mounting bracket Endress+Hauser offers a mounting bracket for installing on pipes or walls (for pipes from 1 " up to 2" diameter). P01-xMx5xxxx-06-xx-xx-xx-001 In the case of pipe mounting, the nuts on the bracket must be tightened uniformly with a torque of at least 5 Nm (3.69 lbf ft).
- Page 29 5 Nm (3.69 lbf ft). Mount the cable with a bending radius (r) 120 mm (4.72 in). Routing the cable (e.g. through a pipe) You require the cable shortening kit. Order number: 71093286 For details on mounting, see SD00553P/00/A6. Endress+Hauser...
-
Page 30: Mounting Of The Profile Seal For Universal Process Mounting Adapter
DustEx protection (only available for devices with DustEx approval). Post-installation check After installing the device, carry out the following checks: • Are all screws firmly tightened? • Are the housing covers screwed down tight? • Are all locking screws and vent valves (Deltabar M only) firmly tightened? Endress+Hauser... -
Page 31: Wiring
Switch on supply voltage. 4…20 mA 11.5 V DC P01-PMD55xxx-04-xx-xx-xx-010 Electrical connection 4...20 mA HART Terminals for supply voltage and signal Test terminals Grounding terminal Supply voltage: 11,5 ... 45 VDC (versions with plug connectors: 35 V DC) External ground terminal Endress+Hauser... - Page 32 Meaning Signal – – Signal + Not assigned Earth A0011176 4.1.4 Devices with valve connector + – – – P01-xMx5xxxx-04-xx-xx-xx-005 Fig. 21: Left: electrical connection for devices with a valve connector Right: view of the connector at the device Endress+Hauser...
-
Page 33: Connecting The Measuring Unit
< 0.7 . 4.2.2 Cable specification • Endress+Hauser recommends using twisted, shielded two-wire cables. • Terminals for wire cross-sections 0.5 to 2.5 mm (20 to 14 AWG) • Cable outer diameter: 5 to 9 mm (0.2 to 0.35 in) 4.2.3... - Page 34 • In the case of Ex d type of protection, do not connect the handheld terminal in the hazardous area. • Do not replace the battery of the handheld terminal in the hazardous area. • For devices with FM or CSA certificates, establish the electrical connection as per Installation or Control Drawing (ZD) supplied. Endress+Hauser...
-
Page 35: Potential Equalization
Connecting Commubox FXA195 (USB) The Commubox FXA195 connects intrinsically safe transmitters with the HART protocol to a computer's USB port. This allows remote operation of the transmitter using Endress+Hauser's FieldCare operating program. Power is supplied to the Commubox through the USB port. The Commubox is also suitable for connection to intrinsically safe circuits. -
Page 36: Overvoltage Protection (Optional)
1.5 mm² max. 2.5 mm² max. 3.75 Nm min. 1.5 mm² ➀ Screw coupling glued at the factory: hold in place with a wrench when loosening/tightening the coupling nut ➁ black Shield grounding ➁ without ➂ direct ➂ black P01-xMx5xxxx-04-xx-xx-en-007 Endress+Hauser... -
Page 37: Post-Connection Check
• Are all screws firmly tightened? • Are the housing covers screwed down tight? As soon as voltage is applied to the device, the green LED on the electronic insert lights up for a few seconds or the connected local display lights up. Endress+Hauser... -
Page 38: Operation
P Q R S T U V W X Y Z , ( ) ‘ _ < > + * / FIELD COMMUNICATOR ä 48 Remote operation via The device is operated using the FieldCare FieldCare operating tool. Endress+Hauser... -
Page 39: Operation Without Operating Menu
The measuring mode is "flow" and the setting in the operating menu. output characterisitcs is "Square root" • "Setup" -> "Measuring mode" regardless of the settings in the operating • "Setup" -> "Extended Setup" -> "Current menu. output" -> "Linear/Sqroot" Endress+Hauser... - Page 40 DIP switch. If operation is locked by means of the operating menu, you can only unlock operation again using the operating menu. Locking/unlocking via DIP switches DIP switch 1 on the electronic insert is used to lock/unlock operation. ä 39, "Function of the DIP switches". Endress+Hauser...
-
Page 41: Operation With An Operating Menu
Contains the last 10 error messages (no longer pending). • Instrument info Contains information on the device identification. • Measured values Contains all the current measured values • Simulation Is used to simulate pressure, level, flow, current and alarm/warning. • Reset Endress+Hauser... - Page 42 Enter the direct access code to go directly to a parameter. Entry Options: • Enter the desired parameter code. Menu path: Expert Direct access Factory setting: Note: For direct access, it is not necessary to enter leading zeros. Endress+Hauser...
- Page 43 • Each parameter is given a 3-digit parameter code for easy navigation • Possibility of configuring the display to suit individual requirements and preferences, such as language, alternating display, contrast setting, display of other measured values such as sensor temperature etc. • Comprehensive diagnostic functions (fault and warning message etc.) Endress+Hauser...
- Page 44 Data transfer via communication Square root symbol Active measuring mode "Flow measurement" The root flow signal is used for the current output. Error message "Out of specification" The device is being operated outside its technical specifications (e.g. during warmup or cleaning processes). Endress+Hauser...
- Page 45 ESC functions: – Exit the edit mode for a parameter without saving the changed value. – You are in a menu at a selection level. Each time you press the keys simultaneously, you go up a level in the menu. Endress+Hauser...
- Page 46 The third position is highlighted in black and can now be edited. P01-PMD55xxx-19-xx-xx-xx-006 1. Switch to the "" symbol with the "-" key. 2. Use "E" to save the new value and exit the editing mode. See next graphic. P01-PMD55xxx-19-xx-xx-xx-007 Endress+Hauser...
- Page 47 P01-PMD55xxx-19-xx-xx-xx-010 Accept the pressure present as position adjustment with the "E" key. The device confirms the adjustment and goes back to the "Pos. zero adjust" parameter. P01-PMD55xxx-19-xx-xx-xx-011 Exit the edit mode for the parameter with "E" . P01-PMD55xxx-19-xx-xx-xx-009 Endress+Hauser...
- Page 48 FieldCare is an Endress+Hauser asset management tool based on FDT technology. With FieldCare, you can configure all Endress+Hauser devices as well as devices from other manufacturers that support the FDT standard. Hardware and software requirements you can find on the internet: www.endress.com È...
- Page 49 Description Code definition (023) Use this function to enter a release code with which the device can be unlocked. Entry User input: • A number between 0 and 999 Menu path: Setup Extended setup Factory setting: Code definition Endress+Hauser...
- Page 50 Any customer-specific configuration carried out at the factory is not affected by a reset (customer- specific configuration remains). If you want to change the customer-specific configuration carried out at the factory, please contact Endress+Hauser Service. As no separate service level is provided, the order code and serial number may be changed without a specific unblocking code (e.g.
-
Page 51: Commissioning
Carry out a post-installation and a post-connection check as per the checklist before commissioning the device. • "Post-installation check" checklist Chap. 3.8 • "Post-connection check" checklist Chap. 4.5 depending on the setting in the "Alarm behavior" (050) parameter Endress+Hauser... -
Page 52: Commissioning Without An Operating Menu
Observe the input Observe the input Observe the input limits. limits. limits. Observe warning on commissioning ( ä 51) Endress+Hauser... - Page 53 ("full pressure") value. Observe Observe the input pressure") and the input limits. and assigned to the input limits. limits. assigned to the the upper level lower level value value ("full ("empty calibration"). calibration"). Observe warning on commissioning ( ä 51) Endress+Hauser...
- Page 54 ("Max. Press. pressure value. Observe the input Flow") and Observe the input limits. assigned to the limits. maximum flow value ("Max. Flow"). Observe warning concerning the commissioning (page ä 51). Endress+Hauser...
-
Page 55: Commissioning With An Operating Menu
Press. eng. unit • mbar, bar • mmH2O, mH2O, inH2O • ftH2O • Pa, kPa, MPa • psi • mmHg, inHg • kgf/cm Factory setting: mbar or bar depending on the sensor nominal measuring range, or as per order specifications Endress+Hauser... -
Page 56: Position Zero Adjustment
"Calib. offset" parameter. This means that you are assigning the value 980.0 (14.7 psi) to the pressure present. – Measured value (after calib. offset) = 980.0 mbar (14.7 psi) – The current value is also corrected. Factory setting: Endress+Hauser... -
Page 57: Level Measurement (Cerabar M And Deltapilot M)
ä 60 Calibration is "In height" – Calibration with reference performed by entering pressure (wet calibration), see ä 62 the density and two height-level value – Calibration without pairs. reference pressure (dry calibration), see ä 64 Endress+Hauser... - Page 58 Select a pressure unit via the "Press eng. unit" parameter, here "mbar" for example. Menu path: Setup Press. eng. unit P01-Mxxxxxxx-19-xx-xx-xx-003 Fig. 27: Calibration with reference pressure – wet calibration See Table, Step 8. See Table, Step 9. Endress+Hauser...
- Page 59 Menu path: Setup Extended setup Level Process density Result: The measuring range is set for 0 to 3 m (9.8 ft). Note! The measured variables %, level, volume and mass are available for this level mode. See ä 114 "Output unit (025)". Endress+Hauser...
- Page 60 Select a level unit via the "Output unit" parameter, here "l" (liters) for example. Menu path: Setup Extended setup Level Output unit P01-Mxxxxxxx-19-xx-xx-xx-004 Fig. 29: Calibration without reference pressure – dry calibration See Table, Steps 6 and 7. See Table, Steps 8 and 9. Endress+Hauser...
- Page 61 Menu path: Setup Extended setup Level Process density Result: The measuring range is set for 0 to 1000 l (264 US gal). Note! The measured variables %, level, volume and mass are available for this level mode. See ä 114 "Output unit (025)". Endress+Hauser...
- Page 62 Select a level unit via the "Output unit" parameter, here "l" (liters) for example. P01-Mxxxxxxx-19-xx-xx-xx-007 Menu path: Setup Extended setup Level Fig. 31: Calibration with reference pressure – Output unit wet calibration See Table, Step 10. See Table, Step 8. See Table, Step 9. Endress+Hauser...
- Page 63 See Table, Step 12. Result: The measuring range is set for 0 to 1000 l (264 US gal). Note! The measured variables %, level, volume and mass are available for this level mode ä 114 "Output unit (025)". Endress+Hauser...
- Page 64 Menu path: Setup Extended setup Level Height See Table, Steps 7 and 8. unit See Table, Steps 9 and 10. Select the "Dry" option via the "Calibration mode" parameter. Menu path: Setup Extended setup Level Calibration mode Endress+Hauser...
- Page 65 See Table, Step 8. See Table, Step 9. See Table, Step 10. See Table, Step 12. See Table, Step 13. Note! The measured variables %, level, volume and mass are available for this level mode ä 114 "Output unit (025)". Endress+Hauser...
- Page 66 • Setup Ext. Setup Level Adjust density (034) (e.g. 1.0 kg/l for water) • Setup Ext. Setup Level Process density (035) (e.g. 0.8 kg/l for oil) Endress+Hauser...
-
Page 67: Linearization
Confirm your entry. P01-Mxxxxxxx-19-xx-xx-xx-006 Menu path: Setup Extended setup Linearization X-value [m ] Using the "Y-value" parameter, enter the associated volume value, here 0 m for example, and confirm the value. Menu path: Setup Extended setup Linearization Y-value P01-Mxxxxxxx-05-xx-xx-xx-015 Endress+Hauser... - Page 68 Additionally, it is possible to call up pre-programmed tank shapes. Note! The linearization table can also be entered manually point for point in the menu of the operating tool (see Chap. 6.6.1 "Manual entry of the linearization table". Endress+Hauser...
- Page 69 Menu path: Setup Extended setup Linearization Lin. mode Select the volume unit/mass unit via the "Unit after lin." parameter, e.g. m Menu path: Setup Extended setup Linearization Unit after lin. Fill the tank to the height of the 1st point. P01-Mxxxxxxx-19-xx-xx-xx-006 Endress+Hauser...
- Page 70 The 0% value (= 4 mA) is defined by the smallest point in the table. The 100% value (= 20 mA) is defined by the biggest point in the table. You can change the allocation of the volume or mass values to the current values using the "Set LRV" and "Set URV" parameters. Endress+Hauser...
-
Page 71: Pressure Measurement
Enter the value for the "Set URV" parameter (here See Table, Step 4. 300 mbar (4.5 psi)) and confirm. This pressure value is assigned to the upper current value (20 mA). Result: The measuring range is configured for 0 to +300 mbar (4.5 psi). Endress+Hauser... - Page 72 Menu path: Setup Extended setup Current output Get URV. Confirm the value present by selecting "Confirm". The pressure value present is assigned to the upper current value (20 mA). Result: The measuring range is configured for 0 to +300 mbar (4.5 psi). Endress+Hauser...
-
Page 73: Electrical Differential Pressure Measurement With Gauge Pressure Sensors (Cerabar M Or Deltapilot M)
Adjustment of the Cerabar M/Deltapilot M on the low pressure side (the differential is generated in this device) Select the "Pressure" measuring mode via the "Measuring mode" parameter. Menu path: Setup Measuring mode Select a pressure unit via the "Press eng. unit" parameter, here "mbar" for example. Menu path: Setup Press. eng. unit Endress+Hauser... - Page 74 Adjustments that result in an offset of the pressure values (e.g. position adjustment, trim) must always be performed in accordance with the individual sensor and its orientation, irrespective of the "Electr. Delta P" application. Other settings result in non-permitted use of the "Electr. Delta P" function and can lead to incorrect measured values. Endress+Hauser...
-
Page 75: Differential Pressure Measurement (Deltabar M)
Carry out calibration if necessary. See also page 76, Deltabar M section 6.6.2. Three-valve manifold Separator 1, 5 Drain valves 2, 4 Inlet valves Equalising valve 6, 7 Vent valves on Deltabar M A, B Shut-off valve for arrangement with 5 valves Endress+Hauser... - Page 76 Note! The damping is only active if DIP switch 2 ("damping ") is in the ON position. Pressure after damping Displays the measured pressure after sensor trim, position adjustment and (111) damping. Display Endress+Hauser...
-
Page 77: Flow Measurement (Deltabar M)
The first totalizer (totalizer 1) can be reset to zero at any time while the second (totalizer 2) totalises the flow from commissioning onwards and cannot be reset. Note! The totalizers are not available for the "Flow in %" flow type. Endress+Hauser... - Page 78 Carry out position zero adjustment ( ä 56) if the flow can A, B Shut-off valves be blocked off. In this case, step 5 is not applicable. Carry out calibration. See page 79, Chap. 6.10.3. for arrangement with 5 valves Endress+Hauser...
- Page 79 The damping is only active if DIP switch 2 "damping " is in the ON position. Flow (018) Displays the present flow value. Display Pressure after damping Displays the measured pressure after sensor trim, position adjustment and (111) damping. Display Endress+Hauser...
-
Page 80: Level Measurement (Deltabar M)
• "in pressure" - without reference pressure ( ä 58) Separator • "in heigth" - with reference pressure ( ä 90) Vent valves on Deltabar M • "in height" - without reference pressure ( ä 90) Shut-off valve Drain valve Endress+Hauser... - Page 81 Drain valves • "in heigth" - with reference pressure ( ä 90) 2, 4 Inlet valves • "in height" - without reference pressure ( ä 90) Equalizing valve 6, 7 Vent valve on Deltabar M A, B Shut-off valve Endress+Hauser...
- Page 82 • "in pressure" - with reference pressure ( ä 84) A, B Shut-off valves • "in pressure" - without reference pressure ( ä 60) • "in heigth" - with reference pressure ( ä 90) • "in height" - without reference pressure ( ä 90) Endress+Hauser...
- Page 83 (dry calibration) ä 60 Calibration takes place "In height" • Calibration with reference by entering the density pressure (wet calibration), ä 90 and two height/level value pairs. • Calibration without reference pressure (dry calibration) ä 88 Endress+Hauser...
- Page 84 ( ä 114), here "m" for example. Menu path: Setup Extended setup Level Output unit Select the "Wet" option via the "Calibration mode" parameter ( ä 114). Menu path: Setup Extended setup Level Calibration mode Endress+Hauser...
- Page 85 Result: See Table, Step 8 The measuring range is set for 0 to 3 m (9.8 ft). 0 m corresponds to an output current of 4 mA. 3 m (9.8 ft) corresponds to an output current of 20 mA. Endress+Hauser...
- Page 86 ( ä 114), here "l" for example. Menu path: Setup Extended setup Level Output unit Select the "Dry" option via the "Calibration mode" parameter ( ä 114). Menu path: Setup Extended setup Level Calibration mode Endress+Hauser...
- Page 87 Full pressure Result: The measuring range is set for 0 to 1000 l (264 US gal). 0 l corresponds to an output current of 4 mA. 1000 l (264 US gal) corresponds to an output current of 20 mA. Endress+Hauser...
- Page 88 ( ä 114), here "m" for example. Menu path: Setup Extended setup Level Height unit Select the "Wet" option via the "Calibration mode" parameter ( ä 114). Menu path: Setup Extended setup Level Calibration mode Endress+Hauser...
- Page 89 See table, Step 8. 0 l corresponds to an output current of 4 mA. See table, Step 9. 1000 l (264 US gal) corresponds to an output current of See table, Step 10. 20 mA. See table, Step 11. Endress+Hauser...
- Page 90 ( ä 114), here "m" for example. Menu path: Setup Extended setup Level Height unit Select the "Wet" option via the "Calibration mode" parameter ( ä 114). Menu path: Setup Extended setup Level Calibration mode Endress+Hauser...
-
Page 91: Backup Or Duplicate Device Data
Backup or duplicate device data The device has no memory module. With an operating tool based on FDT technology (e.g. FieldCare), you have the following options: • Saving/rescuing configuration data • Duplicating instrument configurations • Transferring all relevant parameters when replacing electronic inserts. Endress+Hauser... -
Page 92: Maintenance
• The cleaning agents used should not corrode the surface and the seals. • Mechanical damage to the process isolating diaphragm, e.g. due to pointed objects, must be avoided. • Observe the degree of protection of the device. See the nameplate if necessary ( ä 6 ff). Endress+Hauser... -
Page 93: Troubleshooting
– Overpressure or low pressure present. 3. Perform a reset This message normally only appears briefly. F002 Sens. unknown Sensor does not suit the device (electronic 1. Contact Endress+Hauser sensor nameplate). Service F062 Sensor conn. – Cable connection between sensor and 1. Check sensor cable main electronics disconnected. - Page 94 3. Accept the table F841 Sensor range – Overpressure or low pressure present. 1. Check the pressure value – Sensor defective. 2. Contact Endress+Hauser Service F882 Input signal – External measured value is not received 1. Check the bus or displays a failure status.
-
Page 95: Response Of Output To Errors
– Loose connection at the sensor cable. S841 Sensor range – Overpressure or low pressure present. 1. Check the pressure value – Sensor defective. 2. Contact Endress+Hauser Service S971 Adjustment – The current is outside the permitted 1. Check the pressure value range 3.8 to 20.5 mA. -
Page 96: Repair
• Carry out repairs according to the instructions. Following a repair, the device must fulfill the requirements of the specified individual tests. • A certified device may only be converted to another certified device version by Endress+Hauser. • All repairs and modifications must be documented. -
Page 97: Spare Parts
Select the required spare parts (You may also use the overview drawing on the right side of the screen.) When ordering spare parts, always quote the serial number indicated on the nameplate. As far as necessary, the spare parts also include replacement instructions. Endress+Hauser... -
Page 98: Return
• The duly completed and signed "Declaration of Hazardous Material and Decontamination" (see penultimate page). Only then is it possible for Endress+Hauser to inspect or repair the returned device. • The chemical and physical properties of the medium. • A description of the application. -
Page 99: Technical Data
Cerabar M, Deltabar M, Deltapilot M / 4...20 mA HART Technical data Technical data For the technical data, please refer to the Technical Information for Cerabar M TI436P / Deltabar M TI434P / Deltapilot M TI437P. ä 2, "Overview of documentation" section. Endress+Hauser... -
Page 100: Appendix
Flow ("Flow" measuring mode) (Deltabar M) Level before lin (Level measuring mode) Pressure af. damp Extended setup Code definition Device tag Operator code Level (Level measuring mode) Level selection Output unit Height unit Calibration mode Empty calib. Empty calib. Endress+Hauser... - Page 101 Alarm behavior P Alarm cur. switch Output fail mode High alarm curr. Set min. current Output current Linear/Sqroot Linear/Sqroot (read only) Get LRV (Pressure measuring mode) Set LRV Get URV (pressure) Set URV Totalizer 1 (Deltabar M) Eng. unit totalizer 1 Endress+Hauser...
- Page 102 Last diag. 4 Last diag. 5 Last diag. 6 Last diag. 7 Last diag. 8 Last diag. 9 Last diag. 10 Instrument info Firmware version Serial number Ext. order code Order identifier Cust. tag number Device tag ENP version Endress+Hauser...
- Page 103 Firmware version Ext. order code Order identifier ENP version Electr. serial no. Sensor serial no. Display Language Display mode Add. disp. value Format 1st value Management Enter reset code Measurement Lin./SQRT switch (Deltabar M) Measuring mode Measuring mode (read only) Endress+Hauser...
- Page 104 Full pressure (read only) Full height Full height (read only) Density unit Adjust density Adjust density (read only) Process density Process density (read only) Level before lin Linearization Lin. mode Unit after lin. Line-numb.: X-value: Y-value: Edit table Tank description Endress+Hauser...
- Page 105 Get LRV (Pressure measuring mode) Set LRV Get URV (Pressure measuring mode) Set URV Start current Curr. trim 4mA Curr. trim 20mA Offset trim 4mA Offset trim 20 mA Communication HART config Burst mode Burst option Current mode Bus address Preamble number Endress+Hauser...
- Page 106 Totalizer 1 overflow Totalizer 2 (Deltabar M) Eng. unit totalizer 2 Totalizer 2 mode Totalizer 2 failsafe Totalizer 2 Totalizer 2 overflow Diagnosis Diagnostic code Last diag. code Reset logbook Min. meas. press. Max. meas. press. Reset peakhold Operating hours Endress+Hauser...
- Page 107 Last diag. 3 Last diag. 4 Last diag. 5 Last diag. 6 Last diag. 7 Last diag. 8 Last diag. 9 Last diag. 10 Simulation Simulation mode Sim. pressure Sim. flow Sim. level Sim. tank cont. Sim. current Sim. error no. Endress+Hauser...
-
Page 108: Description Of Parameters
The release code is "0" in the order configuration. Another release code can be defined in the "Code definition" parameter. If the user has forgotten the release code, it can be made visible again by entering the number sequence "5864". Factory setting: Endress+Hauser... -
Page 109: Language
Specify the contents for the second line of the local display in the measuring mode. Selection Options: • No value • Pressure • Main value (%) • Current • Temperature • Totalizer 1 • Totalizer 2 The options depend on the measuring mode chosen. Factory setting: No value Endress+Hauser... -
Page 110: Format 1St Value
If the measuring mode is changed, no conversion takes place. If necessary, the device has to be recalibrated after the measuring mode has been changed. Options: • Pressure • Level • Flow (Deltabar M only) Factory setting Pressure or as per order specifications Endress+Hauser... - Page 111 Options: • mbar, bar • mmH2O, mH2O, inH2O • ftH2O • Pa, kPa, MPa • psi • mmHg, inHg • kgf/cm Factory setting: mbar or bar depending on the sensor nominal measuring range, or as per order specifications Endress+Hauser...
-
Page 112: High Pressure Side (Read Only)
0.0 or as per order specifications Set URV (014) Set the upper-range value – without reference pressure. Display Enter the pressure value for the upper current value (20 mA). Factory setting: Upper range limit sensor or as per order specifications. Endress+Hauser... -
Page 113: Corrected Press
Displays the measured pressure before the sensor trim and position adjustment. Display Corrected press. (172) Displays the measured pressure after sensor trim and position adjustment. Display Pressure af. damp (111) Displays the measured pressure after sensor trim, position adjustment and damping. Display Endress+Hauser... -
Page 114: Level Selection 024
("Empty calibration" and "Full calibration" parameters). • Dry Dry calibration is a theoretical calibration. For this calibration, you specify two pressure/level value pairs via the following parameters: "Empty calib.", "Empty pressure", "Full calib.", "Full pressure". Factory setting: Endress+Hauser... -
Page 115: Empty Calib. 028
"Height unit", "Density unit" and "Adjust density" parameters. Factory setting: • g/cm Adjust density (034) Enter the density of the medium. The measured pressure is converted to a height using Entry the "Height unit" and "Adjust density" parameters. Factory setting: Endress+Hauser... -
Page 116: Process Density
Enter the level value for the specific point in the table and confirm. Display/Entry Note! • If "Lin. mode" = "Manual", the level value has to be entered. • If "Lin. mode" = "Semiautomatic", the level value is displayed and has to be confirmed by entering the associated Y-value. Endress+Hauser... -
Page 117: Y-Value
When the flow type is changed, conversion is not possible. Prerequisite: • "Flow type" (044) = Mass Options: • g/s, kg/s, kg/min, kg/h • t/s, t/min, t/h, t/d • oz/s, oz/min • lb/s, lb/min, lb/h • ton/s, ton/min, ton/h, ton/d Factory setting: kg/s Endress+Hauser... -
Page 118: Norm. Flow Unit
Use the "Set URV" (057) parameter to assign a flow to the upper current value. If you want to assign the upper current value a value other than that for "Max. flow" (009), you must enter the desired value for "Set URV" (057). Factory setting: 100.0 Endress+Hauser... -
Page 119: Max. Pressure Flow
Sensor recalibration by entering a target pressure while simultaneously and automatically Display accepting a reference pressure present for the lower calibration point. Hi trim sensor (132) Sensor recalibration by entering a target pressure while simultaneously and automatically Display accepting a reference pressure present for the upper calibration point. Endress+Hauser... -
Page 120: Alarm Cur. Switch
Display Display • SW The output characteristics is defined in the "Linear/Sqroot" (055) parameter • Square root The output characteristics follows a square root function, independent of the software setting. This characteristics is needed for differential pressure flow measurement. Endress+Hauser... -
Page 121: Linear/Sqroot
1. Select the "Current" option in the "Simulation mode" parameter. 2. Set the 4mA value in the "Sim. current" parameter. 3. Enter the current value measured with the switching unit in the "Curr. trim 4mA" parameter. Input range: Measured current ±0.2 mA Factory setting: 4 mA Endress+Hauser... - Page 122 Displays the difference between 4 mA and the value entered for the "Curr. trim 4mA" Display parameter. Factory setting: Offset trim 20mA (138) Displays the difference between 20 mA and the value entered for the "Curr. trim 20mA" Display parameter. Factory setting: Endress+Hauser...
- Page 123 Displays the device revision. Display e.g.: 1 Manufacturer ID (103) Displays the manufacturer number in decimal numerical format. Display Here: 17 Endress+Hauser HART revision (180) Displays the HART revision. Display Here: 6 Descriptor (139) Enter the tag description (max. 16 alphanumeric characters).
- Page 124 Displays the 4th process value. See also "4th value is" 4th value (154) Display Expert È Communication È HART input Parameter name Description HART input value (155) Displays the HART input value. Display HART input stat. (179) Displays the HART input status Display Bad / Uncertain / Good Endress+Hauser...
- Page 125 For switching the electr. delta P application on or off with an external or constant value. Entry Options: External value Constant Factory setting: Fixed ext. value (174) Use this function to enter the constant value. Entry The value refers to "HART input unit". Factory setting: Endress+Hauser...
-
Page 126: Eng. Unit Totalizer 1
1" (062) parameter. The "Totalizer 1 overflow" (064) parameter displays the overflow. Example: The value123456789 m is indicated as follows: – Totalizer 1: 3456789 m – Totalizer 1 overflow: 12 E7 m Totalizer 1 overflow (064) Displays the overflow value of totalizer 1. See also "Totalizer 1" (063). Display Endress+Hauser... - Page 127 Displays the lowest pressure value measured (peakhold indicator). You can reset this Display indicator by means of the "Reset peakhold" parameter. Max. meas. press. (074) Displays the highest pressure value measured (peakhold indicator). You can reset this Display indicator by means of the "Reset peakhold" parameter. Endress+Hauser...
- Page 128 Last diag. 3 (087) Errors which have occurred multiple times are displayed once only. Last diag. 4 (088) Last diag. 5 (089) Last diag. 6 (090) Last diag. 7 (091) Last diag. 8 (092) Last diag. 9 (093) Last diag. 10 (094) Endress+Hauser...
- Page 129 See also "Simulation mode (112)". Entry Prerequisite: • "Meas. mode" = Flow and "Simulation Mode" = Flow Sim. level (115) Enter the simulation value. See also "Simulation mode". Entry Prerequisite: • "Measuring mode" = Level and "Simulation mode" = Level Endress+Hauser...
- Page 130 Entry Prerequisite: • "Simulation mode"= Current value Factory setting: Current value of the current Sim. error no. (118) Enter the diagnostic message number. See also "Simulation mode". Entry Prerequisite: • "Simulation mode"= Alarm/warning Switch on value: 484 (simulation active) Endress+Hauser...
-
Page 131: Patents
• US 5,334,344 A1 i EP 0 490 807 B1 • US 6,703,943 A1 • US 5,499,539 A1 i EP 0 613 552 B1 Deltapilot M: • US 6,427,129 B1 i EP 0 892 249 B1 • US 6,703,943 A1 • DE 203 13 744.2 U1 Endress+Hauser... -
Page 132: Index
Locking operation......40, 49 Measuring arrangement for level measurement ..12 Measuring arrangement for pressure measurement . . . 10–11 Endress+Hauser... - Page 133 Erklärung zur Kontamination und Reinigung Please reference the Return Authorization Number (RA#), obtained from Endress+Hauser, on all paperwork and mark the RA# clearly on the outside of the box. If this procedure is not followed, it may result in the refusal of the package at our facility.
- Page 134 www.endress.com/worldwide BA00382P/00/EN/13.10 71123275 CCS/FM+SGML6.0 71123275...
Need help?
Do you have a question about the Cerabar M PMC51 and is the answer not in the manual?
Questions and answers