Table of Contents
Advertisement
Available languages
Available languages
Quick Links
Advertisement
Table of Contents

Summary of Contents for VATTON 49130
-
Page 2: List Of Components
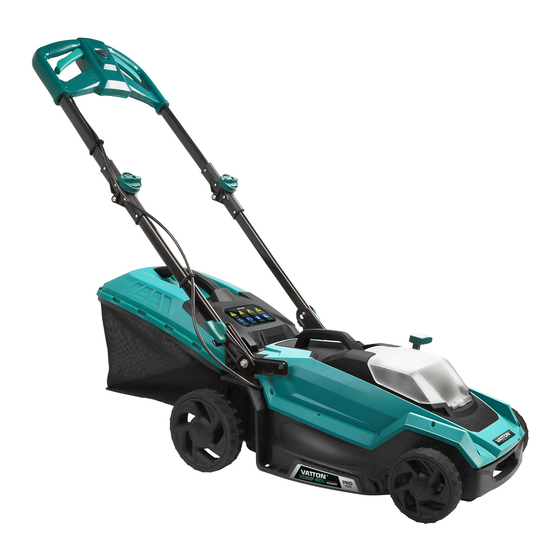
CUT T I N G W I D T H CAPA CIT Y LIST OF COMPONENTS TECHNICAL DATA 01 // Handle Voltage: 40V No-load speed: 3000RPM 02 // Knob Brushed motor rated: 800W 03 // Fuselage carrying handle Cutting width: 400mm. 04 // Transparent cover Type of drive system: Push Cutting height: 25-75mm, 6 position... -
Page 3: Charging Procedure
CHARGING PROCEDURE 2. TO REMOVE OR INSTALL THE BATTERY PACK (SEE B) NOTE: Before using the tool, read the instruc- Locate button on front of the battery pack. Depress the bu- tion book carefully. tton to release and slide it out from the tool. After recharge, insert back into the tool. -
Page 4: General Safety Rules
GENERAL SAFETY RULES Step 1 WARNING! Step 2 Read all instructions. Failure to comply with these instructions listed below may result in electric shock, fire and/or serious injury. The term “power tool” in all of the warnings listed below refers to your live (corded) or battery-powered (cordless) power tool. -
Page 5: Additional Safety Rules
6 Service 5) Maintain posture and balance at all times. This allows better control of the power tool in unexpected situations. 6) Dress appropriately. Do not wear inappropriate clothing Have a qualified technician repair your power tool using or jewellery. Keep your hair, clothing, and gloves away from only identical replacement parts. -
Page 6: Problem Solution
- Clean the mower or do any other works before checking the mower. The ON/OFF switch and safety switch must not be locked. Use only those batteries for the power tool that have been designed to be used for that tool. Use of other batteries may lead to injuries and a risk of fire. -
Page 7: Maintenance
SYMBOLS 4. BATTERY PACK OVERLOAD AND LOW-VOLTAGE PROTECTION. When max. allowable battery current is exceeded during Read the manual working, the overload protection is activated to protect the battery against overheating.When the battery is under normal voltage during working, the power tool will cease to operate. -
Page 8: Lista De Componentes
CUT T I N G W I D T H CAPA CIT Y LISTA DE COMPONENTES DATOS TÉCNICOS 01 // Mango Voltaje: 40V Velocidad sin carga: 3000RPM 02 // Pomo Motor nominal: 800W 03 // Asa de transporte Anchura de corte: 400mm. 04 // Tapa transparente Tipo de sistema de tracción: Empuje Altura de corte: 25-75mm, 6 posiciones... -
Page 9: Procedimiento De Carga
PROCEDIMIENTO DE CARGA 2. PARA RETIRAR O INSTALAR EL PAQUETE DE BATERÍAS (VER B) NOTA: Antes de usar la herramienta, lea Ubique el botón en la parte frontal de la batería. Presione cuidadosamente el libro de instrucciones. el botón y deslícela fuera de la herramienta. Después de recargar, inserte nuevamente en la herramienta. -
Page 10: Reglas Generales De Seguridad
REGLAS GENERALES DE SEGURIDAD Paso 1 ¡ADVERTENCIA! Paso 2 Lea todas las instrucciones. El incumplimiento de estas instrucciones enumeradas a continua- ción puede provocar descargas eléctricas, incendios y/o lesiones graves. GUARDE ESTAS INSTRUCCIONES NO permita que la comodidad o la familiaridad con el pro- ducto (obtenidas por el uso repetido) reemplace el estricto cumplimiento de las reglas de seguridad para el producto en cuestión. -
Page 11: Reglas De Seguridad Adicionales
giratoria de esta puede provocar lesiones personales. en la batería puede causar irritación o quemaduras peli- grosas y graves. 5) Mantenga la postura y el equilibrio en todo momento. Esto permite un mejor control de la herramienta eléctrica en situaciones inesperadas. 6 Servicio 6) Vístase adecuadamente. -
Page 12: Solución De Problemas
Saque la llave: - Cuando se aleje del cortacésped. - Para liberar una cuchilla bloqueada. - Para ajustar la altura de corte. - Para vaciar la bolsa de recogida. - Compruebe que la máquina funciona perfectamente des- pués retirar un objeto indeseable. Las reparaciones se de- ben realizar antes de poner la máquina en funcionamiento de nuevo. -
Page 13: Mantenimiento
SÍMBOLOS 2. RAZONES PARA DIFERENTES TIEMPOS DE TRABAJO DE LA BATERÍA. Los problemas de tiempo de carga, como se indicó an- Lea el manual teriormente, y el hecho de no haber utilizado una batería durante un tiempo prolongado reducirán la vida útil de la batería. - Page 14 CUT T I N G W I D T H CAPA CIT Y LISTA DE COMPONENTES ESPECIFICAÇÕES 01 // Mango Voltagem: 40V Velocidade sem carga: 3000RPM 02 // Punho Motor avaliado: 800W 03 // Pega de transporte Largura de corte: 400mm. 04 // Tampa transparente Tipo de sistema de accionamento: Empuje Altura de corte: 25-75mm, 6 posiciones...
-
Page 15: Procedimento De Carregamento
PROCEDIMENTO DE CARREGAMENTO 2. PARA REMOVER OU INSTALAR O CONJUNTO DE BATERIAS (VER B) NOTA: Antes de utilizar a ferramenta, leia Localizar o botão na parte da frente da bateria. Premir o atentamente o folheto de instruções. botão e deslizá-lo para fora da ferramenta. Depois de re- carregado, voltar a inseri-lo na ferramenta. -
Page 16: Regras Gerais De Segurança
REGRAS GERAIS DE SEGURANÇA Passo 1 ADVERTÊNCIA! Passo 2 Leia todas as instruções. O não cumprimento destas instruções listadas abaixo pode resultar em choque eléctrico, incêndio e/ou ferimentos graves. O termo “ferramenta eléctrica” em todos os avisos listados abaixo refere-se à sua ferramenta eléctrica que é alimen- tada (com um cabo) ou alimentada por bateria (sem um cabo). - Page 17 outros objectos metálicos, tais como papel, clipes de papel, 4) Remover qualquer chave de ajuste antes de ligar a fe- moedas, chaves, pregos, parafusos, ou outros pequenos rramenta eléctrica. Uma chave de fendas esquerda ligada objectos metálicos, que podem ser ligados de um terminal a uma parte rotativa da ferramenta eléctrica pode causar a outro.
-
Page 18: Solução De Problemas
ligado da tomada. Verificar se o aparelho está danificado e, se necessário, repará-lo imediatamente. Desligar a unidade imediatamente após a conclusão dos trabalhos. - Parar a máquina e remover a chave de ignição. Esperar até que todas as peças rotativas tenham parado e a unida- de tenha arrefecido. - Page 19 SIMBOLOS 2. RAZÕES PARA DIFERENTES TEMPOS DE TRABALHO DA BATERIA. Leia o manual Problemas de tempo de carga, como se indica acima, e a não utilização de uma bateria por tempo prolongado re- duzirão a vida útil da bateria. Isto pode ser corrigido após várias operações de carregar e descarregar a bateria após Advertência trabalhos com o berbequim.
- Page 20 Alfa Dyser S.L. Pol. Ind. Anoia · C/Cooperativa, 2 · 08635 Sant Esteve Sesrovires (Barcelona) España · B-60163441 · T. 937831011· F. 937838487 www.alfadyser.com · alfa@alfadyser.com FABRICADO EN R.P.C. / DISEÑO PACKAGING EN U.E.
Need help?
Do you have a question about the 49130 and is the answer not in the manual?
Questions and answers