
Summary of Contents for Girard Products GMW09AB
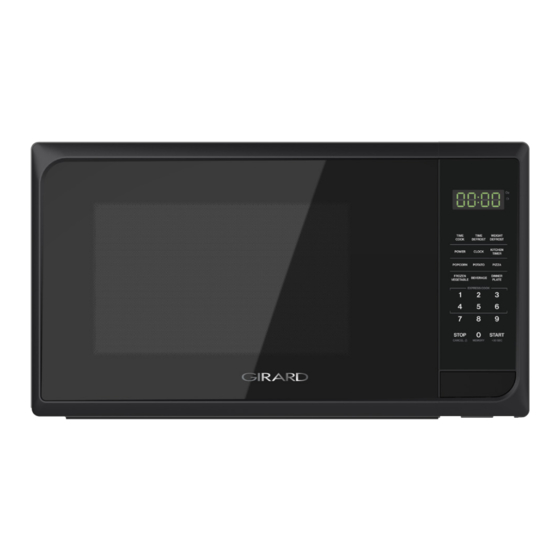
- Page 1 0.9 CU.FT. BUILT-IN MICROWAVE OVEN GMW09AB/2022071764 USER MANUAL * Product picture for reference only...
-
Page 2: Table Of Contents
Thank you for purchasing this Girard product. Before operating your new product, please read these instructions carefully. This user manual contains information for safe use, installation and maintenance of the product. Please keep this user manual in a safe place for future reference. This will ensure safe use and reduce the risk of injury. -
Page 3: Important Safety Instructions
IMPORTANT SAFETY INSTRUCTIONS PRECAUTIONS TO AVOID POSSIBLE EXPOSURE TO EXCESSIVE MICROWAVE ENERGY 1. Do not attempt to operate this oven with the door open since open door operation can result in harmful exposure to microwave energy. It is important not to defeat or tamper with the safety interlocks. - Page 4 e. Use extreme care when inserting a spoon or other utensil into the container. 9. This appliance should be serviced only by qualified service personnel. Contact nearest authorized service facility for examination, repair, or adjustment. 10. To reduce the risk of fire in the oven cavity: a.
-
Page 5: Grounding Instructions
CAUTION ● NOTICE: PACEMAKERS - Most pacemakers are shielded from interference from electronic products, including microwaves. However, patients with pacemakers may wish to consult their physicians if they have concerns. ● Changes or modifications not expressly approved by the party responsible for compliance could void the user's authority to operate the product. -
Page 6: Product Overview
PRODUCT OVERVIEW Product Features Item Description Door Safety Lock System Oven Window Roller Ring Shaft Glass Tray Door Release Button Control Panel Wave Guide (Do not remove the mica plate covering the wave guide) - 5 - CCD-0006006 Rev: 09-22-22... -
Page 7: Control Panel
Control Panel DISPLAY Cooking time, power, indicators and present time are displayed. TIME COOK Cook with the setting you programmed. TIME DEFROST Defrost by the time you input. WEIGHT DEFROST Defrost by the weight you input. POWER Set the cooking power or check power level during cooking. -
Page 8: Installation
INSTALLATION 8. The electrical plug or the circuit breaker What’s in the Box must be accessible so that it can be easily Make sure all the following items are included unplugged in an emergency. in the packaging. If any item is damaged or Microwave Oven Installation missing, contact your dealer. - Page 9 Bottom Duct Installation (sold Trim Kit Installation together with FMSN09A-BL-TK or (FMSN09A-BL-TK/FMSN09A-SS-TK, FMSN09-SS-TK trimkit)) not included) 1. Mark out the cabinet center line as shown 1. Remove the trim kit from the packaging. in the figure below. Check to make sure it is not damaged. 2.
-
Page 10: Electrical Connection
● Oven Installation Never place the glass tray upside down. The glass tray should never be restricted. Slide the microwave oven into the cabinet ● Both the glass tray and turntable ring opening and fix it to the cabinet with four M4 x assembly must always be used during "... -
Page 11: Operation
the buzzer will sound once. 2. Once the number you desired is displayed, 3. When the cooking is finished, the buzzer press “START/+30 SEC” to start cooking, will sound five times then return to the buzzer will sound once. standby mode. 3. - Page 12 ● KITCHEN TIMER During the cooking process, you are allowed to change the cooking power by 1. Press “KITCHEN TIMER” once, the “00:00” pressing the “POWER” button. Once the will be displayed. “POWER” button is pressed, the current 2. Use the number buttons to set the timer. power will flash for 3 seconds, then you The maximum timer allowed to set is 99 can press the number button to change...
- Page 13 If you want to change the power level, press 2. Press “POWER” once, then press “8” to “POWER” once, then press the number button select 80% microwave power. to choose a desired defrosting power level. 3. Press “TIME COOK” once, then press “1”, “0”, “0”, “0”...
-
Page 14: Cooking Techniques
COOKING TECHNIQUES Your microwave makes cooking easier than TURNING conventional cooking, provided you keep these Turn foods over midway through cooking to considerations in mind: expose all parts to microwave energy. This is STIRRING especially important with large foods such as roasts. -
Page 15: Cleaning And Care
NOT RECOMMENDED Wax paper - Use as a cover to prevent spattering. Glass jars and bottles - Regular glass is too Thermometers - Use only those labeled thin to be used in a microwave. It can shatter “Microwave Safe” and follow all directions. and cause damage and injury. -
Page 16: Troubleshooting
microwaveable bowl, microwave for 5 could lead to deterioration of the surface minutes. Wipe thoroughly and dry with a that could adversely affect the life of soft cloth. the appliance and possibly result in a 10. When it becomes necessary to replace the hazardous situation. -
Page 17: Specification
SPECIFICATION Technical Specification Rated Input Power 120V/60Hz, 1350W (MICROWAVE) Rated Output Power (Microwave) 900 W Product Dimensions (W×D×H ) " x143/4" x 13 " (485 x 375 x 340mm) Oven Capacity 0.9 cu. ft. Turntable Diameter Ø10.6" / Glass Net Weight Approx. - Page 18 CCD-0006006 Rev: 09-22-22...
- Page 19 CCD-0006006 Rev: 09-22-22...
- Page 20 The contents of this manual are proprietary and copyright protected by Lippert. Lippert prohibits the copying or dissemination of portions of this manual unless prior written consent for an authorized Lippert representation has been provided. Any unauthorized use shall void any applicable warranty. The information contained in this manual is subject to change without notice and at the sole discretion of Lippert.
Need help?
Do you have a question about the GMW09AB and is the answer not in the manual?
Questions and answers