Table of Contents
Advertisement
Quick Links
Advertisement
Table of Contents

Related Manuals for Supelco MERCK Reflectoquant RQflex 20


Summary of Contents for Supelco MERCK Reflectoquant RQflex 20
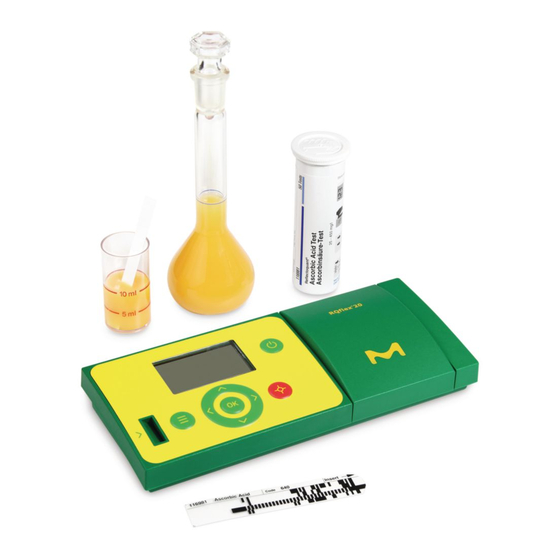
- Page 1 Analytical Reflectoquant ® RQflex ® Reflectometer Operating manual 11/2022...
-
Page 3: Table Of Contents
Table of contents 1 Intended use . . . . . . . . . . . . . . . . . .5 2 Getting started . - Page 4 4 Result . . . . . . . . . . . . . . . . . . . . . . . . . .43 Result list .
-
Page 5: Intended Use
Intented use The Reflectoquant RQflex 20 reflectometer is intented to be used exclusively according to ® ® the operating manual . The reflectometer was developed for performing analyses of chemical parameters in water, food & beverage samples, and environmental samples using Reflectoquant test strips in ®... -
Page 6: Package Contents
Package contents The standard contents of the Reflectoquant ® RQflex 20 Reflectometer package comprise the ® following items: 1 Reflectometer including strip adapter, Cat . No . 1 .17246 .0001 1 Recalibration set, Cat . No . 1 .16954 .0001 1 Quick Guide 4 1 .5-V batteries (AAA) 1 Safety Instructions... -
Page 7: Inserting The Batteries
Inserting the batteries Before operating the system for the first time, the batteries included in the package must be installed . Dispose of used batteries in accordance with the local regulations . 1 . Remove the lid of the battery compartment on the back of the instrument by pressing carefully in the indicated direction . -
Page 8: Replacement Of Batteries
2 .3 .1 Replacement of batteries Refer to page 7 for how to replace used batteries . Recommendation Do not use rechargeable batteries! 2 .3 .2 Saving data - Important notes Before changing the batteries, please shut down the instrument first . Otherwise the date and time settings are lost . -
Page 9: Operation Buttons And Display
Operation buttons and display 2 .4 .1 Operation buttons Display Power On/Off Barcode reader START measure- ment Menu Left (Back) Right (Next) Down... -
Page 10: Display
2 .4 .2 Display General structure Battery Menu item Timer area status Time Method number Status bar Content area Info bar Example 2 .4 .3 Menu items The following items are displayed in the main menu: Method List list of all stored methods Result List list of all stored results Settings... -
Page 11: Starting The Rqflex
Starting the RQflex ® the first time Before working with the RQflex 20, insert the ® batteries (delivery contents) . See section 2 .3 “Inserting the batteries” . Switch on the reflectometer by pressing the [Power On/Off] button . The unit runs an electronic self-check test . The serial number of the RQflex 20 is displayed ®... -
Page 12: Settings
Settings Switch on the reflectometer by pressing the [Power On/Off] button . The unit runs an electronic self-check test . The display then shows the main menu: Select [Settings] in the [MAIN MENU] using the [Up] and [Down] buttons . The display shows: Confirm your selection by pressing [OK] or [Right (Next)] . -
Page 13: Overview
2 .6 .1 Overview The following items are displayed in the settings menu: Languages for setting the desired language (EN - DE - FR - ES - PT - JP - CN) Date Format for setting the desired date format (yyyy-mm-dd - dd .mm .yyyy - mm/dd/yyyy) Time Format for setting the desired time format... -
Page 14: Setting The Language
2 .6 .2 Setting the language Select [Languages] using the [Up] and [Down] buttons if necessary . The display shows: Confirm your selection by pressing [OK] or [Right (Next)] . The display shows: Select the desired language using the [Up] and [Down] buttons . -
Page 15: Setting The Date Format
2 .6 .3 Setting the date format Select [Date Format] using the [Up] and [Down] buttons . The display shows: Confirm your selection by pressing [OK] or [Right (Next)] . The display shows: Select the desired date format using the [Up] and [Down] buttons . -
Page 16: Setting The Time Format
2 .6 .4 Setting the time format Select [Time Format] using the [Up] and [Down] buttons . The display shows: Confirm your selection by pressing [OK] or [Right (Next)] . The display shows: Select the desired time format using the [Up] and [Down] buttons . -
Page 17: Setting The Date
2 .6 .5 Setting the date Select [Date] using the [Up] and [Down] buttons . The display shows: Confirm your selection by pressing [OK] or [Right (Next)] . The display shows: Select the desired date using the [Up] and [Down] buttons . Change the column with the [Left (Back)] and [Right (Next)] buttons . -
Page 18: Setting The Time
2 .6 .6 Setting the time Select [Time] using the [Up] and [Down] buttons . The display shows: Confirm your selection by pressing [OK] or [Right (Next)] . The display shows: Select the desired time using the [Up] and [Down] buttons . Change the column with the [Left (Back)] and [Right (Next)] buttons . -
Page 19: Setting The Auto Power Off Time
2 .6 .7 Setting the auto power off time Select [Auto Power Off Time] using the [Up] and [Down] buttons . The display shows: Confirm your selection by pressing [OK] or [Right (Next)] . The display shows: Possible selections: (00 (= Off) - 15 - 30 - 45 - 60 min) Select the desired auto power off time in minutes using the [Up] and [Down] buttons . -
Page 20: Setting The Audible Signal (On Or Off)
2 .6 .8 Setting the audible signal (ON or OFF) Select [Audible Signal] using the [Up] and [Down] buttons . The display shows: Confirm your selection by pressing [OK] or [Right (Next)] . The display shows: Select the desired audible alert mode (On or Off) using the [Up] and [Down] buttons . -
Page 21: Setting The Acoustical Countdown Warning
2 .6 .9 Setting the acoustical countdown warning Select [Acoustic. Countdown Warning] using the [Up] and [Down] buttons . The display shows: Confirm your selection by pressing [OK] or [Right (Next)] . The display shows: Possible selections: (00 (= Off) - 5 - 10 - 15 - 20 - 25 - 30 sec) Select the desired duration of the warning signal in seconds using the [Up] and [Down] buttons . -
Page 22: Setting The Memory Capacity Warning
2 .6 .10 Setting the memory capacity warning (ON or OFF) Select [Memory Capacity Warning] using the [Up] and [Down] buttons . The display shows: Confirm your selection by pressing [OK] or [Right (Next)] . The display shows: Select the desired memory space warning mode (On or Off) using the [Up] and [Down] buttons . -
Page 23: Initial Calibration
Initial calibration The instrument needs to be calibrated before the first measurement is performed . This is required to set the correct baseline for the reflectomet- ric optics . For this purpose, a Reflectoquant ® Recalibration Set is delivered with the instru- ment . - Page 24 The display shows: Pressing the [Left (Back)] button takes you back to [MAIN MENU] . Select [Calibration] using the [Up] and [Down] buttons if necessary . The display shows: Confirm your selection by pressing [OK] or [Right (Next)] . The display shows: Remove the barcode strip for calibration from the pack (included in the scope of delivery of RQflex...
- Page 25 Make sure that no test strip is inserted in the test strip adapter, then press [OK] . The display shows: Insert the calibration strip of the recalibration set (included in the scope of delivery of RQflex 20) into the strip adapter with the bev- ®...
- Page 26 The display shows: Select the desired action using the [Up] and [Down] buttons: No: return to [CALIBRATION] Yes: return to [QUALITY ASSURANCE] Confirm your selection by pressing [OK] or [Right (Next)] .
-
Page 27: Measurement
Measurement Method list Switch on the reflectometer by pressing the [Power On/Off] button . The unit runs an electronic self-check test . The display then shows the main menu: Press the [START measurement] button to return to the last used method select [Method List] in the [MAIN MENU] using the [Up] and [Down] buttons if necessary . -
Page 28: Add A New Method
Confirm your selection by pressing [OK] or [Right (Next)] . The display shows for example: Pressing the [Left (Back)] button takes you back to [MAIN MENU] in all other cases . Add a new method There are two scenarios for adding a method: Guided way Shortcut 3 .1 .1 Guided way... - Page 29 Remove the barcode strip from the Reflectoquant test strip package . Certain tests ® require two barcode strips . Insert the barcode all the way into the barcode scanner in the direction of the arrow in a smooth motion from left to right, and then remove it again .
-
Page 30: Shortcut
Abort: To abort, press the [Menu] button . The display shows: Select the desired action using the [Up] and [Down] buttons: No: return to [Insert barcode!] Yes: return to [METHOD LIST] Confirm your selection by pressing [OK] or [Right (Next)] . 3 .1 .2 Shortcut A method can be saved and started directly by inserting the barcode strip of the Reflectoquant... -
Page 31: Measuring With Test Kits
Measuring with test kits There are three ways to measure with test kits: 1 . Continue with last used method 2 . Choose from method list 3 . Shortcut Continue with last used method The method number shows the last used method, measurement is started immediately after pressing the red [START measurement] button . -
Page 32: Shortcut
Select the desired method using the [Up] and [Down] buttons . Confirm by pressing the [START measurement] button and follow the instruction in the package insert of the corresponding Reflectoquant test, e . g . ® “Preparation”, “Procedure” . Shortcut A method can be started directly from any menu item by inserting the barcode strip of the Reflectoquant... -
Page 33: Measurement Procedures
Measurement procedures There are two distinct measurement procedures, which differ in the first steps and are specific for the chosen Reflectoquant test . The procedure ® is transferred to the instrument via the barcode strip . All steps involved in obtaining the result are displayed on the instrument screen . - Page 34 Immerse the test strip into the sample as described in the Reflectoquant package insert ® and at the same time press the [START mea- surement] button to start the timer . Carefully allow excess liquid to run off via the long edge of the strip onto an absorbent paper towel .
-
Page 35: Measurement Procedure B
Abort: To abort, press the [Menu] button . The display shows: Select the desired action using the [Up] and [Down] buttons: No: return to [MEASUREMENT] Yes: return to [METHOD LIST] Confirm your selection by pressing [OK] or [Right (Next)] . 3 .2 .2 Measurement procedure B In addition to the measurement workflow as described in measurement procedure A, the... - Page 36 Confirm your selection by pressing [START measurement] . The display shows: Immerse the test strip into the sample as described in the Reflectoquant package insert ® and press the [OK] button . Carefully allow excess liquid to run off via the long edge of the strip onto an absorbent paper towel and press the [OK] button .
- Page 37 After the reaction time, the display shows: Carefully allow excess liquid to run off via the long edge of the strip onto an absorbent paper towel and press the [OK] button . The display shows: Insert the test strip into the test strip adapter and press the [START measurement] button .
- Page 38 The measurement result is displayed and auto- matically stored . The save hint is shown only if memory space warning is on (see section 2 .6 .10, “Setting the memory capacity warning”) . Abort: To abort, press the [Menu] button . The display shows: Select the desired action using the [Up] and [Down] buttons:...
-
Page 39: Skip The Timer
3 .2 .3 Skip the timer It is possible to cancel the timer countdown in order to perform measurements directly without the countdown function of the instrument . The timer function can be skipped by pressing the [START measurement] button again while the timer is running . -
Page 40: General Notes On Measurement
3 .2 .5 General notes on measurement Do not change the temperature conditions during ongoing sample measurements . If the instrument is taken to other temperature conditions, start the test methods anew to reset the internal standard value . Method details Here you can see the details of the chosen method . - Page 41 For deletion the chosen method, select [X Delete Method] using the [Up] and [Down] buttons . Confirm your selection by pressing [OK] or [Right (Next)] . The display shows: Select the desired action using the [Up] and [Down] buttons: No: return to [METHOD DETAIL] Yes: delete the method and return to [METHOD LIST] Confirm your selection by pressing [OK] or...
-
Page 42: Delete All Methods
Delete all methods Select [X Delete all Methods] using the [Up] and [Down] buttons: The display shows: Confirm your selection by pressing [OK] or [Right (Next)] . The display shows: Select the desired action using the [Up] and [Down] buttons: No: return to [METHOD LIST] Yes: delete all methods and return to [METHOD LIST]... -
Page 43: Result
Result Result list Switch on the reflectometer by pressing the [Power On/Off] button . The unit runs an electronic self-check test . The display then shows the main menu: Select [Result List] in the [MAIN MENU] using the [Up] and [Down] buttons . The display shows: Confirm your selection by pressing [OK] or [Right (Next)] . - Page 44 The display shows all results which are stored in the instrument: Pressing the [Left (Back)] button takes you back to [MAIN MENU] . For details, select the desired method using the [Up] and [Down] buttons . Confirm your selection by pressing [OK] or [Right (Next)] .
- Page 45 The display shows: Select the desired action using the [Up] and [Down] buttons: No: return to [RESULT DETAILS] Yes: delete the result and return to [RESULT LIST] Confirm your selection by pressing [OK] or [Right (Next)] .
-
Page 46: Quality Assurance
Quality assurance Recalibration The recalibration set consists of an internal stan- dard (light grey plastic component), a barcode strip for calibration, and a white calibration strip . A recalibration has to be performed • after the first start (see section 2 .7, “Initial calibration”) •... -
Page 47: Procedure
5 .1 .1 Procedure If necessary clean the strip adapter thoroughly (see section 7 .2, “Cleaning the strip adapter”) . Take care that the internal standard has not changed color (if necessary exchange the internal standard, Strip adapter, Cat . No . 1 .17267 .0001) . Keep the instrument at ambient temperature for at least 30 minutes . - Page 48 The display shows: Pressing the [Left (Back)] button takes you back to [MAIN MENU] . Select [Calibration] using the [Up] and [Down] buttons . The display shows: Confirm your selection by pressing [OK] or [Right (Next)] . The display shows: Remove the barcode strip for calibration from the pack (included in the scope of delivery of RQflex...
- Page 49 Make sure that no test strip is inserted in the test strip adapter, then press [OK] . The display shows: Insert the calibration strip of the recalibration set (included in the scope of delivery of RQflex 20) into the strip adapter with the bev- ®...
-
Page 50: Calibration Results
The display shows: Select the desired action using the [Up] and [Down] buttons: No: return to [CALIBRATION] Yes: return to [QUALITY ASSURANCE] Confirm your selection by pressing [OK] or [Right (Next)] . 5 .1 .2 Calibration results Select [Calibration Results] using the [Up] and [Down] buttons . -
Page 51: Checking The Instrument
Checking the instrument 5 .2 .1 Analytical quality assurance (AQA) The objective of analytical quality assurance (AQA) is to ensure correct and precise measure- ment results . Analytical quality assurance (AQA) can be carried out in two steps independent of each other: •... -
Page 52: Rqcheck Procedure
5 .2 .2 RQcheck procedure Select [RQcheck] using the [Up] and [Down] buttons . The display shows: Confirm your selection by pressing [OK] or [Right (Next)] . The display shows: Remove the barcode strip for RQcheck from the package . Insert the barcode all the way into the barcode reader in the direction of the arrow in a smooth motion from left to right, and then remove it... - Page 53 The display shows for approx . 1 second: The save hint is shown only if memory space warning is on (see section 2 .6 .10, “Setting the memory capacity warning”) . Then the display shows: Pressing the [OK] button leads you to [RQcheck Results] .
-
Page 54: Rqcheck Results
5 .2 .3 RQcheck results Select [RQcheck Results] using the [Up] and [Down] buttons . The display shows: Confirm your selection by pressing [OK] or [Right (Next)] . The display shows all RQcheck results which are stored in the instrument: Select the desired RQcheck result using the [Up] and [Down] buttons: Confirm your selection by pressing [OK] or... - Page 55 Confirm your selection by pressing [OK] or [Right (Next)] . Pressing the [Left (Back)] button takes you back to [RQCHECK RESULTS] . The display shows the RQcheck result boxes: Remission RQcheck Result: Measured Remission Values: Target Remission Values: (tolerance: + 2 .5 % remission) Intensity Values: Pressing the [Left (Back)] button takes you back to [RQCHECK RESULTS] .
- Page 56 To delete the results of the chosen date, select [X Delete RQcheck result] using the [Up] and [Down] buttons . The display shows: Confirm your selection by pressing [OK] or [Right (Next)] . The display shows: Select the desired action using the [Up] and [Down] buttons: No: return to [RQCHECK RESULTS] Yes: delete the RQcheck result and return to...
-
Page 57: System Information
System information Switch on the reflectometer by pressing the [Power On/Off] button . The unit runs an electronic self-check test . The display then shows the main menu: Select [Information] in the [MAIN MENU] using the [Up] and [Down] buttons . The display shows: Confirm your selection by pressing [OK] or [Right (Next)] . - Page 58 The display shows information about the software version of the instrument, the free memory space of the instrument, the battery state of the instrument, the serial number of the instrument, the date, and the time: Pressing the [Left (Back)] or [Menu] button takes you back to [MAIN MENU] .
-
Page 59: Maintenance Of The Instrument
Maintenance of the instrument To obtain consistently exact measurement results, please follow these instructions for cleaning and maintenance . Handling Please treat this instrument with the same care as you do with all other electronic devices . Ensure that no liquid enters the instrument cas- ing, since this may result in damage that is not covered by the warranty . -
Page 60: Cleaning The Strip Adapter
Cleaning the strip adapter The strip adapter should be thoroughly cleaned (dismantling the strip adapter into its individual components) at the end of each working day . The strip adapter must be cleaned imme- diately if an error message („E07 + E10: Internal Standard out of range“... -
Page 61: Troubleshooting
Troubleshooting The following tables show explanations of the error messages and tips on how to avoid incorrect measurements . The most commonly encountered problems are caused by • the test strips not being inserted correctly • the reaction time of the strip not being right •... - Page 62 Display message Possible causes Remedy W19: Second barcode not Wrong second barcode, invalid barcode Use a valid second valid! (RQcheck, Calibration) inserted barcode strip Use a valid barcode! W20: Barcode not readable! Barcode is inserted after selecting Try again to insert Try again! 'Calibration' in menu Quality Assurance .
-
Page 63: Error Messages
Display message Possible causes Remedy W30: Measurement not The user tries to execute a measurement Calibrate and check possible! however, the measurement is locked due device Please calibrate and to lost user calibration data check device! W31: Measurement not The user tries to execute a measurement Check device possible! however, the measurement is locked due... - Page 64 Display message Possible causes Remedy E08: Measurement not pos- Range check failed or remission calculation Please repeat the sible! failed - the ongoing strip measurement is measurement Repeat measurement! aborted and the system is going to Method List E09: RQcheck not possible! Internal standard measurement fails first Please remove the Remove strip and con-...
-
Page 65: Other Faults
Other faults Problem Remedy Display is frozen Switch off the instrument by pressing buttons [Power On/Off], [Down], and [OK] successively remove batteries, insert again and switch on anew if the Auto Power Off is activated, the instrument swit- ches off automatically after the defined time . Buttons/barcode Switch off the instrument and start anew . -
Page 66: Technical Data
Technical data Dimension: 184 x 79 x 30 mm Weight: 253 g (including battery) Memory: 50 test methods, 200 measurement results 50 RQcheck results, 50 calibration results Interface: yes (for technical service only) Light source: 4 LEDs, green/red, double optics Power source: 4 x 1 .5-V batteries (AAA) Display:... -
Page 67: Accessories
Accessories Reflectoquant Strip adapter 1 .17267 .0001 Replacement part for ® RQflex ® Reflectoquant Recalibration Set 1 .16954 .0001 Replacement part for RQflex ® ® Reflectoquant RQcheck 1 .17247 .0001 Accessory for RQflex ® ® set for RQflex ®... -
Page 68: Service / Warranty
Service / Warranty Our instruments are 100% quality-controlled, which means that each individual instrument has been tested before leaving the factory . In addition to the descri- bed cleaning and calibration of RQflex 20, the device is maintenance-free . The ®... - Page 70 Merck KGaA, 64271 Darmstadt, Germany Tel . +49(0)6151 72-2440 www.sigmaaldrich.com/reflectoquant Merck, the vibrant M, Supelco, Reflectoquant, and RQflex are trademarks of Merck KGaA, Darmstadt, Germany or its affiliates. All other trademarks are the property of their respective owners . Detailed information on trademarks is available via publicly accessible resources .
Need help?
Do you have a question about the MERCK Reflectoquant RQflex 20 and is the answer not in the manual?
Questions and answers