Table of Contents
Advertisement
Quick Links
Advertisement
Table of Contents

Related Manuals for Deitz Pharmafill PS1 Packserter

Summary of Contents for Deitz Pharmafill PS1 Packserter
- Page 1 Model PS1 Packserter Operation Manual REV B...
-
Page 2: Table Of Contents
2022-10-04 REV B Pharmafill Model PS1 Operation Manual CONTENTS 1. INTRODUCTION ....................... 5 2. SPECIFICATIONS ......................7 3. INSTALLATION Unpacking ....................... 8 Commissioning ......................8 Fiber-Optic Sensors and Air Cylinders ..............10 Compressed Air ..................... 10 Electric ........................11 4. FEATURES General ........................ - Page 3 2022-10-04 REV B Pharmafill Model PS1 Operation Manual Check Bottles ......................34 Test Operation ...................... 34 Begin Operation ....................34 Stopping The Packserter Manually ............... 35 When The Packserter Stops Automatically............35 8. ROUTINE MAINTENANCE Installing Change Parts ..................36 Cleaning .........................
- Page 4 2022-10-04 REV B Pharmafill Model PS1 Operation Manual Warning This machine contains moving parts and operates automatically. This may present a hazard to personnel. Never operate this machine with any covers or guards removed or any guard switches or safety devices removed or bypassed.
-
Page 5: Introduction
Thank you for purchasing a Pharmafill Model PS1 PACKSERTER automatic packet inserter. We at Deitz Company hope you will find that the Model PS1 meets or exceeds your expectations and requirements for an affordable, reliable, and innovative addition to your packaging operation. - Page 6 COMPANY and may not be copied or given to third parties. LEGAL NOTICE: DEITZ COMPANY , PHARMAFILL and PACKSERTER and any graphic representations of the same are legal trademarks of Deitz Company Inc. and may not be used by others without specific written permission from Deitz Company. Page 6...
-
Page 7: Specifications
2022-10-04 REV B Pharmafill Model PS1 Operation Manual Section 2 - SPECIFICATIONS GENERAL MODEL PS1 PACKSERTER Packet Inserter TYPE AD1090 PRODUCT CAPACITY ¼-gram to 5-gram packets on continuous strip spool. CHANGE PARTS Quantity: 3 for each width of strip (1 set included) SPOOL CAPACITY 11.8”... -
Page 8: Installation
A - Unpacking Carefully remove equipment from crate and remove all packing materials. ❑ Inspect all supplied equipment for damage (if any damage is present, please notify DEITZ ❑ COMPANY immediately). Position the machine on the line and adjust the legs of the machine to level the machine. - Page 9 2022-10-04 REV B Pharmafill Model PS1 Operation Manual B – Commissioning (continued) Figure 3.2 Figure 3.3 Page 9...
- Page 10 2022-10-04 REV B Pharmafill Model PS1 Operation Manual C - Sensors and Gating Cylinders Two Bottle Sensors and two Gating Cylinders are attached to a length of rail ❑ Using a 7/16” nut driver or combo wrench, remove sensors and cylinders from the demo ❑...
- Page 11 2022-10-04 REV B Pharmafill Model PS1 Operation Manual E - Electric Power source must be adequate to meet the specifications (see Section 2). ❑ Check the polarity and voltage of the incoming supply. ❑ The machine must be solidly earthed. ❑...
- Page 12 2022-10-04 REV B Pharmafill Model PS1 Operation Manual E - Electric (continued) Make sure the electrical connectors in the back of the machine are secure (fig. 3.7). ❑ MAIN POWER “IN” Figure 3.7 Turn the Main Disconnect Switch to the ON position (fig 3.8). No action will take place. ❑...
-
Page 13: Features
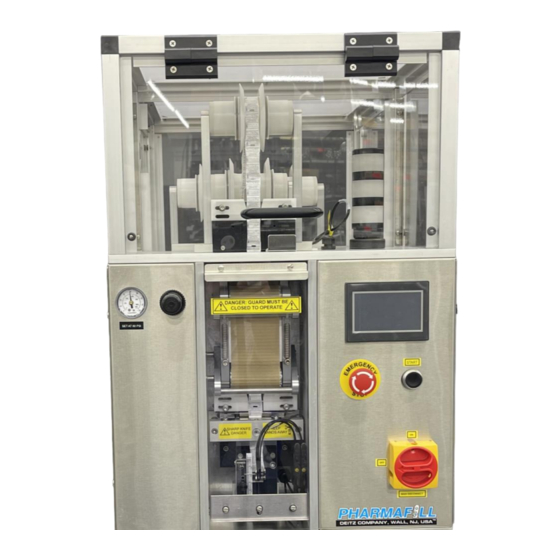
2022-10-04 REV B Pharmafill Model PS1 Operation Manual Section 4 - FEATURES General Graphic Illustration (fig 4.1) Adjustable Machine Height A - General • Automatically cuts continuous strip packets into individual packets. • Suitable for any strip-type product such as desiccants, oxygen absorbers, lotion samples, fast-food condiments, etc. - Page 14 2022-10-04 REV B Pharmafill Model PS1 Operation Manual B - Illustrated Features SUPPLY ROLL (IN BACK) INFEED ROLLERS & ROLLER GUIDES STACK LIGHT UPPER GUIDE BLOCK SUPPLY STRIP SENSOR AIR PRESSURE FILTER/ REGULATOR CONTROL PANEL BELT DRIVE PRESSURE GAGUE EMERGENCY STOP PUSHBUTTON LOWER GUIDE BLOCK PACKET MARK SENSOR...
- Page 15 2022-10-04 REV B Pharmafill Model PS1 Operation Manual C - Adjustable Machine Height The Packserter is mounted on top of a variable height lift platform (fig. 4.2). To accommodate various bottle heights on a fixed height conveyor, the Packserter height may be manually adjusted via a hand crank on the lower left side of the lift platform.
-
Page 16: Operation
2022-10-04 REV B Pharmafill Model PS1 Operation Manual Section 5 - Operation Power Up Using the Control Panel Insert Packets Adjust Settings Feed Options One Step Options Technician Only A - Power Up The Main Disconnect Switch (fig 5.1) controls the electric power to the Packserter. No power goes to any electrical component when this switch is in the OFF position. - Page 17 2022-10-04 REV B Pharmafill Model PS1 Operation Manual A - Power Up (continued) The Emergency Stop Pushbutton (fig 5.3) (also know as the E-stop) will also effectively disconnect all power to the electrical components of the machine via a latching relay. When pressed, it will lock into the depressed position.
- Page 18 2022-10-04 REV B Pharmafill Model PS1 Operation Manual B - Using The Control Panel This is the screen (fig. 5.4) you will see when the Packserter is first powered up. The upper row of 5 buttons is for menu control and data input. The lower row of 5 buttons is for Machine control after a menu item is selected.
- Page 19 2022-10-04 REV B Pharmafill Model PS1 Operation Manual C - Insert Packets Mode Insert Packets mode is used to run the machine manually or automatically. Press MENU. The MENU appears. Press “1. Insert Packets”. Press ENTER. To cause the machine to make one cycle, press MANUAL CYCLE.
- Page 20 2022-10-04 REV B Pharmafill Model PS1 Operation Manual C - Insert Packets Mode (continued) The control panel will display “Supply Strip Missing” when there is a no strip in front of the SUPPLY STRIP SENSOR in the Upper Guide Block. The machine will not cycle.
- Page 21 2022-10-04 REV B Pharmafill Model PS1 Operation Manual C - Insert Packets Mode (continued) Press CLEAR/EXIT to exit Insert Packets mode at any time and return to the top menu. Returns to Home Screen. Page 21...
- Page 22 2022-10-04 REV B Pharmafill Model PS1 Operation Manual D - Adjust Settings Mode Adjust Settings mode lets you set the control values for a production run. Press MENU. The MENU appears. Press “2. Adjust Settings”. Press ENTER. This is the Settings Menu. To change a value setting, tap the value.
- Page 23 2022-10-04 REV B Pharmafill Model PS1 Operation Manual D - Adjust Settings Mode (continued) 4. The fourth setting is “Index Time”. This is the time needed for the bottles to advance one position on the conveyor. (Units = 1/100 secs, Range = .10 to 2.00) 5.
- Page 24 2022-10-04 REV B Pharmafill Model PS1 Operation Manual E - Feed Options Mode 1. This mode lets you directly control the belt drive. Press MENU. The MENU appears. Press “3. Feed Options”. Press ENTER. 2. Select one of the options by using the “F” keys. Press F1 to move the belt forward (down).
- Page 25 2022-10-04 REV B Pharmafill Model PS1 Operation Manual F - One Step Options 1. The One Step mode lets you control each part of the inserting process individually. Press MENU. The MENU appears. Press “4. One Step Options”. Press ENTER. 2.
- Page 26 2022-10-04 REV B Pharmafill Model PS1 Operation Manual G - Technician Only Press MENU. The MENU appears. Press “5. Technician Only”. Press ENTER to make the selection. The purpose of this feature is to allow a technician access to internal memory locations in the PLC, without using a laptop computer.
- Page 27 2022-10-04 REV B Pharmafill Model PS1 Operation Manual G - Technician Only (continued) Leading- the registration signal will be turned on as the leading edge of the seam is detected (pouch-to- seam). This is the default selection. Trailing- the registration signal will be turned on as the trailing edge of the seam (flat) is detected (seam-to-pouch).
-
Page 28: Setting Up For A Run
2022-10-04 REV B Pharmafill Model PS1 Operation Manual Section 6 - SETTING UP FOR A RUN Install Supply Roll Install Change Parts Start Up Feed In the Supply Strip Adjust Roller Guides Setup Conveyor Adjust Settings Adjust Machine Height Use One Step Mode to Fine Tune the Setup Run a Manual Test Adjust Dual-Sensor Mounting Block This section describes the procedure to follow when initially setting up the Packserter to run a... - Page 29 2022-10-04 REV B Pharmafill Model PS1 Operation Manual E. Adjust the Roller Guides (fig 6.2) by using a 3/16 hex key to loosen and move the adjusting clamps. The large pair on the wide roller should be placed widely apart to allow the strip to unwind from side to side without riding over the guides.
- Page 30 2022-10-04 REV B Pharmafill Model PS1 Operation Manual cut and feed cycle, the Short Sensor must detect the lowest edge of the strip, while at the same time the Long Sensor must NOT detect anything. If these conditions are not met, the cycle is aborted, and the error type is reported on the HMI.
- Page 31 2022-10-04 REV B Pharmafill Model PS1 Operation Manual ROLLER GUIDES (LARGE AND SMALL) SUPPLY STRIP NOT GOING UNDER TENSION BAR SUPPLY ROLL INFEED ROLLERS (SET OF 3) Figure 6.2 SUPPLY STRIP GOING UNDER TENSION BAR Figure 6.3 Page 31...
- Page 32 2022-10-04 REV B Pharmafill Model PS1 Operation Manual UPPER GUIDE BLOCK BELT DRIVE LIFTING HANDLE Figure 6.4 OPTICAL REGISTRATION KNIFE BLOCK SENSOR Figure 6.5 Page 32...
- Page 33 2022-10-04 REV B Pharmafill Model PS1 Operation Manual FIBER-OPTIC CABLES FIBER-OPTIC BASE UNITS UNIT 1: UNIT 2: SHORT LONG DUAL SENSOR MOUNTING BLOCK SENSOR 1: SHORT SENSOR 2: LONG 8-32 THUMBSCREW FIBER-OPTIC CORDSET RULER Figure 6.6 Page 33...
-
Page 34: Running Production
2022-10-04 REV B Pharmafill Model PS1 Operation Manual Section 7 - RUNNING PRODUCTION Start Up Check Supply Roll and Strip Check Bottles Test Operation Begin Operation Stopping The Packserter Manually When The Packserter Stops Automatically This section describes the procedure to follow when starting or re-starting production when the Packserter is set up and ready to go, such as after a shift change or a break. - Page 35 2022-10-04 REV B Pharmafill Model PS1 Operation Manual F - To Stop The Packserter Manually Press STOP ❑ Press CLEAR/EXIT ❑ Open the guard door. ❑ G - When The Packserter Stops Automatically The Packserter will stop automatically for several reasons. The stack light will alert you about this When the stack light is green, the machine is ready or running.
-
Page 36: Routine Maintenance
2022-10-04 REV B Pharmafill Model PS1 Operation Manual Section 8 - ROUTINE MAINTENANCE Installing Change Parts Cleaning Belt Maintenance Knife Maintenance Knife Blade Adjustment Sensor Adjustment A - Installing Change Parts Drop Chute Assembly: Custom made based on width and depth of each packet to ensure consistent positioning at the point of bottle entry. - Page 37 2022-10-04 REV B Pharmafill Model PS1 Operation Manual A - Installing Change Parts (continued) 2. Remove FOUR (4) screws from Drop Chute Cover with Phillips head screwdriver. REMOVE FOUR (4) SCREWS Figure 8.2 3. Remove Drop Chute Insert. DROP CHUTE INSERT Figure 8.3 Page 37...
- Page 38 2022-10-04 REV B Pharmafill Model PS1 Operation Manual A - Installing Change Parts (continued) FIRST, PULL TOWARDS YOU… Figure 8.4 …THEN, LIFT UP REMOVE Figure 8.5 Page 38...
- Page 39 2022-10-04 REV B Pharmafill Model PS1 Operation Manual A – Installing Change Parts (continued) 4. Drop Chute Insert is removed. Figure 8.6 5. Inspect back side of Drop Chute Insert for Drop Chute / Packet Dimensions. Make sure Drop Chute Insert matches your product. 1.19”...
- Page 40 2022-10-04 REV B Pharmafill Model PS1 Operation Manual A - Installing Change Parts (continued) 1.00” W .40” D (FOR 24mm) Figure 8.8 6. Install new Drop Chute Insert by sliding down and pushing back into position Figure 8.9 7. Reinstall Drop Chute Cover with FOUR (4) Phillips head screws. 8.
- Page 41 2022-10-04 REV B Pharmafill Model PS1 Operation Manual B - Cleaning Washdown: The Packserter is constructed with contact surfaces that are made of materials suitable for food grade packaging, but it is not waterproof and is not intended for full wash down.
- Page 42 1. Cleaning: Clean the knife as needed, using the cleaning guidelines in Section 8B. 2. Servicing: If it is necessary to service the knife, it may be easily removed as a unit. Please contact Deitz Company for assistance. 3. Blade Replacement: (refer to fig. 8.6) Tools Needed: 1/8”, 3/16” and 5mm hex keys.
- Page 43 2022-10-04 REV B Pharmafill Model PS1 Operation Manual E - Knife Adjustment (continued) 3. With the knife in the closed position, turn both adjusting screws CW (tighten) all the way, so that the Moveable Blade is flat against the Fixed Blade, front to back and left to right.
- Page 44 2022-10-04 REV B Pharmafill Model PS1 Operation Manual F - Sensor Adjustment There are seven fiber optic sensors in the Packserter. Each consists of an amplifier and a fiber optic cable. Five amplifiers are located inside the electrical enclosure on the right side of the machine (fig.
- Page 45 2022-10-04 REV B Pharmafill Model PS1 Operation Manual LABELS AMPLIFIERS FIBER OPTIC CABLES Figure 8.7 STRIP PRESENT SENSOR (PRESENCE) Figure 8.8 Page 45...
- Page 46 2022-10-04 REV B Pharmafill Model PS1 Operation Manual STRIP IN REGISTER SENSOR (MARK) Figure 8.9 CUT PACKET SENSOR (DROP) Figure 8.10 Page 46...
- Page 47 2022-10-04 REV B Pharmafill Model PS1 Operation Manual SHORT SENSOR LONG SENSOR Figure 8.11 Page 47...
-
Page 48: Technical Information
2022-10-04 REV B Pharmafill Model PS1 Operation Manual Section 9 - TECHNICAL INFORMATION Cycle of Operation Troubleshooting Index of Technical Notes/Drawings A - Cycle of Operation Manual Cycle If MAN button + no jam at SN3 + guard door closed = Cycle Knife then when done Cycle Belt Drive + Index Bottles then when done return to top If the guard door is opened at any time, the machine will drop out of the... - Page 49 2022-10-04 REV B Pharmafill Model PS1 Operation Manual B - Troubleshooting 1. No power overall or to some components Check power cord is plugged in and in good condition ❑ Check Main disconnect is on ❑ Check STOP is released ❑...
-
Page 50: (Technical Notes/Drawings Begin After Last Page)
2022-10-04 REV B Pharmafill Model PS1 Operation Manual C - Index of Technical Notes/Drawings (Technical Notes/Drawings Begin After Last Page) Number Title No. of Pages TECH NOTES TN0085 PS1 Bottle Stop Gating Setup TN0092 PS1 Roll Feed Technical Info TN0097 Packet Length Conversion Chart DRAWINGS 9001-86... - Page 53 TN0092 – PS1 Roll Feed Technical Information The supply roll of the Pharmafill PS1 Packserter is automatically advanced via a mechanism that is housed in the Supply Roll Stand. The advance action is started when the supply strip lifts the Tension Bar, which tells that PLC to begin the advance cycle.
- Page 54 Pharmafill PS1 Roll Feed - Technical Info 3. If the roll is not feeding enough material or the advance cycle is called for too often, increase the Roll Feed Time by 0.10 seconds and test again. 4. If this does not provide satisfactory results, try setting the Roll Feed Time to a middle setting (ex: 0.50), then increase the Roll Feed Count by one, and test again.
- Page 55 Pharmafill PS1 Roll Feed - Technical Info DRAG LEVER CYLINDER Figure TN0092.3 TN0092 January 2006 Page 3...
- Page 56 Deitz Company Inc. Model PS1 Packserter This tables applies to machines shipped or upgraded after January 2007. Values are approximate. Use this table as a starting point and fine-tune based on your application. Length (inches) Length (mm) Offset (pulses) 0.60 0.70...
Need help?
Do you have a question about the Pharmafill PS1 Packserter and is the answer not in the manual?
Questions and answers