Table of Contents
Advertisement
Available languages
Available languages
Quick Links
Advertisement
Table of Contents

Related Manuals for ACONATIC B1PAC07

Summary of Contents for ACONATIC B1PAC07
- Page 1 รุ น B1PAC07 โปรดอ า นคู ม ื อ ผู ใ ช น ี ้ อ ย า งละเอี ย ดเพื ่ อ ให แ น ใ จว า การใช ง านการบํ า รุ ง รั ก ษาและการติ ด ตั ้ ง ถู ก ต อ ง...
- Page 2 คํ า อธิ บ ายแต ล ะชิ ้ น ส ว น 1. แผงควบคุ ม 2. แผงด า นหน า 3. ตั ว รั บ สั ญ ญาณ 4. รี โ มทควบคุ ม 5. ด า มจั บ 6. ท อ ระบายอากาศ 7.
- Page 3 รี โ มทควบคุ ม เครื ่ อ งนี ้ ม ี ร ี โ มทคอนโทรล โดยจะมี แ บตเตอรี ่ CR2025 หนึ ่ ง ชิ ้ น ติ ด มาให พ ร อ มกั บ รี โ มทคอนโทรล ก อ นเริ ่ ม ใช ง านรี โ มทคอนโทรลให ถ อด พลาสติ...
- Page 4 แผงควบคุ ม โหมดการทํ า งาน เพิ ่ ม อุ ณ หภู ม ิ และเพิ ่ ม เวลา Timer โหมดทํ า ความเย็ น /โหมดพั ด ลม /โหมดทํ า ความชื ้ น /โหมด ลดอุ ณ หภู ม ิ และลดเวลา Timer อั ต โนมั ต ิ ไฟแสดงสถานะ...
- Page 5 ขั น ท อ ระบายอากาศอี ก ด า นเข า ก ั บ ปลายท อ ระบายอากาศ ตั ้ ง แต 15℃ - 31℃ และปุ ม นี ้ ย ั ง สามารถใช ส ํ า หรั บ การ ปรั...
- Page 6 หยุ ด ทํ า งานหลั ง จากทํ า งานไปแล ว 8 นาที จ ากนั ้ น จะ วิ น าที จากนั ้ น การตั ้ ง ค า ตั ว จั บ เวลาจะได ร ั บ การยื น ยั น ทํ...
- Page 7 การระบายน้ ํ า 6. โหมด Sleep (ใช ง านในโหมดทํ า ความเย็ น เท า นั ้ น ) กดปุ ม สลี ป เพื ่ อ เป ด ใช ง านโหมด Sleep ไฟแสดงสถานะ 1) คํ า เตื อ น: มี ก ารรี ไ ซเคิ ล น้ ํ า กลั ่ น ที ่ ซ อ นอยู ใ นเครื ่ อ งนี ้ น้ ํ า กลั ่ น โหมด...
- Page 8 หรื อ ร า นซ อ ม แผ น กรองอากาศ หากแผ น กรองอากาศอุ ด ตั น ด ว ยฝุ น หรื อ สิ ่ ง สกปรกควรทํ า ความ สะอาดแผ น กรองอากาศทุ ก ๆสองสั ป ดาห ดึ ง แผ น กรองอากาศออกจากตะแกรงช อ งอากาศโดยใช แถบดึ...
- Page 9 การแก ไ ขป ญ หา ป ญ หา สาเหตุ ท ี ่ เ ป น ไปได ประตู ห รื อ หน า ต า งไม ถ ู ก ป ด มี แ หล ง ทํ า ความร อ นภายในห อ ง พั...
- Page 10 ข อ มู ล ทางเทคนิ ค ข อ มู ล ด า นล า งสํ า หรั บ การอ า งอิ ง ของเครื ่ อ งแอร เ คลื ่ อ นที ่ รุ น B1PAC07 แรงดั น ไฟฟ า 220V ความถี...
- Page 11 Portable Air-conditioner User’s Manual Model B1PAC07 Please read this user’s manual carefully to ensure proper use, maintenance and installation - 1 -...
-
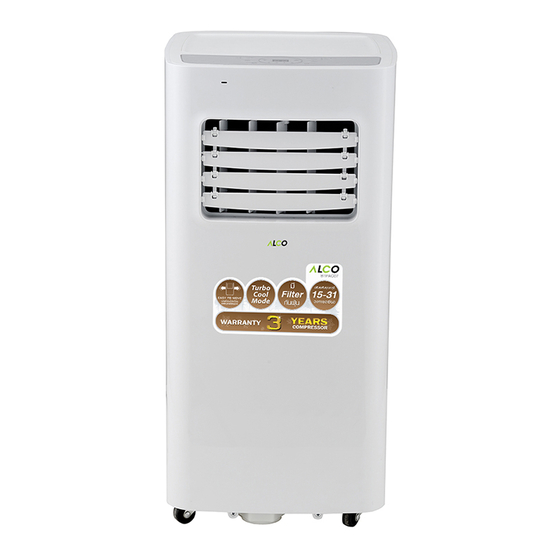
Page 12: Parts Description
PARTS DESCRIPTION 1. Control panel 2. Air outlet 3. Signal receptor 4. Remote control 5. Handle 6. Air exhaust hose 7. Air inlet 8. Drain port (inserted by a stopper) 9. Hose connector 10. Window adaptor 11. Pull tab of the air filter 12. - Page 13 Remote control This unit has a remote control. One piece of CR2025 battery will be provided with the remote control. Before starting to use the remote control, remove the plastic protection from the battery. If you want to change the battery, please refer to the instruction behind the remote control.
-
Page 14: Installation
Control panel More button Temperature/timer increasing button COOL /Fan /Dehumidift /AUTO Temperature/timer decreasing Timer indicator light button Sleep indicator light INSTALLATION The unit shall be installed on a flat surface where the air outlet would not be blocked. The required distance around the unit should be ... -
Page 15: Operation
OPERATION *Always let the appliance rest for at least 2 hours after moving it from one Screw the air exhause hose into the location to another. hose connector. Before use, check up whether the exhaust hose has been mounted properly. -
Page 16: Mode Button
• Drying mode 3. Fan speed button Press the fan speed button to The centrifugal fan runs at a low switch the fan speed between low speed. The fan speed and and high. The corresponding temperature cannot be adjusted. indicator light “LOW”/”HIGH” will The compressor will stop after 8 illuminate. -
Page 17: Timer Button
run. turn on once the select time passed. The adjustment of temperature in Fan mode is not effective. Auto-OFF setting - When the appliance is ON, press the timer button, the timer 5. Timer button indicator light will flash. Auto-ON setting - Press the timer increasing or - When the appliance is OFF, decreasing button to select a... - Page 18 To cancel the timer, set the time to 0 the timer setting. hour, or press into the timer setting, The protective device may trip and and when the digital display flashes, stop the appliance in the press the timer button again. The conditions listed below.
-
Page 19: Cleaning And Maintenance
rises to the upper level, the water- chemicals to clean the appliance. full code “E4” will be shown on the Do not wash the appliance directly. digital display to remind of draining If the appliance is damaged, water. please contact the dealer or repair 2) Please cut off the power supply, shop. -
Page 20: Troubleshooting
TROUBLESHOOTING Troubles Possible Causes The doors or windows are not closed. There are heat sources inside the room. Not cool enough The hot air exhaust hose is not connected or blocked. Temperature setting is too high. Air inlet is blocked. The ground is not level or not flat enough. -
Page 21: Technical Data
TECHNICAL DATA Below data for your operating reference Model B1PAC07 Rated voltage 220V Rated frequency 50Hz Rated input 750W Rated current 3.4A 7000BTU/ Cooling capacity 2000W Moisture removal (L/H) Air flow 250m³/h - 11 -...
Need help?
Do you have a question about the B1PAC07 and is the answer not in the manual?
Questions and answers