Advertisement
Contents

Wire Harness

Hardwiring Kit for Parking Mode | Battery Discharge Prevention | 12V / 24V Compatible | Configurable Voltage Cut-Off and Timer Settings | Parking Mode Switch
The Power Magic Pro powers your dashcam when the engine is off by hardwiring it to the car battery. A low voltage power cut-off function and a parking mode timer protect your car battery from discharge.
Using the Parking Mode Switch you can easily enable/disable parking mode, without affecting drive recording auto-start at ignition.
Specifications
Rated output voltage: 12 - 24 V DC | Power cut-off timer setting: 6 hours – infinity | Output current / Quiescent current: Rated: 1A (Maximum: 2 A) / Below 200μA | Power cut-off voltage (based on the input voltage): 12 V, 12.5 V (±0.1 V) / 22.8 V, 23.2 V (±0.1 V) | Power restoration voltage (based on the input voltage): Cut-off voltage + 0.2V and higher | Country of origin: Republic of Korea | Warranty: 1 year manufacturer's warranty
Notice
The company will not be liable for any damage arising from not following this instruction manual.
Settings
Before adjusting the cut-off voltage and timer switches, ensure you turn the Parking Mode Switch OFF and unplug the wire harness from the Power Magic Pro.
- Parking Mode Switch
The Parking Mode Switch lets you easily enable/disable parking mode without affecting drive recording. Regardless of whether the switch is ON or OFF, the Power Magic Pro detects when you start your engine and automatically powers your dashcam while driving. - Power Cut-Off Settings
The Power Magic Pro will power your dashcam in parking mode until either your car battery voltage drops to the configured value or the configured timer elapses (whichever occurs first).
Parking Mode Switch

Parking Mode Switch ON

Parking mode enabled
When the ignition is off: The Power Magic Pro powers your dashcam in parking mode.
Driving mode enabled
When the ignition is on: The Power Magic Pro powers your dashcam in driving mode.
Parking Mode Switch OFF

Driving mode enabled
When the ignition is on: The Power Magic Pro blocks power from your dashcam.
Driving mode enabled
When the ignition is on: The Power Magic Pro powers your dashcam in driving mode.
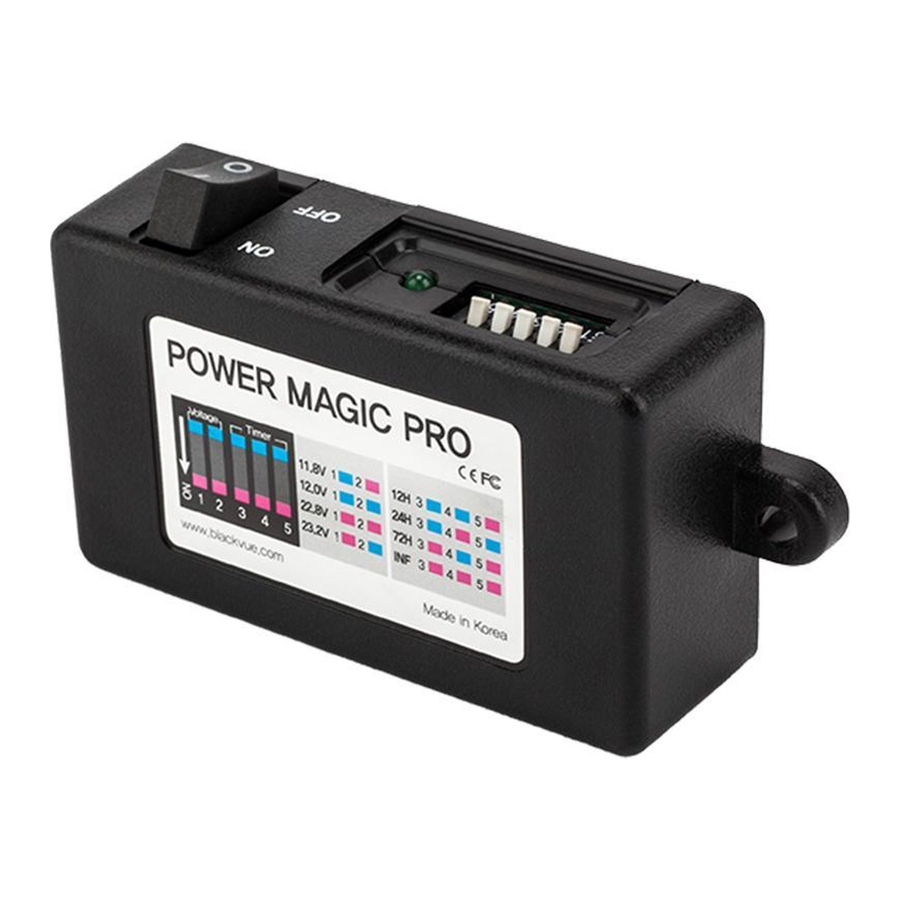
Timer Settings

Cut-Off Voltage Settings
For regular cars:

For heavy vehicles:

Installation Guide
Please check all components and read through this guide before starting. The location and layout of your fuse box and the type of fuses used will vary according to the vehicle model and year. If you have any doubts about installing the Power Magic Pro by yourself, please consult a professional.
* Make sure the engine is off and accessory power is off before proceeding.

- Set the voltage and timer switches
Refer to the Power Cut-Off Settings above and set the switches according to your requirements. - Connect the red ACC(+)wire to a Switched fuse
Referring to your vehicle Owner's Manual/Handbook, identify a Switched (accessory power) fuse in your interior fuse panel. Typical examples are the cigarette lighter and car stereo fuse slots.
Remove the identified Switched fuse. Many cars come with a fuse puller tool in the engine compartment fuse panel.
Remove the sleeve from the end of the red ACC(+) wire, and wrap the wire around one of the blades of the Switched fuse. Reinsert the fuse back into the fuse panel. - Connect the yellow BATT(+) wire to a Constant Power fuse
Identify a Constant Power (battery power) fuse in your fuse panel. Typical Constant Power fuses are the hazard light (emergency lamp), tail lights and interior light fuses. If your car has a "Battery Saver Function" please utilize the hazard light fuse.
Remove the identified Constant Power fuse. Remove the sleeve from the end of the yellow BATT(+) wire, and wrap the wire around one of the blades of the Constant Power fuse. Reinsert the fuse back into the fuse panel. - Connect the black GND wire to a ground point
Locate a ground point, such as a bolt, that is directly on a bare metal part of the vehicle's frame. Secure the ground wire to the bare metal frame (for example by securing it under the bolt). - Plug your dashcam's power plug into the cigarette lighter socket on the wire harness
To ensure good electrical contact you can use electrical tape to tape the plug and socket together. - Plug the wire harness into the Power Magic Pro
Plug the wire harness in and check that the Parking Mode Switch turns the LED on/off. Start your engine and check that the dashcam is powered when the Parking Mode Switch is both ON and OFF. - Fix the Power Magic Pro in place
Secure any excess wire and fix your Power Magic Pro in place using the supplied double-sided tape and/or screws.

Documents / ResourcesDownload manual
Here you can download full pdf version of manual, it may contain additional safety instructions, warranty information, FCC rules, etc.
Download BlackVue Power Magic Pro - Hardwiring Kit For Parking Mode Manual
Advertisement

Need help?
Do you have a question about the Power Magic Pro and is the answer not in the manual?
Questions and answers