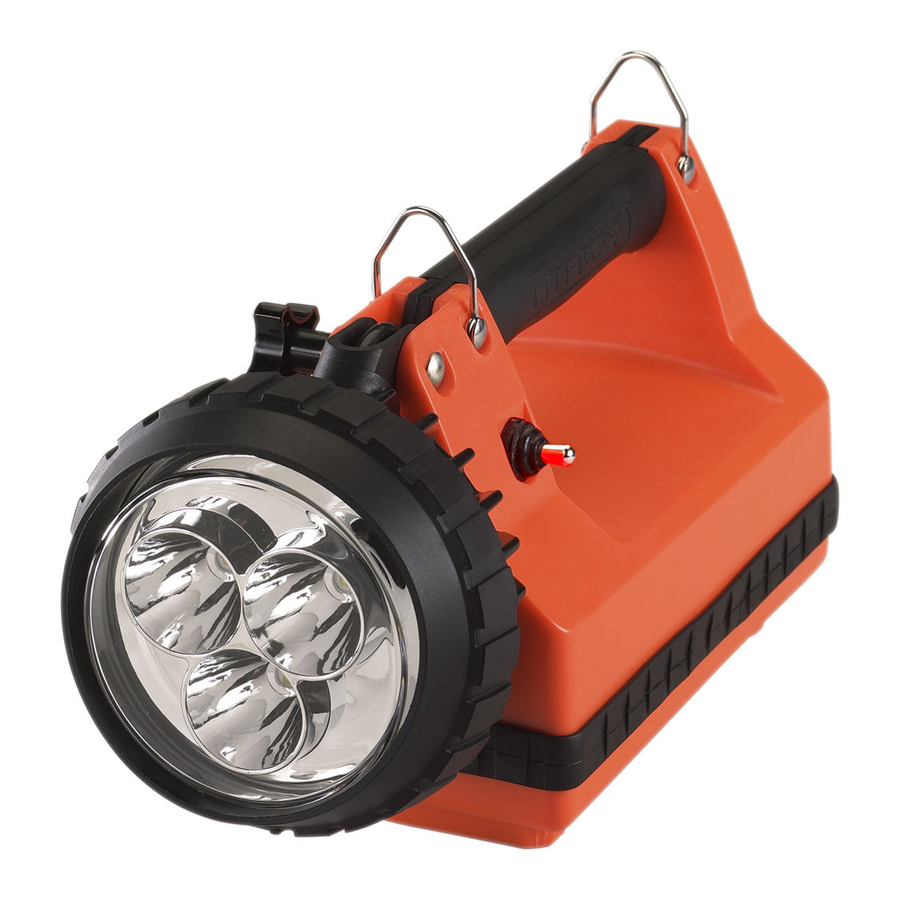
StreamLight LiteBox, FireBox, e-FLood, e-Spot Operating Instructions
- Service manual (31 pages) ,
- Operating instructions manual (6 pages) ,
- Operating instructions (4 pages)
Advertisement
INTRODUCTION
Thank you for selecting the Streamlight LiteBox®/FireBox®/E-Flood™/E-Spot™, a truly remarkable portable lantern. As with any fine instrument, reasonable care and maintenance of this product will provide years of dependable service. Please read all instructions before using your Streamlight. Important safety and operating guidelines are included and should be saved for future reference.
Charge your lantern overnight before first use.
The LiteBox is available in three basic systems: the Standard model, the Vehicle Mount model and the Power Failure model. All come with a convenient charging rack that does not require LiteBox disassembly for charging. The battery is capable of being recharged up to 500 times.
The Standard and Vehicle Mount systems use the same basic lantern with different charging racks. The Standard system comes complete with both AC 120 volt or 230 volt and DC 12 volt cigarette lighter power cords and Standard type charge racks, which will accept these cords. The Vehicle Mount system comes complete with a vehicle-mountable hardware charge rack. The Power Failure system lantern itself differs electronically from the basic lantern, but uses the same charge rack as the Standard model. Both AC and DC cords are included, but only the AC works in the power failure mode. The power failure feature of this unit provides emergency lighting automatically when the power fails. It is one of the few units available anywhere that gives you total portability in an emergency type lantern.
SAFETY
- BEFORE USING YOUR LANTERN AND CHARGER, READ ALL INSTRUCTIONS IN THIS MANUAL AND ALL CAUTIONARY MARkINGS ON THE CHARGER.
![]()
To reduce the risk of fire, electrical shock, or personal injury, DO NOT attempt to recharge your lantern with any chargers other than those supplied by Streamlight. Likewise, do not attempt to charge any other product with Streamlight chargers.![]()
Never leave your lantern with its lamp face against any surface including skin while in operation. The resultant heat build-up can cause a fire or burns.- Careful observation of the lantern's charge indicator LEDs serve as an important warning of possible charge circuit malfunction which may cause battery overcharging. The green LED should turn "on" steadily and the red LED should turn "off" completely within 24 hours. If the red LED stays "on" past this time, remove the lantern from service and return it immediately to an authorized Streamlight repair center or the factory for evaluation and repair. In extremely rare circumstances, an overcharged battery may release a flammable hydrogen gas mixture. In the unlikely event that this mixture should ignite, bodily injury could result.
- The lantern should not be switched on and off during charging unless only the green LED is lighted.
- Remove the lantern from the charger holder (rack) before attempting any cleaning or routine maintenance. Do not try to repair the lantern or charger yourself. Take it to a qualified repair facility or return it to the Streamlight factory.
- Recycle the battery responsibly when no longer serviceable. DO NOT INCINERATE THE BATTERY EVEN IF IT IS SEVERELY DAMAGED OR COMPLETELY WORN OUT. The battery can explode in a fire. Recycle properly.
- Handle the battery carefully and never allow it to short circuit. A shorted battery can deliver hundreds of amperes of current which can easily start a fire.


CHARGING AND OPERATION
Charge your lantern overnight before first use. Charging will occur only when the lamp is "off." Charge indicator LEDs are located on the right side of the handle, underneath the information label. The red LED indicates that the lantern is charging. The green LED indicates the lantern is fully charged and ready for use.
It is important to understand that a battery can take from only minutes to a maximum of 24 hours to fully charge depending on the battery's residual charge and other factors. While the lead-acid battery supplied with the lantern has been specifically selected to tolerate deep discharges, the battery should be charged as soon as possible after use to ensure maximum service life. The battery should never be "exercised" in an attempt to erase "memory" which never occurs with lead-acid batteries.
To release the lantern from the rack, push the black bar down, slide the lantern forward and lift up. The lantern will only fit one (1) way into the rack.
The On/Off switch is on the left side of the handle.
Mode Selection (Firebox Only)
The Firebox is equipped with LED taillights on the rear of the flashlight. The adjustable mode switch determines the functions of the three-position toggle switch. The mode switch is located under the rubber pad in the front foot of the lantern. Follow the instructions on the label to achieve the desired combination of lamp and taillights.
Output Intensity Selection (E-Flood and E-Spot Only)
The E-Flood and E-Spot LED models are equipped with a jumper-selectable output. The lantern ships from the factory in the high output setting. The mode can be changed by removing the Phillips head screw and the cover located on the back of the head assembly. Move the jumper to the "LO" side of the three pin header to decrease the output intensity and increase the run time.
Power failure model: The Power Failure lantern is intended to be used with an AC transformer. If you wish to mount the lantern in a vehicle and charge it with DC power, it should be wired so that charge power is always available. Do not make connections through the ignition switch as the lantern may turn "on" when the ignition is switched "off."
CHARGE RACKS
Power Requirement Of Vehicle Mounted Systems
This section describes the load which your lantern puts on a vehicle electrical system and suggested ways to deal with the situation.
After a complete discharge, charging a single lantern will consume 14 ampere-hours (Ah) from a 12 volt DC source in the first 24 hours, and one Ah each 24 hours thereafter. If the vehicle stands unused, without supplemental battery charging, the lantern will remove the above capacity directly from the vehicle battery if it is left connected at all times and would eventually drain the battery completely.
The typical car battery is 50 to 70 Ah, while a truck battery may be over 100 Ah. In cold weather, even a 15% loss of vehicle battery capacity could cause hard starting.
We recommend you take one of the following actions to keep your vehicle and lantern working well together:
- Use the vehicle daily which keeps the vehicle battery charged and, in turn, the lantern.
- Wire the lantern to the switched side of the ignition. The drawback to this is that while the vehicle battery does not get drained during periods of inactivity, the lantern might never receive a full charge.
- The best solution is to equip the vehicle with a supplemental trickle charger which is connected to AC power when the vehicle is standing. The advantages to this setup are that your vehicle battery will always be topped up, other power accessories can be added to the electrical system, and you may obtain longer vehicle battery life. Such chargers are available from several manufacturers. Your fire equipment distributor should be able to help.
MOUNTING
The charging rack supplied with the lantern is meant for permanent installation, depending on the model, either indoors or in a vehicle. All three models can be charged without racks. The Standard and Power Failure models (LiteBox only) include cigarette lighter adapter for temporary non-rack charging in most vehicles.
Four (4) self-tapping 1 1/4" #8 screws (use a 1/8" pilot) are included with each rack and should be sufficient for most mounting situations. Should your mounting situation require heavier hardware, use #8 machine screws.
The recommended mounting positions are from vertical to horizontal, but with the lamp end facing up. Allow enough extra space above the rack for removing and replacing the LiteBox/FireBox.
VEHICLE MOUNTED, DIRECT WIRE CHARGE RACK
The 12V DC Direct Wire Charge Cord (#22050) is offered for those who would like to permanently mount a Streamlight charger in their vehicle.

- Never attempt to directly wire any charge rack to a 120 volt AC power source. It is intended for 12-15 volts DC only.
- Before making electrical connections in a vehicle, keep in mind that a shorted battery can deliver hundreds of amperes, which can easily start a fire. Make all connections with insulated solder joints, lugs, or other devices intended for such use. Be sure that your installation is fused. If you install a separate fuse for your charge rack, 2 amps per unit are recommended.
Before installation, determine if your connection will be switched or non-switched. (Please read Power Requirements section).
The flashlight is protected from reverse polarity. If connected backwards, the unit simply will not charge. The positive lead from the charge rack is solid red or has a red stripe. The negative lead is solid black or has a black stripe.
DUAL FILAMENT BULB (LITEBOX ONLY)
The LiteBox® dual filament lamp assembly features a safety backup beam in case one filament burns out. The light is carefully engineered to produce the same quality beam patterns for either filament. The push button will alternately choose between the two filaments automatically. If one filament burns out, you will notice it will require three (3) activations of the switch to light the remaining back up filament. This indicates the necessity to replace the bulb.
BULB REPLACEMENT
(LITEBOX AND FIREBOX ONLY)

The inner halogen bulb operates at a high temperature and is pressurized. Allow to cool before handling. We recommend wearing safety glasses when replacing the bulb.
The PAR-36 lamp assembly used in the LiteBox/FireBox feature a lamp assembly having a replaceable bi-pin halogen bulb.
To remove the lamp assembly, stand the flashlight on its back end and pry the black rubber ring from the lamp housing. Lift out the lamp assembly and carefully disconnect the slip-on terminals.
To replace the halogen bi-pin bulb (tri-pin for dual filament), unscrew the bulb socket from the lamp assembly. Carefully pull the old bulb straight out from the socket. Align the pins of the new bulb with the holes in the socket and push until the glass is seated against the socket.
NOTE: Avoid touching the new bulb with your skin as perspiration oil can "smoke" the inside of the lens and reflector, as well as deteriorate the bulb glass. If disconnected, reconnect the slip-on terminals; the dual filament assembly leads are color coded. At this point, if you have the clear "spot" lens, turn on the lantern and adjust the focus by screwing the socket in or out of the reflector while observing the "spot" against a wall about ten feet away. The adjustment range is from fully seated to the point where the socket O-Ring starts to leave the surrounding screw shell. The "flood" lens need not be focused.
Replace the lamp assembly in the lamp housing. Try to dress the lamp wires neatly and make sure the recess on the reflector fits into its key in the housing. The flood assembly should be rotated to obtain a desirable pattern angle. Replace the rubber ring.
BATTERY REPLACEMENT
Read Safety section before replacing battery. The battery compartment is accessible at the bottom of the unit by removing the six (6) base screws. Remove the base of the lantern and the gasket. Disconnect the old battery, taking care not to stress the wiring harness or battery tabs. Slowly pull the battery out and remove the foam pad. Inspect the wiring, making sure that the wires run in their proper channels and are not pinched. This is to prevent shorting the battery, which may cause a fire. Insert the foam spacer and place the new battery into the upper half of the lantern with the terminals toward the switch side and the positive (red) terminal nearest to the circuit board. Connect the red wire to the positive (+) tab of the battery and the black wire to the negative (-) tab. Reversing these connections will damage the LiteBox®/FireBox®. Replace the gasket and cover using moderate torque on the six (6) base screws.
NOTE: The sealed lead acid battery in this product is recyclable. At the end of its useful life, under various country and state laws, it may be illegal to dispose of this battery in the municipal solid waste stream. Check with your local solid waste officials for details in your area for recycling options or proper disposal.
STREAMLIGHT'S LIMITED LIFETIME WARRANTY
Streamlight warrants this product to be free of defects for a lifetime of use except for batteries and bulbs, abuse and normal wear. We will repair, replace or refund the purchase price of this product should we determine it to be defective. This limited lifetime warranty also excludes rechargeable batteries, chargers, switches and electronics which have a 2 year warranty with proof of purchase. THIS IS THE ONLY WARRANTY, EXPRESSED OR IMPLIED, INCLUDING ANY WARRANTY OF MERCHANTABILITY OR FITNESS FOR A PARTICULAR PURPOSE.
INCIDENTAL, CONSEQUENTIAL OR SPECIAL DAMAGES ARE EXPRESSLY DISCLAIMED EXCEPT WHERE SUCH LIMITATION IS PROHIBITED BY LAW. You may have other specific legal rights which vary by jurisdiction.
Go to www.streamlight.com/support ; for a complete copy of the warranty, and information on product registration and the location of authorized service centers. Retain your receipt for proof of purchase.
Serial # _______________________________ Date of Purchase ______________________
IMPORTANT – Be sure to use genuine Streamlight® replacement parts.
PRODUCT REGISTRATION: To register your product go to http://ww.streamlight.com/support/
(Online Product Registration) within ten (10) days of purchase. Retain your receipt or other proof of purchase.
PRODUCT USE: The Streamlights are intended for use as high intensity, heavy duty, rechargeable, portable light sources. Use of the Streamlights for any purpose other than light sources is specifically discouraged by the manufacturer.
Please visit www.streamlight.com for an Authorized Service Center near you.

Documents / Resources
References
Download manual
Here you can download full pdf version of manual, it may contain additional safety instructions, warranty information, FCC rules, etc.
Download StreamLight LiteBox, FireBox, e-FLood, e-Spot Operating Instructions
Advertisement


Need help?
Do you have a question about the LiteBox and is the answer not in the manual?
Questions and answers