
Related Manuals for Ostro Furniture AOF-C3D03


Summary of Contents for Ostro Furniture AOF-C3D03
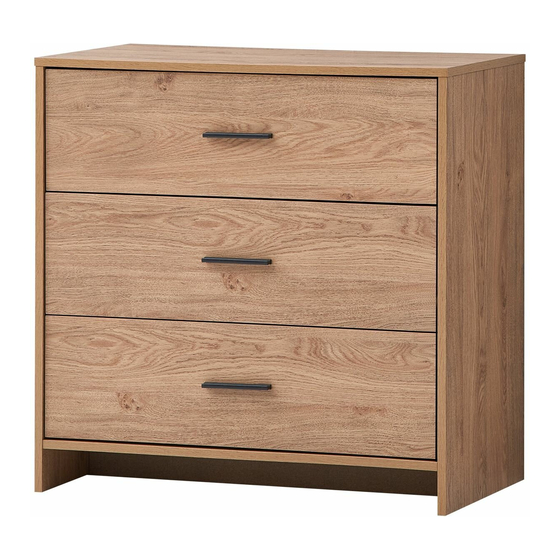
- Page 1 Three Drawer Lowboy Assembly Instructions Model Number: AOF-C3D03 AFTER SALES SUPPORT (AU) 1300 886 649 (NZ) 0800 836 761...
-
Page 2: Assembly Requirements
Assembly Requirements Space: 2 x 2 m Personnel: 2 Adults Time: 1.5 hours Quickfit/Cam Lock Guide To use the quickfit/cam lock, first insert the quickfit into the panel. The “shoulder” of the quickfit should be Shoulder flush against the panel, as shown in (a). When inserting the cam lock, ensure the orientation is correct, as shown, so that it aligns properly with the quickfit,... -
Page 3: Important Safety Information
Important Safety Information IMPORTANT: Please read this manual carefully, and keep it for future reference. • This piece of furniture is intended for use in domestic environments. It is not suitable for commercial, industrial or trade use. Do not use it for any other purpose, and only use it as described in this manual. •... -
Page 4: Care And Maintenance
Important Safety Information • CAUTION: Do not allow children to climb on this furniture - it may topple over and badly injure a child. Do not place toys or other items that may appeal to a child on top of this furniture item. •... - Page 5 ASSEMBLY INSTRUCTIONS Before you begin, please follow assembly instructions carefully, then follow them step by step. Read instruction carefully . See Furniture Parts list and Hardware List for guidance . Be sure you have all parts before you start assembling . Place and assemble furniture on a clean flat soft surface , such as carpet or rug to pervent being scratched .
- Page 6 ASSEMBLY INSTRUCTIONS STEP 1 STEP 2 SCREWDRIVER SCREWDRIVER REQUIRED REQUIRED - Insert hardware A2 onto panel (1), (9) and (10). - Insert hardware A1 onto panel (3), (4) and (6). (Repeat 16 times.) (Repeat 6 times.) - Connect Metal Support (15) to panel (1) - Insert hardware A2 onto panel (3) and (4).
- Page 7 ASSEMBLY INSTRUCTIONS STEP 5 STEP 6 SCREWDRIVER SCREWDRIVER REQUIRED REQUIRED Fix hardware J1 (R) into panel (4) with hardware D. - Attach panel (3) and (4) to panel (2), (5), (6) and (7). (Repeat 4 times for each hardware.) - Insert all hardware A2 into A1. - Rotate all A1 until tight.
- Page 8 ASSEMBLY INSTRUCTIONS STEP 9 STEP 10 HAMMER SCREWDRIVER REQUIRED REQUIRED Hit hardware G into bottom of panel (3), (4) and (5). - Insert hardware H1 into slot at panel (1), (2), (3) and (4). (Repeat 6 times.) - Assemble hardware H1 by using hardware H2. (Repeat 8 times.) ROTATE STEP 11...
- Page 9 ASSEMBLY INSTRUCTIONS STEP 13 STEP 14 SCREWDRIVER REQUIRED Insert the panel (13) along the slot. - Attach panel (14) to panel (10). (Repeat 3 times.) - Attach panel (9) to panel (11), (12) and (14). * In this step only show one of the drawers. - Insert all hardware A2 into A1.
- Page 10 ASSEMBLY INSTRUCTIONS STEP 17 STEP 18 POWER SCREWDRIVER HAMMER DRILL REQUIRED Assemble hardware L1 into panel (1) - Mark and use the power drill REQUIRED REQUIRED by using hardware L2. to drill a hole on the wall. (Repeat 2 times.) - Hit hardware L3 into the wall.
-
Page 11: Warranty & Returns
Warranty returns Should you for any reason need to return this product for a warranty claim, make sure to include all accessories with the product. Product does not work? If you encounter problems with this product, or if it fails to perform to your expectations, make sure to contact our After Sales Support Centre on (AU) 1300 886 649 or (NZ) 0800 836 761 for advice.
Need help?
Do you have a question about the AOF-C3D03 and is the answer not in the manual?
Questions and answers