Table of Contents
Advertisement
Quick Links
Advertisement
Table of Contents

Related Manuals for ICE COBOTICS Cobi 18


Summary of Contents for ICE COBOTICS Cobi 18
- Page 1 Subscribe to Smarter Cleaning Cobi 18 User Manual 8490040 REV.01 (07-2022)
- Page 2 The operator must be mindful when using Cobi 18 in accordance with its intended use and precautions at all times. Operators shall not, directly or indirectly: •...
-
Page 3: Table Of Contents
Machine Setup and Installation........................17-22 Machine Operation in Autonomous Mode.....................23-32 Best Practices for Autonomous Mode......................33-34 Navigation System............................35-38 Manual Mode Operation..........................39-40 Machine Maintenance........................41-46 Battery & Battery Charger..........................47 Troubleshooting..............................48 Fault Code & Solution...........................49-50 Wiring Diagram..............................51-52 Declaration of Conformity..........................53 Autonomous Hard Floor Scrubber Cobi 18... -
Page 4: Safety Precautions
Precautions presented here are intended to prevent harm to the user and other persons as well as damage to property. Always observe the precautions. ICE Cobotics shall not be liable for any damages incurred by the user or any third party who fails to follow any of these safety precautions and as a result of the malfunctioning, misoperation, trouble, etc. - Page 5 - Do not drop, break, deform, puncture, gouge, burn, or paint the machine. * May cause ignition, electric shock, damage, chemical explosion, etc. Servicing, disassembly, and repair is not possible by persons other than by ICE Cobotics or service staff approved by ICE Cobotics and having received approptiate training.
- Page 6 - Do not use the machine if the grounding strap is not in contact with the floor. If the grounding strap breaks or comes off, please contact ICE Cobotics customer service. - Use the equipment within an ambient temperature range of 35.6°F / 2°C to 104°F / 40°C, humidity of 10% to 80%.
- Page 7 * May cause sensors to not operate normally or malfunction. - The Battery is installed inside the machine, unless authorized, do not remove the Battery from the machine. Only use the ICE Cobotics specific battery. CAUTION - If you need to remove the battery from the machine, please turn off the ON/OFF switch of the battery first, then unplug the battery connector and gently pull out the battery.
-
Page 8: Unpacking The Machine
1. Check the packaging for any damage, immediately report to the carrier if any damage is found. Clip 2. Remove the 4 clips that hold the upper box onto the base. Autonomous Hard Floor Scrubber Cobi 18... - Page 9 3. With 2 persons, hold the handholds on the outer box, pull it up and remove it completely. Handhold accessory boxes stored on the top of the packaging, it includes Main brush , Squeegee, 4. Remove the Mop, Side brushes and Hopper. Autonomous Hard Floor Scrubber Cobi 18...
- Page 10 5. Continue to remove the packaging materials, including the upper foam and corner supports, fully exposing the machine. 6. With 2 people, hold the hand holder on the machine, pull it up and remove it from the bottom box, then set it on the floor gently Autonomous Hard Floor Scrubber Cobi 18...
- Page 11 8. Gently lay the machine on its back on the floor with its front facing upwards, remove the protective film from , unpacking is done. the cliff sensors If the protective film is not removed, the machine may not work properly. DANGER Autonomous Hard Floor Scrubber Cobi 18...
-
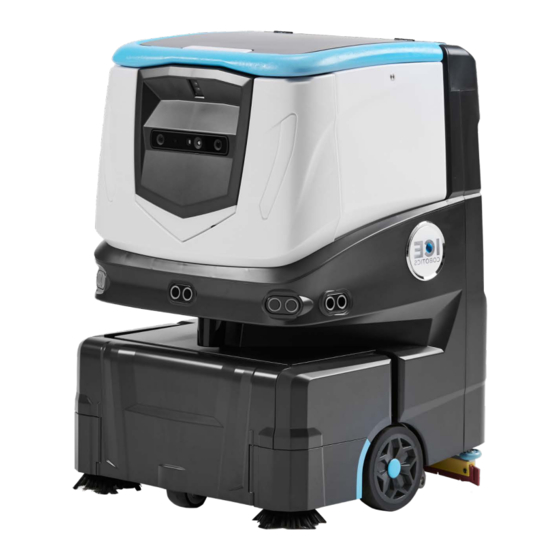
Page 12: Machine Components
24. Turn Signal, Right-Rear 25. Door, Battery Compartment 26. Window, Battery Charging Status Mop Lock/Unlock Button 28. Mop 29. Squeegee 30. Cap, Vacuum Motor Exhaust 31. Rear Caster Wheel 32. Hopper 33. Cliff Sensor 34. Main Brush Autonomous Hard Floor Scrubber Cobi 18... - Page 13 46. Float Housing, Vacuum Motor Shut-off Vacuum Standpipe Assy 48. Dirty Water Standpipe Assy 49. Debris Collector 50. Recovery Tank 51. Handle, Tank 52. Solution/Recovery Tank Assy 53. Drain Plug, Clean Water 54. Drain Plug, Dirty Water Autonomous Hard Floor Scrubber Cobi 18...
-
Page 14: User Interface Instructions
Setting Icon Battery Condition Meter Manual/Autonomous Mode Icon Mapping Switch, Autonomous Mode Timed Task Icon 10. 1-Step Icon, Autonomous Mode Time 11. ECO/MAX Icon, Manual Mode i-SYNERGY Cloud Connect Status 12. 1-Step Icon, Manual Mode Autonomous Hard Floor Scrubber Cobi 18... -
Page 15: Machine Accessories
User Manual Machine Accessories Included Accessories delivered with the machine. Side Brush x 2 Main Brush x 1 Hopper x 1 Squeegee x 1 Mop x 1 Home Location Code x 10 Autonomous Hard Floor Scrubber Cobi 18... -
Page 16: Machine Specifications
300 W / 0.4 hp Vacuum Motor 560 mmH O / 22 inH ² Climbability (Autonomous Mode) Climbability (Manual Mode) 150 ml/min Flow Rate 5 oz/min Min. Turn-Around Aisle Width (Autonomous) 650 mm / 25.6 in Autonomous Hard Floor Scrubber Cobi 18... -
Page 17: Machine Setup And Installation
6. Close the right-side door, gently raise the machine and put it in the upright position. Autonomous Hard Floor Scrubber Cobi 18... - Page 18 2. Open the Left side door, hold the side brush and ensure the install socket is properly aligned to the drive gear, simply push it up to lock and install, pull it down to unlock and remove, same procedure to install the Right-side brush. 3. Close the side door. Autonomous Hard Floor Scrubber Cobi 18...
- Page 19 2. Open the Right-side door, hold the hopper on the end and ensure the magnetic surface faces up, simply push it in to lock and install, pull it out to unlock and remove. 3. Close the side door. Autonomous Hard Floor Scrubber Cobi 18...
- Page 20 1. Check and ensure the machine is turned off, the squeegee holder is on the up position. 2. Hold the squeegee by pinching the 2 ears, ensuring the magnetic surface faces upwards, simply lift it up to lock and install, pull it down to unlock and remove. Autonomous Hard Floor Scrubber Cobi 18...
- Page 21 4. Hold the Mop Assy and align the socket on the Mop holder and the hook on the squeegee holder, push it down to lock and install the Mop, pull it up to unlock and remove. Autonomous Hard Floor Scrubber Cobi 18...
- Page 22 3. The Cobi 18 includes a combined tank, the inner cavity is the Recovery tank, the outer cavity is the Solution tank. Please drain the dirty water if there is still water inside the recovery tank before filling the solution tank.
-
Page 23: Machine Operation In Autonomous Mode
Machine Operation in Autonomous Mode Overview Cobi 18 is a Collaborative Robot scrubber and capable of cleaning in Autonomous mode and Manual mode. It is usually recommended to work in Autonomous mode. To work in Autonomous Mode, the machine must first read a Home Location Code, then you can select to teach a cleaning route, or select a cleaning route saved on the Home location code to start work in Autonomous mode. - Page 24 WARNING 3. Check the floor condition, please pre-sweep the area to be cleaned before scrubbing. Cobi 18 is a robotic scrubber, not a sweeper. The debris hopper is small. Please pre-sweep the area to be cleaned to remove large debris.
- Page 25 3. Check the screen for warning messages. If a message appers, touch the message and follow instructions on how to clear the warning. If warning fails to clear, please contact ICE Cobotics customer service. 4. Autonomous mode is the default cleaning mode.
- Page 26 Place location codes on a surface that will not peel when code is removed. Consult with building manager and place location codes in an approved location. Do not place on rough surfaces. Autonomous Hard Floor Scrubber Cobi 18...
- Page 27 2. Select the cleaning route teach mode by touching the corresponding icon on the screen, the UI will enter the Home Location Code scanning interface. 3. Push the machine to the front of the Home Location Code and scan it. The UI will then enter the cleaning route management interface. Autonomous Hard Floor Scrubber Cobi 18...
- Page 28 4. Touch the [+] icon to add a cleaning route. The UI will then enter the cleaning route mode selection interface. 5. Cobi 18 has two different cleaning route modes. Custom mode and Auto-fill mode. Select the mode you want by touching the corresponding icon.
- Page 29 Touch the "save" icon and the machine will scan the location code and save the new cleaning route. 9. When the route has saved successfully, push the home icon and return to the Autonomous mode interface. The cleaning route is now completed. Autonomous Hard Floor Scrubber Cobi 18...
- Page 30 2. Select the Autonomous mode by touching the corresponding icon on the screen, the UI will enter the Home Location Code scanning interface. 3. Push the machine to the home location code and scan it, entering the cleaning route selection interface. Autonomous Hard Floor Scrubber Cobi 18...
- Page 31 6. Lock the handle and push the GO/STOP button according to the animation on the screen. The vacuum and brush motors will turn on and the machine will begin to work in Autonomous mode. Autonomous Hard Floor Scrubber Cobi 18...
- Page 32 Once the issue has been resolved, press the GO/STOP button to resume cleaning. 9. Upon completion of the route, the machine will automatically return to the starting point and scan the home location code, turn off all motors and apply parking brake. Autonomous cleaning is done. Autonomous Hard Floor Scrubber Cobi 18...
-
Page 33: Best Practices For Autonomous Mode
2. If you notice the unit calling for many “assists” when testing your route, scan the environment removing any obstructions. If the assists persist after obstructions are removed, please retrain the route. Autonomous Hard Floor Scrubber Cobi 18... - Page 34 - New merchandise displays that might have different dimensions. 3. New dimensions may reveal new floor space that was previously covered causing the current route to miss this area. Please reteach this route for the new environment. Autonomous Hard Floor Scrubber Cobi 18...
-
Page 35: Navigation System
User Manual Navigation System When Cobi 18 is in autonomous mode, the machine is driven by the navigation system. The Navigation system mainly contains the Computing Unit and Sensors which can be divided into Safety sensors and positioning sensors, the function is described as follow:... - Page 36 4. For your safety, the minimum allowable aisle width is 800mm. 5. Cobi 18 should not be used in scenarios where the operating environment changes too much or too frequently, this will cause the machine to work with reduced navigation system accuracy, possibly causing it not to operate autonomously.
- Page 37 6. Check to see if there are any objects interfering with the lidar. Remove obstructions. 7. Please contact ICE Cobotics customer service if issue continues to exist. 1. Check and ensure there is no debris on 3D ToF, clean it with microfiber cloth.
- Page 38 3. Ensure there are no new obstructions such as glass or mirrors in the cleaning path. failed. Remove as needed. 4. Please contact ICE Cobotics customer service if issue continues to exist. Self-check failure. Reboot machine and contact ICE Cobotics customer service if issue continues to exist. Autonomous Hard Floor Scrubber Cobi 18...
-
Page 39: Manual Mode Operation
Manual Mode Operation Overview Cobi 18 Manual Mode is typically used for cleaning smaller areas which can not be cleaned autonomously. When in manual mode, the machine operates as a traditional scrubber and the operator will not need to utilize the Home Location Code. - Page 40 5. Tap the 1-step start icon to end manual cleaning. The brush motor will stop immediately, the vacuum motor will shut off after 15 seconds and the screen display will return to the Manual Mode main interface. Autonomous Hard Floor Scrubber Cobi 18...
-
Page 41: Machine Maintenance
2. Remove the Tank Assy from the machine and carry it to the service area, empty and rinse both the Solution Tank and the Recovery tank. 3. Remove the Squeegee Assy from the machine and clean it by flushing it with water, then wiping with clean cloth. Autonomous Hard Floor Scrubber Cobi 18... - Page 42 6. Re-install the tank assembly, squeegee, hopper and mop on the machine. Be sure to install them properly. Do not spray the machine exterior directly with water as it may introduce moisture to certain electrical components and cause damage. DANGER Autonomous Hard Floor Scrubber Cobi 18...
- Page 43 Keep the battery door open for ventilation. 10. Store the machine in an approved area. Folding the handle down will set the parking brake for secure storage. Autonomous Hard Floor Scrubber Cobi 18...
- Page 44 2. Check the main and side brushes for debris. Remove and clean as necessary. Reinstall properly. 3. Remove the water filter on the tank holder and check it for debris build up. Flush with clean water to remove debris and reinstall as needed. Autonomous Hard Floor Scrubber Cobi 18...
- Page 45 5. Check rubber gaskets on tank holder for debris and damage. Debris may be flushed with clean water and replaced. If a gasket is damaged, it will need to be replaced. 6. Check if the Vacuum hose is clogged, rinse the Vacuum hose by flushing it with water if necessary. Autonomous Hard Floor Scrubber Cobi 18...
- Page 46 8. Wipe-off all cliff sensors with microfiber cloth and ensure there is no residual dirt. 9. Wipe off the machine exterior surface with a damp microfiber cloth. 10. Store the machine in an approved area. Folding the handle down will set the parking brake for secure storage. Autonomous Hard Floor Scrubber Cobi 18...
-
Page 47: Battery & Battery Charger
User Manual Battery & On Board Battery Charger Cobi 18 has an on board Lithium Ion Battery and battery charger. Do not remove the battery or charger unless authorized to do so. Battery Nominal Voltage 25VDC Nominal Capacity 25Ah Allowed Max Charging Current Charging Temperature 0-45°C (32-113°F) /5~95%RH... -
Page 48: Troubleshooting
Faulty vacuum motor Contact ICE Cobotics customer service Low battery charge Recharge batteries Low battery charge Fully recharge battery Short run time Defective batteries Replace battery Faulty battery charger Repair or replace battery charger Autonomous Hard Floor Scrubber Cobi 18... -
Page 49: Fault Code & Solution
2. Check environment near home location code A3563 Machine has interference Please remove the obstacle Machine detects a large area of 1. Please inspect machine and environment A3566 glass 2. Please move machine through the area of glass Autonomous Hard Floor Scrubber Cobi 18... - Page 50 The trial period of the machine has expired, please contact customer service Serial number: - A0037 Service deactivated Please contact the customer service center Serial number: - A0038 Service deactivated Service not active, contact customer service Autonomous Hard Floor Scrubber Cobi 18...
-
Page 51: Wiring Diagram
User Manual Wiring Diagram Autonomous Hard Floor Scrubber Cobi 18... - Page 52 User Manual Wiring Diagram Autonomous Hard Floor Scrubber Cobi 18...
-
Page 53: Declaration Of Conformity
Serial number range: 60401 000001 - 60401 999999 is in conformity with the following European Directives and harmonised standards 2006/42/EC, 2014/30/EU, EN 60335-1:2012+A11:2014+A13:2017+A1:2019+A14:2019+A2:2019+A15:2021 EN 60335-2-72:2012 EN 62233:2008 EN IEC 61000-6-1:2019 EN IEC 61000-6-3:2021 EN 61000-3-2:2019+A1:2021 EN 61000-3-3:2013+A1:2019 07. 01, 2022 Autonomous Hard Floor Scrubber Cobi 18...
Need help?
Do you have a question about the Cobi 18 and is the answer not in the manual?
Questions and answers