Advertisement
Quick Links
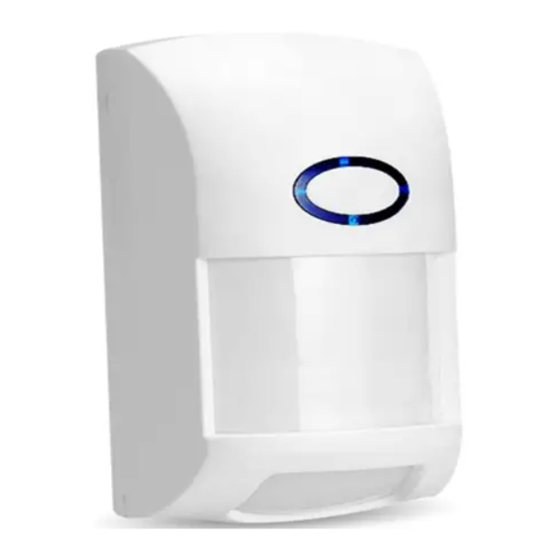
Zigbee PIR Motion Sensor with Pet Immunity
H74426
Installation Instructions and User Manual
1. Specifications
Frequency:
2.4 GHz (IEEE 802.15.4)
32°‐113°F (0°‐45°C)
Operating Temperature:
Operating Humidity:
85% RH non‐condensing
Battery:
1x CR123A Panasonic Lithium 3V DC
Battery Life:
3 Years
Compatibility:
Zigbee,
WWAH (Works with All Hubs)
Pet Immunity:
Up to 50 lbs
Coverage Area:
40 feet by 40 feet, 90° angle
1500 Lux
Light Immunity:
Coverage Pattern:
Side View:
7.5 ft
0 3 6 10 13 16 19 23 26 29 33 36 40
(feet)
Top View:
0
3
6
10
13
16
19
23
26
29
33
36
40
29 26 23 19 16 13 9 6 3 0 3 6 9 13 16 19 23 26 29
(feet)
2. Package Contents
1x Sensor
4x Screws & Wall Anchor
1x CR123A battery (installed)
2x Sensor Case Screw
1x Back Mounting 2‐Sided Adhesive Tape
1x Manual
2x Side Mounting 2‐Sided Adhesive Tape
3. Component Identification
Case Release Button
4. Zigbee Enrollment:
This PIR Motion Sensor needs to be paired before installation.
1. Pull the exposed plastic battery tab.
2. The LED will blink three times every 2‐3 seconds in amber color while
scanning the network.
3. If network is found and successfully joined, the LED will be lit for 1 second in
amber color followed by a short blink in green color.
0
3
4. If network is not found after 1 minute, the sensor will go into sleep mode
6
and the LED will blink in amber color every 1 minute. You need to reset the
10
sensor to trigger a pairing process, and then sensor will repeat steps from 2
13
to 4.
16
To reset the sensor:
19
1. Remove the battery for 10 seconds
23
2. Press and hold down the temper switch while re‐insert the battery
26
29
3. Release the temper switch within 3 seconds
33
36
40
5. Mounting
Mount the PIR Motion Sensor at 7.5 feet (2.3 meters) above the floor.
Press the case release button to separate the front and back sensor case.
The back case gives access to both the flush mount and corner mount
screw knock outs. Drill through the appropriate knockouts and use the
included screws to mount in the desired mounting location.
It is recommended to ensure there is a tight seal around the knockouts to
prevent bugs from entering the sensor and causing false alarms.
Replace the front sensor cover to snap shut and screw in the sensor case
screws on the top and bottom of the back sensor case.
Tamper Switch
CR123A Battery
Sensor Case Screws
6. Walk Test Mode
Walk test mode can be used to test the motion sensor detection coverage area.
To enter walk‐test mode:
1. Remove the battery for 10 seconds
2. Press and hold down the tamper button while re‐insert the battery
3. Keep the tamper switch hold down for 10 seconds then release
The LED will begin to blink slowly in amber to indicates the motion sensor is
warming up. After 45 seconds, the LED will stop blinking which indicates the
motion sensor is ready to detect motion. The LED will be lit in red color to
illuminate each time motion is detected. Once the LED goes out, the sensor is
ready to detect motion again. Walk test mode ends after 20 motions detected,
or no motion detected for 1 minutes. It is recommended that the PIRZB2‐ECO is
tested monthly to ensure proper function.
7. Operation
The PIR Motion Sensor requires 45 seconds to warm up for signal stabilizing
when performing start up or reset. During the warmup period, the LED will blink
slowly in amber.
After warmup completed, the LED will blink every 5 minutes in green color to
indicate the sensor is working properly. However, there are no LED indications
when motion is detected. This is done to maximize battery life. Furthermore,
when motion is detected and a signal is transmitted to the panel, the sensor will
not transmit again until there are no motion detected for a period of 3 minutes
and motion is detected again.
8. Maintenance ‐ Replacing the Battery
When the battery is low, a signal will be sent to the control panel. The LED will
blink every 2 minutes in red.
To insert or replace the battery:
1. Press the case release button to separate the front and back sensor case
2. Remove the front case to expose the battery
3. Replace the CR123A lithium battery. Note the correct orientation of the
battery as shown on the battery compartment.
4. Replace the front cover.
WARNING: Failure to follow these warnings and instructions can lead to heat
generation, rupture, leakage, explosion, fire, or other injury, or damage. Do not
insert the battery into the compartment in the wrong direction. Always replace
the battery with the same or equivalent type (see Specifications on section 1).
Never recharge or disassemble the battery. Never place the battery in fire or
water. Always keep batteries away from small children. If batteries are
swallowed, promptly see a doctor.
Always dispose and/or recycle used batteries in accordance with the hazardous
waste recovery and recycling regulations for your location. Your city, state, or
country may also require you to comply with additional handling, recycling, and
disposal requirements.
Advertisement

Related Manuals for Universal Electronics H74426

Summary of Contents for Universal Electronics H74426
- Page 1 Zigbee PIR Motion Sensor with Pet Immunity 3. Component Identification 6. Walk Test Mode Walk test mode can be used to test the motion sensor detection coverage area. H74426 To enter walk‐test mode: Tamper Switch 1. Remove the battery for 10 seconds Installation Instructions and User Manual 2. Press and hold down the tamper button while re‐insert the battery 3. Keep the tamper switch hold down for 10 seconds then release 1. Specifications The LED will begin to blink slowly in amber to indicates the motion sensor is Frequency: 2.4 GHz (IEEE 802.15.4) warming up. After 45 seconds, the LED will stop blinking which indicates the 32°‐113°F (0°‐45°C) Operating Temperature: motion sensor is ready to detect motion. The LED will be lit in red color to CR123A Battery Operating Humidity: 85% RH non‐condensing illuminate each time motion is detected. Once the LED goes out, the sensor is Battery: 1x CR123A Panasonic Lithium 3V DC ready to detect motion again. Walk test mode ends after 20 motions detected, Battery Life: ...
- Page 2 Canada RF exposure compliance 11. Ensure that the area you wish the PIR to cover is free of obstructions (for example, curtains, screens, plants, and so on.) that may block the pattern of coverage. To comply with RSS‐102 requirements, a separation distance of 20cm must be kept between the device and the 12. Anything that can sway or move due to air current can cause a change in infrared energy user at all times. within the fields of view. Drafts from doors or windows can cause this to happen. Plants, Pour se conformer aux exigences RSS‐102, une distance de séparation de 20 cm doit être maintenue entre balloons, curtains, and hanging baskets should never be left in the PIR’s field of view. l'appareil et l'utilisateur à tout moment. 13. Do not mount the PIR on a surface that allows for any vibration. Vibrations not only cause the PIR to move a little, but it also causes the fields of view in a room to move with respect the FCC ID: MG3‐H74426 IC: 2575A‐H74426 PIR. A little vibration can cause havoc with the PIR’s field of view, thus the PIR may see a Universal Electronics Inc. change in energy and trigger the alarm. 14. An installation often requires that the PIR is aimed at the door. The PIR may detect door movement before the door contact can initiate an entry delay, causing the alarm to trigger. If you install the PIR facing a door, then while programming the PIR, choose an appropriate sensor/zone type. 15. The PIR ONLY detects intrusion within the pattern of coverage. 16. The PIR does not provide volumetric area protection. 17. The PIR creates multiple beams of protection. Intrusion can only be detected in unobstructed areas covered by those beams. 18. The PIR cannot detect motion or intrusion that occurs behind walls, ceilings, floors, closed doors, partitions, glass doors, or windows. ...
Need help?
Do you have a question about the H74426 and is the answer not in the manual?
Questions and answers