
Related Manuals for Delta-T Devices GP1


Summary of Contents for Delta-T Devices GP1
- Page 1 Irrigation Control Using Soil Moisture Sensors Quick Start Guide Version 2c Delta-T Devices Ltd...
-
Page 2: Solenoid Valve
Reduced water use Compact plants Fewer weeds Reduced labour for watering, pruning and weeding Plants are less soft so establish more reliably More fruit and flowers, less vegetative growth © 2010 Delta-T Devices Ltd Page... -
Page 3: System Requirements
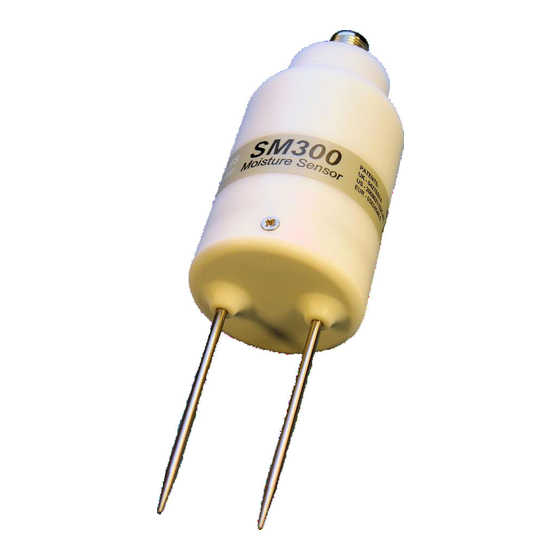
The timer-based irrigation system solenoid controls irrigation by valves The relay cannot be used for direct pump control If you plan to control irrigation for a mixed bed, the plants must have similar water requirements © 2010 Delta-T Devices Ltd Page... - Page 4 You need to assemble the following equipment: Item Accessories / notes Mounting kit (GP1-MP1) Serial cable, small screwdriver and PC software on CD (included with GP1) Logger cable (SMSC/sw-05) SM300 Extension cables may be required (see section 1.1) Note that the SM300 includes a built-in temperature sensor but this can only provide soil / substrate temperature readings when the SM300 is fully buried.
-
Page 5: Installation
Locate the solenoid valve that controls the bed irrigation. Plan where to splice into the cable to the valve, and then consider where it makes sense to mount the GP1. Depending on available extension cables, this will then determine the general location for the SM300. - Page 6 Don’t connect the other end to the solenoid valve at this stage. Tighten the cable glands, replace the GP1 cover, secure all cables to the post and tape carefully over any cable runs in walkways.
- Page 7 GP1 Quick Start Guide. Connect your laptop to the GP1. Start DeltaLINK and select File, New, Program…. From the list choose Standard GP1 Program. 3.2. Set up the GP1 recording program Double-click and select the SM300 sensor type for Channel 1.
- Page 8 If Duty cycle < 100% the GP1 will pulse the irrigation so that the compost has time to wet up. In this example the irrigation would be pulsed ON for 30 seconds every 2 minutes.
-
Page 9: Check The System
OFF condition () is met and control relay () switches off. Note: you should be able to hear the GP1 relay switching, but it may be convenient to attach a multi-meter to the end of the control cable, so that you can check the switching remotely. - Page 10 Turn off irrigation to the bed. Cut the cable from the irrigation timer to the solenoid valve and splice in the cable from the GP1 control relay using the connector block as shown below. You will need to mount the block in a small waterproof enclosure if the connection is likely to get wet.
-
Page 11: Adjust The Settings
Click OK to apply the change. Pocket DeltaLINK The GP1 can also be configured using the Pocket PC version of DeltaLINK. This provides exactly the same facilities for programming the logger and examining the stored readings, but is even more convenient for field use. -
Page 12: Care And Safety
A standard PP3 alkaline battery will power the GP1 and SM300 for more than 4 months when recording at 30 minute intervals. Check the battery voltage from time to time in DeltaLINK and replace when below 6 Volts.
Need help?
Do you have a question about the GP1 and is the answer not in the manual?
Questions and answers