Advertisement
Quick Links
Advertisement

Summary of Contents for Lowrance 5
- Page 1 OWNER'S MANUAL...
-
Page 2: Installation Instructions
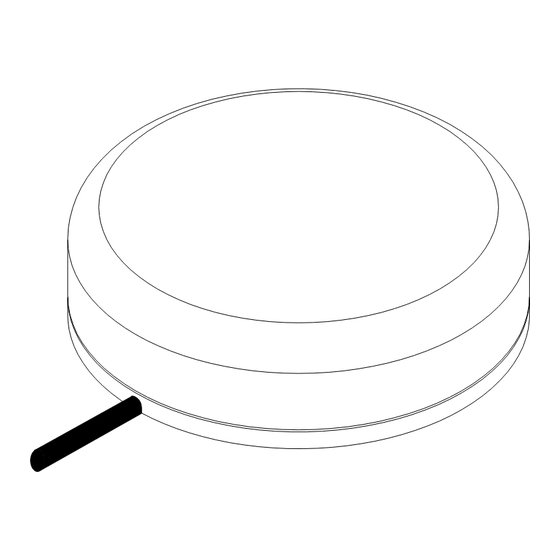
Installation Instructions The LGC-12S GPS module contains a12 parallel channel GPS receiver. ® This unit attaches directly to select Lowrance products capable of dis- playing GPS position information. Power for the LGC-12S is supplied from that equipment. It has a gray connector on the end of the cable. - Page 3 are 4mm x 30mm. (about 1 1/8” long). Drill 4.75 mm (3/16”) holes for the mounting screws. If you're installing the LGC-12S, and need to route the cable through the mounting surface, you’ll need to drill a 25 mm (1”) hole for the cable's connector.
- Page 4 Pole Mount The GPS module attaches to the pole mount adapter with the supplied 4 mm screws. You can route the cable through the slot in the side of the module and down the side of the pole. Alternatively, you can pass it down through the pole mount adapter and run the cable inside the pole.
- Page 5 MMC Interface The MMC Interface lets you transfer maps and other data from the com- puter to the MMC. It connects to the PC's parallel port to transfer data and to the keyboard for power. Connections First, turn the computer off. The keyboard "Y"...
- Page 6 MapCreate™ Installation Instructions 1. Insert the USA-EAST CD-ROM into the computer's drive. 2. Click the Start button, then Run 3. Type D:\setup.exe (where D: is the drive letter for your CD-ROM) 4. Click OK to begin the installation. Follow the on-screen instructions. Types of installations There are three types of installations: Typical -...
- Page 7 Starting MapCreate™ If you installed the Typical or Compact version of MapCreate™, make certain the CD-ROM for the area you intend to use is in the CD-ROM drive. Note: The detailed map data is split down the middle of the United States.
- Page 8 Navigating the Map Center Map To center the map, click on the crosshair button at the top left of the screen. Now click on the part of the map that you want cen- tered in the map window. Zoom You can zoom on any portion of the map using the crosshair button. To do this, place the crosshair cursor on the map near the location that you want zoomed.
- Page 9 the Create Border tool on a corner of the box and click the right mouse button. The box is immediately erased. Draw Line Selecting an area of the map us- ing the line draw feature gives you much more versatility than simply drawing a box.
- Page 10 Continue moving the mouse along the chosen area and clicking the left mouse button each time you need to change direction. You can combine selections and save them together as shown here. When you get to the end, click the right mouse button.
- Page 11 Saving a Map Once you've finished se- lecting a map, you will need to save it. Click on the "Build Map" button. The screen at right appears. Enter a file name and click the "Save" button. A new window appears that shows the progress of the map construction.
- Page 12 Now click on the Transfer Map button. A window similar to the one at right appears. When the map has finished downloading to the MMC, its filename appears in the "Files Stored on Card" box at the bottom of the screen. The MMC card can now be removed from the MMC Interface and placed into the mapping unit.
- Page 13 Agreement. Upon termination, you will promptly return all prod- ucts containing one or more Databases to us. 5. Prices and programs are subject to change without notice. 6. This License Agreement shall be governed by the laws of the State of Oklahoma and comprises the complete and exclusive understanding between you and us concerning the above subject matter.
- Page 14 DATABASES LIMITED WARRANTY “We”, “our”, or “us” refers to Lowrance Electronics, Inc., the manufacturer of this product. “You” or “your” refers to the first person who purchases the product as a consumer item for personal, family, or household use. The Databases Limited Warranty applies to the one or more databases that your product may contain.
- Page 15 LOWRANCE ELECTRONICS FULL ONE-YEAR WARRANTY “We", “our”, or “us” refers to LOWRANCE ELECTRONICS,INC., the manufacturer of this product. “You” or “your” refers to the first person who purchases this product as a con- sumer item for personal, family, or household use.
- Page 16 Your unit is covered by a full one-year warranty. (See inside this manual for complete warranty details.) If your unit fails and the failure is not cov- ered by the original warranty, Lowrance has a flat-rate repair policy that covers your unit and accessories packed with the unit at the factory. There is a 180-day warranty on all non-warranty repairs from the factory, which is similar to the original warranty, but is for 180 days rather than one year.


Need help?
Do you have a question about the 5 and is the answer not in the manual?
Questions and answers