
Subscribe to Our Youtube Channel
Related Manuals for Terumo BCT T-RAC II


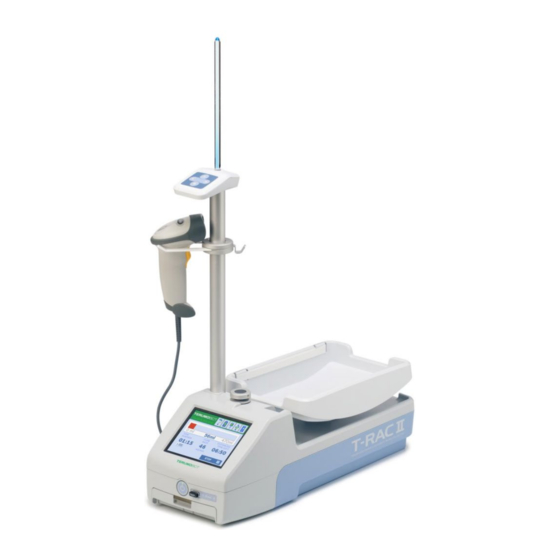
Summary of Contents for Terumo BCT T-RAC II
- Page 1 MÁY CÂN, LẮC VÀ LẤY MÁU TỰ ĐỘNG Digitally signed by CÔNG TY TNHH THIẾT BỊ Y TẾ TERUMO VIỆT NAM Date: 2022.04.06 11:14:07 +07'00' HƯỚNG DẪN SỬ DỤNG 02/2020...
-
Page 2: Table Of Contents
4.2 Phụ kiện ............................. 8 5 Nguyên lý và chức năng hoạt động ......................9 5.1 Pin ................................. 10 5.1.1 Pin khẩn cấp (chỉ trên T-RAC II Jr) ....................11 5.1.2 Pin năng lượng cao ......................... 11 5.2 Kẹp ..............................13 5.3 Nút bật/tắt ............................ - Page 3 10.2.3 Bảo trì chung..........................60 11 Thông tin vận chuyển pin năng lượng cao ..................60 12 Thải bỏ (hết tuổi thọ) ........................... 61 13 Cài đặt Wifi T-RAC II ......................... 62 14 Thiết lập đầu đọc mã vạch biểu tượng LS-2208 ................67...
-
Page 4: Giới Thiệu
Mục đích sử dụng T-RAC II là thiết bị cân và lắc lấy máu với các tính năng tiện dụng và an toàn tiên tiến. T-RAC II kiểm soát, bằng cách liên tục đo trọng lượng, việc lấy máu trong quá trình lấy máu. T-RAC II hoạt động với các loại và... -
Page 5: Định Nghĩa
T-RAC II nên được sử dụng ở nơi yên tĩnh, sạch sẽ và đủ ánh sáng. Nơi không được có các thiết bị rung mạnh, các thiết bị bức xạ điện từ mạnh và các thiết bị ồn ào. T-RAC II không được sử dụng trong môi trường giàu oxy (ví... - Page 6 Đảm bảo rằng pin Năng lượng cao được sạc đầy trước khi sử dụng (thời gian sạc 3 giờ). T-RAC II sẽ mất dữ liệu thu nhận (bao gồm thông tin từ cảnh báo) của hoạt động lấy máu đang diễn ra nếu...
-
Page 7: Thông Số Kỹ Thuật Và Phụ Kiện
Điện áp đầu ra của nguồn điện 12V DC Tần số điện áp đầu vào của nguồn điện 47-63 Hz Điện áp đầu vào của T-RAC II 12V DC Công suất 57VA (công suất đầu vào 100V) - 74,4VA (công suất đầu vào 240V) Pin khẩn cấp... -
Page 8: Phụ Kiện
2 x đầu nối cho Cọc đa năng 1 x RJ-45 cho kết nối Ethernet 1 x RJ-45 để kết nối wifi (chỉ trên T-RAC II Wifi) Tuân thủ các chỉ thị Chỉ thị về thiết bị y tế 93/42/EEC Phân loại EMC... -
Page 9: Nguyên Lý Và Chức Năng Hoạt Động
5 Nguyên lý và chức năng hoạt động T-RAC II (Máy cân, lắc và lấy máu tự động) được thiết kế để thu nhận máu vào các loại và nhãn hiệu túi máu khác nhau. Trong quá trình lấy máu, thiết bị sẽ lắc các túi máu để đảm bảo máu trộn hoàn toàn với dung dịch chống đông có... -
Page 10: Pin
ổ đĩa flash USB. TOME cũng có thể được kết nối với hệ thống quản lý ngân hàng máu và có thể thiết lập các thông số thiết bị hoặc thông số lấy máu trên thiết bị T-RAC II. -
Page 11: Pin Khẩn Cấp (Chỉ Trên T-Rac Ii Jr)
động. Khi chạy bằng pin, T-RAC II sẽ hoạt động giống như khi nó được kết nối với nguồn điện. Pin được lắp ở mặt trước của T-RAC II. Tắt thiết bị trước khi lắp (lại) pin, trừ khi nó được kết nối với nguồn điện. - Page 12 1. Nhấn tay cầm ngăn chứa pin xuống. 2. Kéo ngăn chứa pin ra. Khi nguồn điện bị ngắt kết nối, pin cũng có thể được sạc khi T-RAC II đang ở trong Hộp vận chuyển. Tìm hiểu thêm thông tin trong chương 5.12.
-
Page 13: Kẹp
Khi pin đã hết, cần sạc lại ngay. Không bao giờ cất giữ pin đã hết hoàn toàn. [LƯU Ý] • Khi chỉ chạy bằng pin và pin gần hết, T-RAC II có thể từ chối bắt đầu lấy máu. Một thông báo lỗi sẽ được đưa ra. 5.2 Kẹp Kẹp kiểm soát lưu lượng máu. - Page 14 Đảm bảo rằng miếng màu đen bên trong (ở giữa của hình này) không xoay. Không bật T-RAC II khi đầu kẹp được tháo ra. Đặt kẹp trở lại vị trí: Đảm bảo rằng phần cao của miếng màu đen bên trong hướng về...
-
Page 15: Nút Bật/Tắt
Nhấn nút một lần để bật thiết bị. Nhấn và giữ trong 3 giây để tắt. Nút có đèn LED hai màu: • Tắt: T-RAC II bị tắt và không được kết nối với nguồn điện. • Màu cam: T-RAC II đã tắt nhưng được kết nối với nguồn điện. Pin, nếu có, đang sạc hoặc đã được sạc đầy. -
Page 16: Điều Khiển Từ Xa
5.7 Điều khiển từ xa Điều khiển từ xa được thiết kế để giảm số lần người dùng phải cúi xuống. Trên đầu điều khiển từ xa, một ăng-ten cung cấp thông tin trực quan về trạng thái của thiết bị. Điều khiển từ... -
Page 17: Cọc Đỡ Đa Năng
[CẢNH BÁO] Không bao giờ kết nối Cọc đa năng với T-RAC II cùng lúc kết nối Điều khiển từ xa trên máy tính để bàn. Không bao giờ kết nối nhiều hơn một Cọc đa năng với một thiết bị T-RAC II. Điều này có thể... -
Page 18: Giá Đỡ Bộ Pin Tsm
• Cấu hình nhiều thiết bị T-RAC II cùng một lúc. • Giám sát các thiết bị T-RAC II. • Gửi các thiết lập lấy máu riêng biệt tới T-RAC II, dựa trên thông tin từ BBIS (giao tiếp hai chiều). Để kết nối T-RAC II với mạng:... - Page 19 • Khi hình ảnh Ethernet có màu xanh lá cây và nhấp nháy, dữ liệu đang được gửi. Khi hình ảnh có màu đỏ và nhấp nháy, bộ nhớ trong của T-RAC II đã đầy. T-RAC II sẽ không thể lưu thêm bất kỳ...
-
Page 20: Công Cụ Lấy Máu Di Động Tomes (Mct)
Công cụ lấy máu di động TOMEs. Thiết bị T-RAC II có thể kết nối với PC giống như chúng có thể kết nối với TOME. Sau đó, công cụ lưu tất cả dữ liệu từ tất cả các thiết bị T-RAC II được kết nối trên máy tính chạy công cụ. -
Page 21: Hộp Vận Chuyển
Thanh USB được rút ra hoặc có sự cố. Nếu biểu tượng này nhấp nháy, bộ nhớ trong T-RAC II đã đầy. [CẢNH BÁO] Chỉ có thể lắp hoặc tháo ổ đĩa flash USB khỏi T-RAC II khi tắt T-RAC II. Nếu không, dữ liệu lấy máu có... -
Page 22: Cài Đặt
Tay cầm của T-SEAL Mobile có thể được đặt dưới T-RAC II hoặc trong khay của T-RAC II. Bộ Pin của T-SEAL Mobile cũng có thể được kết nối ở phía sau T-RAC II khi đóng hộp. Để vận chuyển dễ dàng hơn, các hộp có thể được xếp chồng lên nhau. -
Page 23: Sạc Pin
T-RAC II và lắp vào Bộ sạc Quad T-RAC II. Đây là một phụ kiện độc lập không được kết nối với T-RAC II. Mặc dù nó là một thiết bị y tế, nó không thể... -
Page 24: Hướng Dẫn Vận Hành
[CẢNH BÁO] Không bao giờ kết nối Cọc đa năng với T-RAC II cùng lúc với Điều khiển từ xa trên máy tính để bàn được kết nối. Không bao giờ kết nối nhiều hơn một Cọc đa năng với một thiết bị T-RAC II. Điều này có... -
Page 25: Trạng Thái Không Hoạt Động
6.2.2 Trạng thái không hoạt động Khi T-RAC II được bật, màn hình cảm ứng sẽ hoạt động như giao diện chính của thiết bị. ‘Idle screen' được hiển thị. Bắt đầu từ màn hình này, một chu kỳ lấy máu có thể được bắt đầu (xem 6.2.3) hoặc cài đặt đã xong (chương 7). - Page 26 [CẢNH BÁO] Khi đặt túi máu, hãy đảm bảo rằng chúng nằm bên trong khay và không chạm vào bất kỳ bộ phận nào khác của T-RAC II. 2. Lắp ống dây túi máu vào kẹp Đặt ống dây túi máu vào kẹp. Đảm bảo rằng ống được đẩy hết tới mặt sau của kẹp. Đẩy kẹp về phía sau rồi thả...
- Page 27 [LƯU Ý] Khi có kết nối mạng, bạn cũng có thể nhận được thể tích lấy máu từ BBIS. Tham khảo tệp trợ giúp của mô-đun phần mềm T-RAC II TOMEs để thiết lập điều này. 4. Lấy ven tĩnh mạch Sau khi cung cấp đầu vào cho các sự...
- Page 28 Vì lý do an toàn, việc thay đổi trạng thái của kẹp theo cách thủ công bị vô hiệu hóa giữa quá trình lấy ven tĩnh mạch và giai đoạn 'rút kim'. Nhấn nút này để hiệu chuẩn thể tích trong trường hợp nó...
- Page 29 Thời gian dự kiến để kết thúc việc lấy máu. T-RAC II tính toán thời gian này dựa trên thời gian đã trôi qua và tốc độ dòng chảy. Nếu thời gian này chuyển sang màu đỏ, T- RAC II ước tính rằng sẽ...
- Page 30 8. Lấy túi máu khỏi khay Kẹp được mở để có thể lấy ống dây ra khỏi kẹp. Có thể lấy túi máu ra khỏi khay. T-RAC II sẽ phát hiện điều này và tự động chuyển sang bước tiếp theo. Nếu không, có thể nhấn ‘Statistics’.
-
Page 31: Sự Kiện
đọc mã vạch hoặc giao tiếp với BBIS. Đầu vào của mỗi sự kiện được ghi lại trong dữ liệu lấy máu. Bản thân các sự kiện và vị trí của chúng trong chu kỳ lấy máu không thể được cấu hình trên T-RAC II, chúng được cấu hình trên TOME. - Page 32 Mũi tên này cho phép chuyển đến sự kiện trước đó và thay đổi nó. Khi làm điều này, chỉ kết quả mới nhất sẽ được lưu. Danh sách các sự kiện liên tiếp. Sự kiện hiện tại được hiển thị trên nền trắng. Kết quả...
- Page 33 3. Nhiều mã vạch 4. Số-mã vạch 5. Thông tin 6. Sự cố 7. Số chương trình 8. Kiểm tra cân nặng 1. Bộ chọn thể tích Bộ chọn thể tích cho phép đặt thể tích lấy máu. Để biết thêm thông tin về bộ chọn thể tích, hãy xem chương 6.2.3.
- Page 34 4. Số-mã vạch Sự kiện này xác định số được sử dụng trong sự kiện 'nhiều mã vạch'. Số (1 - 6) có thể được nhập bằng mã vạch do người dùng xác định hoặc bằng cách sử dụng bàn phím ảo. Khi sự...
- Page 35 T-RAC II cung cấp mười biểu tượng tiêu chuẩn và thêm chín sự cố do người dùng xác định dưới dạng số. Một hoặc nhiều sự cố có thể được chọn bằng cách nhấn các biểu tượng và/hoặc số. Cũng có thể nhập thủ...
- Page 36 7. Số chương trình Như trong chương 7, T-RAC II có thể chạy tối đa mười chương trình. T-RAC II sẽ tự động chạy chương trình 1 khi không có chương trình nào khác được chọn bằng sự kiện này. Chọn một chương trình khác được thực hiện bằng cách nhấn một số...
-
Page 37: Cài Đặt
7 Cài đặt Để mang lại sự linh hoạt tối đa, cấu hình của T-RAC II được chia theo một số kiểu cài đặt. Cài đặt thiết bị và cài đặt giao tiếp là vốn có của từng thiết bị và cần được ấu hình riêng trên từng thiết bị T-RAC II. Các chương trình, chứa hầu hết các cài đặt, có... - Page 38 Trên T-RAC II Jr, chỉ có 1 chương trình duy nhất không thể trao đổi với các thiết bị khác. Có thể cấu hình trên Mô tả T-RAC II T-RAC II TOMEs + truyền TOMEs + truyền Ethernet Loại cài đặt Junior qua mạng...
- Page 39 Để đạt được các cài đặt có sẵn trên T-RAC II, hãy nhấn ‘Settings’ trên màn hình chờ. Mật khẩu sẽ được hỏi. Mật khẩu mặc định là '9876'. Các cài đặt được trình bày như sau: Chỉ định và điều hướng các kiểu cài đặt (cài đặt thiết bị...
-
Page 40: Cài Đặt Thiết Bị
Cài đặt ‘Manage progs’ được chọn. Sử dụng các nút này để thay đổi cài đặt đã chọn. Trong trường hợp trường được chọn là số hoặc văn bản, sẽ có bàn phím hiển thị. Ví dụ: khi thay đổi cài đặt ‘Time’, màn hình sau sẽ... - Page 41 00:00 - 23:59 (hh: mm) Đặt thời gian của đồng hồ bên trong. Khi T-RAC II được kết nối với TOME qua mạng, thời gian sẽ tự động được lấy từ TOME. Trong trường hợp đó, không thể thay đổi cài đặt này.
-
Page 42: Chương Trình
Chỉ hữu ích khi sử dụng mạng TOMEs. Trên TOME, thiết bị T-RAC II được tham chiếu bằng số TOME dạng ngắn thay vì số sê-ri. Đây là một số duy nhất cho mỗi thiết bị T-RAC II trong mạng. Khi hai thiết bị... -
Page 43: Cài Đặt Chương Trình
T-RAC II khác hoặc trong TOME. [CẢNH BÁO] Chỉ có thể lắp hoặc tháo ổ đĩa flash USB khỏi T-RAC II khi tắt T¬RAC II. Nếu không, dữ liệu lấy máu có thể bị mất và ổ USB có thể bị hỏng. - Page 44 Mặc định: 0 Mức độ đèn nền của màn hình cảm ứng được điều chỉnh bởi T-RAC II. Khi được kết nối với nguồn điện, mức này ở mức tối đa và khi chỉ sử dụng nguồn pin, mức ở mức tối thiểu.
- Page 45 Mã vạch này có thể được đọc trong sự kiện ‘Program #'. Sau đó, T-RAC II sẽ tự động chọn chương trình được liên kết với mã vạch này. Vì mã vạch này chọn chương trình nên nó phải khác nhau đối với từng chương trình.
- Page 46 Mã vạch có thể được chỉ định cho mỗi cài đặt trước thể tích lấy máu. Khi cài đặt ‘Choose vol.” được đặt thành Barc, Prst hoặc Keyb, mã vạch có thể được đọc để chọn thể tích tương ứng. Bạn có...
- Page 47 Blood density 1.05 – 1.06g/ml Mặc định: 1.06 Thể tích máu được hiển thị trên T-RAC II dựa trên trọng lượng của máu và mật độ máu. Mật độ máu có thể được điều chỉnh tại đây. Proceed weigh 0 - 300g Mặc định: 20...
- Page 48 PVFlow. Delay 00:00 - 05:00 (mm: ss) Mặc định: 00:00 Đặt khoảng thời gian giữa thời điểm lấy máu tĩnh mạch (thời điểm nhấn nút ‘start’) và thời điểm máu chảy vào túi. Nếu vượt quá thời gian này, cảnh báo sẽ phát ra. Nếu được đặt thành 00:00, cảnh báo trì...
- Page 49 Có thể nhanh chóng thay đổi cài đặt này từ màn hình trạng thái mạng LAN. Để làm như vậy, hãy nhấn vào biểu tượng trạng thái Ethernet Trên T-RAC II Wifi, việc tắt chức năng mạng LAN cũng sẽ tắt mô-đun wifi bên trong, giúp tiết kiệm điện năng.
-
Page 50: Luồng Chương Trình
đọc từng mã trong một chu kỳ lấy máu. Khi một lỗi đối với lược đồ được phát hiện, một thông báo lỗi sẽ được hiển thị. T-RAC II sẽ không chấp nhận mã vạch sai, một mã khác sẽ cần được quét. - Page 51 • * ('tất cả các mã vạch được quét trong chu kỳ lấy máu') Khi sử dụng ‘* 'cùng với bộ so sánh‘ <>', mã ở phía bên kia của phương trình phải khác với tất cả các mã khác được đọc trong chu kỳ lấy máu. Việc sử dụng ký tự này cùng với bộ so sánh ‘= ', chỉ hữu ích khi (một phần của) tất cả...
-
Page 52: Cài Đặt Giao Tiếp
7.3 Cài đặt giao tiếp Cài đặt giao tiếp xác định cách T-RAC II sẽ kết nối với TOMEs hoặc với Công cụ lấy máu di động TOMEs. Chỉ có thể thay đổi các cài đặt này trên từng thiết bị T-RAC II riêng lẻ. Các cài đặt sau có sẵn:... -
Page 53: Cảnh Báo Lấy Máu
8.1 Cảnh báo lấy máu Các cảnh báo sau chỉ có thể xảy ra trong thời gian lấy máu. Chúng được kích hoạt dựa trên các giới hạn do người dùng đặt trong cài đặt chương trình. Tất cả các cảnh báo này là cảnh báo ưu tiên trung bình, ngoại trừ... -
Page 54: Hệ Thống Cảnh Báo
Nếu hiển thị khi không tặng kèm pin năng lượng cao: Mức pin quá thấp, không thể bắt đầu lấy máu. Nếu hiển thị khi không tặng kèm pin khẩn cấp: T-RAC II Jr không được kết nối với nguồn điện lưới. - Page 55 Màn hình cảm ứng: thông báo 'AGITATOR ERROR'. Nguyên nhân: T-RAC II đã phát hiện ra lỗi khi cố gắng xoay máy lắc. Máy lắc có thể bị chặn hoặc khối lượng trên cân có thể quá lớn. Giải pháp: Kiểm tra máy lắc.
- Page 56 được bắt đầu, dữ liệu lấy máu cũ nhất sẽ bị mất. Giải pháp: Kết nối T-RAC II với TOME qua mạng hoặc tắt thiết bị, lắp ổ flash USB vào khe cắm USB ở phía trước và bật lại thiết bị. Khi thiết bị không hoạt động, nó sẽ tự...
-
Page 57: Cảnh Báo Sự Kiện
Biểu tượng trạng thái: biểu tượng xuất hiện ngay cả khi ổ USB được kết nối. Nguyên nhân: T-RAC II không thể xử lý ổ đĩa flash USB đã được lắp vào. Dữ liệu lấy máu sẽ không được ghi vào ổ đĩa. Giải pháp: Chỉ... -
Page 58: Khắc Phục Sự Cố
Thông qua BBIS, một tập đã được thiết lập để sử dụng trong quá trình lấy máu. Thể tích được chọn trên BBIS, không nằm trong phạm vi cho phép trong chương trình trên T-RAC II. Giải pháp: Thông tin từ BBIS cần được gửi lại (để thực hiện trên BBIS). Nếu không, việc lấy máu sẽ... -
Page 59: 10 Vệ Sinh Và Bảo Dưỡng
Làm sạch bề mặt của T-RAC II bằng vải mềm tẩm chất tẩy rửa nhẹ hoặc dung dịch chlorhexidine gluconate dưới 0,5% và vắt kỹ. Khi vệ sinh T-RAC II, hãy cẩn thận không làm đổ bất kỳ dung dịch tẩy rửa nào vào bên trong thiết bị. -
Page 60: Kiểm Tra Chức Năng Cảnh Báo
10.2.3 Bảo trì chung Để đảm bảo vận hành an toàn và không gặp sự cố, vui lòng bảo dưỡng T-RAC II của bạn ít nhất 12 tháng một lần, tùy thuộc vào tần suất sử dụng. Nếu bạn gặp sự cố hệ thống, vui lòng gọi Terumo BCT hoặc đại diện Terumo BCT của bạn để... -
Page 61: Thải Bỏ (Hết Tuổi Thọ)
• Đào tạo về Hàng hóa Nguy hiểm cho nhân viên liên quan đến việc vận chuyển (DGR Phần 1.5). Bao bì gốc của T-RAC II tuân thủ PI967 và có các nhãn nêu trên, chỉ cần thiết khi T-RAC II được vận chuyển cùng với pin năng lượng cao 8ME05TRC226 hoặc pin năng lượng cao 8ME05TRC320. -
Page 62: 13 Cài Đặt Wifi T-Rac Ii
13 Cài đặt Wifi T-RAC II Mỗi thiết bị T-RAC II Wifi cần được thiết lập riêng để giao tiếp với điểm truy cập không dây. Để làm như vậy, hãy tiến hành như sau 1. Đặt địa chỉ IP của cổng Ethernet của PC trên 192.168.1.100 và mặt nạ mạng con vào 255.255.255.0. - Page 63 6. Trên màn hình ‘Module Status’, nhấn ‘Configuration’. 7. Một màn hình mới được hiển thị. Điền SSID của điểm truy cập không dây. Sau đó, nhấn ‘Commit’:...
- Page 64 8. Sau khi các thay đổi cấu hình được cam kết thành công, hãy nhấn ‘Reload’ trong màn hình này: 9. Nhấn ‘WLAN Security Settings’ ở bên trái màn hình:...
- Page 65 10. Một màn hình mới được hiển thị. Điền vào cài đặt bảo mật của điểm truy cập không dây và nhấn ‘Commit’: 11. Sau khi các thay đổi cấu hình được cam kết thành công, nhấn ‘Restart’ trong màn hình này: 12.
- Page 66 T-RAC II có được kết nối chính xác với điểm truy cập hay không: 14. Điền vào cài đặt địa chỉ IP trong cửa sổ cài đặt Giao tiếp T-RAC II (xem 7.3), tùy theo mạng của bạn.
-
Page 67: Thiết Lập Đầu Đọc Mã Vạch Biểu Tượng Ls-2208
17. Khởi động lại T-RAC II. 18. Biểu tượng Ethernet trên T-RAC II bây giờ sẽ trở thành màu xanh lục, cho biết rằng T-RAC II Wi-Fi được kết nối chính xác với TOMEs: [CẢNH BÁO] Đảm bảo rằng T-RAC II WIFI đang sử dụng băng tần 2,4 GHz chứ không phải 5 GHz. - Page 70 ®: Nhãn hiệu đã đăng ký ©: Bản quyền Terumo BCT, Inc. - Tất cả các quyền được bảo hộ...
- Page 71 02/2020...
- Page 73 Specifications ..........................7 Accesories ............................8 Operating principles and functions ...................... 9 Battery ............................10 5.1.1 Emergency battery (only on T-RAC II Jr) ..................11 5.1.2 High-energy batteries ......................... 11 Clamp ............................13 On/off button ..........................16 Tray ............................... 16 Touch screen ..........................
-
Page 74: Introduction
The device can be transported for usage at different places. T-RAC II shall be used in a quiet, clean and well-lit room, which is free from heavily vibrating devices, strongly electromagnetic radiating devices and noisy devices. -
Page 75: Definitions
All users must be trained according to these instructions. The presence of a doctor approved by the transfusion center is obligatory during blood collection. T-RAC II should be used in an indoor place which is quiet, clean and well-lit. The place should be free of heavily vibrating devices, strongly electromagnetic radiating devices and noisy devices. - Page 76 • Do not touch the connectors of the battery or Multifunctional Pole with bare hands in order to prevent damage to the device because of electrostatic discharge. • Only the power supply which is delivered with T-RAC II should be used. The power supply is a part of this equipment.
-
Page 77: Specifications And Accessories
1x USB at the back for the barcode reader 1 x connector for Desktop Remote Control 2 x connectors for Multifunctional Pole 1 x RJ-45 for Ethernet connection 1 x RJ-45 for wifi connection (only on T-RAC II Wifi) Compliance to directives Medical Device Directive 93/42/EEC EMC Classification... -
Page 78: Accesories
[NOTE] Both 2METOMES / 8METOMESHW and 2METOMESTRA01 / 2METOMESTRA05 / 2METOMESTRA10 are needed in order to transfer data between T-RAC II and TOMEs. [NOTE] * Replacing the emergency battery on T-RAC II Junior needs to be done by a service engineer. -
Page 79: Operating Principles And Functions
At the same time, the weight of the collected blood is measured. At the end of the donation, the clamp closes to stop the blood flow. T-RAC II shows detailed information about the donation on the screen and activates alarms in case of problems. -
Page 80: Battery
There is also a small non-rechargeable lithium battery inside the device which allows to keep time and date. Normally, this battery shouldn’t be replaced during the life time of T-RAC II. If time and date aren’t kept correctly by the device, please contact your Terumo BCT dealer in order to replace this battery. -
Page 81: Emergency Battery (Only On T-Rac Ii Jr)
5.1.2 High-energy batteries The battery provides T-RAC II with a fully independent power source, especially useful for mobile donations. When running on the battery, T-RAC II will work the same as if it was connected to the mains. The battery is inserted at the front of T-RAC II. Switch off the device before (re)placing the battery, unless it is connected to the mains. - Page 82 1. Press down the battery handle. 2. Pull-out the battery pack. When the mains are disconnected, the battery can also be charged while T-RAC II is in its Transport Case. More information can be found in chapter 5.12. The battery’s state can be monitored on the touch screen: •...
-
Page 83: Clamp
• Please refer to chapter 11 for the shipping information of the high-energy batteries! • If no battery is present, an interruption of the mains current will cause T-RAC II to shut down immediately. If that happens during donation, the clamp will not close. T-RAC II will lose donation data (including information from the alarms) of the ongoing donation. - Page 84 Pull-up the clamp head. The tube can now be removed out of the clamp head. Make sure that the inner black piece (in the center of this top view) does not rotate. Do not switch-on T-RAC II while the clamp head is removed.
- Page 85 Page 15 of 76 To put the clamp back in position: Make sure that the high part of the inner black piece is pointing towards the front, on a 20° angle, as shown in this top view. Under an angle of 20°, put the clamp head back in position.
-
Page 86: On/Off Button
9 for more information. 5.6 Barcode reader The barcode reader can be connected to the USB slot at the back of T-RAC II, which is marked as follows. In order to set-up the barcode reader to work with T-RAC II, scan the codes mentioned in... -
Page 87: Remote Control
Page 17 of 76 5.7 Remote control The remote control is designed to decrease the number of times the user needs to bend down. On top of the remote control, an antenna gives visual information about the state of the device. The remote control exists in two versions which can be ordered separately: as part of the Multifunctional Pole or as a Desktop Remote Control. -
Page 88: Multifunctional Pole
(2METRAC204). Length of the pole: 420mm (excl. antenna); 630mm (incl. antenna). [WARNING] Never connect the Multifunctional Pole to T-RAC II at the same time that a Desktop Remote Control is connected. Never connect more than one Multifunctional Pole to one T-RAC II device. This can permanently damage the device. -
Page 89: Desktop Remote Control
Multifunctional Pole. This holder can be used for inserting the sample blood tubes before, during and after donation. 5.9 TSM Battery Unit Holder A TSM Battery Unit Holder can be connected to the back end of the T-RAC II for inserting the Battery Unit of the TSM. -
Page 90: Tomes Connection
3. For wired Ethernet connection: connect the Ethernet cable (CAT5 UTP or better) to the port indicated as follows. Wired Ethernet connection is possible both on T-RAC II Ethernet and T-RAC II Wifi. 4. For wireless Ethernet connection (only on T-RAC II Wifi), follow the steps as described in chapter 13 . - Page 91 When the Ethernet pictogram is green and blinking, data is being sent. When the pictogram is red and blinking, the internal memory of T-RAC II is full. T-RAC II won’t be able to save any more information from donations until the network connection is re-established or until the USB flash drive is inserted.
-
Page 92: Tomes Mobile Collection Tool (Mct)
One USB flash drive per T-RAC II In each T-RAC II, a USB drive is inserted. In this way, all drives can be collected at the end of all donations. This makes it easier to copy data from the T-RAC II devices to the USB drive. -
Page 93: Transport Case
In the lid, there is space for following components: Multifunctional Pole Barcode reader Velcro band for securing the components in transportation Antenna Desktop Remote Control The Hand Unit of T-SEAL Mobile can be put under the T-RAC II or in the tray of T-RAC II. -
Page 94: Installation
Page 24 of 76 The Battery Unit of T-SEAL Mobile can stay connected at the rear of T-RAC II also when the case is closed. For easier transportation, the cases can be stacked on top of each other. For easier cable-management, 3 additional Velcro bands are supplied with the case. -
Page 95: Battery Charging
T-RAC II device and insert it into the T-RAC II Quad Charger. It is a standalone accessory which is not connected with T-RAC II. Although it is a medical device, it cannot be placed or used in the patient environment. -
Page 96: Installation And Operation Instructions
6.1 Installation – first time use Unpack the device and place it at the desired position in the donation area. T-RAC II is to be placed beside a blood donation bed in which the donor will lie. The front of the device is to be placed towards the operator. -
Page 97: Operating Instructions
Switch on T-RAC II by pressing the on/off button. The device will perform its self check. When not using the T-RAC II for a longer time (ie overnight), switch off the device by pressing and holding the on/off button for 3 seconds. -
Page 98: Idle State
Page 28 of 76 6.2.2 Idle state Once T-RAC II is switched on, the touch screen will act as the main interface with the device. The ‘idle screen’ is shown. Starting from this screen, a donation cycle can be started (see 6.2.3) or the settings can be reached (chapter 7 ). -
Page 99: Donation Cycle
This chapter will explain a complete donation cycle. It is assumed that all settings are set to their default values. The most simple donation process is described, as it will also run on T-RAC II Junior. On T-RAC II Ethernet / Wifi, events give a lot more flexibility (e.g. scanning barcodes) and are explained in chapter 6.2.4 and 7.2.2. - Page 100 Page 30 of 76 3. Events – volume chooser In this phase information about the donation can be entered via ‘events’ displayed on the screen. By default, only a volume chooser is depicted here. This screen can also show other ‘events’ besides the volume chooser (see chapter 6.2.4). Depending on the program setting ‘choose vol.’...
- Page 101 Page 31 of 76 [NOTE] When a network connection is present, it is also possible to receive the donation volume from the BBIS. Refer to the help-file of the T-RAC II TOMEs software module for setting this up. 4. Venipuncture After giving input on the events, the clamp will close.
- Page 102 ‘warning timer’ exceeded. The warning timer is an option configurable in the programs. Estimated time for finishing the donation. T-RAC II calculates this time based on the elapsed time and the flow rate. If this time turns red, T-RAC...
- Page 103 Page 33 of 76 6. End of donation After reaching the collection volume or the maximum donation time, the clamp will close and an alarm will sound. Proceed by pushing ‘Next’. As with any alarm, the duration of the alarm is shown on the screen and recorded into the donation data.
-
Page 104: Events
BBIS. The input of each event is recorded in the donation data. The events themselves and their location in the donation cycle cannot be configured on T-RAC II, they are configured on TOMEs. The events can be displayed at following locations: •... - Page 105 / 2METOMESTRA05 / 2METOMESTRA10 are needed in order to use events on T-RAC II. Information about the configuration of events can be found in the help-file of the T-RAC II TOMEs software module. Events are always shown on the touch screen as follows: This arrow allows to go to the previous event and change it.
- Page 106 Page 36 of 76 Alphanumeric keyboard Erase button. Erases the last character. When no characters are left to erase, this arrow brings you to the previous screen. Confirmation button. Press this button to record your input. Symbol button. Switches between alphanumeric symbol keyboard.
- Page 107 Page 37 of 76 2. Standard barcode The user is requested to scan a barcode. The name of a standard barcode (in this case ‘Scan nurse’) as well as its picture are configured on TOMEs. 3. Multi-barcode With this event, multiple barcodes of the same kind are read. Depending on the configuration of this event, the number of barcodes is fixed or taken from a ‘number- barcode’...
- Page 108 Page 38 of 76 4. Number-barcode This event defines the number that is used in a ‘multi-barcode’ event. The number (1 – 6) can be entered with user-defined barcodes or by using the on-screen keyboard. When the event is skipped, the number is ‘0’. In that case, the corresponding multi- barcode event will be skipped automatically.
- Page 109 Button to reach the manual input via keyboard. T-RAC II provides ten standard icons and additionally nine user-defined incidents in the form of numbers. One or more incidents can be selected by simply pushing the icons and/or the numbers. It is also possible to give manual input via an on-screen keyboard (max 25 characters).
- Page 110 7. Program # As can be read in chapter 7 , T-RAC II can run up to ten programs. T-RAC II will automatically run program 1 when no other program is selected using this event.
-
Page 111: Settings
Normally, no calibration will be needed during the life time of T-RAC II. 7 Settings In order to offer maximum flexibility, the configuration of T-RAC II is divided in a number of setting types. The device settings and the communication settings are inherent to each device and need to be configured separately on each T-RAC II device. - Page 112 These are the definitions of the events. This is Event explained in the help- settings file of the T-RAC II TOMEs software module. (Y = yes, N = no, NA = not available)
- Page 113 Page 43 of 76 In order to reach the settings which are available on T-RAC II, press ‘Settings’ on the idle screen. A password will be asked. The default password is ‘9876’. The settings are presented as follows: Indication and navigation of the setting types (device settings –...
- Page 114 Page 44 of 76 To change a setting, push the field that needs to be altered. The field will become selected and two extra buttons will be shown: Setting ‘Manage progs’ selected. Use these buttons in order to change the selected setting. In case the selected field is a number or a text, a keyboard will be shown.
-
Page 115: Device Settings
Language of the firmware. Time 00:00 – 23:59 (hh:mm) Sets the time of the internal clock. When T-RAC II is connected to TOMEs via the network, the time is automatically taken from TOMEs. In that case, this setting cannot be changed. -
Page 116: Programs
Page 46 of 76 Date 01-01-2010 – 31-12-2099 (DD-MM-YYYY) Sets the date of the internal clock. When T-RAC II is connected to TOMEs via the network, the date is automatically taken from TOMEs. Manage progs Both / TOMs Default: Both Both: Programs can be managed on both T-RAC II and TOMEs. - Page 117 USB flash drive. The batch of programs on the USB flash drive must have the name ‘TRACPROG.RAP’. Press ‘T-RAC > USB’ in order to write all programs currently present in T-RAC II to the USB flash drive. The programs are stored in one file carying the name ‘TRACPROG.RAP’. This file...
-
Page 118: Program Settings
Page 48 of 76 [WARNING] The USB flash drive may only be inserted or removed from T-RAC II when T- RAC II is switched off. Otherwise, donation data may get lost and the USB drive may get damaged. [WARNING] Never switch off T-RAC II while data is being transferred. When data is being transferred, this is visualized on the touch screen by a green blinking USB-symbol. - Page 119 Prog. barcode Barcode (max 25 characters) This barcode can be read during the event ‘Program #’. T-RAC II will then automatically select the program which is linked to this barcode. Because this barcode selects the program, it must be different for each program.
- Page 120 Page 50 of 76 Minimum vol. 1 – 650ml Default: 1 Minimum volume which can be chosen in the event ‘volume chooser’ or which can be received from BBIS/TOMEs. Maximum vol. 2 – 650ml Default: 500 Maximum volume which can be chosen in the event ‘volume chooser’ or which can be received from BBIS/TOMEs.
- Page 121 Page 51 of 76 Low flow time 0 – 60s Default: 15s Time in seconds the low flow rate pre-alarm is activated. When the flow rate is still too low after this time, the low flow rate alarm will be activated. When set to 0, the pre-alarm is disabled and the low flow rate alarm will be activated immediately in case of a low flow rate.
- Page 122 Blood density 1.05 – 1.06g/ml Default: 1.06 The blood volume which is displayed on T-RAC II is based on the weight of the blood and the blood density. The blood density can be adjusted here. Proceed weigh 0 – 300g...
- Page 123 Page 53 of 76 PVFlow. delay Default: 00:00 00:00 – 05:00 (mm:ss) Sets the interval between venipuncture (moment of pressing ‘start’ button) and the moment blood should flow into the bag. If this time is exceeded, an alarm will sound. If set to 00:00, the post venipuncture flow delay alarm is disabled and no audible low flow alarm will be given until the first blood is collected.
- Page 124 Page 54 of 76 Re-scan codes Yes / No Default: No Yes: On the statistics screen at the end of donation, the user can go back to view and edit the barcodes that have been read throughout the donation process. Once the idle screen is reached, the barcodes cannot be changed anymore.
-
Page 125: Program Flow
It is possible to quickly change this setting as well from the LAN status screen. In order to do so, press the Ethernet status icon On T-RAC II Wifi, disabling the LAN functionality will also switch off the internal wifi module, saving power. -
Page 126: Barcode Rules
When an error towards the scheme is detected, an error message will be displayed. T-RAC II won’t accept the wrong barcode, another one will need to be scanned. A maximum of 20 equations can be programmed. -
Page 127: Communication Settings
[NOTE] In the barcode event settings on TOMEs, it is possible to program additional barcode checks. 7.3 Communication settings The communication settings define how T-RAC II should connect to TOMEs or to TOMEs Mobile Collection Tool. These settings can only be changed on each T-RAC II device individually. Following settings are available:... -
Page 128: Alarms And Error Messages
‘SAVE’. In that case, press the ON/OFF button to restart the device. 8 Alarms and error messages Various alarms can be triggered by T-RAC II. Alarms that happen during donation are always audible. Whether the other alarms are audible, can be configured by the program setting ‘All alarms aud’. - Page 129 Page 59 of 76 Solution: The flow rate should increase. The donor can react on the alarm given by the antenna by squeezing his hands to raise the blood flow. Low flow rate alarm Indicated by: Touch screen: red indication ‘LOW FLOW’. Clamp: stays locked.
-
Page 130: System Alarms
A problem with the battery has been detected. Solution: In case of high-energy battery: Connect T-RAC II to the mains or replace the battery. Switch- off the device before replacing the battery, unless it is connected to the mains. In case of emergency battery (only on T-RAC II Jr): Contact your Terumo BCT distributor. - Page 131 Clamp error Indicated by: Touch screen: message ‘CLAMP ERROR’. Cause: T-RAC II detected an error when trying to move the clamp. The clamp may be blocked or broken. Solution: Remove the clamp using the emergency exit feature (chapter 5.2) and check it visually to see if there are any abnormalities.
- Page 132 When a new donation would be started, the oldest donation data will get lost. Connect T-RAC II to TOMEs via the network, or switch off the Solution: device, insert a USB flash drive in the USB slot at the front and switch on the device again.
-
Page 133: Event Warnings
Page 63 of 76 8.3 Event warnings Barcode events can be configured to check the scanned barcodes. When a wrong code is read, an error will be given. Also, when communicating with the BBIS, special warnings may be given. The antenna will flash white when one of the following errors/warnings occurs. - Page 134 Via the BBIS, a volume was set to be used during the donation. The volume which was selected on the BBIS, is not within the range allowed in the program on T-RAC II. Solution: The information from the BBIS needs to be resent (to be performed on the BBIS).
-
Page 135: Troubleshooting
10.1 General cleaning Always keep T-RAC II clean. Clean the surface of T-RAC II with a soft cloth soaked in mild detergent or a chlorhexidine gluconate solution of less than 0.5% and well squeezed. When cleaning T-RAC II, be careful not to spill any cleaning solution inside the instrument. -
Page 136: Preventive Maintenance
‘Yes’. Refer to chapter 7 for more information. 2. Switch-off T-RAC II by pressing the on/off button and holding 3 seconds. 3. Pull-out the battery and make sure T-RAC II is still connected to the mains. 4. Switch-on T-RAC II by pressing the on/off button. -
Page 137: High-Energy Battery Shipping Information
Dangerous Goods training for the personnel involved in the shipping (DGR Section 1.5). The original packaging of the T-RAC II complies with PI967 and contains the above mentioned labels, which are only necessary when the T-RAC II is shipped together with the high-energy battery 8ME05TRC226 or high-energy battery 8ME05TRC320. -
Page 138: Disposal (End Of Life)
Thus, if a battery is suspected to be defective, it should not be shipped under any circumstances. If for some reason, the T-RAC II needs to be shipped with the high-energy battery, it is the sole responsibility of the shipper to comply with all requirements of the DGR, of which the most important ones are mentioned above. -
Page 139: Rac Ii Wifi Setup
Page 69 of 76 13 T-RAC II Wifi setup Each T-RAC II Wifi device needs to be set-up separately in order to communicate with the wireless access point. To do so, proceed as follows 1. Put the IP-address of an Ethernet port of a PC on 192.168.1.100 and the subnet mask on 255.255.255.0. - Page 140 Page 70 of 76 6. On screen ‘Module Status’ press ‘Configuration’. 7. A new screen is shown. Fill-in the SSID of the wireless access point. Afterwards press ‘Commit’: 8. After the configuration changes were committed succesfully, press ‘Reload’ in this screen:...
- Page 141 Page 71 of 76 9. Press ‘WLAN Security Settings’ on the left of the screen: 10. A new screen is shown. Fill in the security settings of the wireless access point and press ‘Commit’: 11. After the configuration changes were committed successfully press ‘Restart’ in this screen:...
- Page 142 13. After the module is rebooted, the screen ‘Module Status’ will show again. Check the ‘link status’ to see if T-RAC II is correctly connected to the access point: 14. Fill in the IP-address settings in the T-RAC II Communication settings window (see 7.3), according to your network.
- Page 143 17. Restart T-RAC II. 18. The Ethernet icon on T-RAC II should now become green, indicating that T-RAC II Wifi is correctly connected to TOMEs: [WARNING] Make sure that T-RAC II WIFI is using the frequency band of 2.4 GHz and not 5GHz.
-
Page 144: Symbol Ls-2208 Barcode Reader Set-Up
Page 74 of 76 14 Symbol LS-2208 barcode reader set-up... - Page 145 Page 75 of 76...
- Page 146 Page 76 of 76 LC-7468en, Rev 8 Terumo BCT, Inc. 10811 W. Collins Ave., Lakewood, CO 80215, USA ® : Registered Trademark © : Copyright Terumo BCT, Inc. – All rights reserved...
Need help?
Do you have a question about the T-RAC II and is the answer not in the manual?
Questions and answers