Table of Contents
Advertisement
Advertisement
Table of Contents

Related Manuals for Lifebreath 30 ERV


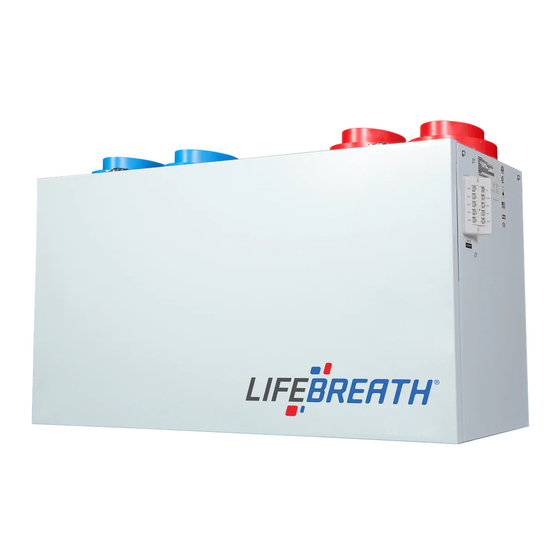
Summary of Contents for Lifebreath 30 ERV
- Page 2 Note Due to ongoing research and product development, specifications, ratings, and dimensions are • subject to change without notice. Refer to www.lifebreath.com for the latest product information. Attention Do not apply electrical power to the unit until after the completion of the installation (including •...
-
Page 3: Table Of Contents
Hanging Straps ................................9 Drain Connection ................................11 Grilles .................................... 12 Grille Fittings ................................. 13 10 Lifebreath Weather Hoods ............................14 11 Lifebreath Dual Hood ..............................15 12 Main Control Installation (99-DXPL02) ......................... 16 13 Main Control Installation (99-BC02, -BC03, -BC04) ...................... 17 14 Interlocking the ERV .............................. -
Page 4: Location Notes
(EC) variable speed blower motor will minimize your electrical energy consumption and operating cost. Installation of a user-accessible control with your product model will improve comfort and may • significantly reduce the product model’s energy use. lifebreath.com... -
Page 5: Simplified Installation (Return/Return Method)
Backdraft dampers are recommended for the stale air to outside air duct. This damper prevents • outdoor air from entering the ERV during the operation of the furnace/air handler while the ERV is in standby, off, or recirculating. lifebreath.com... -
Page 6: Partially Dedicated System Installation
Backdraft dampers are recommended for the stale air to outside air duct. This damper prevents • outdoor air from entering the ERV during the operation of the furnace/air handler while the ERV is in standby, off, or recirculating. lifebreath.com... -
Page 7: Fully Dedicated System Installation
Backdraft dampers are recommended for the stale air to outside air duct. This damper prevents • outdoor air from entering the ERV during the operation of the furnace/air handler while the ERV is in standby, off, or recirculating. lifebreath.com... -
Page 8: Mounting (30Erv) And Plugs
A drain is required; however, the use of a drain is optional in climates where the outdoor temperature remains above -25°C (-13°F) combined with an indoor humidity less than 30%. Attention • Do not drill additional holes in the ERV lifebreath.com... -
Page 9: Hanging Straps
The washer must be wider than the eyelet of the grommet on the hanging strap. • Must push up on the bottom of the ERV when pulling the hanging straps. • The unit must be mounted level for proper drainage of the condensate pans. • lifebreath.com... -
Page 10: Drain Connection
Drain trap and tubing must be below bottom of door with 1/4 in. per foot downwards slope away • from unit. Under certain conditions, a secondary drain pan may be required to protect from condensate • leakage. lifebreath.com... -
Page 11: Grilles
The TechGrille is a round, fully adjustable grille, which provides quiet air distribution. • Part # 99-EAG4, 4 in (100 mm) • Part # 99-EAG5, 5 in (125 mm) • Part # 99-EAG6, 6 in (150 mm) • Part # 99-EAG8, 8 in (200 mm) lifebreath.com... -
Page 12: Grille Fittings
Available size: 6 in. • Caution Do not mount exhaust grille within 4 ft (1.2 m) (horizontally) of a stove to prevent grease from entering the • unit. lifebreath.com... -
Page 13: Lifebreath Weather Hoods
Intake: Should be located upstream (if there are prevailing winds) from the exhaust outlet. Not near dryer vents, furnace exhaust, driveways, oil fill pipes, gas meters, or garbage containers. Exhaust: Not near a gas meter, electric meter or a walkway where fog or ice could create a hazard. lifebreath.com... -
Page 14: Lifebreath Dual Hood
11 L IFEBREATH The Lifebreath Dual Hood only requires one 6 in. opening for intake and exhaust. The Lifebreath Dual Hood can be used up to a maximum airflow of 140 cfm. Available Units: 99-194 – 4 in. Dual Hood (not shown) •... -
Page 15: Main Control Installation (99-Dxpl02)
11. Connect the 3 wires 20 gauge (min.), 100 ft length (max.), to the 3 (RED), 4 (YEL), and 5 (GRN) terminals located on the ERV terminal block (figure C). Attention • Use care when separating or attaching the face plate to avoid damaging the contact pins. lifebreath.com... -
Page 16: Main Control Installation (99-Bc02, -Bc03, -Bc04)
10. Connect the 3 wires 20 gauge (min.), 100 ft length (max.), to the 3 (RED), 4 (YEL), and 5 (GRN) terminals located on the ERV terminal block (figure D). Attention Use care when separating or attaching the face plate to avoid damaging the contact pins. • lifebreath.com... -
Page 17: Interlocking The Erv
Method). The ERV should be interlocked to the furnace/air handler with a Partially Dedicated System Installation. • Caution • Consideration should be given to competing airflows when connecting the ERV in conjunction with an air handler/ furnace blower system. lifebreath.com... - Page 18 Building codes in some areas require “fully-off” functionality. Check with your local building authority before modifying the unit to “standby-off”. Unintentional operation of the ERV by the end user may occur if the unit is modified from “fully-off” to “standby-off”. lifebreath.com...
-
Page 19: Timers
(HI) terminals on the ERV terminal block as shown. Attention • Timers mount in standard electrical boxes. Use 3 wire 20 gauge (min.) 100 ft length (max.) low voltage wire and multiple timers individually wired • back to the unit. lifebreath.com... - Page 20 5. Attach the face plate to the back plate (figure B). Attention • The wireless timers and repeaters must be paired to the main control of the ERV. This process is called “Pairing”. Multiple timers and repeaters can be paired to the main control. lifebreath.com...
-
Page 21: Repeaters
7. To pair additional repeaters with the same main control, repeat steps 1 through 5 until all repeaters have been paired. Attention • The repeaters are to be plugged directly into a 120V power outlet. lifebreath.com... -
Page 22: Installer Selectable High-Speed Settings
4 (Hi 2) and speed 3 (Hi 1). Refer to the specification pages in the manual for the air flow rates for speeds 5, 4 and 3. The factory setting is speed 5 (Hi 3). DIP Switch settings Applicable Units: 30 ERV, 130 ERVD, 170 ERVD Switch Speed... -
Page 23: Dimensional Drawings
19 D IMENSIONAL RAWINGS 30ERV Dimensions: 130ERVD Dimensions: 170ERVD Dimensions: lifebreath.com... - Page 24 20 D IMENSIONAL RAWINGS 267MAX ERV, 267 MAX ERV-FID Dimensions: lifebreath.com...
-
Page 25: Balancing The Airflows
Gauge Attachments: When sampling an airflow, various attachments are available for use on a digital manometer. Consult with your Lifebreath distributor for available options such as a pitot tube, flow measuring station, and an airflow measuring probe. The illustration shows a digital manometer with a pitot tube attachment. - Page 26 • Installations where the ERV is ducted directly to the return of a furnace may require additional dampening on the fresh air to building duct. This is due to the high return static pressures found in some furnace installations. lifebreath.com...
-
Page 27: Balancing The Airflows - Pitot Tube
3. Repeat Step 2 to measure the “Fresh Air to Inside” stream. 4. Review the readings and damper down the duct with the highest duct velocity pressure. Repeat Steps 2 and 3 until both ducts show identical readings. Upon completion of balancing, seal the holes with foil tape. lifebreath.com... -
Page 28: Balancing The Airflows - Door Ports
8. Damper down the higher airflow and repeat Steps 5 through 7 as required until both airflows are identical (balanced). 9. Remove the tape and rubber fittings and reinstall the four door port covers. lifebreath.com... -
Page 29: Door Port Locations
25 D OCATIONS Door Ports (1) Exhaust Balance Port High (+) (2) Exhaust Balance Port Low (-) (3) Supply Balance Port High (+) (4) Supply Balance Port Low (-) 130ERVD 170ERVD lifebreath.com... -
Page 30: Airflow Charts (130Ervd Model)
0.74 0.71 0.97 0.75 0.72 0.98 0.76 0.73 0.99 0.77 0.74 1.00 0.78 0.75 1.01 0.79 0.76 1.02 0.80 0.77 1.03 0.81 0.78 1.04 0.82 0.79 1.05 0.83 0.80 1.06 0.84 0.81 1.07 0.85 0.82 Continued next page ► lifebreath.com... - Page 31 1.19 0.97 1.20 0.98 1.21 0.99 1.22 1.00 1.23 1.01 1.24 1.02 1.25 1.03 1.26 1.04 1.27 1.05 1.28 1.06 1.29 1.07 1.30 1.08 1.31 1.09 1.32 1.10 1.33 1.11 1.34 1.12 1.35 1.13 1.36 1.37 1.38 1.39 1.40 lifebreath.com...
-
Page 32: Airflow Charts (170Ervd Model)
0.85 0.68 0.97 0.86 0.69 0.98 0.87 0.70 0.99 0.88 0.71 1.00 0.89 0.72 1.01 0.90 0.73 1.02 0.91 0.74 1.03 0.92 0.75 1.04 0.93 0.76 1.05 0.94 0.77 1.06 0.95 0.78 1.07 0.96 0.79 Continued next page ► lifebreath.com... - Page 33 1.15 1.04 0.87 1.16 1.05 0.88 1.17 1.06 0.89 1.18 1.07 1.19 1.08 1.20 1.09 1.21 1.10 1.22 1.11 1.23 1.12 1.24 1.13 1.25 1.26 1.27 1.28 1.29 1.30 1.31 1.32 1.33 1.34 1.35 1.36 1.37 1.38 1.39 1.40 lifebreath.com...
-
Page 34: Auto Balancing
Note: DXPL03 Control MUST be used for Auto Balancing Note Should any unexpected behaviour occur on the Auto Balance Screen or on the HRV/ERV, disconnect the HRV/ERV from the outlet, wait approximately 30 seconds and start from step 1. lifebreath.com... -
Page 35: Fault Indicator Display Board (Fid)
DXPL03 after unit has completed self-test. Power is displayed in watts in place of the relative humidity (RH) numbers. Power monitor consumption mode is cancelled by cycling power. This mode will time out in 5 minutes after it is first activated. lifebreath.com... -
Page 36: Troubleshooting
• • External low voltage is shortened used • out by a staple or nail • Check external wiring for a short • Check dehumidistat setting it may • Set the dehumidistat at the desired setting be on OFF lifebreath.com... - Page 37 Tape any holes or tears made in the outer • to the outside A hole or tear in outer duct duct cover, ensure that the vapor barrier is • covering completely sealed. Excessive Vibration Dirt on fan wheels Have contractor service ERV • • lifebreath.com...
Need help?
Do you have a question about the 30 ERV and is the answer not in the manual?
Questions and answers