Advertisement
BRAND INTRODUCTION
Please read this manual carefully before using water heater.
Retain it for future reference.
CANDY Group
Candy is a European leading household appliances brand that started in 1945 from the first washing machine to the latest connected appliances. Since the launch of the first Italian washing machine, Candy quickly became synonymous of washing machine throughout Europe.
Today, Candy is one of the European leaders in household appliances market, offering a comprehensive range of smart practical, efficient, free standing & built-in appliances skillfully combining the most advanced technologies with stylish European design.
SAFETY NOTICES
(Please read before use)
MEANINGS OF ICONS
 | Instructions with this sign is prohibited, it may cause damage to the product or personal safety of the user. |
 | Instructions with this sign is related to safe use of the product an personal safety of the user. Operational rules should be strictly followed, or it may cause damage to the product or to personal safety of the user. |
 | I nstructions with this sign should be well attended by the user. Any misuse or ignorance may hurt or seriously injure the user. |
SAFETY NOTICES
 Immediately cut off power supply and contact Candy Service Centre once the water heater does not work properly or emits burnt smell.
 230V/50Hz independent power source must be used at all times.
 To ensure safety, the water heater should be connected to independent sockets(do not use adapters),with reliable earthing. In addition the power socket must confirm to National Standards.use of water heater without reliable earthing is strictly prohibited. Use pen multimeter to check whether the live line and zero line are reverse. ower socket. Promptly clean the dust
Do not use damaged wire and p on the power plug and socket.
Check the power meter and the electric wire's diameter to ensure that they comply with the rated current for the water heater. Where necessary engage qualified electrician to check the electric circuit.
 Do not touch the plug with wet hands, and make sure that the water heater, plug socket do not come into contact with water. If they are accidentally wet, they must be checked by professional persons appointed by our company before using, in order to prevent electrocution.
 Storing of inflammable and explosive items near the water heater is strictly prohibited.
Do not connect to power when installing or repairing the water heater.
 Non-professionals are strictly prohibited from carrying out repairs, maintenance, dismantling or revamping of the water heater.
Installation of water heater outdoors is strictly prohibited.
Do not install the water heater in an environment which is susceptible to ice-formation. Ice will cause the container and water pipe to break, leading to scalding and water leakage.
Please take precautionary measures during cold weather, in order to prevent damage to water heater from freezing.
If the soft power cable is damaged, it must be replaced by professional staff from the manufacturers or Candy Service Center in order to avoid danger.
 Take care not to be scalded by heater water.
- Touching of hot water valve and pipes is strictly prohibited.
- Make sure to check the water temperature before use; use only when it feels suitable.
Do not use water from the water heater for drinking or similar purposes.
Please cut off the power supply if the water heater was not used for an extended period of time. Drain the water heater of all water according to the instructions in the chapter on Cleaning and Maintenance.
SPECIFICATIONS
ELECTRICAL DIAGRAM

L : Live Wire (Brown/Red)
N : Neutral Wire (Blue/Black)
MT : High Temperature Limiter
BT : Thermostat
HL : Heating Indicator
EH : Heating Element
E : Earthing Wire (Yellow&Green)
TECHNICAL DATA
| Item | Unit | CM10LV | CM15LV | CM25LV |
| Rated Voltage | V | 230 | 230 | 230 |
| Rated Frequency | Hz | 50 | 50 | 50 |
| Rated Pressure | Mpa | 0.80 | 0.80 | 0.80 |
| Rated Power | W | 2000 | 2000 | 2000 |
| Net Weight | Kg | 8 | 11 | 14 |
| Rated Capacity | L | 10 | 15 | 25 |
| Waterproof Grade | IP | IPX4 | IPX4 | IPX4 |
| Mixing Factor | % | 35 | 35 | 35 |
| Tap Water Pressure (Minimum) | Mpa | 0.05 | 0.05 | 0.05 |
| Mean Hot Water Output (Minimum) | ºC | 55 | 55 | 55 |
| Re-heating Time(For temperature rise of 50 C)(Maximum) 0 | minutes | 25 | 35 | 55 |
| Diameter Of Power Wire | mm 2 | 3×1.0 | 3×1.0 | 3×1.0 |
Remarks: The permitted error limit of net weight above is±10%.
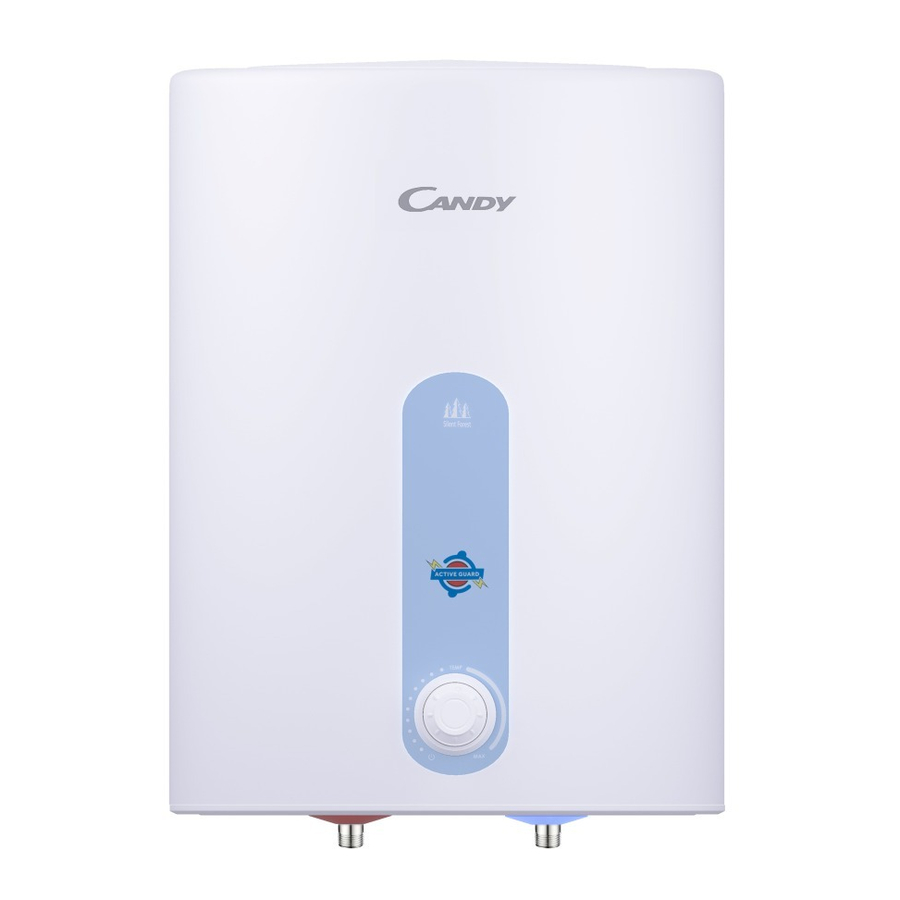
INTRODUCTION OF EXTERIOR AND ACCESSORIES

- Water Inlet Pipe
- Water Outlet Pipe
- Inner Container
- Heating Element
- Anode Rod
- Temperature Measurement Pipe
- Wall Mount Bracket
- Wall Rear Support
| Model | a | b | c | d | e |
| CM10LV | 300mm | 335mm | 460mm | 152mm | 100mm |
| CM15LV | 335mm | 371mm | 466mm | 152mm | 100mm |
| CM25LV | 368mm | 405mm | 581mm | 152mm | 100mm |
Note:
- The margin of error for the above parameters (measurements, weight) is ±10%
PACKING LIST

INSTALLATION INSTRUCTION
DESCRIPTION OF PARTS

INSTALLING SAFETY VALVE

- Install the safety valve which has a rated pressure of 0.80±0.05MPa (its connection is G1/2) into the water inlet pipe with the arrow on the safety valve pointing at the water heater. When the water heater is heated by electrisity, a small amount of water will flow from the safety valve's pressure-relief hole due to the expansion of water in the heater. This is normal. The pressure-relief hole should be connected to the atmosphere and free from blockage at all times.
- Installation method for safety valve's drainage pipe: Attach an end of the water drainage pipe onto the pressure-relief hole on the safety valve. You may cut the water drainage pipe to make it shorter, or extend it depending on the situation. Connect to the other end of the water drainage pipe to the lower water outlet. This will prevent the water from the pressure relief hole from splashing. The water drainage pipe connected to the safety valve should be installed in a slanted manner and in an environment which is not prone to frost.
Note:If your water heater is not installed in a bathroom with sewer, our recommendation would be that you add safety valve water drainage pipe.
If Safety Valve is not installed, Product will not consider for Warranty.
INSTALLATION METHOD

- Must be installed by personnel in Candy Service Person or designated installation personnel.
- The water heater is wall-mounted type.
- Determine the installation position of the water heater.
Based on the measurements indicated in Fig. 2, use impact drill to drill two holes of 12 mm in diameter and 65mm in depth. Insert the expandable hooks into the holes and onto the expandable hooks (as show in Fig.1).Check to make sure the machine is securely suspended. For accessories such as safety valve, please refer to the "Installation of Safety valve" (for reference only).Make sure to seal the joints with - For ease of installation and removal of water heater, we would recommend that G1/2 loose joints be installed at appropriate locations on the water inlet pipes of the water heater. Determine the position of the hot water supply. Connect the water inlet and outlet pipe together with the water pipe to the positions reserved for use of hot water. Hot water pipe should preferably not be too long in order to prevent heat loss.
Note: Make sure that the water heater is securely attached to the hook before letting go; otherwise it may drop and cause injury or property damage.
INSTALLATION PRECAUTIONS
- When installing the water heater, certain space should be reserved (not less than 250mm from the top and bottom and not less than 700mm from the front and the sides), for ease of subsequent maintenance and repair. If the water heater was to be built into clip boards, the bottom section of the clip board should be movable for ease of removal of plastic cover during maintenance.
- Make sure the pressure on the water inlet is not less than 0.05MPa, and not more than 0.80 ±0.05MPa.
- The water heater should be installed indoors in a place where the ambient temperature is above 0℃.The pipes should be closely laid out. The hot water outlet should not be too far away from the point of usage. If the distance exceeds 8 meters, the hot water pipe should have insulation protection, in order to prevent heat loss.
- The wall on which the water heater should be strong such as it is able to withstand four times the weight of the water heater when filled with water. If the wall was not weight-bearing wall or made of hollow bricks, adequate protective measures such as addition of support and high-strength wall screw with back panel should be adopted. The water heater should be installed in places such as it is easy to use and maintain & with floor drain, in order that it will not cause damage to near by facilities or those in the lower levels during a leakage of the water tank or water pipe. It should not be installed over toilet bowls, bathtub, wash basin or door frame in order that users do not feel oppressed or insecure.
- Power socket for the water heater should be installed in dry places which do not easily come into contact with water, in order not to affect the heater's normal operation (it would be best equipped with protective cover).
- Do not reverse the installation for the water inlet and outlet. The safety valve should be installed in the designated position and should not be moved without permission. The satety valve's pressure-relief hole should be connected to the atmosphere and free from blockage at all times.
- Use pen multimeter to check whether the live line and neutral line are reverse. Turn on power supply only when you have ensured that hiter is filled with water and that there is no water leakage. The power supply should also conform with requirements.
- Safety reminder: In order to prevent accidents, please use our company's accessories during installation. Do not replace them on your own or use substitutes. Please make sure to contact our Candy Service Center/Person if the pipes or accessories are damaged & replace them with the accessories supplied by our company. Our company shall not be liable for any direct or indirect losses caused as a result of accidents for failure to comply with the aforesaid.
- All water pipes should be installed by qualified water pipe installation workers. The epipelines should comply with the national standards and regulations on the prohibition of prevention tools to draw water to water source pipelines by way of inverse siphon, as well as local building codes.
After completion of installation, make sure to turn on the water inlet valve and mixing valve since there is no water in the Inner Tank. Turn the mixing valve to the maximum for hot water outlet. Turn off the outlet valve when water flows out from the splinkler head or outlet (indicating that the container is filled with water). Turn off the water outlet valve.
Inspect all connections to ensure that there is no water leakage before connecting to power.
OPERATION

- Adjust the water temperature knob at the bottom of the water heater to set the temperature.
- Temperature adjustment knob: Slowly turn the knob clockwise to raise the temperature setting. The knob will not continue to turn once it reaches maximum temperature setting. Turn it anticlockwise gradually to reduce the temperature setting.
Once the minimum temperature setting is reached, the water heater's power will be cut off if you continue to turn the water temperature knob. - If the heating indicator light is light, it means that the water heater is heating.
- If the heating indicator light is off, it means that heating is complete and that the water heating is on standby or cut off.
- Temperature adjustment knob: Slowly turn the knob clockwise to raise the temperature setting. The knob will not continue to turn once it reaches maximum temperature setting. Turn it anticlockwise gradually to reduce the temperature setting.
- Water heating will be on standby automatically when the water temperature reaches the set temperature. Once it lowers to certain temperature, power will be automatically connected.
- Observe the water drainage of the safety valve's pressure-relief hole. When the water pressure is ≥ 0.80 ±0.05MPa and the pressure-relief hole on the safety valve releases excess pressure by discharging water droplets.
INSTRUCTION MANUAL
Things to note during use
- Do not connect the power before filling the inner tank with water in order to prevent damage to the water heater.
- Adjust the water temperature to the suitable level before use in order to prevent scalding.
- Insofar as there is adequate hot water, set a lower temperature to reduce heat loss, high temperature corrosion and scaling. This will extend the water heater's lifespan. Do not place inflammable substances such as petrol near the water heater, otherwise it may cause fire.
- In order to avoid a hazard due to inadvertent resetting of the thermal cut-out, this appliance must not be supplied through an external switching device, such as a timer, or connected to a circuit that is regularly switched on and off by the utility.

The water heater must be repaired or maintained by qualified professionals.
Improper methods may cause serious injury or damage to property.
CLEANING
External cleaning
- Power must be switched off before cleaning the water heater.
- Take a wet cloth and dab it with small quantity of neutral detergent. Lightly wipe the water heater. Do not use petrol or other solvents. Finally use a dry cloth to wipe, make sure to dry the water heater thoroughly. Make sure not to use detergents containing abrasive agents (e.g. toothpaste),acidic substances, chemical solvents (e.g. alcohol) or polish to clean the water heater.
Internal cleaning
In order to ensure that the water heater works efficiently, the heating pipe and inner container should be cleaned once every two years. Take care not to damage the exterior of the heating pipe or the protective layer on the surface of the inner container. Depending on the local water quality and the usage habit, the Anode rod might need to be regularly changed. If maintenance is required, please contact Candy Service Person
CHECK
- When the water heater is in use, the safety valve should be checked once every month. To check it, lift the safety valves small plastic handle in upward direction. (take care not to hurt your hand). If there is water flowing out, the safety valve is working normally. please contact the Candy service please replace it with a New Candy Standard Spare parts.
- Regularly engage Candy Service Personnel to carry out safety inspection and promptly clear the water heating pipes of the scale. Check also the consumption of the anode rod; change it if consumption becomes excessive.
NOT IN USE FOR AN EXTENDED PERIOD OF TIME
If the water heater is not used for an extended period of time, please carry out the following steps:
- Turn off the water inlet pipe valve.
- Screw the water drainage pipe to the safety valve's pressure-relief hole; turn on the safety valve handle.
- Turn the hot water valve to the maximum (at the same time unscrew the sprinkler head soft pipe from the water outlet valve; take care not be scalded by hot water), drain the inner container of water.
When the water heater needs to be used again, our recommendation is to open hot water valve before switching on the power in order to prevent accidents. Allow any gas that may be trapped in the pipe to be discharged. Do not smoke or allow other exposed fire to be near the opened valves. At the same time make sure to carefully examine all the parts of the water heater and ensure that they are in a perfect condition. Make sure to fill the inner container with water before use.
TROUBLESHOOTING & INSTALLATION TEMPLATE
TROUBLESHOOTING
| Symptom | Things to Check | Solutions |
| No water |
| Check |
| Check and clear | |
| Only cold water but the heating indicator light is glow |
| Check and open |
| Increase the temperature to the required value. Once the water is heated to the pre-set Temperature control flow volume of cold & hot water using the moderate mixing valve. | |
| Continue heating | |
| Confirm this is not due to the reasons 1, 2, 3, service person | |
| Only cold water and the heating indicator light is not glow |
| Check power socket |
| Confirm this is not due to the reason 1, then contact Service Person | |
| Heating indicator light is on all the time |
| Continue heating |
| Confirm this is not due to the reason 1,then contact Service Person | |
| Water volume is sometimes large or small, or water is sometimes hot or cold | Whether water pressure is stable | Set lower mixing valve or ensure water pressure is stable before use |
| Small hot water outlet volume |
| Calibrate using the method stipulated in the Instruction Manual |
| Set lower mixing valve | |
| Water Heating takes longer time than specified in Instruction manual |
| Get the Heating element de-scaled from authorised service person (as per annexure) |
| Measure the temperature of water using thermometer. Adjust the flow rate at 2 Ltrs/min (may vary if the water inlet temp is too cold) | ||
| Low voltage at certain places | Check the voltage at customer's place | |
| Equipment creates abnormal Noise | High voltage fluctuations, Hard water | This is a normal phenomena, and can be reduced by replacing the anode. |
| Equipment creates hissing Noise | Due to scaling on Heating element | Descale the Heating Element |
| Unit not working | Power point may not be working | Need the electricity line at customer's place to be checked |
| Check for any short circuit of harness/Power cord inside | Replace Power Cord. | |
| Cut out operated due to dry heating | Reset Cut out and change heating element | |
| Heating Element might not be functioning (may be due to Dry heat or short/Crack/burst/ heavy scaling) | Replace Heating element | |
| Leakage of the unit unit | Rusting of the tank | Check from where the leakage is (tank, collar, gasket, HE), Replace or repair based on the observation |
| Not enough torque to the bolts on Heating element flange | Replace or repair based on the observation | |
| Leaking from Heating element flange | Replace Heating element | |
| Water dripping from Safety valve | High inlet water pressure | This is normal, and is an indication that the safety valve is functioning. To avoid this, install a Pressure Reducing Valve (PRV) at a distance of less than 12 feet from the inlet connection), to reduce inlet water pressure to maximum 2.5 bar. |
| No Hot water out put | Heating element not working | Replace Heating element |
| Thermostat low setting (check if someone tampered the setting in Instant water heater) | Increase thermostat setting by rotating knob to clockwise direction | |
| Cut out trip | Reset Cut out and if cutout cannot reset then replace it. | |
| Inlet valve closed | Open the inlet valve. | |
| User gets mild shock when using WH | Improper earthing at customer's place | Check for proper earthing & if not then suggest customer to do it properly |
| Outlet water blockage | Heavy scaling on Outlet pipe opening end, Melting of inner outlet pipe due to dry heating | Descaling of the product from authorised service personal |
| Dry heating of element / replace Pipe. | ||
| Water Heater unit burn | Short circuit of harness / Power Cord | Do not tamper standard connections set by Factory replace Harness and / or Power Cord |
| Dry heating of heating element | Do not switch ON the product without water in the tank. | |
| Use of Low ampere plug | Use 16A socket and plug for electrical connection. | |
| Smell comes out of water | If Water heater unit is not used in 15+ days, water inside smells for some time | Flush out 2 times capacity of water heater. |
INSTALLATION TEMPLATE
- For actual installation position dimensions please refer the Fig. 2.
CANDY WATER HEATER WARRANTY CARD
Customer Name:
Address:
Serial No:
Date of Purchase:
Model No:
Dealer Seal/Candy Seal & Signature:
HAIER APPLIANCES (INDIA) PVT. LTD. (here –in-after referred to as "the company" )hereby offers the following warranty to the domestic purchaser commencing from the date of purchase. The company, at its own sole discretion, will free of charge repair or replace any defective part or parts which prove to be defective in workmanship and/or materials and not due to abnormal or improper usage by the customer/consumer
| MODEL SERIES | WARRANTY PERIOD | PARTS NOT COVERED | |
| Comprehensive Period on Product Components | Period on Inner Tank Only | Pipe, Outer Body, Plastic Parts | |
| CM10LV | 36 months | 84 months | |
| CM15LV | 36 months | 84 months | |
| CM25LV | 36 months | 84 months | |
TERMS AND CONDITIONS OF WARRANTY:
- The warranty term will commence and shall automatically terminate on completion of warranty period from the date of invoice.
- The company is not liable for any delay in servicing due to reasons beyond the control of the company or any of its Candy service centers.
- Parts replaced or repaired under this warranty are warranted throughout the remaining period of the original warranty.
- It is entirely left to the company's discretion to repair/replace parts at the site of installation or at the Candy service center of the company.
- This waranty shal be strictly Imited to the repairs or replacement of defective parts speciied in the warranty.
- This warranty shall not, in any case, extend towards payment of any monetary consideration whatsoever or return of the product.
- The company may repair/replace parts free of cost during the warranty period. This warranty does not cover any Excise Duty, central or sales tax, octroi and other local taxes or levies on the components/parts.
- The parts shall be replaced by functional/ operating/ equivalent material only and not necessarily with brand new ones and are likely to be different from the one originally fitted. The parts thus removed shall be taken back by the company.
- The company reserves the right to retain any part or component replaced at its sole discretion during the warranty period.
- In no event the company or its authorized service center shall be liable for any consequential damages or resulting liability, damage or loss arising directly or indirectly out of any defect in the product.
- This warranty is not valid in case of the following events:
- If the product has been installed/serviced/repaired/opened or tampered by any unauthorized personnel/technician.
- If defects arise/caused by accidents, alteration, misuse, neglect, substitution of original components with spurious/non-genuine components, attacked by household pest/ rodents, flood, earthquake, ightning and / or any other act of God/natural calamities.
- The product is shifted outside India.
- The warranty card & Invoice is not completed at the time of Purchase
- The complete warranty card is not presented to authorized service person at the time of service of the product
- The product is not operated according to Instruction given in user manual. Defect or cause by improper reckless use which shall be determined by the authorized service person.
- Any repair work is carried out by the person other than authorized service personal.
- Defects caused by due to causes beyond control like lightening or abnormal voltage, acts of God & while in transit to service center from purchase residence.
- Warranty is not valid in case the serial no. is deleted, defected or alter or not mentioned on warranty card.
- If customer name, address, serial no. ,DOP, Model & dealer seal & signature not available clearaly.
- Wartanty card is confined fo the 1st Purchaser of the product only, its not ransferable.
- Any change of location or change in the ownership during the warranty period must be intimated in writing to the company.
- The company's employees or its authorized representatives have no authority to vary the terms of this warranty
- This warranty is effected in New Delhi and claims, if any, shall be made only before the courts having jurisdiction in New Delhi and no claims shall be made against the company outside New Delhi not withstanding that the appliances may have been sold or delivered elsewhere.
- This offer entitles customer to enjoy free of cost an extended warranty during the warranty period on select models as above mentioned.
- Labour, Gas charging and Transportation charges to be paid by customer accordingly during the extended warranty period of 108 months.
- After the expiry of this warranty and/ or extended warranty period, the customer has to bear service charges and taxes as applicable.
Note: - All consumer electronic products as listed in Schedule II of the E-waste Handling & Management Rules, 2011 should be disposed of according to the procedure laid under the said Rules.
Customer Name:
Address:
Serial No:
Date of Purchase:
Model No:
Dealer Seal/Haier Seal & Signature:
BUILDING NO. – 1,OKHLA INDUSTRIAL
ESTATE, PHASE – 3,NEW DELHI - 110020
CANDY CARELINE:1800 202 9999

Documents / ResourcesDownload manual
Here you can download full pdf version of manual, it may contain additional safety instructions, warranty information, FCC rules, etc.
Advertisement


Need help?
Do you have a question about the CM10LV and is the answer not in the manual?
Questions and answers