
Subscribe to Our Youtube Channel
Summary of Contents for Bio-Tek ELx405
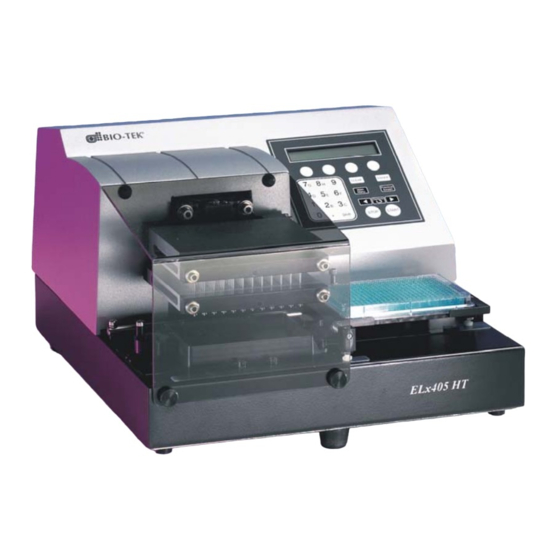
- Page 1 ™ ELx405 Microplate Washer Operator’s Guide For all models: ELx405 ELx405 Select ELx405 Magna ELx405 HT ELx405 Select CW...
- Page 3 ELx405™ Microplate Washer Operator’s Guide January 2005 2005 7101000 Revision I Bio-Tek Instruments, Inc.
- Page 4 | Preface Bio-Tek Instruments, Inc.
- Page 5 Information in this document is subject to change and does not represent a commitment by Bio-Tek Instruments, Inc. Changes made to the information in this document will be incorporated in new editions of the publication. Bio-Tek assumes no responsibility for the use or reliability of software or equipment that is not supplied by Bio-Tek or its affiliated dealers.
- Page 6 | Preface Bio-Tek Instruments, Inc.
-
Page 7: Table Of Contents
Directive 2002/96/EC: Waste Electrical and Electronic Equipment ....xxii Directive 98/79/EC: In Vitro Diagnostics (some models)........xxiii Electromagnetic Interference and Susceptibility ....xxiv USA FCC CLASS A....................xxiv Canadian Department of Communications Class A..........xxiv User Safety................xxiv Safety Symbols ..............xxv ELx405 Operator's Guide... - Page 8 | Preface Warranty ................xxvii Bio-Tek Instruments Warranty Policy ..............xxvii Hardware Warranty ....................xxvii Registration Card ............... xxviii Registration Online ............xxviii Chapter 1: Introduction............1 Introducing the ELx405....................2 ELx405 Washer Variations....................3 Compatibility With the Bio-Stack System ..............4 Hardware Features ......................
- Page 9 Installation of the Washer for Operation With the Bio-Stack ........36 Repackaging and Shipping................... 37 Before Repackaging the Instrument ..............38 Repackaging the ELx405 and Its Accessories ............39 Repackaging the External Valve Module (if equipped)........39 Chapter 3: Operation ..............41 ELx405 Front Panel ......................
- Page 10 Run Link Program....................88 Define Link Program....................89 Delete Link Program ....................90 Setup Utilities ......................... 91 RS-232 Settings (RS232) ..................91 Sensor System (SENSOR) ..................91 Adjust Utility (ADJUST)..................92 Park Utility (PARK)....................93 Bio-Stack Utilities (BIOSTACK) ................93 Bio-Tek Instruments, Inc.
- Page 11 Plate Clearance Height (PLATE) ................94 Vacuum Dissipation Delay (VACUUM) .............. 94 Manifold Selection (MANIFOLD)................. 95 ELx405 Washer Menu Maps..................96 Main Menu (DEFINE function path for Create and Edit) ......... 97 Main Menu (DEFINE function path for Copy and Delete) ....... 98 Main Menu (RUN function path)................
- Page 12 Appendix A: Troubleshooting ..........171 Overview........................172 Troubleshooting Checklist .................. 172 Troubleshooting Charts ....................173 Washer Start-Up ....................173 Fluid Aspiration..................... 175 Fluid Delivery ......................178 Fluid Leakage......................181 Microplate Carrier Movement................182 Washer Manifold Movement................182 Microplate Scratches ..................... 183 Bio-Tek Instruments, Inc.
- Page 13 Appendix C: Chemical Compatibility ........205 Components and Materials Composition..............206 Appendix D: Default Programs ..........207 Default Programs ......................208 Appendix E: Changing the Manifolds ........209 Changing Manifolds in HT Models With the 96-Tube Manifold......210 Index ..................213 ELx405 Operator's Guide...
-
Page 14: List Of Figures
Figure 16: Attaching the Mist Shield ....................33 Figure 17: ELx405 Front Panel With LCD and Keypad ..............42 Figure 18: Dispense and Aspirate Heights for the ELx405 and Magna Models ......68 Figure 19: Dispense and Aspirate Heights for the Select, Select CW, and HT2/HTV2 Models With Dual/96 Manifold ...................... -
Page 15: Contact Information
800-242-4685 (toll free in the U.S.) 802-655-4740 (outside the U.S.) Fax: 802-655-3399 E-Mail: tac@biotek.com European Coordination Center Bio-Tek Instruments GmbH Kocherwaldstrasse 34 D-74177 Bad Friedrichshall Germany Internet: www.biotek.de Phone: +49 (0) 7136 9680 Fax: +49 (0) 7136 968 111 E-Mail: info@biotek.de ELx405 Operator's Guide... -
Page 16: Document Conventions
Caution A Caution indicates potential damage to the instrument and tells you how to avoid the problem. Note: Bold text is primarily used for emphasis. This icon calls attention to important information. Bio-Tek Instruments, Inc. -
Page 17: Revision History
Ch. 1. Moved Technical Support section from App. A to Ch. 1, and updated TAC addresses, phone numbers, etc. Included information about compatibility of ELx405 Auto Plate and Select models with Bio-Stack Microplate Stacking System in Ch. 1. - Page 18 Fig. 3-2C: Dispense and aspirate heights for the ELx405 HT (384-well) washer. • Updated Ch. 4 and Ch. 5. Added information from revised ELx405 IQ-OQ- PQ Manual (PN 7100567) to liquid testing section of Ch. 5, including new section on liquid testing for ELx405 HT model.
- Page 19 Bio-Tek website, where this information may be found. • Revised Maintenance chapter with updated cleaning procedure for removal of Bovine Serum Albumin (BSA) residue from washer. • Updated ELx405 product name to reflect latest product name configuration. 1/05 • Added text throughout manual about new models: −...
-
Page 20: Intended Use Statement
Failure to conduct Quality Control checks could result in erroneous test data. Repackaging and Shipping Important! If you need to ship the instrument to Bio-Tek for service or repair, contact Bio-Tek for a Return Materials Authorization (RMA) number, and be sure to use the original packing. -
Page 21: Warnings
Warning! Electrical Grounding. Never use a two-prong plug adapter to connect primary power to the ELx405. Use of a two-prong adapter disconnects the utility ground, creating a severe shock hazard. Always connect the power cord directly to a three-prong receptacle with a functional ground. -
Page 22: Precautions
Refer to Appendix C . Use of wash buffers containing acetic acid Chemical Compatibility is limited to washers upgraded with PN 68098 Teflon valves. ® Contact Bio-Tek for upgrade information and prior to using other questionable chemicals. Bio-Tek Instruments, Inc. - Page 23 Chapter 4 Preventive Maintenance instructions regarding BSA. Caution: Shipping Bracket. The manifold shipping bracket must be removed prior to operating the ELx405, and reinstalled before repackaging the washer for shipment. See Chapter 2 Installation for instructions. Caution: Waste Sensor Port.
-
Page 24: Directive 89/336/Eec:electromagnetic Compatibility
Laboratory Use, Part 1: General requirements.” Directive 2002/96/EC: Waste Electrical and Electronic Equipment Disposal Notice This instrument contains printed circuit boards and wiring with lead solder. Dispose of the instrument according to Directive 2002/96/EC, “on waste electrical and electronic equipment (WEEE).” Bio-Tek Instruments, Inc. -
Page 25: Directive 98/79/Ec: In Vitro Diagnostics (Some Models)
Microplate Washers: Dispense precision and average residual volume is traceable to NIST. Specific data for a particular serial number is available on request from Bio-Tek Instruments. See page xiii for contact information. EN 61010-2-101:2002 Particular requirements for in vitro diagnostic (IVD) medical equipment. -
Page 26: Electromagnetic Interference And Susceptibility
Canadian Standards Association CAN/CSA C22.2 No. 61010-1-04 “Safety Requirements for Electrical Equipment for Measurement, Control and Laboratory Use, Part 1: General Requirements.” • Underwriters Laboratories UL 61010-1:2004 “Safety Requirements for Electrical Equipment for Measurement, Control and Laboratory Use, Part 1: General Requirements.” Bio-Tek Instruments, Inc. -
Page 27: Safety Symbols
Borne de terre de protection Schutzleiteranschluss Borne de tierra de protección Terra di protezione On (Supply) Marche (alimentation) Ein (Verbindung mit dem Netz) Conectado Chiuso Off (Supply) Arrêt (alimentation) Aus (Trennung vom Netz) Desconectado Aperto (sconnessione dalla rete di alimentazione) ELx405 Operator's Guide... - Page 28 Separate collection for electrical and electronic equipment Les équipements électriques et électroniques font l’objet d’une collecte sélective Getrennte Sammlung von Elektro- und Elektronikgeräten Recogida selectiva de aparatos eléctricos y electrónicos Raccolta separata delle apparecchiature elettriche ed elettroniche Bio-Tek Instruments, Inc.
-
Page 29: Warranty
‘consumable’ items used in any of the instruments are not covered by this warranty. Bio-Tek will continue to stock parts for a minimum of five (5) years after the manufacture of any equipment has been discontinued. Parts shall include all materials, charts, instructions, diagrams, and accessories that were furnished with the standard instrument. -
Page 30: Registration Card
Warranty Registration card. By sending in the registration card, you will be assured of receiving prompt information on product enhancements. Registration Online If you prefer, you may register your instrument online at Bio-Tek’s Web site: www.biotek.com. Bio-Tek Instruments, Inc. - Page 31 Chapter 1 Introduction This chapter introduces the ELx405 Microplate Washer, and describes variations of the washer, hardware and software features, and technical specifications. Instructions on how to contact Bio-Tek for Technical Assistance are included on page 12. Introducing the ELx405 ............2 ELx405 Washer Variations............3...
-
Page 32: Chapter 1: Introduction
Chapter 1: Introduction Introducing the ELx405 Precise, fast, and easy to use, the ELx405 is a user-programmable, fully automated microplate washer. Variations of the washer include the ELx405, Select, HT, Magna, and Select CW. Its key features include the following: •... -
Page 33: Elx405 Washer Variations
The ELx405 Select CW software includes the standard flow rates of the ELx405 Select as well as two ultra low flow rates for a gentler washing of non-adherent cells or cell lines that are more loosely adhered to the microplate. -
Page 34: Compatibility With The Bio-Stack System
The ability to pause processing to allow the user to add more plates to the input stack or to remove some from the output stack. If you have purchased the Bio-Stack to operate with the ELx405, Select, HT, and Select CW, refer to the Bio-Stack Operator’s Manual for instructions on configuring the washer to run with the Bio-Stack. -
Page 35: Figure 1: The Elx405™ Microplate Washer With The Bio-Stack
Compatibility With the Bio-Stack System | Figure 1: The ELx405 Microplate Washer With the Bio-Stack ELx405 Operator's Guide... -
Page 36: Hardware Features
Waste, fluid, flow, and vacuum detection sensors • Robot accessible carrier for all models • Bio-Stack accessible carrier for the ELx405, Select, HT, and Select CW models • Typical processing speeds for the following models: < 30 seconds (3 cycles, 300 µl/well Single/Dual 96-tube manifolds: 96 wells, no soak);... -
Page 37: Software Features
User-definable washer program names, resulting in the rapid recall of desired wash protocols and plate dimension set-ups • Programs may be copied, edited or deleted • Program parameters may be locked. Requires custom program; contact Bio-Tek for more information • Easy-to-update washer software •... -
Page 38: Package Contents
Stylus – aspirate tubes (all 96-tube and 192-tube manifold models) 7102108 Stylus – dispense tubes 96-tube single or dual manifolds 2872304 (ELx405, Select, Select CW, Magna, HT2/HTV2 192-tube manifolds (all HT models) 7102139 Accessory 96-tube dual manifold (for HT models only that are sold with this 7102064... -
Page 39: Optional Accessories
Efficiency or Dispense Precision tests Bio-Tek Blue Test Dye Solution 7773001 Installation-Operational-Performance Qualification (IQ-OQ-PQ) package 7100567 Bio-Stack Microplate Stacker BIOSTACK ELx405™ ActiveX Programmer’s Package 7100560 ELx405 Service Manual 7101001 Note: For accessories not listed here, contact Bio-Tek for more information. ELx405 Operator's Guide... -
Page 40: Specifications
Chapter 1: Introduction Specifications Microplates ELx405™, Select, Magna, Select CW, 96-well plates/strips: HT2/HTV2 (with the dual/96-tube manifold installed) 384-well plates: Select, Select CW, all HT models Electrical Voltage range: 100 to 240 V~ at 50 to 60 Hz, ≤ 8.0 A Accessory Outlet: ≤... -
Page 41: Performance Specifications
0.1% Tween 20, with FD&C #1 blue dye at a Manifold rate of 102 µl per well, per second (rate 5) into a Costar 384-well flat-bottomed plate. The absorbance of the solution is read at 630 nm and 450 nm reference. ELx405 Operator's Guide... -
Page 42: Technical Support
• Your name and company information • A fax number and/or e-mail address, if available. If you need to return the washer to Bio-Tek for service, contact Bio-Tek for a Return Materials Authorization (RMA) number. When obtaining the RMA, explain whether the washer requires calibration, cleaning, periodic maintenance, warranty work, and/or repair. -
Page 43: Phone Support
Bio-Tek Instruments, Inc. Technical Assistance Center P.O. Box 998, Highland Park Winooski, Vermont 05404-0998 USA Shipping Address Ship instruments that need repair or service to Bio-Tek at the following address: Bio-Tek Instruments, Inc. Technical Assistance Center 100 Tigan Street Highland Park... -
Page 44: Applications Support
If you are having difficulty with washing cell-based assays, integrating a unique data reduction transformation, or just looking for a recommendation on an appropriate fluorophore, contact Bio-Tek at the phone numbers or e-mail address listed below. Phone Support You can telephone the... - Page 45 Chapter 2 Installation This chapter includes instructions for unpacking and setting up the ELx405 Microplate Washer, installing its components, and repackaging the instrument for shipment. Unpacking and Inspecting the Instrument ........16 Removing the Manifold Shipping Bracket ........21 Setting Up the Washer..............22 Verifying Performance ..............35...
-
Page 46: Chapter 2: Installation
Bio-Tek. For customers who purchased the optional Valve Module (PN 7100540): The valve module should be returned with the ELx405 in order to ensure that the washer will meet published performance specifications when used with the valve module. Refer to the instructions in this chapter for unpacking the module and repackaging the unit for shipment. -
Page 47: Figure 2: Removing The Inner Shipping Box
Magna models: The magnet plate carrier is packaged with the magnetic plate in a small container, and is included in the shipping accessories, with the Magna’s microplate carrier. ELx405 Operator's Guide... -
Page 48: Figure 4: Removing The End Caps
Note the manifold shipping bracket in (the Select model is Figure 5 shown). Follow the instructions on page 21 for removing the bracket. caps Figure 4: Removing the End Caps Shipping bracket Figure 5: Manifold Shipping Bracket Bio-Tek Instruments, Inc. -
Page 49: Unpacking The Valve Module
Remove the bubble wrap between the two bottle holders and place it in the shipping container with any other shipping materials that came with the valve module. Store these shipping materials with the packaging containers for the washer and accessories. ELx405 Operator's Guide... -
Page 50: Figure 6: Removing The Valve Module From The Shipping Container
Fluid ports (4) (in bubble wrap) Figure 6: Removing the Valve Module From the Shipping Container Wire bottle holders (2) Supply bottles (4) Figure 7: Removing the Wire Holders, Supply Bottles, and Other Accessories From the Shipping Container Bio-Tek Instruments, Inc. -
Page 51: Removing The Manifold Shipping Bracket
Removing the Manifold Shipping Bracket | Removing the Manifold Shipping Bracket Important! The ELx405 washer is shipped with a protective manifold shipping bracket. This bracket must be removed before the washer is used, and must be reinstalled prior to shipping to avoid irreparable damage to the manifold. -
Page 52: Setting Up The Washer
Operating Environment The washer is sensitive to extreme environmental conditions. For optimal operation, install the ELx405 Washer under the following conditions: • On a level surface. • In an area where ambient temperatures between 15°C and 30°C can be maintained. -
Page 53: Figure 9: Installing The Microplate Carrier For The Elx405 Model
Carrier Manifold Priming trough or ultrasonic cleaner Rail Slot Carrier glide strips (2) (do not remove) Figure 9: Installing the Microplate Carrier for the ELx405 Model The ultrasonic cleaner is available in Ultrasonic Advantage™ models only. ELx405 Operator's Guide... -
Page 54: Figure 10: Installing The Microplate Carrier For The Select, Select Cw, And All Ht Models
Priming trough or ultrasonic cleaner Carrier glide strips (2) (do not remove) Slot Rail Figure 10: Installing the Microplate Carrier for the Select, Select CW, and all HT Models The ultrasonic cleaner is available in Ultrasonic Advantage™ models only. Bio-Tek Instruments, Inc. -
Page 55: Figure 11: Installing The Microplate And Magnet Plate Carriers For The Magna Model
Setting Up the Washer | Carrier rail guides Microplate carrier Manifold Priming/soaking trough Slot Rails Magnet plate carrier Carrier glide strips (2) (do not remove) Figure 11: Installing the Microplate and Magnet Plate Carriers for the Magna Model ELx405 Operator's Guide... -
Page 56: Connecting The Tubes And Bottles
Figure 12 For optimal operation of the ELx405 washer, all tubing, cables, and fittings for the waste and supply systems must be properly connected. on the following page illustrates the rear panel of instrument and the Figure 12 locations of the ports and connections for the waste and supply systems. - Page 57 Setting Up the Washer | Vacuum pump accessory outlet Power switch Power cable socket Vacuum pump accessory fuse Serial port External valve module control port (if installed) Waste sensor port Fluid inlet fitting Vacuum port Figure 12: Rear Panel ELx405 Operator's Guide...
- Page 58 (See also the High Flow Pump Installation instructions, PN 7101049, included in the package contents of your ELx405 washer.) There is no regulator on the pump; therefore, if the pump is plugged directly into a wall outlet, the pump will run continuously, resulting in vacuum levels outside the specified range.
- Page 59 Vacuum tube from vacuum to waste Waste Vacuum tube from waste bottles (overflow bottle) bottle to vacuum port Waste Waste bottles (heavy-walled) Figure 13: Washer With Vacuum Pump and Waste Tubing Connections ELx405 Operator's Guide...
- Page 60 4. Place the four supply bottles and valve module on the same surface as the washer to optimize performance. Final Check 1. Verify that the tubing was not crimped during installation. 2. Ensure that there are no loose fittings or cable connections. Bio-Tek Instruments, Inc.
- Page 61 Setting Up the Washer | Supply tubing from supply bottle to fluid inlet port Supply Supply bottles Supply Figure 14: Washer With Supply Tubing Connections (Without Optional External Valve Module) ELx405 Operator's Guide...
-
Page 62: Figure 15: Washer With External Valve Module
| Chapter 2: Installation Valve module Valve cable connected from valve module to valve control port Supply tube connected from valve module to fluid inlet fitting Supply bottles (thin-walled) Supply Figure 15: Washer With Optional External Valve Module Bio-Tek Instruments, Inc. -
Page 63: Attaching The Mist Shield
Figure 16 are lined up with the two holes in the front base of the washer. Insert the two thumbscrews and finger-tighten only. Posts (2) Mist shield Thumbscrews (2) Figure 16: Attaching the Mist Shield ELx405 Operator's Guide... -
Page 64: Connecting The Power Cord
Insert the three-prong plug into an appropriate three-prong receptacle that has a functional ground. Serial Port for Communication With Other Devices The ELx405 has a 25-pin serial (RS-232) port located on the rear panel of the instrument (see ). The serial port allows the washer to receive data from Figure 12 a computer for purposes of factory or dealer service. -
Page 65: Verifying Performance
Verifying Performance | Verifying Performance Before using the ELx405 Washer for the first time, verify that it is operating properly by turning the washer on. The washer will automatically perform a System Self Test to check the manifold, and manifold-to-carrier positioning. It also performs a magnetic carrier load test on the Magna models. -
Page 66: Installation Of The Washer For Operation With The Bio-Stack
| Chapter 2: Installation Installation of the Washer for Operation with the Bio-Stack Installation of the ELx405 for operation with the Bio-Stack Microplate Stacker includes the following: • Installation of special alignment hardware on both instruments. • Serial cable connection between the Bio-Stack and the PC controlling the Stacker. -
Page 67: Repackaging And Shipping
Repackaging and Shipping | Repackaging and Shipping If you need to ship the ELx405 Washer to Bio-Tek for service or repair, be sure to use the original packaging. Other forms of commercially available packaging are not recommended and can void the warranty. -
Page 68: Before Repackaging The Instrument
When obtaining the RMA, explain whether the washer requires calibration, cleaning, periodic maintenance, warranty work, and/or repair. Make a note of any error messages displayed and their frequency. Provide Bio-Tek with the name and contact information of a person who may be contacted if questions arise. Bio-Tek Instruments, Inc. -
Page 69: Repackaging The Elx405 And Its Accessories
Figure 2 tape shut the outer box. Write the RMA number on the outside of the shipping box. Insure the instrument for full value before shipping to Bio-Tek. Repackaging the External Valve Module (if equipped) Refer to (on page 20) for the instructions below:... - Page 70 | Chapter 2: Installation Bio-Tek Instruments, Inc.
- Page 71 Chapter 3 Operation This chapter includes instructions for operating the ELx405 Microplate Washer and its software. ELx405 Front Panel ..............42 Keypad Description ..............43 Entering Program Names ............44 System Startup ...............45 Main Menu ................46 Programs................47 Operation With the Bio-Stack ............48 General Usage Guidelines ............49 Wash ..................52...
-
Page 72: Chapter 3: Operation
| Chapter 3: Operation ELx405 Front Panel The front panel on the ELx405 Microplate Washer features a 25-key keypad and a 2-line x 24-character LCD display as shown below. LCD display B I O - T E K E L x 4 0 5... -
Page 73: Keypad Description
Options key or the Shift + Options key combination. Press the ENTER key to select the current option. START STOP To stop running (abort) a washer To start running a washer program, program, press the STOP key. press the START key. ELx405 Operator's Guide... -
Page 74: Entering Program Names
| Chapter 3: Operation Entering Program Names Each ELx405 washer program requires the entry of a unique name, using up to 16 alphanumeric characters. To enter a program name via the washer keypad: • Press Shift + key , or scroll through the alphabet with the... -
Page 75: System Startup
System Startup | System Startup To turn on the ELx405, press the on/off switch on the washer’s rear panel. The washer will perform a System Self Test, displaying the screens shown below until initialization is complete. During this time, all keys are inactive. -
Page 76: Main Menu
| Chapter 3: Operation Main Menu Following successful power-up of the ELx405, the Main Menu appears: BIO-TEK ELx405 DEFINE MAINT UTIL The following options are available through the Main Menu. (See the Washer Menu on pages 96 through 100 for a complete listing of menu options.) -
Page 77: Programs
Programs | Programs The following table lists the program types that can be created through the keypad of the ELx405 Microplate Washer: Program Description Page WASH Create a typical wash program with fully customizable dispense and aspirate sequences. PRIME Set up routines for priming the instrument before washing begins. -
Page 78: Operation With The Bio-Stack
You can run Wash, Dispense, Aspirate and Link programs whether the washer is operated with or without the Bio-Stack. The Prime, Soak, and Maintenance programs are run on the washer without the Bio-Stack. The Magna model does not support the Bio-Stack. Bio-Tek Instruments, Inc. -
Page 79: General Usage Guidelines
Use the volumes specified for the following models (see , page 76): Recommended Prime and Low Flow Prime Volumes ELx405, Magna, Select, and HT models. Without the external valve module: 200 ml Prime Volume, when all the lines are empty or when changing fluids. -
Page 80: Maintenance
• Accumulation of residue on carrier or inside aspirate/dispense tubes, waste/supply bottles or tubing, manifold, inlet/outlet fittings • Worn tubing, o-rings or channel-end seals • Kinked or bent aspirate/dispense tubes or waste/supply tubing Bio-Tek Instruments, Inc. -
Page 81: Programming Considerations
• Operation with the Bio-Stack Microplate Stacker : The washer should be configured to operate with the Bio-Stack (refer to the Bio-Stack Operator’s Manual for instructions on configuring the washer for Bio-Stack operation). ELx405 Operator's Guide... -
Page 82: Wash
New/Repeat Select NEW to start a new program or REPEAT to repeat the last one. Press Action to take after Main Menu to return to the Main Menu. program is complete. Bio-Tek Instruments, Inc. -
Page 83: Define Wash Program
Specify program parameters. See METHOD, DISP, and ASPIR Program Options tables on the following pages. Press Main Menu to Save. After all wash components have been selected, press Main Menu then select YES to save the program. ELx405 Operator's Guide... - Page 84 Shake Intensity The options range from 1 to 5, where 1 = Least Intense, and 5 = Most Intense. Specify the intensity of microwell shaking. The washer display shows the corresponding cycles/sec value for each option. Bio-Tek Instruments, Inc.
- Page 85 30 sec 0-600 Shake Before Soak? No/Yes Shake Duration seconds 1-600 Shake Intensity* Re-Move Magnet? No/Yes Magna Prime After Soak? No/Yes Prime Volume milliliters 1-999 (Magna models must have 96 Plate Type selected) Prime Flow Rate ELx405 Operator's Guide...
- Page 86 (see above). The volume range is 50 to on when the defined 3000 µl/well. volume is reached. Bio-Tek recommends that you set the vacuum on volume equal to your dispense volume for small volumes. Refer also to application notes on the Bio-Tek website for more information (www.biotek.com).
- Page 87 A positive offset positions the dispense tubes away from the front side of the well. A setting of 0 indicates no offset (0.000 mm). To visually determine the best offset parameters for a microplate assay, use the Adjust Utility (see page 92). ELx405 Operator's Guide...
- Page 88 See the description for Horiz Y Disp Pos on the preceding page. Prime Before Start? Select YES or NO. Prime the dispense tubes before starting the wash program. Note: The shaded options above are not available for Dispense-only programs. Bio-Tek Instruments, Inc.
- Page 89 Select YES to save the program. Wash DISPENSE (DISP) Defaults and Ranges Parameter Units Default Range Models Dispense Volume µl/well 50-3000 ELx405, Magna, Select, Select CW, HT/96-tube (In a Dispense-only program, the default volume is 250.) 25-3000 HT/192-tube Dispense Flow Rate Additional Select CW...
- Page 90 | Chapter 3: Operation Wash DISPENSE (DISP) Defaults and Ranges, cont’d Parameter Units Default Range Models Horizontal quarter -30 to 30 ELx405 or Magna Dispense Position steps -45 to 45 Select, Select CW, HT/96-tube with 96-well plates -25 to 25 Select, Select CW,...
- Page 91 Notes: • The shaded options above are not available for Dispense-only programs. • Bottom Horizontal Dispense Position and Bottom Horizontal Y Dispense Position: For higher throughput of the HT with 384-well plates, use the 192- tube manifold. ELx405 Operator's Guide...
- Page 92 A range of –20 to 20 may be selected; the default is 0. Use the Adjust Utility (see page 92) to determine the height of the magnet carrier in relation to the microplate carrier. Bio-Tek Instruments, Inc.
- Page 93 The delay applies to the normal (initial) defined aspirate height. aspiration if Crosswise Aspirate is not enabled. If Crosswise Aspirate is enabled, the delay applies to the crosswise, not the normal initial, aspiration. ELx405 Operator's Guide...
- Page 94 The only difference is that Crosswise Horizontal Position specifically refers to See the description for Crosswise Aspiration. The recommended Horizontal Aspr Pos on range is +10 to +35. the preceding page. Note: The shaded options above are not available for Aspirate-only programs. Bio-Tek Instruments, Inc.
- Page 95 384- HT/192-tube well plates Notes: • Aspirate Height: Although the range is 12-180, the recommended highest value is 175. • Horizontal Aspirate Position: For higher throughput of the HT with 384-well plates, use the 192-tube manifold. ELx405 Operator's Guide...
- Page 96 Crosswise No/Yes Aspirate? Crosswise On Final Final, All Crosswise 12-180 Height Crosswise quarter steps -30 to 30 ELx405, Magna Horizontal Position -55 to 55 Select, Select CW, HT/96-tube with 96-well plates -25 to 25 Select, Select CW, HT/96-tube with 384-...
- Page 97 Final Aspirate milliseconds 0 to 5000 Delay Notes: • The shaded options are not available for Aspirate-only programs. • Crosswise Horizontal Y Position: For higher throughput of the HT with 384- well plates, use the 192-tube manifold. ELx405 Operator's Guide...
-
Page 98: Figure 18: Dispense And Aspirate Heights For The Elx405 And Magna Models
| Chapter 3: Operation Manifold Dispense tubes Aspirate tubes Microplate Dispense height (overflow position shown) Carrier mounting surface Aspirate height Figure 18: Dispense and Aspirate Heights for the ELx405 and Magna Models Bio-Tek Instruments, Inc. -
Page 99: Figure 19: Dispense And Aspirate Heights For The Select, Select Cw, And Ht2/Htv2 Models With Dual/96 Manifold
Bottom manifold Dispense tubes Aspirate tubes Microplate Dispense height (overflow position shown) Carrier mounting surface Top manifold Bottom manifold Aspirate height Figure 19: Dispense and Aspirate Heights for the Select, Select CW, and HT2/HTV2 Models With Dual/96 Manifold ELx405 Operator's Guide... -
Page 100: Figure 20: Dispense And Aspirate Heights For The Ht Model
| Chapter 3: Operation Top manifold Bottom manifold Dispense tubes Aspirate tubes Microplate Dispense height (overflow position shown) Carrier mounting surface Top manifold Bottom manifold Aspirate height Figure 20: Dispense and Aspirate Heights for the HT Model Bio-Tek Instruments, Inc. -
Page 101: Edit Wash Program
Name Use up to 16 alphanumeric characters. Enter a unique name for See Entering Program Names on page the new Wash program. 44 for instructions. OK To Copy? Select YES to copy the program. ELx405 Operator's Guide... -
Page 102: Delete Wash Program
Delete Wash Program Options Option & Description Models Action/Comments Select Wash Program Press the Options key to cycle through the available Wash Programs. Select the Wash program you wish to delete. OK To Delete? Select YES to delete the program. Bio-Tek Instruments, Inc. -
Page 103: Prime
Select a Prime program to run. New/Repeat Select NEW to start a new program or REPEAT to repeat the last one. Press Action to take after Main Menu key to return to the Main program is complete. Menu. ELx405 Operator's Guide... -
Page 104: Define Prime Program
Only appears on the The volume range is from 1 to 999 ml. Select CW model, which is equipped with Note: The program uses flow rate 10 additional, low flow (not editable by the user). tubing. Bio-Tek Instruments, Inc. - Page 105 Parameter Units Default Range Models Parameter milliliters 1-999 Low Flow milliliters 1-999 Select CW Prime Volume (For the low flow tubing) Prime Flow Rate Soak After Prime? No/Yes Soak Duration HH:MM 00:01 1 minute to 18 hours ELx405 Operator's Guide...
-
Page 106: Recommended Prime And Low Flow Prime Volumes
SELECT ACTION EDIT SELECT PROGRAM TYPE PRIME SELECT PRIME PROGRAM SELECT REAGENT BOTTLE ”Edit program parameters” MAIN MENU KEY OK TO SAVE PROGRAM? SELECT REAGENT BOTTLE only appears if the washer is equipped with the external valve module. Bio-Tek Instruments, Inc. -
Page 107: Copy Prime Program
Delete Prime Program Options Option & Description Models Action/Comments Select Prime Program Press the Options key to cycle through the available Prime programs. Select the Prime program you wish to delete. OK To Delete? Select YES to delete the program. ELx405 Operator's Guide... -
Page 108: Default Prime Program: Prime_200
Default Prime Program: Prime_200 The default prime program Prime_200 (included in all ELx405 models) cannot be edited like the other prime programs. This program is very convenient to use when 200 ml is the recommended Prime Volume (see Recommended Prime and , page 76). -
Page 109: Dispense
Option & Description Models Action/Comments Select Disp Program Press the Options key to cycle through the available Dispense programs. Select a Dispense program. New/Repeat Select NEW to start a new program or REPEAT to repeat the last one. ELx405 Operator's Guide... -
Page 110: Define Dispense Program
Select, HT, and Select CW. Define Dispense Program Options (page 56) for a Define Wash DISPENSE (DISP) Program Options complete list of dispense program options. Note that the options in the shaded region are not available for Dispense-only programs. Bio-Tek Instruments, Inc. -
Page 111: Edit Dispense Program
Name Use up to 16 alphanumeric characters. Enter a unique name for See Entering Program Names on page the new Dispense 44 for instructions. program. OK to Copy? Select YES to copy the program. ELx405 Operator's Guide... -
Page 112: Delete Dispense Program
Delete Dispense Program Options Option & Description Models Action/Comments Select Dispense Program Press the Options key to cycle through the available Dispense programs. Select the Dispense program you wish to delete. Delete? Select YES to delete the program. Bio-Tek Instruments, Inc. -
Page 113: Aspiration
Option & Description Models Action/Comments Select Aspir Program Press the Options key to cycle through the available Aspiration programs. Select an Aspiration program. New/Repeat Select NEW to start a new program or REPEAT to repeat the last one. ELx405 Operator's Guide... -
Page 114: Define Aspiration Program
SELECT PROGRAM TYPE MORE ASPIR SELECT ASPIR PROGRAM PLATE TYPE EDIT PROGRAM MAIN MENU OK TO SAVE PROGRAM? PLATE TYPE only appears on the Select, Magna, Select CW, and HT models with the accessory 96-tube manifold installed. Bio-Tek Instruments, Inc. -
Page 115: Copy Aspiration Program
Delete Aspiration Program Options Option & Description Models Action/Comments Select Aspir Program Press the Options key to cycle through the available Aspiration programs. Select the Aspiration program you wish to delete. OK to Delete? Select YES to delete the program. ELx405 Operator's Guide... -
Page 116: Soak
To modify a Soak program, follow the menu path shown below. Some of these items are options and some are prompts. DEFINE SELECT ACTION EDIT SELECT PROGRAM TYPE MORE SOAK SELECT SOAK PROGRAM “Edit the soak parameters” OK TO SAVE PROGRAM? Bio-Tek Instruments, Inc. -
Page 117: Copy Soak Program
Delete Soak Program Options Option & Description Models Action/Comments Select Soak Program Press the Options key to cycle through the available Soak programs. Select the Soak program you wish to delete. OK to Delete? Select YES to delete the program. ELx405 Operator's Guide... -
Page 118: Linking Programs
Option & Description Models Action/Comments Select Link Program Press the Options key to cycle through the available Link programs. Select a Link program. New/Repeat Select NEW to start a new program or REPEAT to repeat the last one. Bio-Tek Instruments, Inc. -
Page 119: Define Link Program
Soak program to (see above), then only programs with the be included in the Link selected Plate Type will be accessible for program. inclusion in the Link program. Press Main Menu to save. Select YES to save the program. ELx405 Operator's Guide... -
Page 120: Delete Link Program
Delete Link Program Options Option & Description Models Action/Comments Select Link Program Press the Options key to cycle through the available Link programs. Select the Link program you wish to delete. OK to Delete? Select YES to delete the program. Bio-Tek Instruments, Inc. -
Page 121: Setup Utilities
SENSOR on the washer, however, Bio-Tek recommends that the sensor detection systems remain activated Once exception would be, for instance, if you wish to run a prime program using air instead of fluid, deactivate the vacuum detection, fluid detection, and flow detection sensors, to avoid getting errors. -
Page 122: Adjust Utility (Adjust)
Select, Select CW, and HT/96-tube manifold, and for the Magna. ( PLATE TYPE 96Bead does not appear in the standard ELx405 or HT with the 192-tube manifold installed.) At the ADJUSTMENT POSITION screen, select a tube position: ASPIR... -
Page 123: Park Utility (Park)
Bio-Stack™, by selecting the CONF (Configuration), (Alignment), and (Verification) utilities. Refer to ALIGN VERIFY your Bio-Stack Operator’s Manual for instructions if you are operating the washer with the Bio-Stack. UTIL SETUP MORE BIOSTACK BIOSTACK UTILITIES CONF ALIGN VERIFY ELx405 Operator's Guide... -
Page 124: Delay After Dispense (Disp)
Bio-Stack or other automated system. For standalone use, Bio-Tek does not recommend changing these parameters from the default setting, unless you are increasing the vacuum dissipation delay for the High Flow vacuum pump. -
Page 125: Manifold Selection (Manifold)
192 to 96. See Appendix E Changing the Manifolds complete instructions. To view or change the Manifold Selection parameter, select the following: UTIL SETUP MORE MORE MORE MANIFOLD MANIFOLD SELECTION 96 or 192 ELx405 Operator's Guide... -
Page 126: Elx405 Washer Menu Maps
| Chapter 3: Operation ELx405 Washer Menu Maps Refer to the on pages 97 through 100 for a complete listing of Washer Menu Maps options available through the Main Menu. Bio-Tek Instruments, Inc. -
Page 127: Main Menu (Define Function Path For Create And Edit)
ELx405 Washer Menu Maps | Main Menu (DEFINE function path for Create and Edit) DEFINE MAINT UTIL CREATE EDIT COPY DELETE SELECT SELECT PROGRAM TYPE PROGRAM TYPE WASH PRIME DISP ASPIR SOAK LINK SELECT SELECT SELECT SELECT SELECT SELECT WASH PROGRAM... -
Page 128: Main Menu (Define Function Path For Copy And Delete)
PROGRAM OK TO DELETE? OK TO DELETE? OK TO DELETE? OK TO DELETE? OK TO DELETE? OK TO DELETE? YES / NO YES / NO YES / NO YES / NO YES / NO YES / NO Bio-Tek Instruments, Inc. -
Page 129: Main Menu (Run Function Path)
ELx405 Washer Menu Maps | Main Menu (RUN function path) DEFINE MAINT UTIL SELECT PROGRAM TYPE WASH PRIME DISP ASPIR LINK SOAK SELECT SELECT SELECT SELECT SELECT WASH PROGRAM PRIME PROGRAM DISPENSE PROGRAM ASPIRATE PROGRAM LINK PROGRAM PRIME WASHER? PRIME WASHER? -
Page 130: Main Menu (Maint, Util Function Path)
ELx405 BIOSTACK INTERFACE POS: LOCATION? PLACEMENT +400 *AUTCL options available only in models with the Ultrasonic Advantage™ (ultrasonic cleaner) **Only on washers with the external valve module ***Bio-Stack options available on all ELx405™ models, except the Magna Bio-Tek Instruments, Inc. -
Page 131: Chapter 4: Preventive Maintenance
Chapter 4 Preventive Maintenance This chapter describes how to maintain the washer, prepare it for storage or shipment, and decontaminate the instrument. Overview ................102 Recommended Maintenance Schedule.........103 Required Materials ..............104 Warnings & Precautions ............105 Maintenance Programs .............106 Prime Programs ...............107 Rinse/Soak the Fluid Path ............109 Clean Components ..............114 Decontaminate the Washer ............128... -
Page 132: Overview
Beyond that, it is difficult for Bio-Tek to recommend a fixed frequency for each task to be performed. The risk and performance factors of your assays should determine the frequency with which to conduct these tasks. -
Page 133: Recommended Maintenance Schedule
Clean fluid inlet filter, p. 126 Decontaminate the Washer Decontaminate external surfaces, p. 129 Run DECONTAMINATION, p. 130 Prepare the Washer for Storage or Shipment Run LONG_SHUTDOWN, p. 134 Replace Components Replace o-rings, and channel-end Annually seals, p. 136 ELx405 Operator's Guide... -
Page 134: Required Materials
In the following cleaning procedures, when not otherwise specified, “water” means use either deionized or distilled water. Unless otherwise instructed, always connect a supply bottle containing deionized or distilled water to the washer before running the Maintenance programs. Bio-Tek Instruments, Inc. -
Page 135: Warnings & Precautions
® upgraded with Bio-Tek part number 68098 Teflon valves. Contact Bio-Tek for upgrade information and prior to using other questionable chemicals. Warning! Wear protective gloves when handling contaminated instruments. Gloved hands should be considered contaminated at all times;... -
Page 136: Maintenance Programs
Chapter 4: Preventive Maintenance Maintenance Programs The ELx405 onboard software contains the following pre-defined Maintenance programs for most of the recommended tasks: • DAY_RINSE • OVERNIGHT_LOOP • RINSE_AND_SOAK • LONG_SHUTDOWN • DECONTAMINATION a Maintenance program: From the washer’s main menu, select... -
Page 137: Prime Programs
Define Prime Program and their parameters. Note: In addition to the tubing that every ELx405 Washer model is equipped with, the Select CW model contains smaller diameter “low flow” tubing for gentle cell washing. The Low Flow Prime Volumes specified in the charts below and on the following page are necessary to purge the Select CW’s low flow tubing. - Page 138 800 ml (All models except Select CW); 1-999 ml Prime Volume 600 ml (Select CW) Low Flow Prime Volume 200 ml 1-999 ml (Select CW models only) Flow Rate Soak After Prime? Yes/No Soak Duration 2 minutes 1 minute to 18 hours Bio-Tek Instruments, Inc.
-
Page 139: Rinse/Soak The Fluid Path
Washers not equipped with the external valve module: MAINT SELECT MAINT PROGRAM: DAY_RINSE CONNECT RINSE AND PRESS <START> KEY Washers equipped with the external valve module: MAINT SELECT MAINT PROGRAM: DAY_RINSE RINSE VALVE? A B C or D START MAINTENANCE? YES ELx405 Operator's Guide... - Page 140 60 ml 1 to 999 ml Low Flow Prime Volume 0 ml 1 to 999 ml (Select CW models only) Prime Flow Rate Soak After Prime? Yes/No Soak Duration 3 hours, 50 minutes 1 minute to 18 hours Bio-Tek Instruments, Inc.
-
Page 141: Overnight/Multi-Day Maintenance
RINSE_AND_SOAK Important! Keep the manifold in a wetted condition to ensure proper evacuation of fluid. Bio-Tek recommends changing the Soak Duration to 18 hours for overnights and weekends when the washer is not being used. This will decrease flow problems and is a more trouble-free way to operate the washer. - Page 142 Do not use isopropyl alcohol to flush out BSA. Bio-Tek recommends performing the following additional Maintenance procedures to thoroughly flush out protein particles and other contaminants from the washer’s fluid path, if necessary: Four-liter volumes specified in the following are approximate amounts.
- Page 143 (0.1-0.5 N) of HCl. Rinse well with deionized water to remove the HCl. Run the OVERNIGHT_LOOP Maintenance program with deionized water, or run the P_DAY_RINSE Prime program three times with deionized water if you plan to use the washer immediately. ELx405 Operator's Guide...
-
Page 144: Clean Components
Do not immerse the instrument, spray it with liquid, or use a “wet” cloth on it. • Do not allow the cleaning solution to run into the interior of the instrument. (If this happens, contact the Bio-Tek Service Department.) • Do not expose any part of the instrument to the recommended diluted sodium hypochlorite solution (bleach) for more than 20 minutes. - Page 145 If more intensive cleaning is required (for example, if reagent has spilled and dried on the stainless steel shaft), see Cleaning the Carrier Transport Arm (Select, Select on page 116 for thorough cleaning CW, and HT Models) instructions. ELx405 Operator's Guide...
-
Page 146: Figure 22: Position Of The Transport Arm On The Plate Carrier
The transport arm is noted with an arrow in the photo above. As shown in the photo, the arm fits into the left side of the plate carrier. Follow the instructions on the next two pages for removing, cleaning, and reassembling the transport arm. Bio-Tek Instruments, Inc. -
Page 147: Figure 23: Removing The Screws And Washers From The Transport Arm
Remove the screws and washers and slide the arm free from the carrier. Take note of the orientation of the arm to the plate carrier as it is turned upside down. Be sure to reassemble the components properly. Figure 24: The Transport Arm Removed From the Carrier ELx405 Operator's Guide... - Page 148 Wipe the top surface of the instrument base, and all exposed surfaces of the instrument. If detergent was used, wipe all surfaces with a cloth moistened with water. Use a clean, dry cloth to dry all wet surfaces. Bio-Tek Instruments, Inc.
- Page 149 Replacing the O-Rings and Channel-End Seals page 136. For additional cleaning, an ultrasonic bath may be used, or the AUTOCLEAN program may be run (models with the Ultrasonic Advantage™ only; see the AUTOCLEAN section on page 123). the manifold! DO NOT AUTOCLAVE ELx405 Operator's Guide...
-
Page 150: Figure 25: Carrier And Manifold Placement In The Elx405 Model
Manifold o-rings (2) Manifold end plates (2) Screws, washers, and springs (2) Slot for Carrier Carrier glide strips (2) carrier pin transport rail (do not remove) Figure 25: Carrier and Manifold Placement in the ELx405 Model Bio-Tek Instruments, Inc. -
Page 151: Figure 26: Carrier And Manifold Placement In The Select, Select Cw, And Ht Models
Figure 26: Carrier and Manifold Placement in the Select, Select CW, and HT Models The ultrasonic cleaner is available in Ultrasonic Advantage™ models only. Do not try to remove the ultrasonic cleaner! Only Bio-Tek authorized service personnel should remove the cleaner for maintenance or repair. -
Page 152: Figure 27: Carrier And Manifold Placement In The Magna Model
Chapter 4: Preventive Maintenance Microplate carrier Carrier pin Channel end seals Manifold o-rings (2) Manifold end plates (2) Screws, washers, and springs (2) Priming trough Carrier for magnetic plate Figure 27: Carrier and Manifold Placement in the Magna Model Bio-Tek Instruments, Inc. - Page 153 The reservoir is mounted on the washer in the same position as the priming trough in other models. Do not try to remove the ultrasonic cleaner! Only Bio-Tek authorized service personnel should remove the ultrasonic cleaner for maintenance or repair.
- Page 154 UTIL AUTCL DEFINE AUTOCLEAN NUM LOOPS: Enter 01 to 10 loops LOOP <loop number> DURATION: Enter 01 to 60 minutes LOOP <loop number> VALVE: Select A, B, C, or D OK TO SAVE PROGRAM? YES Bio-Tek Instruments, Inc.
- Page 155 (a 50% duty cycle), and you will hear a periodic “hissing” sound that indicates the ultrasonic energy is present. When PROGRAM COMPLETE appears, select REPEAT to run the program again, or select STOP and press the Main Menu key. ELx405 Operator's Guide...
- Page 156 “in” toward the instrument) and then remove the filter from the housing. Wash the filter with hot water and a soft-bristled brush. Rinse the filter, then replace it in the fitting and reinstall onto the rear of the instrument. Bio-Tek Instruments, Inc.
- Page 157 Clean Components | Fluid inlet filter Vacuum port Figure 28: Cleaning the Fluid Inlet Filter ELx405 Operator's Guide...
-
Page 158: Decontaminate The Washer
HT models with the 96-tube manifold (HT2/HTV2): For routine maintenance, decontaminate the manifold (96- or 192-tube) most frequently in use. For shipment of the instrument to Bio-Tek for calibration or repair, decontaminate both manifolds. Bio-Tek Instruments, Inc. -
Page 159: Decon Procedure For External Surfaces Of The Instrument
Use a clean, dry cloth to dry all wet surfaces. Reassemble the instrument as necessary. Discard the used gloves and cloths using a Biohazard trash bag and an approved Biohazard container. ELx405 Operator's Guide... -
Page 160: Decon Procedure For Tubing And Manifold
Valve B: Rinse solution bottle Reconnect the power cord and turn on the washer. To run the program, follow this sequence: DECONTAMINATION While this program is running, you will need to periodically check the display panel and follow the instructions. Bio-Tek Instruments, Inc. - Page 161 RUNNING: DECONTAMINATION/ DISINFECTING CONNECT RINSE BOTTLE AND PRESS <START> KEY Washer equipped with the external valve module: MAINT SELECT MAINT PROGRAM: DECONTAMINATION DISINFECTANT VALVE? A B C or D RINSE VALVE? A B C or D START MAINTENANCE? YES ELx405 Operator's Guide...
-
Page 162: Alternate Decontamination Procedure For Tubing And Manifold
Soak the tubing and manifold in the bleach or alcohol solution. Wait 20 minutes. Rinse the tubing and manifold with DI or distilled water. Use a clean, dry cloth to dry all wet surfaces of the tubes and manifold. Bio-Tek Instruments, Inc. - Page 163 If fluid leaks from the manifold, try disassembling and carefully reassembling. Discard the used gloves and cloths using a Biohazard trash bag and an approved Biohazard container. Verify dispenser performance visually or by performing the Dispense Precision Test Chapter 5 Performance Verification/Qualification Tests ELx405 Operator's Guide...
-
Page 164: Prepare For Storage Or Shipment
For the ELx405™ HT2/HTV2: Before switching from one manifold to another (e.g., before removing the 192-tube manifold and installing... -
Page 165: Storing The Washer
Protect the washer from temperature extremes that can cause condensation within the unit and from corrosive fumes and vapors. Store the washer under the following environmental conditions: Temperature: –20° to 50°C (-4° to 122°F) Relative humidity: 10% to 85% (non-condensing) ELx405 Operator's Guide... -
Page 166: Replace Components
12 (or 24) rubber plugs (seals) on the channel ends if they show signs of cracking or drying out. Order the replacement o-rings and seals from Bio-Tek (see page 104). You must remove the manifold to change the seals, so these tasks work best in... -
Page 167: Figure 29: Replacing The Channel-End Seals
Do not overtighten the manifold screws Caution: When reinstalling the manifold, only tighten the screw-washer-spring assembly that holds it in place until you feel the mechanical stop. You will damage the instrument if you continue tightening past this point. ELx405 Operator's Guide... - Page 168 Chapter 4: Preventive Maintenance Bio-Tek Instruments, Inc.
-
Page 169: Chapter 5: Performance Verification/Qualification Tests
Chapter 5 Performance Verification/ Qualification Tests This chapter describes how to verify the performance of the ELx405 Microplate Washer. Overview ................140 Verification Schedule ..............141 Installation Qualification (IQ).............142 Operational Qualification (OQ) ...........142 Performance Qualification (PQ) ..........143 System and Checksum Tests .............144... -
Page 170: Overview
| Chapter 5: Performance Verification/Qualification Tests Overview Instrument verification for the ELx405 involves three activities: qualification of installation and setup, qualification of routine capability, and qualification of long-term stability. This chapter refers to these activities as Installation Qualification (IQ) Operational Qualification... -
Page 171: Verification Schedule
The package contains thorough procedures for performing Installation Qualification, Operational Qualification and Performance Qualification (IQ-OQ-PQ) and preventative maintenance (PM). Extensive Checklists and Logbooks are included for recording results. Contact your local dealer for more information. ELx405 Operator's Guide... -
Page 172: Installation Qualification (Iq)
OQ tests to monitor for trends. • The successful completion of the OQ procedure, in combination with results that are comparable to previous PQ and OQ tests, confirms that the washer is performing consistently over time. Bio-Tek Instruments, Inc. -
Page 173: Performance Qualification (Pq)
These tests should be performed routinely; the recommended interval is monthly. This frequency may be adjusted depending on the trends observed over time. • The successful completion of the PQ procedure confirms that the washer is performing consistently under normal operating conditions. ELx405 Operator's Guide... -
Page 174: System And Checksum Tests
, to determine its cause. If the problem is something you can fix, turn off the Codes washer, fix the problem, and then turn the washer back on. If the cause is not something you can fix, contact Bio-Tek’s Technical Assistance Center. Bio-Tek Instruments, Inc. -
Page 175: Checksum Test
The Main Menu will be displayed after the test is finished. If you need to provide the Checksum information to TAC: Since the above screens are displayed only briefly, you may have to run the Checksum Test a few times to record all of the required information. ELx405 Operator's Guide... -
Page 176: Liquid Tests
(%Coefficient of Variation), or the ratio of the standard deviation of the distribution of fluid volumes in the wells to the mean value of volume per well. The lower the %CV, the better the uniformity across the manifold. Bio-Tek Instruments, Inc. -
Page 177: Valve Module Test (Overview)
Dispense Precision Test (192), without Valve Module Dual/192 Evacuation Efficiency Test (192) Dispense Precision Test (192), with Valve Module Evacuation Efficiency Test Dual/96 Dispense Precision Test, without Valve Module (HT2/HTV2 Evacuation Efficiency Test only) Dispense Precision Test, with Valve Module ELx405 Operator's Guide... -
Page 178: Materials
Precision test. In most cases, enough fluid will be left over to re-run a test, if necessary. If you will be performing the annual OQ with the external valve module, you will need several additional liters of deionized water. Bio-Tek Instruments, Inc. - Page 179 Agent 125 ml) contains 10% Tween 20 in deionized water and 0.01% Sodium Azide as a preservative. Bio-Tek PN 7773001 (Solution #2 10X Concentrate Blue Test Dye 125 ml) contains 5 g per liter FD&C Blue #1, 0.1% Tween 20 in deionized water, and 0.01% Sodium Azide as a preservative.
-
Page 180: Evacuation Efficiency Test (96)
Troubleshoot as follows: • If the test fails once: Failure of this test is commonly caused by improper aspiration tube placement within the wells, usually because a microplate other than the recommended Corning Costar 96 was used. ® Bio-Tek Instruments, Inc. - Page 181 Shake the plate to get uniform distribution of the remaining dye in each well. If you are using one of Bio-Tek’s keypad-based readers, such as the ELx800 or ELx808, ensure that the reader is not running in Rapid mode. To check the setting, select...
- Page 182 If the problem appears to be related to a particular region, edge, or corner of the plate, review the alignment and flatness of the plate on the carrier. Please do not adjust the carrier adjustment screws! Contact your Bio-Tek dealer if you suspect an alignment problem. For additional suggestions, see Appendix A Troubleshooting If the test continues to fail, contact Bio-Tek Instruments.
-
Page 183: Dispense Precision Test (96)
It does not evacuate the solution. When the program is finished, carefully remove the plate. If you are using one of Bio-Tek’s keypad-based readers, such as the ELx800 or ELx808, ensure that the reader is not running in Rapid mode. - Page 184 It does not evacuate the solution. When the program is finished, carefully remove the plate. If you are using one of Bio-Tek’s keypad-based readers, such as the ELx800 or ELx808, ensure that the reader is not running in Rapid mode.
- Page 185 Run the Maintenance program DAY_RINSE two or three times to prime the fluid lines, manifold, and the valve being tested. ELx405 standard models (Single/96 manifold): See the note on the next page before performing step #4. Edit the Dispense program accuracy_qc_test...
- Page 186 Dispense Precision Test Worksheet 166. For the ELx405™ standard model only, the accuracy_qc_test program is locked for editing; it can only be used to test Valve A. In order to test all four valves, you’ll need to create a copy of this program. You will then edit the copy when performing step #4.
-
Page 187: Evacuation Efficiency Test (192)
See Chapter , for instructions on copying and editing programs and Operation modifying the abovementioned parameters. After making this change, retry the test using a clean, dry microplate. ELx405 Operator's Guide... - Page 188 Shake the plate to get uniform distribution of the remaining dye in each well. Note: If you are using one of Bio-Tek’s keypad-based readers, such as the ELx800NB, ensure that the reader is not running in Rapid Mode. To check the setting, select...
- Page 189 Please do not adjust the carrier adjustment screws! Contact your Bio-Tek dealer if you suspect an alignment problem. For additional suggestions, refer to Appendix A Troubleshooting If the test continues to fail, contact Bio-Tek Instruments.
-
Page 190: Dispense Precision Test (192)
It does not evacuate the solution. When the program is finished, carefully remove the plate. Note: If you are using one of Bio-Tek’s keypad-based readers, such as the ELx800NB, ensure that the reader is not running in Rapid Mode. - Page 191 It does not evacuate the solution. When the program is finished, carefully remove the plate. Note: If you are using one of Bio-Tek’s keypad-based readers, such as the ELx800NB, ensure that the reader is not running in Rapid Mode.
- Page 192 When the program is finished, carefully remove the plate and weigh it. This is the Total Dispense Weight in grams. The weight should be 30.72 grams, ± 10% (between 27.65 g and 33.79 g). If the weight falls outside this range, contact Bio-Tek. Bio-Tek Instruments, Inc.
- Page 193 Residuals and Fungi Growth Decontamination Chapter 4 suggestions. After cleaning the fluid inlet filter or valve and tubing, retry the test. If the test continues to fail, contact Bio-Tek. Record results in the on page 169. Dispense Precision Test Worksheet ELx405 Operator's Guide...
-
Page 194: Worksheets
Mean OD for the plate (Sum of all wells ÷ 96): Residual Factor (Mean OD ÷ Mean Residual Weight): Calculate the Residual Weight for each well: well OD ÷ Residual Factor Every Residual Weight per well <= 0.005 g? Pass Fail Date: Test Performed By: Bio-Tek Instruments, Inc. - Page 195 Standard Deviation: (calculate using spreadsheet program) Mean OD: (sum of all wells ÷ number of wells) % Coefficient of Variation: ((Standard Deviation ÷ Mean OD) x 100) % CV <= 4.0? Pass Fail Date: Test Performed By: ELx405 Operator's Guide...
- Page 196 Total Dispense Weight 28.8 g ±10%? (25.92 g - 31.68 g) Valve A grams Pass Fail Valve B grams Pass Fail Valve C grams Pass Fail Valve D grams Pass Fail Date: Test Performed By: Bio-Tek Instruments, Inc.
- Page 197 Mean OD for the plate (sum of all wells ÷ 384): Residual Factor (Mean OD ÷ Mean Residual Weight): Calculate the Residual Weight for each well: well OD ÷ Residual Factor Every Residual Weight per well <= 0.002 g? Pass Fail Date: Test Performed By: ELx405 Operator's Guide...
- Page 198 Standard Deviation: (calculate using spreadsheet program) Mean OD: (sum of all wells ÷ number of wells) % Coefficient of Variation: ((Standard Deviation ÷ Mean OD) x 100) % CV <= 4.0? Pass Fail Date: Test Performed By: Bio-Tek Instruments, Inc.
- Page 199 Total Dispense Weight 30.72 g ±10%? (27.65 g – 33.79 g) Valve A grams Pass Fail Valve B grams Pass Fail Valve C grams Pass Fail Valve D grams Pass Fail Date: Test Performed By: ELx405 Operator's Guide...
- Page 200 | Chapter 5: Performance Verification/Qualification Tests Bio-Tek Instruments, Inc.
-
Page 201: Appendix A: Troubleshooting
Appendix A Troubleshooting This appendix lists problems that you may experience with the washer, and suggests possible solutions for these problems. Overview ................172 Troubleshooting Charts.............173... -
Page 202: Overview
| Appendix A: Troubleshooting Overview Every effort has been made to ensure that the ELx405 Microplate Washer is extremely reliable and easy to use. Nevertheless, you could experience problems with the washer hardware, software, and/or accessories. This appendix offers the following information to help resolve these problems. -
Page 203: Troubleshooting Charts
The vacuum pump accessory cable not installed cable should be plugged into correctly. the back of the washer. Too much residual vacuum Release the vacuum by force for pump. loosening the waste bottle stopper. Reconnect and start again. ELx405 Operator's Guide... - Page 204 Motor, sensor, or Turn washer off, wait at least 15 electrical problem. seconds, then turn back on. If washer does not pass its self-test, contact Bio-Tek TAC. Misaligned carrier or Contact Bio-Tek TAC. manifold. Incorrect manifold HT models with the accessory selected.
-
Page 205: Fluid Aspiration
Tween 20. If this is not possible, water buffer. continue below. Some wells might be left Insufficient vacuum. Bio-Tek offers a high flow pump for full. those 96- and 384-well assays using only water for the wash fluid. Contact Bio-Tek for more information. - Page 206 Make sure the carrier is clean (see Cleaning the Plate Carrier System in Ch. 4). Try a different microplate or strip holder. If the problem is unresolved, the carrier may have to be realigned. Contact Bio-Tek TAC. Bio-Tek Instruments, Inc.
- Page 207 System in Ch. 4). Try a different microplate or strip holder. If the problem is unresolved, the carrier may have to be realigned. Contact Bio-Tek TAC. Washer program requires To minimize the residuals, program optimization. a second or crosswise aspiration (see Define Wash ASPIRATION Program Options in Ch.
-
Page 208: Fluid Delivery
Insufficient suction Perform Periodic Maintenance as force, clogged tubing, described in Ch. 4. If problem or faulty valve. persists, contact Bio-Tek TAC. Unable to System not primed. Run a Prime program using the dispense Large air pockets in following volumes: fluid: tubing. - Page 209 If it is cont’d. plugged in, contact Bio-Tek TAC. Plate Dispense height too Change the Dispense Height in the overfills high. The aspirate tubes program (see Define Wash (floods).
- Page 210 When the program begins, you should be able to hear the vacuum pump turn on. If it is not turning on, contact Bio-Tek TAC. If the vacuum pump turns on, remove the vacuum tubing from the back of the washer while the pump is on and put your finger over the port.
-
Page 211: Fluid Leakage
Worn tubing. Replace tubing, or cut back tubing external one inch (to remove worn section). tubing connector. Worn seal (inlet or Replace filter or seal (see vacuum fitting). Connecting the Tubes and Bottles in Ch. 2). ELx405 Operator's Guide... -
Page 212: Microplate Carrier Movement
Check for and remove any obstructions. Ensure that the manifold is installed properly (see Setting Up the ELx405: Installing the Microplate Carrier in Ch. 2). Incorrect manifold HT models with the accessory 96- selected. tube manifold (including Select... -
Page 213: Microplate Scratches
Make sure the carrier is clean (see Cleaning the Plate Carrier System in Ch. 4). Try a different microplate or strip holder. If the problem is unresolved, the carrier may have to be realigned. Contact Bio-Tek TAC. ELx405 Operator's Guide... - Page 214 | Appendix A: Troubleshooting Bio-Tek Instruments, Inc.
-
Page 215: Appendix B: Error Codes
Appendix B Error Codes This appendix lists error codes that may appear on the ELx405 Microplate Washer. If an error is displayed, refer to Appendix A, Troubleshooting. Contact Bio-Tek’s Technical Assistance Center if further instructions are necessary. Error Codes ................186 General Errors.................187... -
Page 216: Error Codes
Appendix B: Error Codes Error Codes An error code is displayed on the ELx405™ as a four-digit identifier. The first digit will be , or • , or denote a noncritical ( General ) error, which means that the instrument will still respond to keypad input. See , page 187. -
Page 217: General Errors
Note: Calibration errors ( AUTOCAL_JIG_ERR; MANIFOLD_AUTOCAL_ERR; ) will normally be displayed only during calibration or repair of the etc. instrument by Bio-Tek TAC. Motor errors: n = motor; Program errors: n = program #. Code Cause 0100 Washer function was aborted due to operator-initiated abort, or following some other error. - Page 218 Manifold motor couldn’t find edge of autocal jig during autocal routine. AUTOCAL_JIG_ERR Probable Causes: • Distance from optical sensor to autocal jig is too short. • Autocal jig contacts are contaminated. • Autocal jig is not installed properly or a connection is not made. Bio-Tek Instruments, Inc.
- Page 219 • Motor is defective. • Optical sensor is defective. • Shipping block is still installed. • Lead screw has become unglued from the motor shaft. • Incorrect manifold selected (HT2/HTV2 models). ELx405 Operator's Guide...
- Page 220 Probable Causes: • Contamination on the y-axis rail of the carrier. • Y-axis motor is not able to move due to contamination. • Optical sensor is defective. • Y-axis motor is defective. • Incorrect manifold selected (HT2/HTV2 models). Bio-Tek Instruments, Inc.
- Page 221 At that time, a checksum test is run when validating a program name, or when loading a program from flash memory to RAM. If it fails, then the software assumes the program is corrupt in flash memory. Probable Causes: • Memory corruption. ELx405 Operator's Guide...
- Page 222 CNFG_DATA_ERR initialized, or flash memory is corrupted. Probable Causes: • New basecode overwrites configuration values. • Unit has not been calibrated or lost calibration values. • Main PCB has been replaced. • Memory corruption. Bio-Tek Instruments, Inc.
- Page 223 • Errors 0203 or 0403 initially occurred and were not resolved; see the Probable Causes for 0203. 1400 Autocal of washer is aborted – occurs whenever the operator requests an abort of the autocal procedure. AUTOCAL _ABORT_ERR ELx405 Operator's Guide...
- Page 224 MALLOC_ERR such as downloaded configuration data, or autocal configuration data. Probable Causes: • The memory is corrupt. Contact Bio-Tek TAC. • If the error persists, the processor PCB needs to be replaced. 1A00 Horizontal aspirate position is out of range – occurs...
- Page 225 Waste bottle is full. • Foam in the overflow bottle has pushed the switch open. • Waste tubing is not properly connected, and the overflow bottle is the primary bottle, i.e., the first bottle that waste flows into. ELx405 Operator's Guide...
- Page 226 (i.e., INVALID_LINK_ERR when programs are saved and/or downloaded), or when one of the programs within a linked program is not found or is invalid. Probable Causes: • Memory corruption. • Requested program is corrupt or not available. Bio-Tek Instruments, Inc.
- Page 227 Infrared detector or fluid sensor has failed. • Main PCB failed to detect fluid sensor. • Air bubble moving ball out of sensor intermittently. • Dispense valve did not close properly, allowing some fluid to flow, causing manifold to drip. ELx405 Operator's Guide...
- Page 228 DC_PUMP_ERR 3700 Invalid number of loops selected for the program. This usually occurs when AUTOCLEAN AUTCLN_NUM_LOOPS_INVALID_ERR trying to start the AUTOCLEAN feature from a PC, and the parameters downloaded include an out-of-range loop count. Bio-Tek Instruments, Inc.
- Page 229 During PC control of the washer, the PC is trying to set or run an undefined feature. INVALID_FEATURE_ERR AUTCLN errors appear only in Ultrasonic Advantage™ models. These errors may also appear during keypad control of the washer, with the exception of error code 3A00. ELx405 Operator's Guide...
-
Page 230: Fatal Errors
Appendix B: Error Codes Fatal Errors Fatal errors indicate conditions that require immediate attention. If a fatal error is displayed, contact Bio-Tek’s Technical Assistance Center for further instructions. For the codes that represent device errors, the fourth digit of the code represents the... - Page 231 A600 Quick flash memory configuration timed out. Occurs in the interrupt handler routine, which QFLASH_TIMEOUT_ERR is triggered every 1 msec, if there is a quick flash memory error. ELx405 Operator's Guide...
- Page 232 Memory manager (memory allocation heap) corruption detected – occurs when writing data HEAP_CORRUPTED_ERR to flash memory. This can also be detected during that portion of the software, which runs in the background, while other tasks are simultaneously running. Bio-Tek Instruments, Inc.
-
Page 233: Bio-Stack Errors
Bio-Stack Errors | Bio-Stack Errors The following error codes may be displayed on the ELx405 during operation with the Bio-Stack Microplate Stacker. Refer to the section Troubleshooting and Error Codes of the Bio-Stack Operator’s Manual for more information. Code Cause... - Page 234 Appendix B: Error Codes Bio-Stack Errors, Cont’d Code Cause B-8305 The ELx405 has received an invalid message response from the Bio-Stack. Occurs when INVALID_RESPONSE_ERR neither a NAK nor an ACK is received from the Bio-Stack. This can happen during any...
-
Page 235: Appendix C: Chemical Compatibility
This appendix lists the name and material(s) of each washer component that will come into contact with chemicals during operation or maintenance. If there are questions about compatibility of chemicals with the washer, contact Bio-Tek. Components and Materials Composition ........206... -
Page 236: Components And Materials Composition
EP (ethylene propylene) Outlet valve, Select CW inlet valve Viton Vacuum switch Polycarbonate Fluid pump Santoprene* Buffer bottle Polyethylene ® * Teflon (if the washer is upgraded with PN 68098 Teflon valves, for use with acetic acid). Bio-Tek Instruments, Inc. -
Page 237: Appendix D: Default Programs
Appendix D Default Programs This appendix lists all default wash, prime, dispense, aspirate, and maintenance programs available on the washer. Default Programs..............208... -
Page 238: Default Programs
192accuracy_qc Aspirate residual_qc_test 192resid_qc_test Maintenance DAY_RINSE OVERNIGHT_LOOP RINSE_AND_SOAK LONG_SHUTDOWN DECONTAMINATION AUTOCLEAN** *These programs are available in HT models when the accessory 96-tube manifold is installed. ** AUTOCLEAN appears only in models with the Ultrasonic Advantage™ (ultrasonic cleaner). Bio-Tek Instruments, Inc. -
Page 239: Appendix E: Changing The Manifolds
Appendix E Changing the Manifolds This appendix contains instructions for changing manifolds in ELx405 HT models with the accessory 96-tube manifold. Changing Manifolds in HT Models With the 96-Tube Manifold....210... -
Page 240: Changing Manifolds In Ht Models With The 96-Tube Manifold
If you ran DAY_RINSE or an AUTOCLEAN program as instructed in step 1 above, ensure that the manifold is thoroughly dry before storing it. Bio-Tek Instruments, Inc. - Page 241 Manifold Selection feature before operating the washer. Failure to set the manifold type before operating the washer may damage the manifold and void your warranty. Refer to , for more Manifold Selection Chapter 3 Operation information. ELx405 Operator's Guide...
-
Page 242: Figure 30: Storing The 96- Or 192-Tube Dual Manifold In The Shipping Case
Store lower manifold for dual 96- or 192- tube manifold in this compartment Store upper manifold for dual 96- or 192- tube manifold in this compartment Figure 30: Storing the 96- or 192-Tube Dual Manifold in the Shipping Case Bio-Tek Instruments, Inc. -
Page 243: Index
Index Accessories Biohazards, xix Optional, 9 Bio-Stack Compatibility with washer, 2, 4 Accessory 96-tube manifold, 3 Repackaging, 37 Installation with washer, 36 Operation with washer, 48 accuracy_qc_test, 153, 154, 155 Air bubbles in tubing, 50 Bottles Aspirate height, 62 Cleaning, 115 Aspiration delay, 63, 66 Connection, 26 Aspiration height, 62, 65... - Page 244 Application support, 14 Technical support, 12 Copyright information, iii Crosswise aspiration options, 64, 66 Electrical grounding, xix ELISA, 2 ELx405 ELx405 model, 3 HT model, 3 Daily maintenance tasks, 109 DAY_RINSE, 109 Key features, 2 Decontamination, 128 Magna model, 3...
- Page 245 Liquid testing, 146 Changing the manifolds, 209 Dispense Precision Test, 153, 160 HT2 and HTV2 models, 3 Evacuation Efficiency Test, 150, 157 Humidity warning, xix, 22 Materials, 148 Solutions, 149 Which tests to perform, 147 Low vacuum, 175 ELx405 Operator's Guide...
- Page 246 Edit prime program, 76 Operational qualification (OQ), 142 Prime_200, 78 O-rings Part number, 104 Prime_CW, 78 Replacing, 136 Recommended prime and low flow prime volumes, 76 Overnight/multi-day maintenance tasks, Run prime program, 73 OVERNIGHT_LOOP, 111 Prime programs, 107 AUTOPRIME, 110 Bio-Tek Instruments, Inc.
- Page 247 Communications, 34 Protein residuals Setup utilities, 91 BSA caution, xxi Adjust utility, 92 Removing, 112 Bio-Stack utilities, 93 Delay after dispense, 94 Manifold selection, 95 Park utility, 93 Plate clearance height, 94 Registration Card, xxviii RS-232 settings, 91 ELx405 Operator's Guide...
- Page 248 Sensor system, 91 Dispense Precision, 96-tube, 153 Vacuum dissipation delay, 94 Evacuation Efficiency, 192-tube, 157 Evacuation Efficiency, 96-tube, 150 Shipping Address for Bio-Tek, 13 System Self Test, 144 Bracket removal/installation, xxi, 18, 21, Troubleshooting, 171 Charts, 173 Preparing instrument for, 38...
- Page 249 Define wash dispense program options, Define wash method program options, 54 Define wash program, 53 Delete wash program, 72 Edit wash program, 71 Run wash program, 52 Washer menu maps, 96 Waste sensor port Caution, xxi Waste system Installation, 28 ELx405 Operator's Guide...
- Page 250 | Index Bio-Tek Instruments, Inc.
Need help?
Do you have a question about the ELx405 and is the answer not in the manual?
Questions and answers