Advertisement
Quick Links
Advertisement

Subscribe to Our Youtube Channel
Summary of Contents for Kaiser PROFI E20B50B24-SB
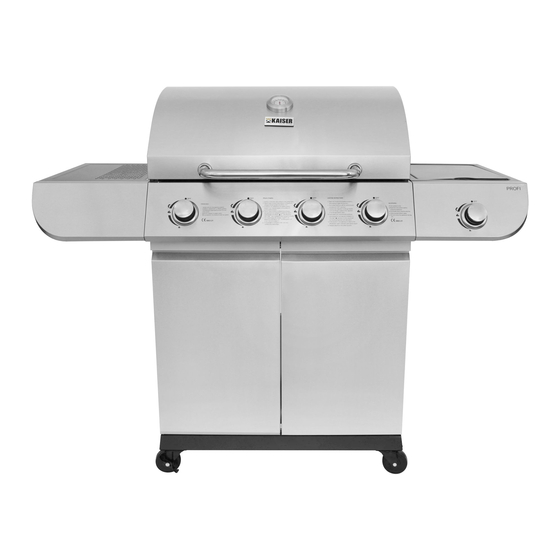
- Page 1 Install Care and use instructions Gas Barbeque 4+1 burners PROFI E20B50B24-SB...
-
Page 2: Outdoor Use Only
SAVE THESE INSTRUCTIONS FOR THIS GAS GRILL IS DESIGNED FOR FUTURE REFERENCE OUTDOOR USE ONLY IMPORTANT: READ ALL INSTRUCTIONS AND OPERATIONS BEFORE OPERATING THIS UNIT. FOLLOW ALL STEPS IN ORDER. NEVER ALLOW CHILDREN TO OPERATE THIS UNIT. Warnings: Only to be used outdoors. Read the instructions before using the appliance. - Page 3 If you own or use an extra spare tank, or have a disconnected tank, you should never store it near or under the grill unit or heat box, or near any other ignition or heat source. 1. Technical data a) Choose the proper regulator according to appliance category and gas pressure in the table above, for example, Use 37 mbar regulator with appliance category I3+ for propane gas.
- Page 4 Total Nominal Heat Main Burner Side Burner Back Model No.(s) Inputs (Hs) I3+ Burner No. (28-30/37) mbar Butane (G30) 28-30 mbar 14.5kW 1054g/h E20B50B24-SB Propane (G31) 37 mbar 14.5kW 1034g/h 2. Mounting steps Make sure your grill is assembled properly. Detailed assembly instructions are packed with each grill giving specific assembly procedures for each model.
- Page 5 Energy saving tips: a) Reduce the opening time of the lid. b) Turn the grill off as soon as cooking is completed. c) Preheat the gas grill for 10 to 15 minutes only. (Except for the first use) d) Do not preheat longer then recommended. e) Do not use a higher setting than required.
- Page 6 How to change your cylinder Note: Turn off the switch of cylinder (No spanner is required) A) if put the gas cylinder outside the grill, The height of the gas cylinder is below the 80cm, and the width is within 35cm How to connect a gas bottle Attention: Exclusively use a regulator and flexible hose approved by national authorities and current...
- Page 7 Never position the gas container unit under the firebox. It must be positioned on a level surface away from the most hot parts of the barbecue Connecting steps a) Turn the orange cap so that the arrow is pointing to the gap in the shroud. b) Remove the orange safety cap by pulling the lanyard out, then out.
- Page 8 Warning: Always test gas line for leaks at connector with soap water finishing all connections. How to disconnect a gas bottle a) Except for twin-cylinder installations with a changeover valve, turn off the gas tap if fitted to the appliance. Wait until the burner and pilot light have gone out. For installations with a changeover valve, it is only necessary to switch off the empty cylinder.
- Page 9 l) Do not attempt to use this appliance in a garage or any enclosed area. Also this appliance must be keep away from flammable materials, etc. We recommend keeping a distance of at least 0.5 to 1.0 meter clear of any flammable materials. m) We would recommend that this gas grill should be serviced by your local gas retail outlet at least once a year by a competent engineer.
- Page 10 Warning : If the burner still does not light ,turn the gas control knob to” OFF” and wait for 2 minutes for the unburnt gas to evaporate before lighting again. Figure 3 8. Storage Your Gas Bottle must be stored outdoors in a well ventilated area and must be disconnected from your gas grill when not being used.
- Page 11 Trouble Shooting Emergencies Possible cause Prevention/ Solution Gas leaking from Damaged hose Turn off gas at LP tank, if hoes is cut or cracked/cut/burned hose cracked, replace hose.See LP tank lead test and connection regulator to the LP tank Gas leaking from LP tank Mechanical failure due to resting or Turn off LP tank valve mishandling...
- Page 12 Burner will not light using Electrical issues: 1.Replace electrode. ignitor 1. Electrode cracked or broken;” sparks at 2.Tip of electrode should be pointing toward crack.” port hole in burner. The distance should be 2. Electrode tip not in proper position 1/8”...
- Page 13 If your problem is not resolved from the information above, please Contact your local gas dealer. a) Turn the burner on for 15 to 20 minutes. Ensure appliance is cold before continuing. b) Grids should be cleaned periodically by soaking and washing in soapy water. c) The interior surfaces of the grill housing cover should also be washed with hot, soapy water.
- Page 22 Technical Specifications With 4 burners & 1 sider burner Cooking area: 700*420mm Warming rack: 700*120mm,S/S Power: 3.0kW per burner, sider burner 2.5kW, total 14.50kW Lid: S/S with double layer, S/S thermometer Lid handle: S/S Firebox: steel, black high temp painted Cooking Grill: matte enameled multi-functional cast iron cooking grill Control Panel: S/S 430 Ignition: Automatic...

Need help?
Do you have a question about the PROFI E20B50B24-SB and is the answer not in the manual?
Questions and answers