Table of Contents
Advertisement
Advertisement
Table of Contents

Related Manuals for LiteOn LVW-5005X


Summary of Contents for LiteOn LVW-5005X
- Page 1 P/N 7819901160A...
-
Page 2: Table Of Contents
Table of contents Getting started Accessories ... 1 Important safety instructions ... 2 Warnings, cautions and others ... 3 Disk information ... 4 Controls and displays Remote control ... 5 Front panel connections ... 6 Display window ... 6 Rear panel connections ... 7 Connecting up Connecting the antenna cable and television ... -
Page 3: Important Safety Instructions
Important safety instructions Read instructions. Read all the safety and operating instructions before operating the product. Retain instructions. Keep the safety and operating instructions for future reference. Heed warnings. Adhere to all warnings on the product and in the operating instructions. Follow instructions. -
Page 4: Warnings, Cautions And Others
Warnings, cautions and others CAUTION! TO REDUCE THE RISK OF ELECTRIC SHOCK, DO NOT REMOVE THE COVER OF THIS UNIT. THERE ARE NO USER SERVICEABLE PARTS INSIDE. REFER SERVICING TO QUALIFIED SERVICE PERSONNEL. The lighting flash with arrowhead symbol, within an equilateral triangle, is intended to alert the user to the presence of uninsulated “dangerous voltage”... -
Page 5: Disk Information
Angle: Appears at the beginning of a scene recorded from multiple angles. All Write Technology (LVW-5005X model only) “ALL WRITE” technology makes it alright to record on almost all of the recordable discs. (DVD+RW, DVD+R, DVD-RW,... -
Page 6: Controls And Displays
Controls and displays Remote Control To install batteries Open the battery compartment and insert the batteries. Make sure the polarity (+ and -) matches the marks inside the remote control. Do not use rechargeable type batteries. Remote sensor The remote has a range of approximately 3M and works best when pointed directly at the unit. -
Page 7: Front Panel Connections
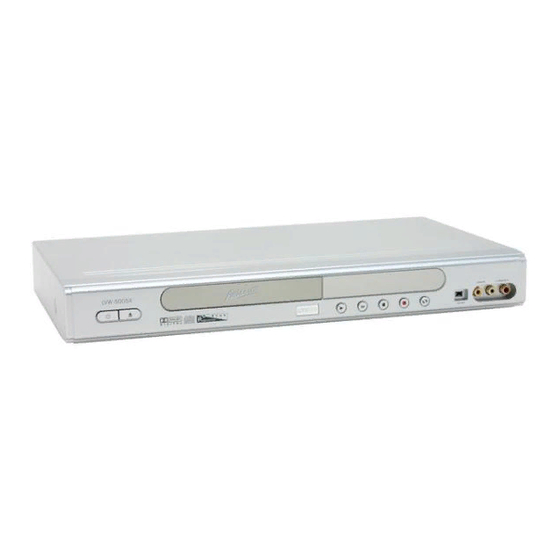
4) VCD indicator 5) CD indicator 6) MP3 indicator 7) JPEG indicator 8) RW indicator: DVD+RW indicator (LVW-5001, LVW- 5005X model) DVD-RW indicator (LVW-5005X model) CD-RW indicator (LVW-5005X model) PAUSE Pauses playback or recording. STOP Stops playback or recording. 8) RECORD Starts recording. -
Page 8: Rear Panel Connections
Controls and Displays Rear panel connections Names of parts 1) VHF/UHF IN/OUT jacks Antenna cables input and output. Note: Playback signals don’t go through here. Make proper connections before using this DVD Recorder. 2) LINE IN (S-VIDEO) jack S-Video signal input. 3) AV2 Rear IN (VIDEO/AUDIO L/R) jacks Composite signal input. -
Page 9: Connecting Up
Connecting up Before making connections 1) Do not connect the AC power cord until all other connections are made. 2) Connect VIDEO OUT of the unit directly to the video input of your TV. Connecting VIDEO OUT of the unit to a TV via a VCR may cause a viewing problem when playing back a copy-protected disc. -
Page 10: For Better Picture
For better picture There are two types of connections (S-Video, and Component video) that provide higher quality viewing. 1. Connecting to a TV via S-Video out Connecting to a TV with a S-Video jack Use a S-Video cable (not supplied) to connect the S-Video output on the unit to the S-Video input on the television. Note: 1.Enter system setup to enable S-Video (refer to the section titled “Quick Setup”). -
Page 11: For Better Sound
For better sound There are two types of audio connections, analog and digital. Connecting to a stereo audio amplifier or receiver Use an audio cord (same as supplied) to connect the AUDIO OUT on the DVD recorder to the audio input on a stereo amplifier or a receiver. -
Page 12: Connecting Satellite Receiver Or Cable Box
ONNECTING ATELLITE ECEIVER OR ABLE Connecting the cable box/satellite box and television Before using the unit, follow the steps below to connect the unit to the cable box and TV. Connecting to a satellite box or a cable box with COMPOSITE jacks Use a RF cable (supplied) to connect the RF IN on the cable box/satellite receiver to the antenna outlet. -
Page 13: Quick Setup
Quick setup Initial setup Remote control & Setup menu Confirm the antenna is connected correctly, and follow the steps below to make the personal adjustments for using the DVD- Recorder. 1. Press [ POWER] to turn on the unit. 2. Press [SETUP] to display the setup menu. 3. -
Page 14: Tv Channel Setup
TV channel setup Automatic TV channel search When the automatic channel search function is activated, the TV channels are searched and stored in a specific order. If the channel assignments of your TV content provider changes or if you are reinstalling the DVD-Recorder, you may need to start this proce- dure again.This will replace the stored TV channel with the new ones. -
Page 15: Channel Editing
Channel Editing Before channel editing Ensure that the antenna cables are securely hooked up to the unit. Adding or deleting TV channel manually 1.Turn on the TV set and the DVD-Recorder, and press [Source] to switch the input signal source of the unit to “TV.” 2.Press [EDIT] to bring up the “Channel Editor”... -
Page 16: Recording
Check our website for the list of qualified discs. LVW-5005X model only LVW-5005X DVD Recorder is a versatile DVD-Recorder that employs the “ALL WRITE” technology to make it alright to record on almost all of the recordable discs. You may use DVD+RW, DVD+R, DVD-RW, DVD-R, CD-RW or CD-R discs to record. -
Page 17: Adding New Recordings
3.You cannot change the channel or recording mode during recording. 4.Before playing a DVD+R disc on another player, you need to finalize the disc. LVW-5005X model only Before playing a DVD+R/DVD-R/DVD-RW disc on compatible equipment, you will need to finalize the disc. PLAY] or... -
Page 18: Recording From A Vcr Or V8 / Hi8 / Dv
Recording Recording from a VCR or Camcorder/ Hi8 / DV Before starting to record This DVD-Recorder can accept standard CVBS (RCA) analog audio/video cable or IEEE-1394 cable and record Camcorder onto DVD in the digital video format of your choice. The unit functions much like a digital VCR. -
Page 19: Dv Recording
12.To stop recording. Press [ STOP] LVW-5001 model Before playing a DVD+R disc on compatible equipment, you will need to finalize the disc. LVW-5005X model Before playing a DVD+R/DVD-R/DVD-RW disc on compatible equipment, you will need to finalize the disc. -
Page 20: One Touch Record" To Record The Dv Signal
Recording “One Touch Record” to record DV contents Before starting to record DV contents When you do not need to operate your DV, this unit allows basic DV control on DVD Recorder Remote control. 1.Power on your TV and this DVD-Recorder. 2.Place a recordable DVD disc in the tray. -
Page 21: Record On Cd-R/Cd-Rw Discs
Recording (LVW-5005X model only) Record on a CD-R/CD-RW disc Before starting to record This DVD Recorder is a versatile unit that can record video in either VCD / SVCD or audio CD format on CD-R/RW discs. Please use qualified recordable disc to ensure the best recording quality. -
Page 22: Timer Record
Prior to timer record Please check that the recordable DVD disc or recordable CD disc (LVW-5005X model only) has enough space for the timer recording function. Before you start to record, follow the steps to set the date, time, picture quality and channel of the program manually. -
Page 23: Playback
Playback DVD/VCD/SVCD video disc playback Before you can start to enjoy the digital audio and video on DVDs, be sure that you have made the necessary settings in the Setup screen menus outlined in the previous section to correspond to your home system. Having made these settings, you are now ready to start using the player to enjoy DVDs, Video CDs, and CDs. -
Page 24: Navigation Operation
Playback Navigation operation During playback, press [ Navi.] to display the “Navigation” menu. SLOW MOTION Select a slow-motion speed. You can choose to play the disc at +1/2x, +1/4x or -1/2x, -1/4x. SEARCH Locating a desired position in the current title or track (time search). -
Page 25: Jpeg/Mp3 File And Audio Cd Playback
JPEG/MP3 file and Audio CD playback The unit can play an Audio CD, JPEG, or MP3 file on a disc. JPEG file playback Playing JPEG files 1.Place the JPEG disc on the tray. The disc will begin playback automatically. 2.Press [ ] or [ ] to advance to the next picture, or return to the previous picture. -
Page 26: Editing
Editing Before starting to edit This section explains the basic editing functions on the unit. Please finish all the editing before finalizing the disc.You cannot edit a finalized disc. DVD menu and Edit menu (DVD-R/-RW/+R/+RW discs only) 1. Press [ PLAY] or [ GUIDER] to display the “DVD Menu.”... -
Page 27: Easy Guider
You can select “EXIT” or press the [GUIDER] button again to exit the “Easy Guider” menu. LVW-5005X model only LVW-5005X employs the “ALL WRITE” technology and can record on almost all of the recordable discs. You may use one of the following types of discs for recording: DVD+RW, DVD+R, DVD-... -
Page 28: Record On Cd-R/Cd-Rw
Easy Guider Record on CD-R/CD-RW disc (LVW-5005X only) Note: Ensure to prepare the disc before you start to record. VCD/SVCD/Audio CD recording 1. Press [ GUIDER ] to display the “Easy Guider” menu. 2. Press [ ] [ ] to select the “Record” icon and then press [ENTER]. -
Page 29: Erase
[GUIDER] button again to exit the “Easy Guider” menu. LVW-5005X model only LVW-5005X employs the “ALL WRITE” technology and can record on almost all of the recordable discs. You may use one of the following types of discs for recording: DVD+RW, DVD+R, DVD-... -
Page 30: Gui Operation
GUI operation Changing settings This chart displays the settings for this unit. Change the settings to suit your preferences and to set up the unit in the environment in which it is being used. 1) Press [SETUP] to display the setup menu. 2) Press [ ] [ ] to select “System”... -
Page 31: Firmware Update
GUI Operation Audio Digital Output Settings of digital audio output. (Enable digital audio output with PCM data) Bit Stream (Enable digital audio output with encode data) DTS Output Enable/Disable Digital Theater System output. (Enable Digital Theater System mode) OFF (Disable Digital Theater System mode) TV Tuner TV Signal --->... -
Page 32: Glossary
Glossary 480i/480p Indicates the number of scanning lines and scanning format of an image signal. 480i indicates 480 scanning lines with interlace format, and 480p indicates 480 scanning lines with progressive format. Aspect ratio Aspect ratio refers to the length to height ratio of TV screens. The ratio of a standard TV is 4:3, while the ratio of a high-definition or wide TV is 16:9. -
Page 33: Specifications
Specifications (LVW-5001 model only) MEDIA TYPES SUPPORTED (Read Only): DVD-R/RW, DVD+R/RW, DVD-ROM, CD-R/RW, CD-ROM CONTENT FORMAT SUPPORTED : 1) DVD-Video 2) DVD+VR (DVD+VR format is compatible with DVD-Video in most case) 3) Video CD 4) Super VCD 5) Audio CD 6) MP3 Maximum number of files recognizable : 1000 files Compression rate : between 32 kbps and 320 kbps... - Page 34 Specifications (LVW-5005X model only) MEDIA TYPES SUPPORTED (Read Only): DVD-R/RW, DVD+R/RW, DVD-ROM, CD-R/RW, CD-ROM CONTENT FORMAT SUPPORTED : DVD-Video DVD+VR (DVD+VR format is compatible with DVD-Video in most case) Video CD Super VCD Audio CD Maximum number of files recognizable : 1000 files...
-
Page 35: Troubleshooting Guide
Troubleshooting Guide Picture The image from this unit does not appear on the television. --> Make sure that the TV is connected to the AUDIO/VIDEO terminal, SCART-S-VIDEO out terminal or COMPONENT VIDEO OUT terminals on this unit. (refer to “CONNECTING UP section) -->...
Need help?
Do you have a question about the LVW-5005X and is the answer not in the manual?
Questions and answers