
Subscribe to Our Youtube Channel
Related Manuals for Linksys WDT11


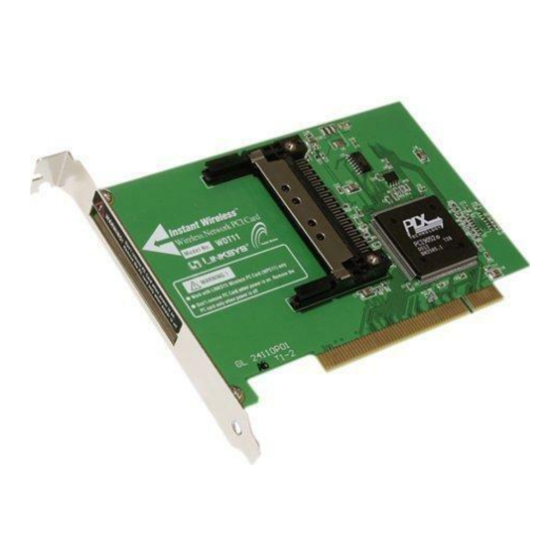
Summary of Contents for Linksys WDT11
- Page 1 Instant Wireless Series Network PC Card & PCI Adapter Use this Guide to install the following: WPC11 & WDT11 User Guide...
- Page 2 Linksys reserves the right to revise or update its products, software, or documentation without obligation to notify any individ- ual or entity.
-
Page 3: Table Of Contents
Table of Contents Introduction The Instant Wireless Wireless Network PC Card and PCI Adapter Features Package Contents for the Network PC Card System Requirements for the Network PC Card Package Contents for the PCI Adapter System Requirements for the PCI Adapter Planning Your Wireless Network Network Topology Roaming... -
Page 4: Introduction
Put the “mobile” back into mobile computing with the Linksys Instant Wireless ™ Network PC Card and PCI Adapter! Whether you’re at your desk or in the boardroom, the Linksys Instant Wireless™ Network PC Card and PCI Adapter allow you to share printers, files, and more anywhere within your wire- less LAN infrastructure, increasing your productivity and keeping you “in... -
Page 5: Package Contents For The Pci Adapter
Package Contents for the PCI Adapter • One Instant Wireless PCI Adapter • User Guide and Registration Card • One Driver CD-ROM System Requirements for the PCI Adapter • Pentium 90 or Faster • Minimum 16MB of RAM • PCI Local Bus 2.1 compliant Instant Wireless Series Network PC Card and PCI Adapter... -
Page 6: Installing The Pci Adapter And Network Pc Card In Your Desktop Pc
Installing the PCI Adapter and Network PC Card in Your Desktop PC Installing the PCI Adapter 1. Turn off your desktop PC. (If you are just installing the WPC11 on your notebook computer, please skip to the Installing the Network PC Card in your Notebook PC section.) 2. - Page 7 Windows will ask you to browse for the driver’s folder. Direct Windows to the CD-ROM and select the d:\WPC11- WDT11\Win9x folder (where D: is the letter of your CD-ROM drive). Click the OK button.
-
Page 8: Installing The Pci Drivers For Windows 98
Network PC Card and PCI Adapter 3. Make sure that Specify a location is selected and type D:\WPC11- WDT11\win9x in the location box (where “D” is the letter of your CD-ROM drive). 4. At this point, you will be returned to the Add New Hardware Wizard screen. -
Page 9: Installing The Pci Drivers For Windows Me
“Automatic search for better driver”, and click the Next button to proceed 2. When the screen below appears, make sure that the drop-down box reads “D:\WPC11-WDT11\Win9x” and click OK. 3. Windows will begin copying files from the Setup Utility CD. Windows may need files from the Windows Millennium CD to complete the installation. -
Page 10: Installing The Pci Drivers For Windows Nt
3. After Windows Millennium copies files from your CD, you will be notified that installation has been completed. Click the Finish button to continue. 4. Windows will now ask you to restart your computer. Click the Yes button to restart. Once your computer has restarted, you can continue on to the Configuration Utility section. - Page 11 Setup Utility CD has all of the appropriate drivers. Click the Have Disk button to continue. 6. On the Insert Disk screen, type “D:\WPC11- WDT11\ WINNT” (where D: is the letter of your CD-ROM drive) in the field provided. Then, click the OK button to continue.
- Page 12 Protocol is already selected by default, you should check with your net- worked computers before installing any additional network protocols. Click the Next button to continue. N N o o t t e e : : Linksys does not provide technical sup- port for TCP/IP configuration or troubleshooting. Instant Wireless...
- Page 13 12. Windows NT may request further files at this point. Type “ D : \ W P C 1 1 - WDT11\WINNT” in the field provid- ed and click the Continue button. If files are still requested, insert your Windows NT...
- Page 14 17. Verify that the correct information is presented on this screen, which will appear next. To make any corrections, click the Back button. To continue, click the Next button. 8. Windows NT has now completed installing the network. Click the Finish button to continue and then restart your computer.
- Page 15 4. On the Insert Disk screen, type “ D : \ W P C 1 1 - WDT11\WINNT” in the field provided (where “D” is the let- ter of your CD-ROM drive). Make sure the Setup Utility CD is inserted in the CD- ROM drive.
-
Page 16: Installing The Pci Drivers For Windows 2000
Installing the PCI Drivers for Windows 2000 1. Windows 2000 will automatically identify the Network PC Adapter, once it is connected to the PC, and prompt you to install the necessary driver. Make sure that the Setup Utility CD (included) is inserted into your CD-ROM drive and click the Next button on the Found New Hardware Wizard screen to proceed. -
Page 17: Installing The Network Pc Card In Your Notebook Pc
5. The Digital Signature Not Found screen is a notification by Windows 2000. However, this does not mean that there is a problem. Click the Yes button to continue. 6. Windows will now install the driver files. The installation is now complete. Click the Finish button when completed and restart your computer. - Page 18 Click the Other Locations button to select the driver’s location. 3. This will bring you to the Select Other Location screen. In the Location box, type “d:\WPC11-WDT11\win9x” (where D: is the letter of your CD- ROM drive). Then click the OK button. Instant Wireless...
-
Page 19: Installing The Drivers For Windows 98
Network PC Card and PCI Adapter 3. Make sure that Specify a location is selected and type “d:\WPC11- WDT11\Win9x” in the drop down box (where “D” is the letter of your CD- ROM drive). Click the OK button. 4. Windows is now ready to install the driver. Click the Next button to continue. -
Page 20: Installing The Drivers For Windows Me
2. When the screen below appears, make sure that the drop-down box reads “D:\WPC11-WDT11\Win9x” and click OK. 3. Windows will begin copying files from the Setup Utility CD. Windows may need files from the Windows Millennium CD to complete the installation. If you are prompted to do so, insert your Windows Millennium CD into the CD-ROM drive. -
Page 21: Setting Up The Network Pc Card For Windows Nt
4. After Windows Millennium copies files from your CD, you will be notified that installation has been completed. Click the Finish button to continue. 5. Windows will now ask you to restart your computer. Click the Yes button to restart. Once your computer has restarted, you can continue on to the Configuration Utility section. - Page 22 Click the Have Disk but- ton to continue. 6. When the Insert Disk screen appears, type “D:\WPC11- WDT11\WINNT” (where D: is the let- ter of your CD-ROM drive) in the field provided. Then, click the OK button to continue.
- Page 23 Protocol is already selected by default, you should check with other net- worked computers before installing any additional network protocols. Click the Next button to continue. N N o o t t e e : : Linksys does not provide technical sup- port for TCP/IP configuration or troubleshooting. Instant Wireless...
- Page 24 12. Windows NT may request further files at this point. Type “ D : \ W P C 1 1 - WDT11\WINNT” (where D: is the let- ter of your CD- ROM rive) in the field provided and click the OK button.
- Page 25 17. On this screen, you will enter your a unique Computer Name, which is how your computer will be identified on the network. You will also assign the computer to either a Workgroup or Domain, whichever is appropriate. Select either Workgroup or Domain, and enter the name of which one is appropriate.
- Page 26 Click the Have Disk button to continue. 4. On the Insert Disk screen, type “D:\WPC11-WDT11\WINNT” (where D: is the letter of your CD-ROM drive) in the field provided. Then, click the OK button to continue. 5. The Select OEM Option screen will show two options from which to choose.
-
Page 27: Setting Up The Network Pc Card For Windows 2000
Network PC Card and PCI Adapter 3. Select Specify a location, click the Next button, then type in “D:\WPC11- WDT11\win2000” (where D: is the letter of your CD-ROM drive) and click the Next button. Type in d:\WPC11-WDT11\win2000 (where “D” is the letter of your CD-ROM drive) in the Copy manufacturer’s files from field... -
Page 28: Configuring The Network Pc Card
5. The Digital Signature Not Found screen is a notification by Windows 2000. However, this does not mean that there is a problem. Click the Yes button to continue. 6. Windows will now install the driver files. Click the Finish button when completed. - Page 29 2. Select Channel from the list provided and select a Value, from the drop down menu on the right, between 1 and 11. This Channel must be the same for all wireless devices on your network. Click Network Type to continue or the OK button to finish.
- Page 30 6. A preamble is a signal used to synchronize the transmis- sion timing between two or more systems. A series of transmission pulses is sent before the data to indicate that "someone is about to transmit data". This ensures that systems receiving the information correctly inter- pret when the data transmis- sion starts.
-
Page 31: Configuring The Network Pc Card For Windows Nt
Configuring the Network PC Card for Windows NT The Resources and Properties screen allows you to make modifications your Network PC Card, optimizing performance. Check with your other wireless PCs before making any changes and then follow these steps when configuring Resource and Properties Fields:... - Page 32 4. The SSID depends on what Mode is selected. If the Mode is Infrastructure, it should have the same SSID name as the Access Point. If the Mode is Ad-Hoc, all clients should share the same SSID name. 5. The DS Channel setting must be the same for all wireless points in the network.
- Page 33 8. Select Power Save Mode and select either “Enabled” or “Disabled”. “Disabled” will allow for uninterrupted data communication. Selecting “Enabled” allows your note- book to enter “sleep” mode and could interrupt data com- munication. For further infor- mation about Power Save Mode, see the chapter entitled Configuration Utility.
-
Page 34: Configuring The Network Pc Card For Windows 2000
12. The TX Rate setting should remain Fully Auto as set by default. Changing this to a different transfer rate will lock in that rate and may result in dropped connections. You may choose between 1, 2, 5.5, 11, or Fully Auto. Click the OK button to continue. -
Page 35: Installing Network Protocols
4. On the Properties screen, click the Configure button to config- ure your card. 5. The next screen that you will see will be the General tab. This will give you information on status Network PC Card. Click the Advanced tab to configure your card. -
Page 36: Configuration Utility
“ Ma nu f a c tur e r s” and TCP/IP from the list of “Network Protocols” and click the OK button. N N o o t t e e : : Linksys does not provide technical sup- port for TCP/IP config- uration or troubleshoot- ing. - Page 37 3. The Destination screen will show you the default destination selected by the utility. If you should want to install this in another location, click the Browse button and select an alternate destination. When you are ready to continue, click the Next button. 4.
-
Page 38: Configuring The Network Pc Card With The Configuration Utility
Configuring the Network PC Card with the Configuration Utility After you start up the utility from the Program Folder as specified in the previous section, you will see the Wireless LAN Configuration Utility screen. This utility is divided into four parts: Link Info, Configuration, Encryption, and About. Each part will be explained here. - Page 39 ENCRYPTION The 40-bit or 128-bit WEP keys can be generated from a user-defined passphrase or entered manually. An acronym for Wired Equivalent Privacy, WEP is an encryption scheme used to protect your wireless data communications. WEP uses a combination of 40-bit or 128-bit keys to provide access control to your network and encryption security for every data transmission.
-
Page 40: Troubleshooting
This chapter provides solutions to problems usually occurring during the instal- lation and operation of the Network PC Card. Read the description below to solve your problems. If you can’t find an answer here, check the Linksys web- site at www.linksys.com. - Page 41 What is Roaming? Roaming is the ability of a portable computer user to communicate continu- ously while moving freely throughout an area greater than that covered by a sin- gle Access Point. Before using the roaming function, the workstation must make sure that it is the same channel number with the Access Point of dedicat- ed coverage area.
-
Page 42: Appendix
Can Instant Wireless products support printer sharing? Instant WirelessTM products perform the same function as LAN products. Therefore, Instant WirelessTM products can work with NetWare, Windows NT/2000, or other LAN operating systems to support printer or file sharing. What is WEP? WEP is Wired Equivalent Privacy, a data privacy mechanism based on a 40 bit shared key algorithm, as described in the IEEE 802.11 standard. -
Page 43: Environmental Information For The Network Pc Card
FROM THE PRODUCT'S PACKAGING ON HAND WHEN CALLING. RETURN REQUESTS CANNOT BE PROCESSED WITHOUT PROOF OF PURCHASE. IN NO EVENT SHALL LINKSYS’ LIABILITY EXCEED THE PRICE PAID FOR THE PRODUCT FROM DIRECT, INDIRECT, SPECIAL, INCIDEN- TAL, OR CONSEQUENTIAL DAMAGES RESULTING FROM THE USE OF THE PRODUCT, ITS ACCOMPANYING SOFTWARE, OR ITS DOCU- MENTATION. -
Page 44: Contact Information
Contact Information For help with the installation or operation of this product, contact Linksys Customer Support at one of the phone numbers or Internet addresses below. Sales Information 800-546-5797 (LINKSYS) Tech Support 800-326-7114 RMA Issues 949-261-1288 949-261-8868 Email support@linksys.com http://www.linksys.com FTP Site ftp.linksys.com... - Page 45 © Copyright 2001 Linksys, All Rights Reserved.
Need help?
Do you have a question about the WDT11 and is the answer not in the manual?
Questions and answers