SunFounder Pironman Manual
Hide thumbs
Also See for Pironman:
- Manual (67 pages) ,
- Manual (107 pages) ,
- Assembly instructions manual (119 pages)
Table of Contents
Advertisement
Advertisement
Table of Contents

Related Manuals for SunFounder Pironman


Summary of Contents for SunFounder Pironman
- Page 1 SunFounder Pironman www.sunfounder.com Nov 01, 2022...
-
Page 3: Table Of Contents
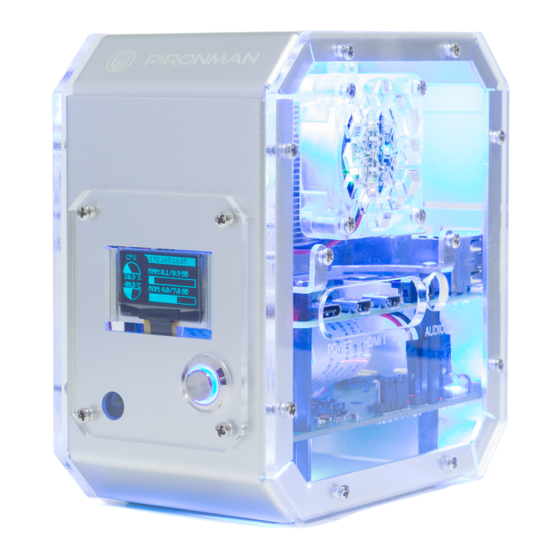
......... . 5 5. Set up the Pironman Change the config.txt... - Page 5 SunFounder Pironman Pironman is SunFounder’s customized Mini PC for Raspberry Pi. Just connect the screen, mouse and keyboard, and you can use it for projects, entertainment and office. • Small size of 4.43” x 2.69” x 4.68” • Raspberry Pi mini PC •...
- Page 6 SunFounder Pironman CONTENTS...
-
Page 7: 1. What Else Should We Prepare
• Raspberry Pi 4 Model B Pirionman is fully compatible with Raspberry Pi 4 Model B. If you have Raspberry Pi 1B+/2B/3B/3B+, you can use them as well, but the tower cooler inside the Pironman may not be as compatible. - Page 8 SunFounder Pironman When you use a screen, a USB keyboard and a USB mouse are also needed. • Sound or Earphone The Raspberry Pi is equipped with an audio port about 3.5 mm that can be used when your screen has no built-in speakers or when there is no screen operation.
-
Page 9: 2. Component List And Assembly Instructions
CHAPTER 2. COMPONENT LIST AND ASSEMBLY INSTRUCTIONS Before assembling the Pironman, please first verify that all parts and components have been included. If there are any missing or damaged components, please contact SunFounder immediately at cs@sunfounder.com to resolve the issue as soon as possible. - Page 10 SunFounder Pironman Chapter 2. 2. Component List and Assembly Instructions...
-
Page 11: 3. Installing The Os
CHAPTER THREE 3. INSTALLING THE OS Note: • You can check the complete tutorial on the official website of the Raspberry Pi: raspberry-pi-setting-up. • If your Raspberry Pi is set up, you can skip the part and go into the next chapter. Step 1 Raspberry Pi have developed a graphical SD card writing tool that works on Mac OS, Ubuntu 18.04 and Windows, and is the easiest option for most users as it will download the image and install it automatically to the SD card. - Page 12 SunFounder Pironman Step 3 Insert your SD card into the computer or laptop SD card slot. Step 4 In the Raspberry Pi Imager, select the OS that you want to install and the SD card you would like to install it on.
- Page 13 SunFounder Pironman Step 6 Press Ctrl+Shift+X or click the setting icon to open the Advanced options page to enable SSH and set username and password. Note: • Now that the Raspberry Pi doesn’t have a default password, you will need to set it yourself. Also, the username can be changed.
- Page 14 SunFounder Pironman your Raspberry Pi. Step 7 Click the WRITE button. Chapter 3. 3. Installing the OS...
- Page 15 SunFounder Pironman Step 8 If your SD card currently has any files on it, you may wish to back up these files first to prevent you from permanently losing them. If there is no file to be backed up, click Yes.
- Page 16 SunFounder Pironman Step 9 After waiting for a period of time, the following window will appear to represent the completion of writing. Chapter 3. 3. Installing the OS...
- Page 17 SunFounder Pironman...
- Page 18 SunFounder Pironman Chapter 3. 3. Installing the OS...
-
Page 19: 4. Login To Raspberry Pi
3. Connect the screen to Raspberry Pi’s HDMI port. 4. Power the Pironman with a 5V/3A Type C cable and press the power button on the Pironman to turn it on. 5. After a few seconds, the Raspberry Pi OS desktop will be displayed. -
Page 20: If You Have No Screen
SunFounder Pironman 6. Now you can open the terminal by clicking the icon in the upper left corner. Note: Don’t forget to press the power button on the Pironman to turn it on. 4.2 If You Have No Screen If you don’t have a display, you can log in to the Raspberry Pi remotely. However, you need to get the IP address of the Raspberry Pi first and then use an application to log in to the Raspberry Pi as SSH. - Page 21 SunFounder Pironman 4.2.1 1. Get the IP Address After the Raspberry Pi is connected to WIFI, we need to get the IP address of it. There are many ways to know the IP address, and two of them are listed as follows.
- Page 22 SunFounder Pironman 4.2.2 2. Use the SSH Remote Control We can open the Bash Shell of Raspberry Pi by applying SSH. Bash is the standard default shell of Linux. The Shell itself is a program written in C that is the bridge linking the customers and Unix/Linux. Moreover, it can help to complete most of the work needed.
- Page 23 SunFounder Pironman Step 4 Input the passcode and the password. Step 5 We now get the Raspberry Pi connected and are ready to go to the next step. 4.2. If You Have No Screen...
- Page 24 SunFounder Pironman Note: When you input the password, the characters do not display on window accordingly, which is normal. What you need is to input the correct password. For Windows Users If you’re a Windows user, you can use SSH with the application of some software. Here, we recommend PuTTY.
- Page 25 SunFounder Pironman Step 3 Click Open. Note that when you first log in to the Raspberry Pi with the IP address, there prompts a security reminder. Just click Yes. Step 4 When the PuTTY window prompts login as, type in pi (the user name of the RPi), and password.
- Page 26 SunFounder Pironman Step 5 Here, we get the Raspberry Pi connected and it is time to conduct the next steps. Note: If you are not satisfied with using the command window to control the Raspberry Pi, you can also use the remote desktop function, which can help us manage the files in the Raspberry Pi easily.
-
Page 27: 5. Set Up The Pironman
FIVE 5. SET UP THE PIRONMAN Note: This Pironman is used in the same way as PC and requires the power button to power on/off. 5.1 Change the config.txt Before you can start using Pironman, you need to configure the power button and the IR receiver. -
Page 28: Modify The Configuration
5.3 Modify the Configuration In the pironman module, we have some basic configurations for Pironman, and you can check them with the fol- lowing command. pironman -c The current configurations are shown below. - Page 29 file. sudo nano ~/.config/pironman/config.txt Press Ctrl+X -> Y -> Enter to save and exit editing. Note: For details on the introduction and configuration of the components in Pironman, please refer to: 6. About Hardware. 5.3. Modify the Configuration...
- Page 30 SunFounder Pironman Chapter 5. 5. Set up the Pironman...
-
Page 31: 6. About Hardware
CHAPTER 6. ABOUT HARDWARE 6.1 Features Functions • Raspberry Pi mini PC • Tower cooler can cool a 100% CPU load Pi to 39°C at 25°C room temperature • Onboard USB to M.2 SATA SSD, TRIM supported • IR Receiver for multi-media center like Kodi or Volumio •... - Page 32 SunFounder Pironman e. USB 3.0 f. Gigabit LAN port g. USB Type C Raspberry Pi power supply (direct power to Raspberry Pi, not recommended) h. micro HDMI x 2 i. 3.5mm headphone jack 7. Power button 8. OLED screen: 0.96” 128x64 resolution 9.
-
Page 33: Main Board
SunFounder Pironman 6.2 Main Board About the Jumper Caps 6.2. Main Board... -
Page 34: Oled Screen
OLED screen in Sleep Mode. Power Cut Memory When the Pironman suddenly loses power, the chip of the Main Board will record this state and will automatically power on the next time. -
Page 35: Cooling Fan
Note: The WS2812 RGB Strip is connected to GPIO12. The WS1812 RGB Strip is a light strip with 8 RGB LEDs that can be used to display Pironman’s status. You can use commands to make it turn on or off, or to modify its color (default is blue), display mode and change rate. -
Page 36: Power Button
Raspberry Pi’s files or leave some changes unsaved. 2. Safe Shutdown There is also a way to safely turn off the Pironman by pressing and holding the power button for 2 seconds after configuring it. 6.7 IR Receiver... -
Page 37: Sata Ssd
Note: The M.2 SSD hard drive interface only supports SATA protocol, not NVME/PCIe. In the Pironman’s mainboard, there is an M.2 SSD connector for installing your M.2 SATA SSD. Various lengths of M.2 SATA SSD can be mounted: 22mm x 30mm, 42mm, 60mm, and 80mm, supporting SSD TRIM function. - Page 38 SunFounder Pironman 2. Remove the screw for the M.2 SATA SSD. Chapter 6. 6. About Hardware...
- Page 39 SunFounder Pironman 3. Insert your M.2 SATA SSD. 4. Screwed in place. 6.8. M.2 SATA SSD...
- Page 40 SunFounder Pironman 5. Put the base plate back on. 6. Plug in SSD Bridge and 5V/3V power supply. Chapter 6. 6. About Hardware...
- Page 41 SunFounder Pironman Booting from SSD 1. Updating the Bootloader sudo apt update sudo apt full-upgrade sudo rpi-update sudo rpi-eeprom-update -d -a After setting, reboot to take effect. 2. Use the following command to view the name of the storage device.
- Page 42 3. Now, clone the system from the Micro SD card to the M.2 SATA SSD. Where if is followed by the sd card name and of is followed by the M.2 SSD name. sudo dd if=/dev/mmcblk0 of=/dev/sda bs=4M 4. Pull out the Micro SD card, connect the M.2 SATA SSD and then power on the Pironman. Chapter 6. 6. About Hardware...
-
Page 43: 7. Appendix
CHAPTER SEVEN 7. APPENDIX 7.1 Remote Desktop There are two ways to control the desktop of the Raspberry Pi remotely: VNC and XRDP, you can use any of them. 7.1.1 VNC You can use the function of remote desktop through VNC. Enable VNC service The VNC service has been installed in the system. - Page 44 SunFounder Pironman Step 3 P3 VNC Step 4 Select Yes -> OK -> Finish to exit the configuration. Chapter 7. 7. Appendix...
- Page 45 SunFounder Pironman Login to VNC Step 1 You need to download and install the VNC Viewer on personal computer. After the installation is done, open it. Step 2 Then select “New connection”. Step 3 Input IP address of Raspberry Pi and any Name.
- Page 46 SunFounder Pironman Step 4 Double click the connection just created: Chapter 7. 7. Appendix...
- Page 47 SunFounder Pironman Step 5 Enter Username (pi) and Password (raspberry by default). 7.1. Remote Desktop...
- Page 48 SunFounder Pironman Step 6 Now you can see the desktop of the Raspberry Pi: Chapter 7. 7. Appendix...
- Page 49 SunFounder Pironman That’s the end of the VNC part. 7.1.2 XRDP Another method of remote desktop is XRDP, it provides a graphical login to remote machines using RDP (Microsoft Remote Desktop Protocol). Install XRDP Step 1 Login to Raspberry Pi by using SSH.
- Page 50 SunFounder Pironman Step 4 Finished the installation, you should login to your Raspberry Pi by using Windows remote desktop applications. Login to XRDP Step 1 If you are a Windows user, you can use the Remote Desktop feature that comes with Windows. If you are a Mac user, you can download and use Microsoft Remote Desktop from the APP Store, and there is not much difference between the two.
- Page 51 SunFounder Pironman Then the xrdp login page pops out. Please type in your username and password. After that, please click “OK”. At the first time you log in, your username is “pi” and the password is “raspberry”. Step 4 Here, you successfully login to RPi by using the remote desktop.
-
Page 52: Install Kodi On Raspberry Pi Use Osmc
SunFounder Pironman 7.2 Install Kodi on Raspberry Pi Use OSMC is one of the most popular ways to play media on your Raspberry Pi. It supports a large number of different media formats, and you can use this media center software to play music, videos, and even show your images. - Page 53 SunFounder Pironman OSMC is an operating system distribution that uses Kodi media center software. One of the advantages of OSMC is that it is actively maintained and built on top of a full operating system, allowing it to be easily extended beyond its built-in Kodi functionality. For example, we can easily set up Netflix on it because we can easily access the backend.
- Page 54 SunFounder Pironman 7.2.2 Install the OSMC Image You will learn how to install OSMC image on a Micro SD card in this section. Traditionally, burning tools used to be Etcher and Win32 disk imager, but Raspberry Pi has now developed Raspberry Pi Imager, which is an all-in-one image and tool that makes image installation easy.
- Page 55 SunFounder Pironman 4. Here we choose OSMC. 5. Raspberry Pi 0/1, 2/3, 4/400 versions are provided; please select the appropriate version. 7.2. Install Kodi on Raspberry Pi Use OSMC...
- Page 56 SunFounder Pironman 6. After selecting the appropriate drive, then click Write. 7. Once the installation success message appears, you can pull out the Micro SD. Chapter 7. 7. Appendix...
- Page 57 1. Now pull out the Micro SD card and insert it into the card slot of the Piron. 2. Connect your display to the Pironman with the HDMI cable, then turn it on with the power switch. 7.2. Install Kodi on Raspberry Pi Use OSMC...
- Page 58 3. You will be greeted with the following screen when you launch OSMC for the first time. Please wait until the setup process is complete before continuing with our OSMC setup guide. 4. Once the installation is complete, you will need to reboot Pironman. You can reboot by long pressing the power switch or by re-plugging the power cable.
- Page 59 SunFounder Pironman this will help ensure that the time is correct. 7. You will be asked if you would like to rename your device here. Default device name is osmc and it is recom- mended to change to another name.
- Page 60 SunFounder Pironman 9. In this step, you will be asked to agree to OSMC’s and Kodi’s terms of service. Please select the Continue option after reading the license and agreeing to it. 10. Select a theme of your choice. For this guide, we will use the default OSMC theme.
- Page 61 SunFounder Pironman 11. Now you will be asked if you want to sign up for OSMC’s newsletter. For this guide, we will continue using the No thanks option. 12. At this point, you have now finally completed the initial configuration process of OSMC on your Raspberry Pi.
- Page 62 SunFounder Pironman 7.2.4 Configuring Network in OSMC In this section, we will show you how to configure the network for your device using the OSMC interface. 1. Go to the Settings option. 2. Then go to the My OSMC menu.
- Page 63 SunFounder Pironman 3. Select Network. This menu also contains several other options that can help you configure OSMC on your Raspberry Pi. 4. You can configure WIFI in this option, or just plug in a network cable, after which you will see information about the connection and remember this IP address, which you will need to access OSMC remotely later in the guide.
- Page 64 SunFounder Pironman 7.2.5 Files Transfer Sometimes you may need to transfer files between your OSMC device and your computer in order to edit, add, or change files that already exist. Depending on your previous experience, there are many ways to transfer files. Some of these methods work right out of the box (if SSH is enabled).
- Page 65 SunFounder Pironman Samba Server You can also transfer files using SMB server, which is a more intuitive and useful way. But you need to go to OSMC and install this server first, as follows. 1. Go to the My OSMC menu page and select the App Store icon.
- Page 66 SunFounder Pironman 2. Select Samba (SMB) Server. 3. Select Install. Chapter 7. 7. Appendix...
- Page 67 SunFounder Pironman 4. Select Apply to start the SMB server installation. 5. A popup will appear in the upper right corner to prompt you to install. Once the installation is complete, you will be able to access your Raspberry Pi files from your own computer.
- Page 68 SunFounder Pironman 6. On Windows, use Win+R to open Run Box. 7. Type \\ip address in the input box. 8. Now you will see a shared drive called osmc. Chapter 7. 7. Appendix...
- Page 69 SunFounder Pironman 9. Once you click in, you will see different folders and now you can transfer your music, videos or movies to them. 7.2.6 Adding OSMC’s videos to Scrape In this section, we will show you how to add a video folder for OSMC to scrape.
- Page 70 SunFounder Pironman 2. Next, we need to select the Files submenu. This submenu will allow you to browse through the imported folders or add additional folders. 3. Next, select the Add video.. option. In this option, we will add folders for OSMC’s Kodi to scan into its library.
- Page 71 SunFounder Pironman • The Browse option will allow you to find folders via OSMC’s file browser. • Add option will allow you to manually input the path to the directory. • Whichever route you take, choose the folder where your TV shows and movies are stored, then click OK.
- Page 72 SunFounder Pironman 6. After selecting the type of media the catalog contains, you can now select OK. OSMC will automatically select a known good information provider that will be used to scrape your library. OSMC will scan your video and search for its name in a database on the Internet. This scan allows it to retrieve posters, actors, messages and other interesting information about your video.
- Page 73 SunFounder Pironman 7.2.7 Configure a remote A 38KHz IR receiver is built into the Pironman and is connected to the GPIO13 pin, so you can use the remote control to control your Kodi. 1. Configure IR receiver 1. Go to the Settings -> My OSMC menu and select the Raspberry Pi icon.
- Page 74 SunFounder Pironman 2. Select a remote control 1. Kodi supports many different remotes and you can follow the instructions to configure them. Now go back to the My OSMC menu and select the Remotes icon to go to the configuration page.
- Page 75 SunFounder Pironman i. Logging in via SSH Now log in to the OSMC system remotely from your PC, the default name and password are osmc. Windows users can download an SSH client called PuTTY here. As an alternative, some Windows 10 installations provide access to a command line SSH client via “PowerShell” from the Windows Start Menu.
- Page 76 SunFounder Pironman 2. In the terminal, check if the Raspberry Pi detects your IR receiver with the following command. ls /dev/lirc A port message like /dev/lirc0 should appear. 3. Now to see if you can receive data from the remote.
- Page 77 SunFounder Pironman irrecord -d /dev/lirc0 • All you need to do is to run the above command. • Press the Enter key twice. • Name the remote control • Press and hold a key to sample until Please enter the name .. appears. .
- Page 78 SunFounder Pironman 9. Select the .conf file under your Home folder by Browse. 10. Once selected, press OK to select and then confirm your change. Chapter 7. 7. Appendix...
- Page 79 SunFounder Pironman At this point you can use your remote to control OSMC. 7.2. Install Kodi on Raspberry Pi Use OSMC...
Need help?
Do you have a question about the Pironman and is the answer not in the manual?
Questions and answers