Advertisement
Quick Links
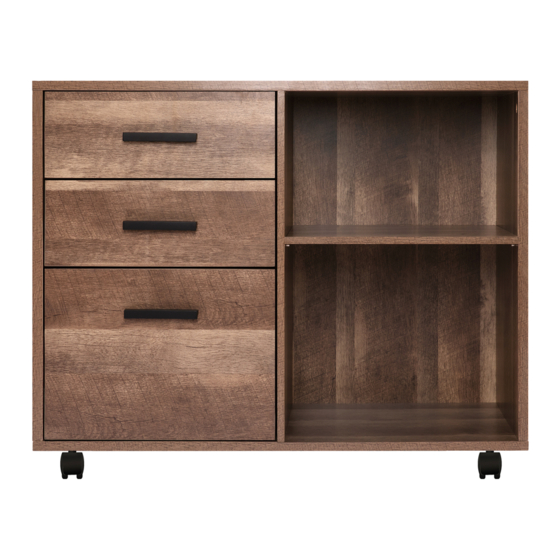
Rolling Office Cabinet
Assembly Instructions
Product Dimensions:
31.49 "L×15.74"D×25.98"H
Please take a moment to read through the entire instruction booklet before assembly to
familiarize yourself with this product. Once you feel ready to start, follow the instructions
step by step and this should make this process as easy as we could make it for you.
If you need help or have damaged or missing parts, contact customer service
Page 1 of 14
Advertisement

Summary of Contents for Naomi Home Parker Rolling Office Cabinet
- Page 1 Rolling Office Cabinet Assembly Instructions Product Dimensions: 31.49 ”L×15.74”D×25.98”H Please take a moment to read through the entire instruction booklet before assembly to familiarize yourself with this product. Once you feel ready to start, follow the instructions step by step and this should make this process as easy as we could make it for you. If you need help or have damaged or missing parts, contact customer service Page 1 of 14...
- Page 2 WARNING CAUTION ADULT ASSEMBLY REQUIRED CHOKING HAZARD This product includes small parts, sharp points and sharp edges in its unassembled state. • Keep unassembled parts away from children under 3 years of age, and animals. SAFETY WARNINGS Follow the information on the warnings appearing on cabinet and on the •...
- Page 3 ASSEMBLY AT A GLANCE Please take a moment to read through the whole instruction booklet before assembly to familiarize yourself with this product. Once you feel ready to start, follow the instructions step by step and this should make this process as easy as we could make it for you. This drawing is to give you an overall idea only of how this assembly will go together and does not replace the assembly instructions.
-
Page 4: Component Parts
COMPONENT PARTS Please check that you have all the parts listed below 1. Top Panel ×1 2. Left Side Panel×1 3.Middle clapboard×1 4. Right Side Panel×1 5.Movable Shelf ×1 6. Bottom Panel×1 7.Left backplane×1 8.Right back panel×1 9. Drawer Front Panel×2 10. - Page 5 ASSEMBLY INSTRUCTIONS Drawer Slide Inner Select N (×2) .Divide N(×2) into Drawer Slide Inner(×2) and Drawer Slide Outer(×2). Drawer Slide Outer Select H(×4).Divide H(×4) into Drawer Slide Inner(×4) and Drawer Slide Outer(×4) NOTE: To insert drawer to Drawer Slide Inner glide, please separate the two pieces of the glide, push the release tabs as indicated...
- Page 6 ASSEMBLY INSTRUCTIONS Front Drawer Slide Outer Select D(×9), (H)Drawer Slide Outer(×2), (N)Drawer Slide Outer(×1). REAR Insert D(×3) into (H)Drawer Slide Outer(×1) into 2.Repeat for another D(×3) and (H)Drawer Slide Outer(×1). Insert D(×3) into (N)Drawer Slide Outer(×1) Drawer Slide Outer into 2. Drawer Slide Outer FRONT BOTTOM...
- Page 7 ASSEMBLY INSTRUCTIONS Select C×6,E×6,6×1, 7×1, 8×1. Push 8 along the grooves of 3 and 4.Push 7 along the grooves of 2 and 3.Insert one side of the 6 into the 4 with C×2,E×2.Repeat for the 6 and 3,2. Select I(×16),J(×2),K(×2). Insert I(×8) into J(×2) into 6 tightly.Repeat for the I(×8) and K(×2).
- Page 8 ASSEMBLY INSTRUCTIONS Select L(×8), M(×8). Install the L(×8) into of the back of the Cabinet with the M(×8). Select E(×8),10(×2), 11(×2) and 12(×2). Insert E(×2) into the hole of the10 into the 12.Repeat the steps for 11 and 12. Page 8 of 14...
- Page 9 ASSEMBLY INSTRUCTIONS Select A(×8), F(×4), G(×2) and 9(×2). Install G into 9 with F(×2).With A(×4) is inserted into the hole of 9. Repeat for the other 9. Select B(×8),13(×2). Push 13 along the grooves of 10 and 11.Install the B(×4) into the 10 and 11.
- Page 10 ASSEMBLY INSTRUCTIONS Select D(×12), (H)Drawer Slide Inner(×4). Insert (H)Drawer Slide Left into 10 with D(×3). Repeat for the 11. Drawer Slide Inner Drawer Slide Inner Drawer Slide Inner Select E(×4),15(×1), 16(×1), 17(×1). Insert E(×2) into the hole of the 15 into the 17.Repeat the steps for 16 and 17.
- Page 11 ASSEMBLY INSTRUCTIONS ASSEMBLY INSTRUCTIONS Select A(×4), F(×2), G(×1) and 14(×1). Install G into 14 with F×2.With A(×4) is inserted into the hole of 14. Select B(×4),P(×2),18(×1). Push 18 along the grooves of 15 and 16.Insert P(×2) into 14 and 17.Install the B(×4) into the 15 and 16.
- Page 12 ASSEMBLY INSTRUCTIONS Select D(×3), (N)Drawer Slide Inner(×1). Attach (N)Drawer Slide Inner(×1) to 15 with D(×3). Drawer Slide Inner Drawer Slide Inner Select D(×3), (N)Drawer Slide Inner(×1). Attach (N)Drawer Slide Inner(×1) to16 with D(×3). Drawer Slide Inner Drawer Slide Inner Page 12 of 14...
- Page 13 ASSEMBLY INSTRUCTIONS ASSEMBLY INSTRUCTIONS Put the Drawers (×3) into the Cabinet. Select O(×4), 5(×1). Insert O(×4) into 3 and 4.Put 5 on the O(×4). Page 13 of 14...
- Page 14 ASSEMBLY COMPLETE CONGRATULATIONS, YOUR ROLLING OFFICE CABINET IS COMPLETE! Page 14 of 14...


