Advertisement
Please contact us via eva@agptek.com, when anything comes to your mind, we urge to turn this little thing into the best music player in the world and in your hand.
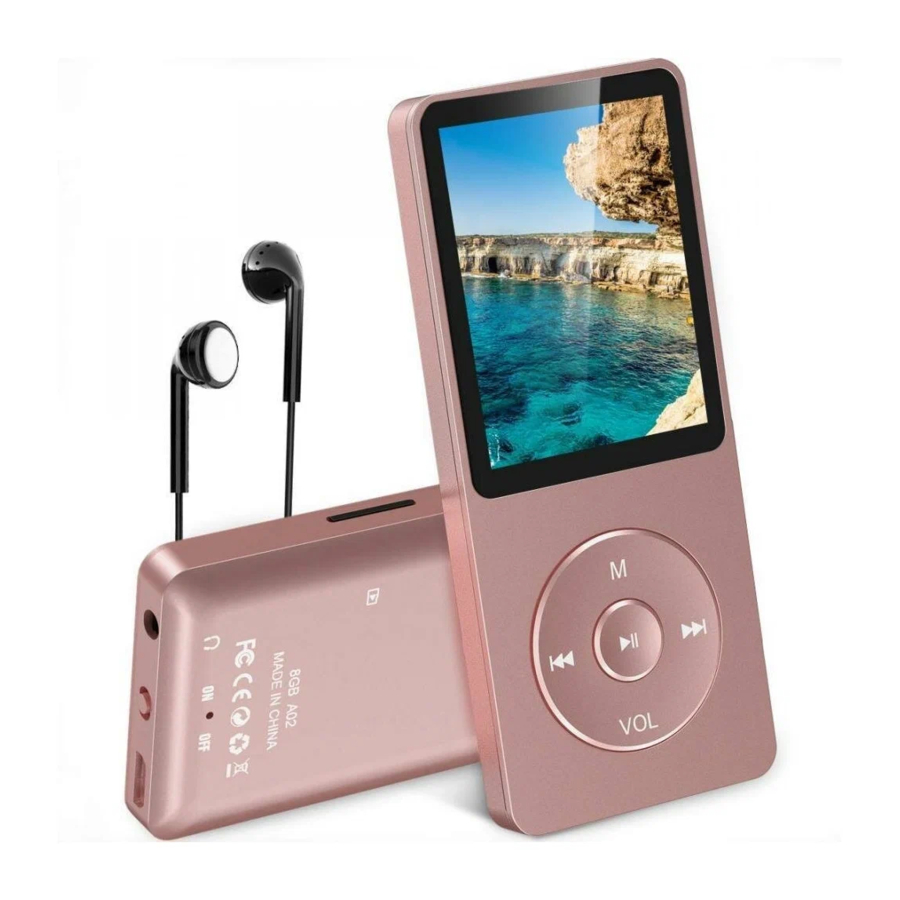
Quick Guide
- Plug Earphone into the jack on bottom right of your device, then turn power switch to on and the mark of AGPtEK will show on Screen.
- Each time you press the button, it will bring you to one of its nine different functions, including Music, Video, Radio, Pictures, Recordings, EBook, Folder, Tools, and Setting.
- Press the button
![]() when choosing the icon "music" to start its function, and you will see a list including items such as all songs, create playlist, artists, albums, genres, Album art, and playlists.
when choosing the icon "music" to start its function, and you will see a list including items such as all songs, create playlist, artists, albums, genres, Album art, and playlists. - You can play your music according different items as you like, such as artists, albums, etc., and choose the button
![]() for entering. When it is on the main interface of playing, press the button
for entering. When it is on the main interface of playing, press the button![]() to set the song, and press the button
to set the song, and press the button![]() to back up to the previous level.
to back up to the previous level. - Press the button
![]() and
and ![]() at the same time to lock the player, push the two keys again to unlock it.
at the same time to lock the player, push the two keys again to unlock it.
 to set the song, and press the button
 to back up to the previous level.
  and
and 
Charging the Battery

- Plug one end of the micro USB cable into the USB port of a computer or into the mains plug.
- Plug the other end of the cable into the micro USB port on your device.
- When the device is fully charged, disconnect the cable from your device by pulling it straight outward.
Power On and Off
You can turn your player on and off through the switch button and the button 
- Turn the slider switch to on, the player will power up.
- When the slider switch is turned to on, it will be turned on / off by pressing the center button for three seconds.
- When the player is on the song playing screen, press the button VOL and then press the center button to turn off it. The next time you switch back on the player, it will start from the last position it left off.

Note: If you cannot switch on the player, please check if you turn the switch to on.
Play Your Music

- Return and rewind/forward
- When the player is on music playing screen, there are two ways for you to return:
- Return with the button "M"
Press "M" button, a related list will show with the item "Home", choose it and then you will return to the main interface. - Return with the button
![]() and
and ![]()
Press the button![]() to return to the last grade, press the button
to return to the last grade, press the button ![]() continually to return to the main interface.
continually to return to the main interface.
- Return with the button "M"
- Use the button
![]() for rewind/forward
for rewind/forward
Hold button![]() to fast rewind, tap to the previous song; Hold the button
to fast rewind, tap to the previous song; Hold the button ![]() to fast forward, tap to the next song.
to fast forward, tap to the next song.
- When the player is on music playing screen, there are two ways for you to return:
- Shuffle and repeat
- Shuffle your music through the button "M"
You can choose the song from "Music" or "Folder" to get into the music playing screen and then push the button M, you will find the item "Shuffle" under "Play mode".
Note: if you play the song through "Music", it will only shuffle the songs in the folder which your music is included. If you play the song through "Folder", it will shuffle songs by folder. - Shuffle your music through "Setting"
You can also shuffle your songs under play mode by pressing the button "Setting" on main interface. When "Shuffle" is for on in this situation, you can shuffle your songs in two ways:- Back to the main interface, and then choose "Music" or "Folder" to shuffle your songs
- Choose with the "Play music from..." under play mode of "Setting", please note that the songs you shuffle are from "Music" in this situation.
Note: The condition of shuffle in music playing screen are always the same as it's in the "Setting"
- To repeat your songs
You can repeat your songs from the music playing screen by pressing the button M> "Play mode" > "Repeat", and you can also repeat by pressing "Setting"> "Play mode" > "Repeat". The player would only play the first 10 seconds of a track and then skip if you select option "View playing".
Note: if you play songs through "Music", it will only repeat in the folder which your songs is included. If you play songs through "Folder", it will repeat by folder with the option "Repeat all". The song you choose with the option "Repeat" under "Setting" are from "Music".
- Shuffle your music through the button "M"
- Play mode
There are easy mode and normal mode in this mp3 player for you to choose:- When the player is on the music playing screen, it comes to easy mode by pressing the center button (please press the central button for about 2 seconds), and press VOL and M to adjust the volume.
- The mp3 player comes back to normal mode by pressing the center button again. Press and hold VOL until the volume screens appears and then use M and VOL to adjust the volume.
- Resume playback
- Resume option
When you have dropped out from music playing interface, you could select "Resume" to start from where you left off if you are still under the menu of "Music". - Resume with power on/off
Press the button VOL to exist from the main playing screen and push the central button![]() for three seconds to switch off the player, the next time you turn on the player it will start from where you left off.
for three seconds to switch off the player, the next time you turn on the player it will start from where you left off.
- Resume option

 for rewind/forward
  to fast forward, tap to the next song.
Transfer Files to Your Player
- Connect your device to the computer with the enclosed Micro USB cable the mp3 player will show up as a removable disk as soon as the computer recognize it and then just drag files into the mp3 player. If your computer cannot recognize the player, the enclosed Micro USB lead may has problem please use another Micro USB lead to connect it to your PC.
- When your device is showed as a removable disk, you can put the files saved on your computer to your player. When the slider is "off" the unit will power up when connected to a USB port, and then go dead when disconnected. Slide the switch of the opposite position it will power up OK.
Right-click your device on computer, and then choose the item "Format" with exFAT option.

Note: if there is the "Disk error" showing for your device, please connect your player with the computer, and then format the disk with "exFAT" option.

Video and Radio
- Video
- Back to menu
- When is on video playing screen, press VOL or under other states press "
![]() " time to return to last menu.
" time to return to last menu. - Press "M" button, a related list will show with the item "Home", choose it and then you will return to the main interface.
- When is on video playing screen, press VOL or under other states press "
- Playing/Pause: tap the playing key
Fast rewind/fast forward: long pressing the last-song/next-song
Back to menu: in music play mode press VOL or under other states press "![]() " for short time to return to last menu.
" for short time to return to last menu.
Note: The product only supports 160*128 video, you may convert video files to this format by the tools included in the device. - To use the "amvtransform" included in the device Install the program on your computer first, and then press the icon
![]() to choose the file you want to convert on your computer, and choose the icon
to choose the file you want to convert on your computer, and choose the icon ![]() to put the converted video in the file on your A02 player. Choose the icon
to put the converted video in the file on your A02 player. Choose the icon ![]() to start convert, the bottom will show the progress of converting for the icon
to start convert, the bottom will show the progress of converting for the icon![]() , it will be ok until it showed 100%.
, it will be ok until it showed 100%.
![]()
- Back to menu
- Radio
- Manual tune and Auto tune
You can adjust the radio through "Manual tune" or "Auto tune",press the button![]() and
and ![]() for rewind and forward search one by one, and long press the button for searching automatically, then press the button
for rewind and forward search one by one, and long press the button for searching automatically, then press the button ![]() to stop on the channel you like.
to stop on the channel you like. - Set the FM radio with the button "M"
When it's on radio playing screen, press the button "M", and then a related list will show with the items "Home", "Previous menu", "Save to preset", "Tuner region" and so on.- Choose the item "Home" to main interface (You can also press VOL button and then press "
![]() " continually to return the main interface.). Choose "Previous menu" to back up to the last menu.
" continually to return the main interface.). Choose "Previous menu" to back up to the last menu. - Choose the item "Start FM radio recording" to save the radio you want to record, and you will find it in the item "FM recording".
Please kindly note that you can only listen to mono radio station on this player.
- Choose the item "Home" to main interface (You can also press VOL button and then press "
- Manual tune and Auto tune
 " time to return to last menu.
 to choose the file you want to convert on your computer, and choose the icon
  to put the converted video in the file on your A02 player. Choose the icon
  to start convert, the bottom will show the progress of converting for the icon
 , it will be ok until it showed 100%.
 and
and  for rewind and forward search one by one, and long press the button for searching automatically, then press the button
  to stop on the channel you like.
  " continually to return the main interface.). Choose "Previous menu" to back up to the last menu.
Recording and E book
- Recording
On main menu, press the button![]() to enter Recording function, there four items for you to choose, including start language record/recording library/record format/record setting/, press playing button
to enter Recording function, there four items for you to choose, including start language record/recording library/record format/record setting/, press playing button ![]() to enter it after choosing the item you want. Press
to enter it after choosing the item you want. Press ![]() key to save the recording.
key to save the recording. - E Book
On main menu, press the button![]() to enter E book function, please note it only supports "txt" format for your reading. Press the button
to enter E book function, please note it only supports "txt" format for your reading. Press the button ![]() and
and ![]() to turn the page up/down.
to turn the page up/down.
Please note: if you can't read your txt document through E book, connect your player to the computer, and then choose the file for the item "save as", select the code as "UTF-8" and save. Copy the txt file to E-Book folder and it will back to normal condition for your reading.
 to enter Recording function, there four items for you to choose, including start language record/recording library/record format/record setting/, press playing button
  key to save the recording.
 and
and  to turn the page up/down.
FAQ and Supports
- How to use the playlist
- To use the preset playlist.
Press the button and then choose the option "Add to playlist" for the song you want to operate. There are 3 items prepared for you, including "Playlist on the go [1]", "Playlist on the go [2]" and "Playlist on the go [3]", you can add the song to any one of these three as you like. - To create the playlist by yourself
Editing Playlist by media player could be painful, no matter by iPod or others. There is a free program called Media Go. It's the easiest program to use for transferring playlists to the AGPTek. Just create your playlists in Media Go and then right-click its name and select 'Add playlist to X:( Which is your MP3 player's disk) '. (You can download it at http://mediago.sony.com/chs/download)
After sending your playlist and music to the player, you may find it in "Music", and then select playlists.

- To use the preset playlist.
- How to add bookmark for your audio book
When it is on main audio playing interface, tap the button M to access to the submenu. Then a related list will show, choose "Bookmarks" with the option "Add bookmark".- It is marked by the stopping time as "hh: mm: ss". So you can set the stopping time before you add it for continues playing next time conveniently.
- Maximum number of bookmarks supported by each audio file is 10. You can also cover the previous bookmark with new bookmark, and then the old one will be replaced by the new.
- You can find the bookmarks you saved with the option "Go to bookmark" under item "Bookmarks", and you can delete them with the option "Delete bookmark".
- How to sort you music or audio books
- Sort by name in computer
The copying sequence has the highest priority. Before you copying them from your computer into the player, please arrange the files to a right sequence in computer (by name, like the picture below. Not by #, it is sorted by ASCII).
If the file order is sorted by name before you copying them into the player, they would be right order.
Note: To check the music you have arranged by name on your compute, you should open the "Music" of your player, and then just enjoy it. - Rename
If your music is not sort by the right number, use the application "Renamer" to sort your music by number. Download Renamer on the website (http://renameapp.codeplex.com/documentation), and then choose the item "Add folders" or "Add files" to add your music into list. You can set as the picture shows to number your music by sequence, and then choose the item "rename files" after you have arranged your music in right order.
Note: To check out the arranged music you have done, you need to open the "Folder" on the main interface of your player, and then you can enjoy your music as the arranged order.
- Sort by name in computer
- How to load tons (2000 up) of Music
Make separate folders in card and drop your tracks into them. You can do this on your PC in windows explorer.
Please kindly note that the player can only see a max of 4000 tracks! - How to load APE (lossless) music
An entire multi-track audio CD may be ripped to a single audio file and a cue sheet. However software audio players and hardware digital audio players often treat each audio file as a single playlist entry, which can make it difficult to select and identify the individual tracks. A common solution is to split the original audio file into a series of separate files, one per track.
Step 1: Download TTplayer via http://images.agptek.us/image/TTPlayer.rar. And then add your APE music into TT player.
Step 2: Select the music you need to convert, and then right click, choose "Convert Format".
Step 3: Now Choose "Monkey's Audio (APE)" and sampling rate conversion from 44000 or 48000 Hz, and then "Convert now"
Step 4: when the conversion is finished, put the split APE music into your MP3 player.
Now, enjoy your music!
 music")
- Format Supported
music format MP3/WAV/APE/WMA/FLAC etc. Video format AMV (converted video) Picture JPG/JPEG/BMP E-book Support TXT FM radio Support Radio Lyrics display Support LRC Lyrics Recording WAV - How to sort music in SD card by artists, albums and genres
- Insert your micro SD card into the player
- Find 'Folder' icon and select it, then the player display two folders 'Local folder' and 'Card folder' and play one song from the card folder
- Press the button
![]() to exit from the song screen and press the button
to exit from the song screen and press the button ![]() to go back to the main menu.
to go back to the main menu. - Press the 'music' icon and you can see all the tracks on your micro SD card and sorted by artists, albums and genres.
Note: The 'Music' option can only show music on the internal memory or the card memory but not a combination of both.
- How to return from the music playing screen to the home screen
Push the button![]() for once, and then press the button
for once, and then press the button ![]() to go back to the main menu.
to go back to the main menu.
Or push the button M and the player display option "Back to home". - Why it can't play FLAC, or other music format
It does play FLAC. The music file only can be played within the range below:


 music")
 to exit from the song screen and press the button
  to go back to the main menu.
| MP3 | MP1 | Bit rate: 32kbps---448kbps |
| Sampling rate: 8KHz---48KHz | ||
| MP2 | Bit rate: 8kbps---384kbps | |
| Sampling rate: 8KHz---48KHz | ||
| MP3 | Bit rate: 8kbps---320kbps | |
| Sampling rate: 8KHz---48KHz | ||
| WMA | Bit rate: 5kbps---384kbps | |
| Sampling rate: 8KHz---48KHz | ||
| OGG | Bit rate: Q0--Q10(20kbps---499kbps) | |
| Sampling rate: 8KHz---48KHz | ||
| APE | Bit rate: Fast\Normal Compression (800kbps-1000kbps) | |
| Sampling rate: 8KHz---48KHz | ||
| FLAC | Bit rate: L0--L8(1000kbps-1200kbps) | |
| Sampling rate: 8KHz---48KHz | ||
| WAV | IMA-ADPCM | Bit rate: 32kbps---384kbps |
| Sampling rate: 8KHz---48KHz | ||
| MS-ADPCM | Bit rate: 32kbps---384kbps | |
| Sampling rate: 8KHz---48KHz | ||
| PCM | Bit rate: 128kbps---1536kbps | |
| Sampling rate: 8KHz---48KHz | ||
| AAC-LC | Bit rate:(8kbps---320kbps) | |
| Sampling rate: 8KHz---48KHz | ||
| ACELP | Bit rate: 5kbps---64kbps | |
| Sampling rate: 8KHz---16KHz | ||
You may convert the music by TTplayer which is included in the device of ape file, thus making them the playable range.
Select the music you need to convert, and then right-click, choose "Convert Format". Choose "Monkey's Audio (APE)" and sampling rate conversion from 44000 or 48000 Hz, and then "Convert now"
Precautions
- When the device freezes, turn it off, and then restart it.
- When the device only plays each song for 10 seconds, turn off the slideshow feature, or you may restore the player to factory's setting (in the setting).
- Player doesn't turn on
- Check the switch button and see if it is power-off
- Connect it with computer and then check it again
If the player still can't be used after charging, please contact with our customer service
- Serious Noise
- Please check whether the headset is clean or not, the dirt will cause noise
- Check whether the music file is damaged or not, please try another song for testing.
- The damaged music file may cause serious noise
- No sound in headset
- Please check whether the voice volume is setting up at 0
- Please check if there is any problem about the headset connecting
- Couldn't play audio books music
If the audio books' format is audible, you may use the tools below to convert it.
http://download.cnet.com/Free-AAC-to-MP3-Converter/3000-2140_4-76060139.html or http://toptitleweb.com/howtos/convert-aax-to-mp3.html - If the device could not recognize a Micro SD card, check if you switch from local folder to card folder.
VideosAGPtek A02 8GB MP3 player Review Video
Documents / Resources
References
Media Go - Sony Network Entertainment
http://images.agptek.us/image/TTPlayer.rar
![toptitleweb.com]() http://toptitleweb.com/howtos/convert-aax-to-mp3.html
http://toptitleweb.com/howtos/convert-aax-to-mp3.html![download.cnet.com]() Free AAC to MP3 Converter - Free download and software reviews - CNET Download
Free AAC to MP3 Converter - Free download and software reviews - CNET Download

Download manual
Here you can download full pdf version of manual, it may contain additional safety instructions, warranty information, FCC rules, etc.
Advertisement


Need help?
Do you have a question about the A02 and is the answer not in the manual?
Questions and answers