
Related Manuals for Linear Logic ScanGauge III


Summary of Contents for Linear Logic ScanGauge III
- Page 1 www.ScanGauge.com User Manual Plugs into the diagnostic connector already built into all 1996 or newer cars and light trucks. Version 1.0...
- Page 2 RIGHTS AND OBLIGATIONS The ScanGauge may be used on any number of vehicles. The software contained in the ScanGauge is copyright protected by Linear Logic and may not be transferred or disassembled and used in another product, in part or in whole.
-
Page 3: Table Of Contents
Installing the ScanGauge ScanGauge Overview Basic Operation and Features Installation Setup and Calibration Basic Setup Options Advanced Setup Options Fillup Calibration Backlight Display Operating Your ScanGauge Digital Gauges Trip Computers Scan Tool Advanced Features X-GAUGE Overview™ X-GAUGE Auto Scan Troubleshooting Where to Get Support View Firmware Version of Your ScanGauge Reset Your ScanGauge... -
Page 4: Installing The Scangauge
Installing the ScanGauge The ScanGauge is simple to install and requires no additional power source other than the OBD II connector. There are, however, some important considerations when choosing a location for your ScanGauge. Please see the Installation section for detailed information. ScanGauge Overview Basic Operation and Features Locating the OBDII Connector... -
Page 5: Scangauge Overview
ScanGauge Overview Package Contents • ScanGauge • Deluxe Window • Quick Start Guide Mount • 6ft OBDII Cable Overview... -
Page 6: Basic Operation And Features
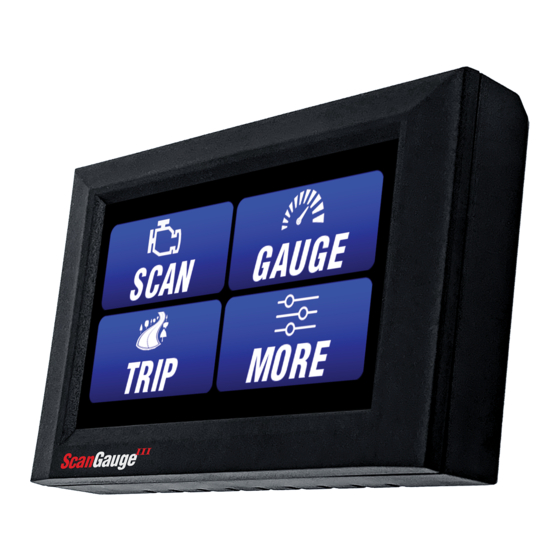
Basic Operation and Features Menu and Selection Buttons The ScanGauge 3 has a capacitive touch display. At the bottom of every screen is a small icon, pressing this button will bring you back to the home screen at any time. There are tabs at the top of many pages that help to navigate different menu and gauge screens. - Page 7 SCAN GAUGE Use the Scan Tool feature to view and clear trouble Use GAUGE to display up to 9 real-time codes and turn off the check engine light. Digital Gauges MORE TRIP Press the trip button to access the built-in Trip comput- Press the MORE button to access the ers.
-
Page 8: Installation
Installation Locate the OBDII connector. This connector is normally located under the dash on either Typical OBDII side of the steering column. It can also be located under the dash on the passenger side in some vehicles. On rare connector location occasions, it is behind the ashtray in the dash or in the armrest. -
Page 9: Connecting Your Scangauge
Turn the vehicle on. If the vehicle can be run, start it. If it cannot be run, turn the key to the Run position. This is the position it is normally in when the vehicle is being driven. Plug the ScanGauge plug into the OBDII socket. The ScanGauge derives all the power it needs from the OBDII connector. -
Page 10: Important Installation Considerations
Important Installation Considerations The ScanGauge has an operating temperature range of 0˚F to 160˚F (-18˚C to 71˚C). At higher tem- peratures, the display will become dark and difficult to read. At lower temperatures, the contrast will be reduced. As long as the temperature doesn’t exceed –22˚F to 176˚F (-30˚C to 80˚C), the display will return to normal operation when the ScanGauge temperature returns to the normal operating tempera- ture range. - Page 11 Set Up and Calibrate Your ScanGauge To get the most out of your ScanGauge, it is important to follow the setup and calibration procedures to ensure your ScanGauge reports accurate information. This section outlines the various setup options and provides detailed information about calibrating the ScanGauge for the most accurate readings.
-
Page 12: Setting Up Your Scangauge
Setting Up Your ScanGauge Initial Setup Overview To properly use your ScanGauge, you must first set up the vehicle parameters. Basic setup param- eters include engine size, fuel tank size, fuel type and units of measure. Advanced parameters are also available and are covered later in this chapter. Access the Setup Options Your new ScanGauge must first be set up so that it may report accurate information about your vehicle. - Page 13 It is dangerous to run a vehicle out of fuel and can damage the fuel pump. Do not rely on the fuel gauge or ScanGauge at low fuel levels or low remaining distance or time. Can the ScanGauge use Imperial Gallons? ScanGauge uses gallons as a unit label, not a unit of measurement.
-
Page 14: Advanced Setup Options
Advanced Setup Options Advanced Setup Overview and Adjustments The Advanced Setup and Adjustment Options provide additional setup parameters you can use to adjust the functions and features of the ScanGauge to suit both your vehicle and your preferences. ScanGauge provides a number of advanced setup parameters, including the ability to adjust the reported speed to compensate for oversized tires, the ability to set the fuel cutoff level, perform wifi firmware update, as well as the update rate at which ScanGauge reports data. - Page 15 Adjustment Parameters Setup Parameter Options Description Sets the speed offset to compensate Speed Adjustment -100%-100% for inaccurate speed readings. See page 17. 0-99 Sets the fuel cutoff level. Fuel Cutoff Setting See page 18. Fuel Price 0-99 Sets the fuel price without fill up Adjusts the Fuel Flow Calculation Fuel Flow Calc -99% - +99%...
-
Page 16: First Fill-Up Procedure
Set Speed Adjustments The speed indicated by ScanGauge can be adjusted to compensate for changes in tire size, gear changes, tire wear or any other factor that may affect the accuracy of your vehicle’s speedometer. It is important to note that this adjustment only affects the ScanGauge’s indicated speed and distances, and it does not affect the vehicle speedometer or odometer readings. - Page 17 Fuel Price Adjustment (without Fill Up) You can adjust the price per gallon/liter without doing the fill up. From the home screen press MORE then SETUP and select the ADJUST tab at the top. Scroll down to “Fuel Price” and change the cost by using the left plus and minus to change the dollar amount and the right side plus and minus button to adjust the cents.
- Page 18 Set the Speaker Volume The speaker volume for monitors and alarms can be adjusted here using the slider. Update Rate You can adjust the rate in which ScanGauge reports data. The effect of this setting is most visible in the Gauge Screen.
- Page 19 WIFI Update The ScanGauge can update to the latest firmware using WIFI on a 2.4ghz connection. To update navigate to the ADVANCED tab on the setup menu. Press WiFi update and then press Check For Updates. This will prompt you to select your wireless network and type in your password.
- Page 20 Filling Your Fuel Tank When you add fuel to your tank you can keep track of your tank information along with helping the ScanGauge to calibrate the fuel use calculation. From the home screen press MORE then FILLUP. This will bring you to the fill up screen. If you filled until the pump stopped itself you can press FULL on the bottom right, if you did not fill completly press PARTIAL.
- Page 21 Set Up and Callibration...
-
Page 22: Backlight Display
Backlight and Display Backlight and Display Options You can customize the backlight and display colors of your ScanGauge. Options include the ability to set the intensity of the backlight, choose a standard built-in color for the display, and create your own custom color for the gauges and menu. - Page 23 Change the Backlight Color You can select a preset color or mix your own using the RGB sliders. When you have “Gauge Preview” selected and change the color it will apply that color to the gauges. If you have “Menu Preview” selected it will apply it to the Menus.
-
Page 24: Operating Your Scangauge
Operating Your ScanGauge The ScanGauge features a simple and easy-to-use, menu-driven design. After each button is pressed, new selections will appear in the display prompting you for what can be done next. The HOME button at the bottom center of every screen will take you back to the home screen at any time. -
Page 25: Digital Gauges
Digital Gauges Digital Gauges Overview The ScanGauge can display up to 9 digital gauges at a time. The gauges are updated in real time when your vehicle is running and can be used to monitor the operating condition of your vehicle. Access the Digital Gauges From the Home Screen, press the GAUGE button. -
Page 26: Trip Computers
Trip Computers Trip Computer Overview The ScanGauge features 4 built-in trip computers. The trip computers automatically store a set of useful information about the trips you have taken in your vehicle and are updated in real time as you drive. Built-in Trip Computers Trip Computer Display Name... - Page 27 Accessing the Trip Computers From the Home Screen, press the lower left TRIP button, this will take you to the CURRENT trip which automatically resets itself after the ScanGauge is asleep. You can also press the RESET button and confirm your selection to manually reset the current trip. Using the tabs at the top of the screen you can view TODAY’s trip PREVIOUS day’s trip and the TANK trip.
- Page 28 Monitor and Alarm Set the Monitor and Alarm Function The ScanGauge can monitor sensors and alert you when they are at, above, or below certain conditions. From the gauge screen, press the gear icon in the bottom right of the screen. Using the tabs at the top, select MONITORS and press on any Empty slot, or select one you have previously made to edit or delete.
-
Page 29: Scan Tool
Scan Tool Scan Tool Overview The ScanGauge features a built-in Scan Tool that you can use to view and clear Diagnostic Trouble Codes (DTCs) and turn off the Check Engine light. Access the Scan Tool From the Home Screen, press the SCAN button in the top right corner to access the built-in Scan Tool. When you press SCAN, the ScanGauge automatically checks your vehicle’s computer for any DTCs. - Page 30 Emissions Tests If your vehicle has no trouble codes it will display if there are any emissions tests that have yet to pass. This will display in the center. You can press on the EMISSIONS button to view all tests and see which have not yet completed.
-
Page 31: Advanced Features
Advanced Features The ScanGauge includes the XGauge feature which can dis- play vehicle specific sensors as live data. This feature allows you to automatically scan for available parameters and also manually enter them as needed. Program Custom Gauges with X-GAUGE™ X-GAUGE Overview Auto Scan for X-GAUGE Manual Entry for X-GAUGE... - Page 32 Overview While all OBDII compliant vehicles supply a “standard” set of data that ScanGauge can read, some makes and models of vehicles can supply additional information beyond the standard set of data. Your ScanGauge features the exclusive X-GAUGE™ Programmable Gauge System that provides you a method to tap into this additional information.
- Page 33 The XGauges will now be viewable from the gauge screen. While on the gauge screen press on whichever gauge you would like to change and at the top of the screen you will see a tab labeled XGAUGE. Programming Your Own X-GAUGE In most cases the Auto Scan will find everything, but occasionally you may need to enter an XGauge in manually.
- Page 34 Programming Your Own X-GAUGE Continued Enter the RXD value and press NEXT followed by the MTH value, after entering that and pressing next it will bring you to the NAME screen. You can enter any name you like for this value and it will be what is displayed on the XGauge list in the gauge screen.
-
Page 35: Troubleshooting
Troubleshooting This section provides basic troubleshooting information. For more comprehensive information, please visit us online at: www.ScanGauge.com/support. Basic Troubleshooting View Firmware Version Reset Your ScanGauge ScanGauge Factory Reset Read or Set the Operating Mode Troubleshooting... -
Page 36: Where To Get Support
Basic Troubleshooting Where to Get Support Online: www.ScanGauge.com/support Below is a list of the more common troubleshooting tips. For a more comprehensive list of troubleshooting tips, tricks and frequently asked questions, please Phone: 1-480-656-4089 visit us online. E-mail: support@linear-logic.com Problem Possible Cause Solutions Nothing displayed and no... - Page 37 Problem Possible Cause Solutions Unable to clear trouble Vehicle is not responding to Sometimes multiple attempts are needed codes the Clear Codes command to clear the codes. You may also try clearing the codes with the vehicle not running, and the key in the on position. Some vehicles don’t respond properly to the Clear Codes command and the codes cannot be cleared by the ScanGauge.
-
Page 38: View Firmware Version
View Firmware Version and MAC address of Your ScanGauge From the Home Screen, press MORE then ABOUT. This page will display your version number, our contact information and your ScanGauge MAC ID. On the bottom right you can press Tutorial to view the Tutorial again at any time. -
Page 39: Reset Your Scangauge
Reset Your ScanGauge You can reset your ScanGauge to factory defaults and clear all custom settings and saved data. To Reset Your ScanGauge From the Home Screen, press MORE then SETUP then press the ADVANCED tab at the top and select Reset To Default on the list of options to the left. -
Page 40: Read Or Set The Operating Mode
ScanGauge Factory Reset The ScanGauge can be reset to factory firmware and settings. On the back of the ScanGauge there is a small hole and a button inside. With the ScanGauge unplugged you can use a pin or paperclip press inside and there is a small button. - Page 41 www.ScanGauge.com...
-
Page 42: Version 1.0
Limited Warranty Linear Logic will repair this product with new or rebuilt parts, free of charge, for a period of 3 years from the date of original purchase in the event of a defect in materials or workmanship. Warranty Service can be obtained by sending the product to:...
Need help?
Do you have a question about the ScanGauge III and is the answer not in the manual?
Questions and answers