
Related Manuals for RIAB V2/2022


Summary of Contents for RIAB V2/2022
- Page 1 ANLEITUNG S.2 - S.12 INSTRUCTION P.13 - S.23 MODE D‘EMPLOI P.24 - S.34 REGALSYSTEM SHELVING SYSTÈME D‘ÉTAGÈRES...
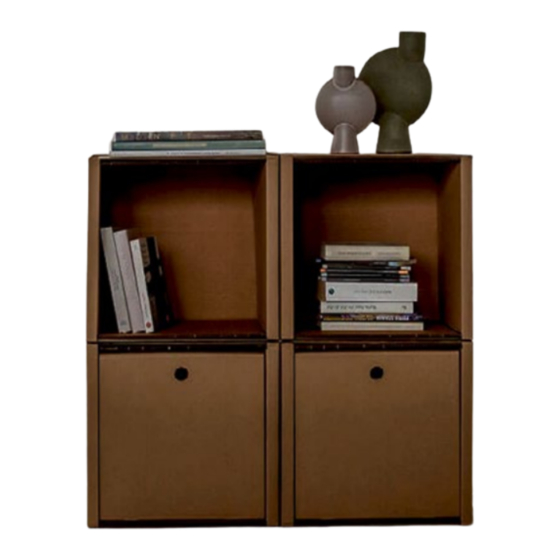
- Page 2 BESTIMMUNGSGEMÄSSE VERWEDUNG Das modulare Regalsystem ist ausschließlich zur Verwendung als Gestaltung eines Regals im Innenbereich bestimmt. Die maximale Stapelhöhe beträgt sechs Module. Das Regalsystem darf nur mit folgenden Maximalgewichten je Modul belastet werden: 10 kg in den unteren 3 Reihen; 7,5 kg in den Reihen vier bis sechs;...
- Page 3 Module dürfen niemals frei hängend montiert werden. Die Wandbefestigung dient nur zur Sicherung gegen Umkippen. Die maximale Tragkraft beträgt 10 kg pro Modul in den unteren drei Regalreihen und 7,5 kg von der vierten bis zur sechsten max. 7,5 kg Reihe.
- Page 4 Achtung: Die Zubehörteile sind nicht verankert und können herausfallen, wenn man sie zu weit rauszieht. Ab einer Höhe von 3 Modulen muss das oberste Modul mit der beiliegenden Wandbefestigung fixiert werden. Ab dem vierten Modul: Immer zwei Wandbefestigungen ver- wenden (3. Modul und oberstes). Die maximale zulässige Stapelhöhe beträgt sechs Module.
- Page 5 REGALMODUL ZUR MONTAGE BENÖTIGT BITTE BEACHTE: Wellpappe hat zwei Seiten. Die Seite mit den feineren Wellen (A) sollte immer außen sein. Die Seite mit den breiteren Wellen (B) befindet sich innen. Alle Teile einmal an den gerillten Stellen vorfalten.
- Page 6 GRUNDMODUL AUFBAU BITTE BEACHTE: Bei der Verwendung von mehr als einem Modul müssen diese mit den beiliegenden Verbindungselementen (siehe E) miteinander verbunden werden.
- Page 8 SCHUBLADE REGALBODEN TÜR...
- Page 9 SEITENWÄNDE 180° 1) Sollten sich die Seitenwände wieder nach Innen hin öffnen, empfiehlt es sich den Umschlag nochmals abzunehmen und die beiden Faltungen an der Stirnseite erneut um 180° zu knicken. Dies nimmt Spannung heraus und der Umschlag sollte somit besser in Position bleiben.
- Page 10 Um den Verbinder korrekt zu platzieren, musst du die Lage mit der sichtbaren Längswelle etwas nach außen drücken. Der Spatel hilft dir dabei. Verbinder entfernen...
- Page 11 WANDMONTAGE ENTSORGUNG Das Regalsystem ist recycelbar. Entsorge es am Ende seines Lebenszyklus in der Altpapiertonne bzw. dem in deiner Gemeinde geltenden Papierentsorgungssystem. CARTON CARTON Sollte deine Frage nicht beantwortet worden sein, kontaktiere uns gerne. Wir helfen dir weiter!
-
Page 12: Intended Use
INTENDED USE The modular shelving system is designed exclusively for use as a configuration shelf in the indoor. The maximum stacking height is six modules. The shelving system may only be loaded with the following maximum weights per module: 10 kg in the bottom 3 rows; 7.5 kg in rows four to six; 2.5 kg on the top surface of the shelving system. - Page 13 Do not sit on the shelving system! Modules must never be mounted freely suspended. The wall mounting serves only to secure against tipping over. Maximum load capacity is 10 kg per module on the lower three rows of shelves and 7.5 kg from the fourth to the max.
- Page 14 Do not to climb on the shelving system and use the wall bracket to protect against tipping over. Attention: The accessories are not anchored and can drop out if pulled out too far. From a height of 3 modules, the uppermost module must be fixed with the enclosed wall bracket.
- Page 15 SHELF MODULE CONSISTS OF REQUIRED FOR WALLMOUNTING PLEASE NOTE: Corrugated board has two sides. The side with the smaller flutes should always be on the outerside. The side with the larger flutes is inside. Prefold all parts once at the creased points.
- Page 16 MODULE CONSTRUCTION PLEASE NOTE: If more than one module is used, they must be connected to each other with the supplied connecting elements (see E).
- Page 18 DRAWER SHELF BOARD DOOR...
-
Page 19: Side Panel
SIDE PANEL 180° 1) If the side panels open inwards again, it is advisable to remove the envelope again and fold the two folds at the front side again by 180°. This will take out any tension and the envelope should therefore remain in position. - Page 20 CONNECTOR In order to place the connector correctly, you must press the layer with the visible longitudinal shaft slightly outwards. The spatula helps you here. Remove connector...
-
Page 21: Wall Mounting
WALL MOUNTING DISPOSAL The Shelving is recyclable. Dispose it at the end of its life cycle in the waste paper bin or the paper disposal system in your city. CARTON CARTON If your question has not been answered, please contact us. We will help you! -
Page 22: Utilisation Conforme
UTILISATION CONFORME Le système d‘étagères modulaire est exclusivement destiné à être utilisé comme aménagement d‘une étagère à l‘intérieur. La hauteur maximale d‘empilement est de six modules. Le système d‘étagères ne peut être chargé que des poids maximum suivants par module : 10 kg dans les trois rangées inférieures ; 7,5 kg dans les rangées quatre à... - Page 23 Ne pas s‘assoir sur le système d‘étagères ! Les compartiments ne doivent jamais être montés en suspension libre. L‘attache murale sert à empêcher le basculement uniquement et ne convient pas à la fixation. La capacité de charge maximale par module est de 10 kg sur les trois rangées inférieures d‘étagères et de 7,5 kg de la quatrième à...
- Page 24 Ne montez jamais sur le système d‘étagère et n‘utilisez pas l‘attache mural pour vous protéger du basculement. Attention : Les accessoires ne sont pas ancrés et peuvent tomber si on les tire trop loin. Jusqu‘à hauteur de 3 compartiments, le compartiment supérieur doit être fixé...
- Page 25 COMPARTIMENT D‘ÉTAGÈRE SE COMPOSE DE NÉCESSAIRE POUR LE MONTAGE MURAL NOTIFICATION: Le carton ondulé a deux faces. Le côté avec les ondulations les plus fines doit toujours être à l‘extérieur. Le côté avec les ondulations plus larges est à l‘intérieur. Pré-plier toutes les pièces une seule fois aux points rainurés.
- Page 26 CONSTRUCTION D‘UN COMPARTIMENT NOTIFICATION : Si plusieurs compartiments sont utilisés, ils doivent être raccordés entre eux à l‘aide d-es éléments de raccordement fournis (voir E).
- Page 28 TIROIR L‘ÉTAGÈRE PORT...
- Page 29 MUR LATÈRAL 180° 1) Si les parois latérales s‘ouvrent à nouveau vers l‘intérieur, il est conseillé de retirer à nouveau l‘enveloppe et de replier les deux plis à l‘extrémité de 180°. Cela supprime toute tension et l‘enveloppe doit donc rester en place. 2) Ensuite, tournez le module de base sur l‘arrière et appuyez fermement sur la face avant par le haut.
- Page 30 CONNECTEUR Pour placer correctement le connecteur, vous devez presser légèrement la couche avec l‘arbre longitudinal visible vers l‘extérieur. La spatule vous aide à. Retirer le connecteur.
-
Page 31: Montage Mural
MONTAGE MURAL MISE AU REBUT Le système d‘étagères est recyclable. À la fin de son cycle de vie, il doit être jeté dans la poubelle à papier ou dans le système de collecte de papier de ta ville. CARTON CARTON Si tu n‘as pas trouvé... - Page 32 ROOM IN A BOX GmbH & Co. KG www.roominabox.com Coppistrasse 17 hello@roominabox.com Regalsystem V2/2022 D- 10365 Berlin +49 (0) 30 555 7955-0...
Need help?
Do you have a question about the V2/2022 and is the answer not in the manual?
Questions and answers