Advertisement
Available languages
Available languages
Quick Links
1795884COM
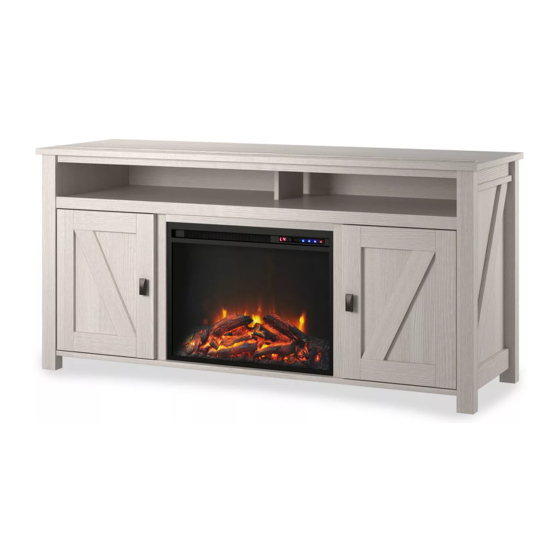
Farmington 60" Fireplace TV Stand
Date of Purchase ___ / ___ / ___
Lot Number:
THIS INSTRUCTION BOOKLET CONTAINS IMPORTANT SAFETY INFORMATION. PLEASE READ AND KEEP FOR FUTURE REFERENCE.
Do Not Return This Product!
Contact our customer service team for help first.
Call: 1-800-489-3351 (toll free)
Monday-Friday 9am - 5pm CST
Visit: www.ameriwoodhome.com
WARNING
- Unit can tip over causing severe injury or death.
- Anchor unit to stud in wall (if instructed to).
- Do Not allow children to climb on unit.
- Put heavy items on lower shelves or drawers.
B34 1795884COM00GO
Easy
Assembly Difficulty Meter
Follow Ameriwood Home
You
Tube
Tough
Advertisement

Subscribe to Our Youtube Channel
Related Manuals for Ameriwood HOME Farmington 1795884COM


Summary of Contents for Ameriwood HOME Farmington 1795884COM
- Page 1 Easy Tough Assembly Difficulty Meter WARNING Follow Ameriwood Home - Unit can tip over causing severe injury or death. - Anchor unit to stud in wall (if instructed to). - Do Not allow children to climb on unit. - Put heavy items on lower shelves or drawers.
-
Page 2: Helpful Hints
Contact Us! Do NOT return this product! Contact our friendly customer service team first for help. Assembly Tips Call us! 1-800-489-3351 Monday-Friday 9am - 5pm CST Tube Visit ameriwoodhome.com Helpful Hints PEOPLE NEEDED FOR ASSEMBLY: 2 ESTIMATED ASSEMBLY TIME: 2 HOUR - Open your item in the area you plan to keep it to avoid excessive heavy lifting. -
Page 3: Before You Start
Before You Start Read through each step carefully and follow the proper order Separate and count all your parts and hardware Give yourself enough room for the assembly process Have the following tools: Flat Head Screwdriver, #2 Phillips Head Screwdriver and Hammer Caution: If using a power drill or power screwdriver for screwing, please be aware to slow down and stop when screw is tight. -
Page 4: Board Identification
Board Identification Not actual size BOTTOM FIXED SHELF T1795884010GO T1795884020GO T1795884030GO QTY: 1 PC QTY: 1 PC QTY: 1 PC LEFT SIDE PANEL RIGHT SIDE PANEL PARTITION T1795884040GO T1795884050GO T1795884060GO QTY: 1 PC QTY: 1 PC QTY: 2 PCS RAIL RAIL RAIL T1795884070GO... - Page 5 Board Identification Not actual size PARTITION LEFT DOOR RAIL ADJUSTABLE SHELF T1795884120GO T1795884130GO T1795884100GO T1795884110GO QTY: 1 PC QTY: 1 PC QTY: 1 PC QTY: 2 PCS RIGHT DOOR BACK PANEL UPPER BACK PANEL STOPPER T1795884140GO T1795884150GO T1795884160GO T1795884170GO QTY: 1 PC QTY: 1PC QTY: 2 PCS QTY: 1PC...
- Page 6 Board Identification Not actual size ameriwoodhome.com Tube...
-
Page 7: Part List
Hardware Bag Reference number: 21795884COM0GO Part List Actual Size M4 x 19mm ×36 ×36 ×38 ×4 ×5 S CREW T GO1306 ameriwoodhome.com Tube... - Page 8 STEP ×15 ×8 1.1 Cam bolt (2) into (A), (B) and (I) as illustrated. 1.2 Insert (3) into (B), (J) and (P) as illustrated. ameriwoodhome.com Tube...
- Page 9 STEP ×13 ×12 2.1 Cam bolt (2) into (C) and (H x 2) as illustrated. 2.2 Insert (3) into (C) and (L) as illustrated. H X 2 ameriwoodhome.com Tube...
- Page 10 STEP ×8 ×18 3.1 Cam bolt (2) into (D) and (E) as illustrated. 3.2 Insert (3) into (D), (E), (G) and (F x 2) as illustrated. ameriwoodhome.com Tube...
- Page 11 STEP Quick Assembly LOCK ×5 ×5 Proper orientation of CAM LOCK 4.1 Attach (J) into (A) with (5) as illustrated. 4.2 Attach (I) into (C) with (1) as illustrated. FINISHED EDGE UNFINISHED EDGE ameriwoodhome.com Tube...
- Page 12 STEP Quick Assembly LOCK ×6 Proper orientation of CAM LOCK 5.1 Attach (G) into (C) with (1) as illustrated. 5.2 Attach (H) into (F) with (1) as illustrated. UNFINISHED EDGE ameriwoodhome.com Tube...
- Page 13 STEP Quick Assembly LOCK Proper orientation of CAM LOCK ×4 6.1 Attach (F) into (C), with (1) as illustrated. ameriwoodhome.com Tube...
- Page 14 STEP Quick Assembly LOCK Proper orientation of CAM LOCK ×4 7.1 Attach (B) into (F) with (1) as illustrated. 7.2 Attach (Q) into (B) as illustrated. ameriwoodhome.com Tube...
- Page 15 STEP Assembly LOCK ×8 8.1 Attach (D) and (E) into (C), (B) with (1) as illustrated. ameriwoodhome.com Tube...
- Page 16 STEP Assembly LOCK ×8 ameriwoodhome.com Tube...
- Page 17 STEP ×42 10.1 Attach (P), (O) into (C) with (1) as illustrated. ameriwoodhome.com Tube...
- Page 18 STEP ×4 ×24 ×2 ×4 ×8 ×4 11.1 Attach (K) with (11) as illustrated. 11.2 Attach (10) into (M), (N) with (6) as illustrated. 11.3 Attach (10), (M),(N) into (D), (E) with (6) as illustrated. 11.4 Attach (9) into (M), (N) with (4) as illustrated. 11.5 Attach (12) into (M),(N) as illustrated.
- Page 19 STEP To adjust the vertical height. Loosen the four screws "A" on bolt hinges. Two of them are usually in slotted holes which allows you to adjust up of down by a few mm. then tighten back up. Para ajustar la altura vertical Afloje los cuatro tornillos "A"...
- Page 20 STEP ×6 13.1 Attach (T) from backside with (6) as illustrated. ameriwoodhome.com Tube...
- Page 21 STEP Quick Assembly Ø4 x 14mm LOCK ×1 ×2 ×2 Proper orientation of CAM LOCK 14.1 Attach (Q) into (C) with (1) as illustrated. 14.2 Attach (13) into (B) with (8) as illustrated. ameriwoodhome.com Tube...
- Page 22 STEP 15.1 Attach (S) into (A) as illustrated. 15.2 Adjust the foot (R) before use. leveler ameriwoodhome.com Tube...
- Page 23 Maximum Loads This unit has been designed to support the maximum loads shown. Exceeding these load limits could cause sagging, instability, product collapse, and/or serious injury. Notice: Please apply the TV warning label to your unit so you'll always have the model's weight and TV size limits.
- Page 24 Visit your local retailer's website, rate your purchased product and leave us some feedback! We would like to extend a big "Thank You" to all of our customers for taking the time to assemble this Ameriwood Home product, and to give us your valuable feedback. ameriwoodhome.com Tube...
- Page 25 de l'aide. Visitez: ameriwoodhome.com Tube Tube Tube...
- Page 26 Page 4 & 5: Identification du conseil Pas la taille réelle Taille actuelle (A) HAUT (B) BAS (C) ÉTAGÈRE FIXE (D) PANNEAU LATERAL GAUCHE Boulon (E) PANNEAU LATÉRAL DROIT (F) CLOISON (6) Vis (G) RAIL (H) RAIL (I) RAIL (J) RAIL (10) (K) ÉTAGÈRE RÉGLABLE (11)
- Page 27 Page 15 Page 18 Page 20 Page 24 Merci ameriwoodhome.com Tube Tube Tube...
- Page 28 Español Cubierta Delantera Este libro de instrucciones contiene información IMPORTANTE de seguridad. Por favor lea y manténgalo para referencia en el futuro. No Regrese este producto! Comuniquese con nuestro amistoso equipo de servicio al cliente para obtener ayuda. Llamenos al: 1-800-489-3351 (Gratis) Lunes - Viernes 9am - 5pm CST Visitar: www.ameriwoodhome.com PRECAUCION Este mueble puede volcarse y causar graves heridas y/o muerte.
- Page 29 Español Página 4 & 5: Identificación de la Junta Página 6: Lista de No es la talla actual Tamaño real (1) Bloqueo de la leva (A) ARRIBA (B) INFERIOR (2) Perno de leva (C) ESTANTE FIJO (3) Taco de madera (D) PANEL LATERAL IZQUIERDO (4) Tornillo (E) PANEL LATERAL DERECHO...
- Page 30 Visite el sitio web de su tienda local, califique su comprado y denos sus comentarios! Nos gustaría enviar un gran "Agradecimiento" a todos nuestros clientes por tomarse el tiempo de ensamblar este producto de Ameriwood Home, y por darnos sus valiosos comentarios. Gracias ameriwoodhome.com...
Need help?
Do you have a question about the Farmington 1795884COM and is the answer not in the manual?
Questions and answers