
Related Manuals for ims PRO ARCPULL 350


Summary of Contents for ims PRO ARCPULL 350
- Page 1 ARCPULL 350 02-31 / 92-100 32-61 / 92-100 62-91 / 92-100 73502 03/08/2022 Find user manuals in other languages Find more languages of user manuals ims-welding.com...
-
Page 2: Table Of Contents
6�7�1 Choix du support férule céramique ������������������������������������������������������������������������������������������������������������������������������� 20 6�7�2 Procédure de changement d’adaptateur de céramique ��������������������������������������������������������������������������������������������������� 21 6�7�3 Mise en place de l’accessoire sur le pistolet ������������������������������������������������������������������������������������������������������������������� 21 Utilisation des coffrets ArcPull 350 Difficult Access (réf. 070813) �������������������������������������������������������������������������������������������� 22 Manipulation du pistolet �����������������������������������������������������������������������������������������������������������������������������������������������... -
Page 3: Avertissements - Règles De Sécurité
Manuel d’utilisation ARCPULL 350 Notice originale 1. AVERTISSEMENTS - RÈGLES DE SÉCURITÉ CONSIGNE GÉNÉRALE Ces instructions doivent être lues et bien comprises avant toute opération. Toute modification ou maintenance non indiquée dans le manuel ne doit pas être entreprise. Tout dommage corporel ou matériel dû à une utilisation non conforme aux instructions de ce manuel ne pourra être retenu à la charge du fabricant. - Page 4 Manuel d’utilisation ARCPULL 350 Notice originale Les bouteilles doivent être entreposées dans des locaux ouverts ou bien aérés. Elles doivent être en position verticale et maintenue à un support ou sur un chariot. Le soudage doit être proscrit à proximité de graisse ou de peinture.
- Page 5 Manuel d’utilisation ARCPULL 350 Notice originale ÉMISSIONS ELECTRO-MAGNETIQUES Le courant électrique passant à travers n’importe quel conducteur produit des champs électriques et magnétiques (EMF) localisés. Le courant de soudage produit un champ électromagnétique autour du circuit de soudage et du matériel de soudage.
- Page 6 Manuel d’utilisation ARCPULL 350 Notice originale e. Mise à la terre de la pièce à souder : Lorsque la pièce à souder n’est pas reliée à la terre pour la sécurité électrique ou en raison de ses dimensions et de son emplacement, ce qui est le cas, par exemple, des coques de navire ou des charpentes métalliques de bâtiments, une connexion raccordant la pièce à...
-
Page 7: Description Du Matériel
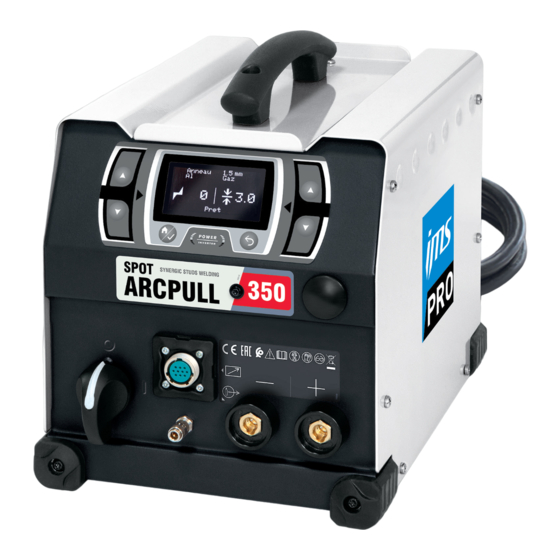
2. DESCRIPTION DU MATÉRIEL Le SPOT ARCPULL 350 est un poste à souder par arc-tiré inverter monophasé qui permet de souder pièces rappor- tées (goujons, goujons à filetage interne, clous d’isolation, anneaux de tirage, tiges d’extraction de rivets, etc.) sur des matériaux à... - Page 8 Manuel d’utilisation ARCPULL 350 Notice originale Fig 2 : Vue extérieure du pistolet et son IHM (sans fourche de soudure ni accessoire) Gâchette Écrou moleté du porte-électrode Molette de verrouillage des tiges Tiges de prise de masse Connecteur contrôle faisceau pistolet Texas positive Texas négative...
-
Page 9: Alimentation Et Mise En Marche
Manuel d’utilisation ARCPULL 350 Notice originale 3. ALIMENTATION ET MISE EN MARCHE • Ce produit est livré avec une prise 16 A de type CEE7/7 et doit être branché à une installation électrique monopha- sée avec neutre relié terre, comprise entre 208 VAC et 240 VAC (50 - 60 Hz). Le courant effectif absorbé (I1eff) est indiqué... -
Page 10: Mise À Jour Du Produit
Manuel d’utilisation ARCPULL 350 Notice originale 3.4. MISE À JOUR DU PRODUIT Le produit possède une connectique USB en face avant protégée par un ca- puchon, pour mettre à jour son logiciel (ajout de synergies, de fonctionnalités). Contacter votre revendeur, pour plus de détails. -
Page 11: État De Surface De La Pièce Support Et Décapage
Manuel d’utilisation ARCPULL 350 Notice originale 5.1. ÉTAT DE SURFACE DE LA PIÈCE SUPPORT ET DÉCAPAGE La soudure de pièce rapportée doit être effectuée sur une pièce support exempte de graisse. Il est également nécessaire de décaper cette pièce support si celle-ci à un traitement chimique (couche de zinc pour l’acier galvanisé, anticorrosif pour les aciers ayant subi un traitement thermique, alu-... -
Page 12: Choix De L'accessoire De Soudure
Manuel d’utilisation ARCPULL 350 Notice originale Goujon, goujon à filetage interne Non recommandé ArCO² 8% Non recommandé Inox Tiges extracteur de rivet en inox Non recommandé ArCO² 8% Non recommandé Coffret porte goujon ( 064591 ) Coffret porte-gou- Coffret porte goujon difficult access... -
Page 13: Polarité Du Pistolet
Manuel d’utilisation ARCPULL 350 Notice originale 5.5. POLARITÉ DU PISTOLET La polarité du pistolet a un impact sur la qualité de la soudure. Dépendant du type de pièce à souder, et de sa matière, il est préférable de connecter la texas positive du pistolet à la borne + ou –... -
Page 14: Installation Accessoires Et Réglage Du Pistolet
Manuel d’utilisation ARCPULL 350 Notice originale Cause Remède cas : soudure sur tôle plane cas soudure sur tôle avec obstacle métallique soudure sur IPN ème 6. INSTALLATION ACCESSOIRES ET RÉGLAGE DU PISTOLET La mise en place des accessoires et leur réglage sur le pistolet doivent impérativement se faire :... -
Page 15: Réglage D'un Porte-Goujon / Porte-Clou D'isolation
Manuel d’utilisation ARCPULL 350 Notice originale Dévisser les deux vis de face avant et dégager le capot vers l’avant du pistolet. Dévisser légèrement les deux vis de serrage des tiges. Si changement de tige, enlever les tiges en tirant dessus, puis en remettre de nouvelle. -
Page 16: Utilisation De L'accessoire Pour Pose D'anneaux De Tirage (Réf� 059610)
Manuel d’utilisation ARCPULL 350 Notice originale 6.2.1. RÉGLAGE PORTE GOUJON SOUDURE SANS FÉRULE EN CÉRAMIQUE Le réglage du porte-goujon expliqué ci-dessous est applicable pour toute pièce rapportée à l’exception de celle soudées sous protection par férule en céramique (075979), ainsi que les des tiges d’extraction pour rivet (voir §6.4 et §6.5). -
Page 17: Utilisation Du Coffret Arcpull Rivet Box1 350 - 24Kn (Réf. 064584)
Manuel d’utilisation ARCPULL 350 Notice originale Positionner l’anneau de tirage dans le porte anneau jusqu’en butée. 6.4. UTILISATION DU COFFRET ARCPULL RIVET BOX1 350 – 24KN (064584) Note : Préparer les tiges de reprise de masse comme expliqué au §6.1. -
Page 18: Utilisation Du Coffret Stud Hold Box 350 (Réf. 068339)
Manuel d’utilisation ARCPULL 350 Notice originale Oter l’écrou moleté (n°2 - Fig 2) de l’axe d’entrainement du pistolet et y visser le support porte goujon. Visser légèrement la buse de protection gazeuse sur le support porte goujon, y introduire le porte goujon jusqu’en butée et... -
Page 19: Utilisation De L'adaptateur Pour Férule En Céramique (Réf� 075979)
Manuel d’utilisation ARCPULL 350 Notice originale Configuration 1 Configuration 2 Assembler la coiffe de protection gazeuse et le patin en fonction de la configuration de l’outil choisi : (atten- tion au positionnement des trous). Monter l’ensemble sur les tiges du pistolet. -
Page 20: 6�7�3 Mise En Place De L'accessoire Sur Le Pistolet
Manuel d’utilisation ARCPULL 350 Notice originale Le support de férule céramique doit être choisi en correspondance avec son diamètre Support adapté Support trop grand 6.7.2. PROCÉDURE DE CHANGEMENT D’ADAPTATEUR DE CÉRAMIQUE Dévisser les deux vis et déposer le support céramique de l’adaptateur... -
Page 21: Utilisation Des Coffrets Arcpull 350 Difficult Access (Réf. 070813)
Manuel d’utilisation ARCPULL 350 Notice originale 6.8. UTILISATION DES COFFRETS ARCPULL 350 DIFFICULT ACCESS (070813) Note1 : Préparer les tiges de reprise de masse comme expliqué au §6.1. Note 2 : Préparer le porte-goujon comme expliqué au §6.2. Note 3 : Choisir le canon adapté à la matière de la pièce rapportée à souder. Le canon gravé d’un n’est pas... -
Page 22: Soudure De Pièces Rapportées Hors Anneaux De Tirage
Manuel d’utilisation ARCPULL 350 Notice originale 6. Insérer un anneau dans le porte anneau. 7. Déverrouiller les tiges de prise de masse avec la molette. 8. Positionner le pistolet sur la tôle et mettre en contact l’anneau avec la tôle. -
Page 23: Mode De Fonctionnement Du Produit
Manuel d’utilisation ARCPULL 350 Notice originale 8. MODE DE FONCTIONNEMENT DU PRODUIT Fig 3 : Vue du clavier du générateur Écran Bouton G+ Bouton G- Bouton D+ Bouton D- Bouton Menu Principal/Valider Bouton Retour/Annuler Le produit dispose de mode de fonctionnement synergique et manuel, ainsi que d’un moyen pour sauvegarder et rap- peler des configurations de soudure. -
Page 24: Type De Pièces À Souder
Manuel d’utilisation ARCPULL 350 Notice originale Sur l’écran principal du Mode Synergique sont affichés : 1 - Le matériau de la pièce rapportée : AlMg, Fe, etc. 2 - Le type de protection du bain : No Gaz, Ferrule, ou le type de gaz recommandé... -
Page 25: Épaisseur De La Tôle Support
Manuel d’utilisation ARCPULL 350 Notice originale 8.1.2. ÉPAISSEUR DE LA TÔLE SUPPORT Épaisseur affichée en millimètre. Pour augmenter ou diminuer l’épaisseur de la tôle sur laquelle la pièce rapportée sera soudée, appuyer sur les touches D+ et D-. Les plages d’épaisseur qui peuvent être sélectionnées sont liées au type, à la taille et au matériau de la pièce à souder. -
Page 26: Liste Des Messages Affichés En Bas De L'écran De Soudage
Manuel d’utilisation ARCPULL 350 Notice originale 8.3. LISTE DES MESSAGES AFFICHÉS EN BAS DE L’ÉCRAN DE SOUDAGE Message Description Pistolet déconnecté Aucun pistolet n’est connecté à l’appareil. Texas déconnecté La texas positive du pistolet n’est pas connectée au générateur (n°6 - Fig 2). -
Page 27: Menu Réglage En Mode Synergique
Manuel d’utilisation ARCPULL 350 Notice originale 8.4.1. MENU RÉGLAGE EN MODE SYNERGIQUE Lorsque le poste fonctionne en mode synergique, le menu de réglages permet de sélectionner le type de pièce rap- portée à souder, sa taille, son matériau et son type de protection gazeuse. -
Page 28: Menu Programmes
Manuel d’utilisation ARCPULL 350 Notice originale 2 - Amorçage : • Réglable de -2 à +8. Joue directement sur la consigne du convertisseur de puissance du poste. • À 0 (valeur par défaut), le produit assure un amorçage optimal sans risque de rupture d’arc lors de la levée de la pièce rapportée tout en limitant le courant de court-circuit. -
Page 29: Menu Configuration
Manuel d’utilisation ARCPULL 350 Notice originale 8.4.4. MENU CONFIGURATION Configuration > Pregaz > 400ms Postgaz 400ms Langue Compteurs Reset machine Info Appuyer sur les touches G+ et G- pour déplacer le curseur de gauche (Pré-gaz, Post-gaz, Langue, Reset machine, Info.). -
Page 30: Message D'erreur, Anomalies, Causes, Remèdes
Manuel d’utilisation ARCPULL 350 Notice originale 8.4.4.2. Panneau d’informations Info machine Soft gene V3.0 Hard gene V1.0 Pistolet 200-350 Soft pistolet V3.0 Hard pistolet V7.0 Le panneau d’information précise les numéros des versions logicielles et hardward du générateur et, si le pistolet est connecté, son type (200-350, 700). - Page 31 Manuel d’utilisation ARCPULL 350 Notice originale Protection thermique du Dépassement du facteur de Attendre l’extinction du message pistolet. marche. pour reprendre le soudage. THERMISCHER FEHLER Défaut moteur du pistolet. Le mécanisme du pistolet Rebrancher le pistolet et rallumer est bloqué.
- Page 32 Using the pulling ring attachment accessory (PN. 059610) ���������������������������������������������������������������������������������������������������� 46 6�4 Using the ARCPULL 350 Rivet Consumable Box 1 (350 - 24 kN) (PN. 064584)������������������������������������������������������������������������� 47 6�5 Using the ARCPULL 350 Rivet Consumable Box 2 (350 - 50 kN) (PN. 073388)������������������������������������������������������������������������� 47 6�6...
-
Page 33: Warnings - Safety Regulations
Operating manual Translation of the original ARCPULL 350 instructions 1. WARNINGS - SAFETY REGULATIONS GENERAL INSTRUCTIONS These instructions must be read and understood before use. Do not undertake any modifications or maintenance work that is not specified in the user manual. - Page 34 Operating manual Translation of the original ARCPULL 350 instructions FIRE AND EXPLOSION HAZARDS Fully shield the welding area; flammable materials should be kept at least 11 metres away. There must be fire fighting equipment close to the welding activities. Beware of hot spatter or sparks as these can cause a fire or explosion, even through cracks.
- Page 35 Operating manual Translation of the original ARCPULL 350 instructions All welders should use the following procedures to minimise their exposure to electromagnetic fields coming from the welding circuit: • Position the welding cables together and secure them with a clamp, if possible.
- Page 36 Operating manual Translation of the original ARCPULL 350 instructions TRANSPORTING AND MOVING THE WELDING POWER SOURCE The source of the welding current is equipped with a top handle enabling it to be carried by hand. Be careful not to underestimate its weight.
- Page 37 2. A DESCRIPTION OF THE EQUIPMENT The SPOT ARCPULL 350 is a single-phase, inverter, drawn-arc welding unit for welding accessories (studs, internally threaded studs, insulation nails, pulling rings and rivet extraction rods, etc.) on aluminium or steel-based materials. It has both a SYNERGY and a MANUAL mode. The program menu allows you to save and recall a wide selection of welding configurations.
- Page 38 Operating manual Translation of the original ARCPULL 350 instructions Fig 2: The gun’s exterior and its HMI (without welding fork or accessories) Trigger Electrode holder knurled nut Three-rod locking knob Earthed rods Gun-cable bundle control connector Positive dinse Negative dinse...
-
Page 39: Power Supply And Starting-Up
Operating manual Translation of the original ARCPULL 350 instructions Welding trolley 910 Double clamp earth Hot air gun (supplied Infrared thermometer cable (700 A) without cartridge) 070967 068605 060777 052994 3. POWER SUPPLY AND STARTING-UP • This product is supplied with a 16 A, CEE7/7 plug and must be connected to a single-phase, earthed electrical sys- tem between 208 - 240 VAC (50 - 60 Hz). -
Page 40: Updating The Machine
Operating manual Translation of the original ARCPULL 350 instructions 3.4. UPDATING THE MACHINE The product has a USB port on the front panel, protected by a cap, for upda- ting its software (adding new synergies and features). Contact your distributor for further details. -
Page 41: Support Plate Thickness Depending On The Stud's Diameter
Operating manual Translation of the original ARCPULL 350 instructions 5.1. THE SUPPORT PART’S SURFACE CONDITION AND CLEANING METHOD Welding consumables must be carried out on a grease-free support part. It is also necessary to clean this support part if it has been chemically treated (a zinc coating for galvanised steel, an anti- corrosive coating for heat-treated steel and alumina for aluminium). -
Page 42: Selecting Welding Accessories
Operating manual Translation of the original ARCPULL 350 instructions Studs, internally threaded studs Not recommended ArCO² 8% Not recommended Stainless steel Stainless steel rivet-extraction rods Not recommended ArCO² 8% Not recommended Consumable kit with th readed stud chuck (064591) Stud consumable... -
Page 43: The Gun's Polarity
Operating manual Translation of the original ARCPULL 350 instructions 5.5. THE GUN’S POLARITY The gun’s polarity has an impact on the welds’ quality. Depending on the type and material of the part to be welded, connecting the gun’s positive dinse to the power source’s + or - terminal is advised. - Page 44 Note 2: Using the ARCPULL Rivet Boxes 1 and 2 (P.N. 064584 and 073388), as well as the Difficult-Access Box (P.N. 070813), requires using the short pins supplied with the ARCPULL 350. Loosen the locking knob (no. 3 - Fig. 2) so that the earthing rods (no.
-
Page 45: Adjusting A Stud Support/Insulating Nail Support
Operating manual Translation of the original ARCPULL 350 instructions Unscrew the two front-panel screws and release the cover slightly towards the front of the gun. Slightly loosen the two rod-clamping screws. If changing the rods, remove them by pulling on them, then replace them with new ones. -
Page 46: 6�2�1 Adjusting A Welding Stud Support Without A Ceramic Ferrule
Operating manual Translation of the original ARCPULL 350 instructions 6.2.1. ADJUSTING A WELDING STUD SUPPORT WITHOUT A CERAMIC FERRULE The process for adjusting the stud support, as explained below, can be applied to all consumables except those welded under ceramic ferrule protection (075979) and rivet extraction rods (see sections 6.4 and 6.5). - Page 47 Insert the pulling ring in the pulling ring support until it can go in no further. 6.4. USING THE ARCPULL 350 RIVET CONSUMABLE KIT 1 (350 - 24 KN) (PN. 064584) Note: Prepare the earth pins as explained in section 6.1.
- Page 48 Operating manual Translation of the original ARCPULL 350 instructions Remove the knurled nut (no. 2 - Fig. 2) from the gun’s drive shaft and screw in the stud support. Gently screw the gas shielding nozzle onto the stud support, insert the stud support until it can in no further and tighten the gas shielding nozzle.
-
Page 49: Using The Ceramic Ferrule Adaptor (Pn. 075979)
Operating manual Translation of the original ARCPULL 350 instructions Configuration 1 Configuration 2 Assemble the gas shielding co- ver and the pad depending on the configuration of the selected tool (pay attention to the position of the holes). Fit the entire assembly to the gun’s rods. - Page 50 Operating manual Translation of the original ARCPULL 350 instructions Adjusted support Support too large 6.7.2. PROCEDURE FOR CHANGING THE CERAMIC ADAPTOR Unscrew the two screws and remove the ceramic sup- port from the adaptor. Reposition the correct support onto the adaptor (grooves facing outwards) and tighten the two screws.
-
Page 51: 7�1 Welding The Pulling Rings
Operating manual Translation of the original ARCPULL 350 instructions 6.8. DIFFICULT-ACCESS STUD HOLDER BOX (P.N. 070813) Note 1: Prepare the earth pins as explained in section 6.1. Note 2: Prepare the stud support as explained in section 6.2. Note 3: Choose the appropriate gun to suit the material of the consumable to be welded. The engraved barrel of a is not suitable for welding aluminium parts. - Page 52 Operating manual Translation of the original ARCPULL 350 instructions 6. Insert a pulling ring into the ring support. 7. Unlock the earthing rods using the locking knob. 8. Position the gun on the sheet and bring the pulling ring into contact with the sheet.
-
Page 53: Welding In Synergy Mode
The product has both SYNERGY and MANUAL operating modes as well as a system for saving and recalling weld configurations. When the ARCPULL 350 is switched on, it will return to whichever operating mode it was in when it was last switched off. - Page 54 Operating manual Translation of the original ARCPULL 350 instructions The SYNERGY mode main screen will display: 1.) The consumable’s material: AlMg, Fe, etc. 2.) The type of weld pool protection: a ferrule, without gas shielding or using the recommended gas type 3.) The part to be welded’s icon...
-
Page 55: The Support Plate's Thickness
Operating manual Translation of the original ARCPULL 350 instructions 8.1.2. THE SUPPORT PLATE’S THICKNESS Thickness displayed in millimetres. To increase or decrease the thickness of the sheet to which the attachment will be welded, press the D+ and D- keys. -
Page 56: List Of Messages Displayed At The Bottom Of The Welding Screen
Operating manual Translation of the original ARCPULL 350 instructions 8.3. LIST OF MESSAGES DISPLAYED AT THE BOTTOM OF THE WELDING SCREEN Message Description Gun disconnected There is no gun connected to the machine. Dinse disconnected The gun’s positive dinse is not connected to the power source (no.6... -
Page 57: Synergy Mode's Settings Menu
Operating manual Translation of the original ARCPULL 350 instructions 8.4.1. SYNERGY MODE’S SETTINGS MENU When the unit is operating in SYNERGY mode, the settings menu allows you to select the type of consumable to be welded as well as its size, material and gas shielding type. -
Page 58: Program Menu
Operating manual Translation of the original ARCPULL 350 instructions 2 - Ignition: • Can be adjusted between -2 - +8. This directly affects the device’s power converter setpoint. • The default value (0) ensures the best possible ignition without the risk of breaking the arc when the attachment is lifted whilst also limiting the short-circuit current. -
Page 59: Configuration Menu
Resetting the ARCPULL 350 will clear all welding settings from the program menu, switch the product back to French and the Pre-Gas and Post-Gas times will automatically return to 0.4 s. -
Page 60: Error Messages, Faults, Causes And Solutions
Operating manual Translation of the original ARCPULL 350 instructions 8.4.4.2. Information Panel Info machine Soft gene V3.0 Hard gene V1.0 Pistolet 200-350 Soft pistolet V3.0 Hard pistolet V7.0 The information panel shows the machine’s software and hardward version numbers and, if connected, the type of gun attached (200-350, 700). -
Page 61: The Gun
Operating manual Translation of the original ARCPULL 350 instructions The gun’s thermal protec- Exceeding the duty cycle. Wait until the message has tion. disappeared before resuming welding. THERMISCHER FEHLER Gun motor fault. The gun’s mechanism is Reconnect the gun and turn blocked. - Page 62 6�7�1 Auswahl des Keramikhülsenhalters ������������������������������������������������������������������������������������������������������������������������������� 79 6�7�2 Verfahren zum Wechseln des Keramikadapters �������������������������������������������������������������������������������������������������������������� 80 6�7�3 Anbringen des Zubehörs auf der Pistole ������������������������������������������������������������������������������������������������������������������������ 80 Verwendung der Koffer ArcPull 350 Difficult Access (Ref. 070813) ������������������������������������������������������������������������������������������ 81 Manipulation der Pistole ����������������������������������������������������������������������������������������������������������������������������������������������� Schweißen von Zugringen ��������������������������������������������������������������������������������������������������������������������������������������������������� 82 Schweißen von Aufsatzstücken außerhalb der Zugringe ��������������������������������������������������������������������������������������������������������...
-
Page 63: Warnungen - Sicherheitsregeln
Betriebsanleitung Übersetzung der ARCPULL 350 Originalbetriebsanleitung 1. WARNUNGEN - SICHERHEITSREGELN ALLGEMEINER HINWEIS Die Missachtung dieser Bedienungsanleitung kann zu schweren Personen- und Sachschäden führen. Nehmen Sie keine Wartungsarbeiten oder Veränderungen an dem Gerät vor, die nicht in der Anlei- tung genannt werden. - Page 64 Betriebsanleitung Übersetzung der ARCPULL 350 Originalbetriebsanleitung SCHWEISSRAUCH/-GAS Beim Schweißen entstehen Rauchgase bzw. toxische Dämpfe. Es muss für eine ausreichende Belüftung gesorgt werden, und manchmal ist eine Luftzufuhr erforderlich. Eine Frischluftmaske kann bei unzureichender Belüftung eine Lösung sein. Überprüfen Sie die Wirksamkeit der Luftansaugung, indem Sie diese anhand der Sicherheitsnormen überprüfen.
- Page 65 Betriebsanleitung Übersetzung der ARCPULL 350 Originalbetriebsanleitung ELEKTROMAGNETISCHE EMISSIONEN Der durch einen Leiter fließende elektrische Strom erzeugt lokale elektrische und magnetische Felder (EMV). Beim Betrieb von Lichtbogenschweißanlagen kann es zu elektromagnetischen Störungen kommen. Elektromagnetische Felder (EMF) können bestimmte medizinische Implantate stören, z. B. Herzschrittmacher. Für Personen, die medizinische Implantate tragen, müssen Schutzmaßnahmen ergriffen werden.
- Page 66 Betriebsanleitung Übersetzung der ARCPULL 350 Originalbetriebsanleitung TRANSPORT DER SCHWEISSSTROMQUELLE Das Schweißgerät lässt sich mit einem Tragegriff auf der Geräteoberseite bequem heben. Unterschätzen Sie jedoch nicht dessen Eigengewicht! Der Griff ist nicht als Lastaufnahmemittel gedacht. Verwenden Sie keine Kabel oder Pistolen, um die Schweißstromquelle zu bewegen. Das Gerät darf ausschließlich in vertikaler Position transportiert werden.
-
Page 67: Beschreibung Des Geräts
Originalbetriebsanleitung 2. BESCHREIBUNG DES GERÄTS SPOT ARCPULL 350 ist ein einphasiges Inverter-Schweißgerät mit Hubzündung zum Schweißen von Aufsatzstücken (Stifte, Stifte mit Innengewinde, Isolationsnägel, Zugringe, Nietenausziehstifte usw.) an Materialien auf Aluminium- oder Stahlbasis. Es verfügt über einen synergetischen und einen manuellen Betriebsmodus. Das Menü „Programme“ er- möglicht Schweißeinstellungen zu speichern und abzurufen. - Page 68 Betriebsanleitung Übersetzung der ARCPULL 350 Originalbetriebsanleitung Abb. 2: Außenansicht der Pistole und ihres HMI (ohne Schweißgabel oder Zubehör) Brennertaster Rändelmutter des Elektrodenhalters Stangenverriegelungsrad Massenanschluss-Stifte Steueranschluss Pistolen-Kabelschlauchpaket Texasbuchse positiv Negative Texasbuchse Gasanschluss LED bereit (grün) LED Kontakt (blau) LED Fehler (rot) Heißluftpistole...
-
Page 69: Versorgung Und Inbetriebnahme
Betriebsanleitung Übersetzung der ARCPULL 350 Originalbetriebsanleitung 3. VERSORGUNG UND INBETRIEBNAHME • Dieses Gerät wird mit einem 16 A-Stecker vom Typ CEE7/7 geliefert und muss an eine einphasige Elektroinstallation mit geerdetem Neutralleiter zwischen 208 VAC et 240 VAC (50 - 60 Hz) angeschlossen werden. Der effektiv aufge- nommene Strom (l1eff) ist auf dem Gerät für maximale Betriebsbedingungen angegeben. -
Page 70: Aktualisierung Des Geräts
Betriebsanleitung Übersetzung der ARCPULL 350 Originalbetriebsanleitung 3.4. AKTUALISIERUNG DES GERÄTS Das Gerät verfügt über einen USB-Anschluss an der Vorderseite, der durch eine Kappe geschützt ist, um seine Software zu aktualisieren (Hinzufügen von Synergien, Funktionen). Wenden Sie sich an Ihren Händler, um weitere Einzel- heiten zu erfahren. -
Page 71: Schutz Des Schmelzbads
Betriebsanleitung Übersetzung der ARCPULL 350 Originalbetriebsanleitung 5.1. OBERFLÄCHENBESCHAFFENHEIT DES TRÄGERTEILS UND ABTRAGUNG Das Einschweißen muss an einem fettfreien Trägerteil erfolgen. Es ist auch erforderlich, dieses Trägerteil zu entfernen, wenn es einer chemischen Behandlung unterzogen wurde (Zinkschicht für verzinkten Stahl, Korrosionsschutz für Stähle, die einer Wärmebehandlung unterzogen wurden, Aluminiumoxid für Aluminium). -
Page 72: Auswahl Des Schweißzubehörs
Betriebsanleitung Übersetzung der ARCPULL 350 Originalbetriebsanleitung Stift, Innengewindestift Nicht empfohlen ArCO² 8 % Nicht empfohlen Edelstahl Nietenausziehstift aus Edelstahl Nicht empfohlen ArCO² 8 % Nicht empfohlen Koffer Stifthalter (06 4591) Stifthalter-Kof- Koffer Stifthalter Difficult Access fer (06 4591) (07 0813) mit Adapter für... -
Page 73: Polarität Der Pistole
Betriebsanleitung Übersetzung der ARCPULL 350 Originalbetriebsanleitung 5.5. POLARITÄT DER PISTOLE Die Polarität der Pistole wirkt sich auf die Qualität der Schweißstelle aus. Abhängig von der Art des zu schweißenden Teils und seinem Material ist es vorzuziehen, den Pluspol der Pistole mit dem Plus- oder Minuspol des Generators zu verbinden. -
Page 74: Installation Von Zubehör Und Einstellung Der Pistole
Betriebsanleitung Übersetzung der ARCPULL 350 Originalbetriebsanleitung Ursache Lösung Fall: Schweißen auf Flachblech Fall Schweißen auf Blech mit Metallhindernis Schweißen auf IPN 6. INSTALLATION VON ZUBEHÖR UND EINSTELLUNG DER PISTOLE Das Anbringen von Zubehörteilen und deren Einstellung an der Pistole muss... -
Page 75: Einstellung Eines Stifthalters/Isoliernagelhalters
Betriebsanleitung Übersetzung der ARCPULL 350 Originalbetriebsanleitung Lösen Sie die beiden Schrauben an der Vorderseite und heben Sie die Abdeckung zur Vorderseite der Pistole hin ab. Lösen Sie die beiden Klemmschrauben der Stifte leicht. Wenn Sie Stifte wechseln, ziehen Sie die Stifte heraus und setzen Sie dann neue ein. -
Page 76: Verwendung Des Zubehörs Zur Installation Des Zugrings (Ref. 059610)
Betriebsanleitung Übersetzung der ARCPULL 350 Originalbetriebsanleitung 6.2.1. EINSTELLUNG EINES STIFTHALTERS FÜR DIE SCHWEISSUNG OHNE KERAMIKHÜLSE Die unten beschriebene Einstellung des Stifthalters gilt für alle Aufsatzstücke mit Ausnahme derjenigen, die unter dem Schutz einer Keramikhülse (075979) geschweißt werden, sowie für Nietenausziehstifte (siehe §6.4 und §6.5). -
Page 77: Verwendung Des Koffers Arcpull Rivet Box1 350 - 24 Kn (Ref. 064584)
Betriebsanleitung Übersetzung der ARCPULL 350 Originalbetriebsanleitung Positionieren Sie den Zugring bis zum Anschlag in den Ringhalter. 6.4. VERWENDUNG DES KOFFERS ARCPULL RIVET BOX1 350 – 24 KN (064584) Hinweis: Bereiten Sie die Masseanschluss-Stifte vor, wie in §6.1 erklärt. Entfernen Sie die Stellschraube des Stif- thalters vollständig und setzen Sie einen... -
Page 78: Verwendung Des Koffers Stud Hold Box 350 (Ref. 068339)
Betriebsanleitung Übersetzung der ARCPULL 350 Originalbetriebsanleitung Entfernen Sie die Rändelmutter (Nr. 2 - Abb. 2) von der Antriebswelle der Pistole und schrauben Sie den Stifthalter dort fest. Schrauben Sie die Schutzgasdüse leicht auf den Stifthalter, führen Sie den Stifthal- ter bis zum Anschlag ein und ziehen Sie die Schutzgasdüse fest. -
Page 79: Verwendung Des Adapters Für Keramikhülse (Ref. 075979)
Betriebsanleitung Übersetzung der ARCPULL 350 Originalbetriebsanleitung Konfiguration 1 Konfiguration 2 Bauen Sie die Schutzgaskappe und den Gleitschuh entsprechend der Konfiguration des gewählten Werkzeugs zusammen: (Achten Sie auf die Position der Löcher). Montieren Sie die Baugruppe auf den Pistolenstangen. Lösen Sie das Pistolenrädchen (Nr. -
Page 80: 6�7�2 Verfahren Zum Wechseln Des Keramikadapters
Betriebsanleitung Übersetzung der ARCPULL 350 Originalbetriebsanleitung Die Halterung für die Keramikhülse sollte entsprechend ihrem Durchmesser gewählt werden. Angepasster Halter Halter zu groß 6.7.2. VERFAHREN ZUM WECHSELN DES KERAMIKADAPTERS Lösen Sie die beiden Schrauben und entfernen Sie den Keramikhalter des Adapters Setzen Sie den richtigen Halter Adapter wieder ein (wobei die Fräsungen nach außen zeigen), und... -
Page 81: Verwendung Der Koffer Arcpull 350 Difficult Access (Ref. 070813)
Ziehen Sie das Pistolenrädchen fest. 0,5 bis 2 mm 6.8. VERWENDUNG DER KOFFER ARCPULL 350 DIFFICULT ACCESS (070813) Hinweis 1: Bereiten Sie die Masseanschluss-Stifte vor, wie in §6.1 erklärt. Hinweis 2: Bereiten Sie den Masseanschluss-Stift vor, wie in §6.2 erklärt. -
Page 82: Manipulation Der Pistole
Betriebsanleitung Übersetzung der ARCPULL 350 Originalbetriebsanleitung 7. MANIPULATION DER PISTOLE 7.1. SCHWEISSEN VON ZUGRINGEN 1. Montieren Sie den Ringhalter (siehe §6.3). 2. Entfernen Sie den Lack an der Stelle, an der geschweißt werden soll. 3. Wählen Sie die für den zu schweißenden Ring geeignete Synergie aus. -
Page 83: Funktionsweise Des Geräts
Betriebsanleitung Übersetzung der ARCPULL 350 Originalbetriebsanleitung 8. FUNKTIONSWEISE DES GERÄTS Abb. 3: Ansicht der Tastatur der Stromquelle Bildschirm Taste G+ Taste G- Taste D+ Taste D- Taste Hauptmenü/Bestätigen Taste Zurück/Löschen verfügt über einen synergetischen und einen manuellen Betriebsmodus sowie eine Möglichkeit, Schweißkonfigura- tionen zu speichern und abzurufen. -
Page 84: Art Der Zu Schweißenden Stücke
Betriebsanleitung Übersetzung der ARCPULL 350 Originalbetriebsanleitung Schweißstelle gut hält. Auf dem Hauptbildschirm des Synergie-Modus wird Folgendes angezeigt: 1 - Das Material des Aufsatzstücks: AlMg, Fe, usw. 2 - Die Art des Badschutzes: Gasfrei, Hülse oder die Art des empfohlenen Gases 3 - Das Piktogramm des zu schweißenden Stücks... -
Page 85: Schweißen Im Modus Manuell
Betriebsanleitung Übersetzung der ARCPULL 350 Originalbetriebsanleitung 8.1.2. DICKE DES TRÄGERBLECHS Angezeigte Stärke in Millimetern. Um die Stärke des Blechs, auf das das Aufsatzstück geschweißt wird, zu erhöhen oder zu verringern, drücken Sie die Tasten D+ und D-. Die Stärkebereiche, die ausgewählt werden können, hängen von der Art, der Größe und dem Material des zu schweißen- den Stücks ab. -
Page 86: Liste Der Meldungen, Die Am Unteren Rand Des Schweißbildschirms Angezeigt Werden
Betriebsanleitung Übersetzung der ARCPULL 350 Originalbetriebsanleitung 8.3. LISTE DER MELDUNGEN, DIE AM UNTEREN RAND DES SCHWEISSBILDSCHIRMS ANGEZEIGT WERDEN Meldung Beschreibung Pistole getrennt Es ist keine Pistole an das Gerät angeschlossen. Texasbuchse getrennt Die positive Texasbuchse der Pistole ist nicht mit der Stromquelle verbunden (Nr. -
Page 87: Einstellmenü Im Synergie-Modus
Betriebsanleitung Übersetzung der ARCPULL 350 Originalbetriebsanleitung 8.4.1. EINSTELLMENÜ IM SYNERGIE-MODUS Wenn das Gerät im Synergie-Modus arbeitet, können Sie im Menü Einstellungen den Typ des zu schweißenden Auf- satzstücks, seine Größe, sein Material und die Art des Schutzgases auswählen. Im Synergie-Modus werden die Einstellungen in der Reihenfolge von oben nach unten gewählt: 1 - Einsatztyp „Elektrode“: Stift, Nagel, Ring usw. -
Page 88: Menü Programme
Betriebsanleitung Übersetzung der ARCPULL 350 Originalbetriebsanleitung 2 - Zündung: • Einstellbar von -2 bis +8. Verwendet direkt den Sollwert des Stromwandlers des Geräts. • Bei 0 (Standardeinstellung) gewährleistet das Gerät eine optimale Zündung ohne die Gefahr eines Lichtbogenbruchs beim Anheben des Aufsatzstücks und begrenzt gleichzeitig den Kurzschlussstrom. -
Page 89: Menü Konfiguration
Betriebsanleitung Übersetzung der ARCPULL 350 Originalbetriebsanleitung 8.4.4. MENÜ KONFIGURATION Configuration > Pregaz > 400ms Postgaz 400ms Langue Compteurs Reset machine Info Drücken Sie die Tasten G+ und G-, um den linken Cursor zu bewegen (Gasvorströmung, Gasnachströmung, Sprache, Gerät zurücksetzen, Info.). -
Page 90: Fehlermeldung, Anomalien, Ursachen, Lösungen
Betriebsanleitung Übersetzung der ARCPULL 350 Originalbetriebsanleitung 8.4.4.2. Informationsfeld Info machine Soft gene V3.0 Hard gene V1.0 Pistolet 200-350 Soft pistolet V3.0 Hard pistolet V7.0 Das Informationsfeld gibt die Nummern der Software- und Hardwareversionen der Stromquelle und der Pistole, falls angeschlossen, und den Typ an. - Page 91 Betriebsanleitung Übersetzung der ARCPULL 350 Originalbetriebsanleitung Wärmeschutz der Pistole. Einschaltdauer ist über- Warten, bis Nachricht erlischt, um schritten. weiter zu schweißen. THERMISCHER FEHLER Pistolenmotorfehler Der Mechanismus der Pis- Schließen Sie die Pistole wieder tole ist blockiert. an und schalten Sie das Gerät wieder ein.
- Page 92 Pièces de rechange ARCPULL 350 SPARE PARTS / ERSATZTEILE Ventilateurs 24V / Fans (24 V) / Lüfter 24 V 51048 (x2) Electrovanne 2 voies 24V / Two-way solenoid valve (24 V) / 2-Wege-Magnetventil 24 V 70991 Coupleur gaz BSP20 / Gas coupling (BSP20) / Gaskupplung BSP20...
- Page 93 Pièces de rechange ARCPULL 350 SPARE PARTS / ERSATZTEILE Moteur / Motor / Motore / Мотор 71832 Si fabrication avant 05/2022 S81143 Carte électronique / Electronic board / Steuerplatine / Placa electrónica / If manufactured before 05/2022 Электронная плата / Printplaat / Scheda elettrica Si fabrication après 05/2022...
- Page 94 Pièces de rechange ARCPULL 350 Bague de vérouillage / Locking nut / Verriegelungsring / Anilla de bloqueo / Кольцо блокировки / Vergrendelring 90598 / Anello di blocco Coque avant / Front cover / Schale vorne / Frontal / Voorzijde / Frontale...
- Page 95 Schéma électrique ARCPULL 350 ELECTRICAL DIAGRAM / STROMLAUFPLAN...
- Page 96 Schéma électrique ARCPULL 350 ELECTRICAL DIAGRAM / STROMLAUFPLAN 51459 51459 Pink Grey White Brown Yellow Green...
- Page 97 Spécifications Techniques ARCPULL 350 TECHNICAL SPECIFICATIONS / TECHNISCHE SPEZIFIKATIONEN ARCPULL 350 Primaire / Primary / Primär Tension d’alimentation / Power-supply voltage / Versorgungsspannung 230 V +/- 15% Fréquence secteur / Mains frequency / Netzfrequenz 50 / 60 Hz Fusible disjoncteur / Circuit breaker fuse / Sicherung Schutzschalter 16 A Secondaire / Secondary / Sekundär...
- Page 98 Pictogrammes ARCPULL 350 SYMBOLS / ZEICHENERKLÄRUNG Attention ! Lire le manuel d’instruction avant utilisation. Warning ! Read the user manual before use. ACHTUNG ! Lesen Sie diese Anleitung sorgfältig durch vor Inbetriebnahme des Geräts. Symbole de la notice User manual symbol Symbole in der Bedienungsanleitung Source de courant de technologie onduleur délivrant un courant continu.
- Page 99 Pictogrammes ARCPULL 350 Information sur la température (protection thermique) Temperature information (thermal protection) Information zur Temperatur (Thermoschutz) Entrée de gaz Gas input Gaseingang Sortie de gaz Gas output Gasausgang Commande à distance Remote control Fernregler...
- Page 100 JBDC 1, rue de la Croix des Landes - CS 54159 53941 Saint-berthevin Cedex FRANCE www.ims-welding.com +33-2-43-01-01-60 sales@ims-welding.com...
Need help?
Do you have a question about the ARCPULL 350 and is the answer not in the manual?
Questions and answers