Table of Contents

Related Manuals for ACP OmniVR

Summary of Contents for ACP OmniVR
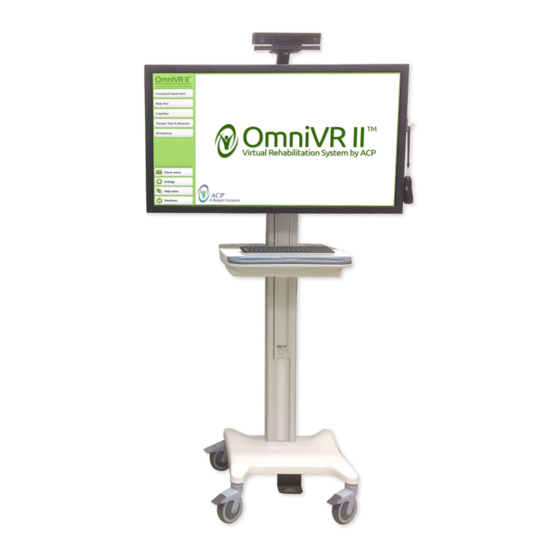
- Page 1 OmniVR ® Virtual Rehabilitation System User Manual 0.350.1100 | acplus.com 800.350.1100 | acplus.com 800.350.1100 | acplus.com 800.350.1100 | acplus.com AN ACPLUS® INTERCONNECTED TECHNOLOGY Revised 09.26.22 MNL-0007 (1.3)
- Page 2 ACP. This manual may only be used by entities that have purchased the equipment or have implemented the ACP program and are covered by an executed lease agreement.
-
Page 3: Table Of Contents
References and Recommended Readings Function – Section GG Operation of the OmniVR® Elite Cognition Space Requirements and Environmental Factors Multiple Participants Turning the OmniVR® On and Off Therapy Tests Operating the OmniVR® Air Mouse Functional Reach Sit to Stand Timed Up and Go... -
Page 4: Delivery Of The Omnivr® Elite
Go to Table of Contents Delivery of the OmniVR® Elite Upon receipt of the OmniVR® Elite with OmniVR® III software, inspect the shipping NOTE: The purpose of this manual is to acquaint medical professionals with the container and contents for any obvious or concealed damage. All ACP products OmniVR®. -
Page 5: Symbols On The Product
OmniVR® Equipment User Manual Go to Table of Contents Symbols on the Product Symbol Used for Symbol Used for Serial number Product number Date of manufacture Manufacturer Caution, consult accompanying documents Remote control connection Observe the user manual Consult instructions for use... - Page 6 Research supports the use of VR augmented biofeedback because patients benefit from The OmniVR® provides a broad range of settings via preset this positive feedback loop within an interactive VR-based levels and adjustable parameters for personalization. The environment.
-
Page 7: Indications
OmniVR® Equipment User Manual Go to Table of Contents Indications The OmniVR® is indicated for: Post-stroke rehabilitation General debility Muscle weakness Imbalance Gait training Sitting balance and posture (static and dynamic) Neurodegenerative Cognitive impairment Wheelchair immobility conditions 800.350.1100 acplus.com MNL-0007 (1.3) -
Page 8: Precautions
Equipment Hazards If the OmniVR® is damaged/faulty or if error messages appear on the screen or the screen goes blank, attempt to power down the unit normally or, if necessary, unplug the power cord and contact ACP Customer Support. -
Page 9: Exercise Termination Criteria
OmniVR® Equipment User Manual Go to Table of Contents Exercise Termination Criteria Patients should be monitored for any of the following conditions, which should lead to terminating or a reason to pause the exercise. Significant blood Chest pain Severe shortness of breath pressure changes Lightheadedness;... -
Page 10: References And Recommended Readings
OmniVR® Equipment User Manual Go to Table of Contents References and Recommended Readings Adamovich, S. V., Fluet, G. G., Tunik, E., & Merians, A. S. (2009). Sensorimotor Training in Virtual Reality: A Review. NeuroRehabilitation, 25(1), 29-44. Krch, D., Nikelshpur, O., Lavrador, S., Chiaravalloti, N., Koenig, S., & Rizzo, A. (2013). Pilot Results from a Virtual Reality Executive Function Task. IEEE https://doi.org/10.3233/nre-2009-0497... -
Page 11: Operation Of The Omnivr® Elite
Space Requirements Environmental Factors The space required for optimal operation of the OmniVR® is approximately 6' x 9' Placement of the OmniVR® in locations with the conditions listed below may result in (an 8' x 15' area is required for the Timed Up and Go therapy test). The area should... -
Page 12: Turning The Omnivr® On And Off
3. Turn the monitor off by pressing the power button on the air mouse or on the top back of the monitor. 4. Remove the power cord from the wall outlet. NOTE: Do not remove power cord from the wall outlet before the OmniVR® is powered “OFF” using the procedure above. 800.350.1100 acplus.com... -
Page 13: Navigating The Omnivr® Iii Software
Go to Table of Contents Navigating the OmniVR® III Software This section of the User Manual references the OmniVR® III software, which is available on new and upgraded OmniVR® Elite systems, and most legacy systems. Entry Points The OmniVR® software has multiple navigation entry points, including:... -
Page 14: Home Screen Definitions
Go to Table of Contents Navigating the OmniVR® III Software Home Screen Definitions A. Favorites: Any of the OmniVR® exercises can be F. Advisory menu: The advisory menu provides saved to a folder on the home screen to allow step-by-step assistance selecting an exercise you quick access. -
Page 15: All Exercises
OmniVR® Equipment User Manual Go to Table of Contents Navigating the OmniVR® III Software – All Exercises All Exercises All exercises Select exercise Select movement pattern position Select “All exercises” from the All 30 of the OmniVR® exercises are The clinician can choose from a set OmniVR®... - Page 16 OmniVR® Equipment User Manual Navigating the OmniVR® III Software – All Exercises All Exercises continued Exercise levels Exercise start screen Customize parameters Each exercise will provide three levels The exercise start screen provides an After selecting the “Customize” button NOTE: Many of the parameter screens of difficulty: Easy, Moderate, and Hard.
- Page 17 OmniVR® Equipment User Manual Navigating the OmniVR® III Software – All Exercises All Exercises continued Exercise instructions How-to video By selecting the “Instructions” button, By selecting the “How-to video” icon, the clinician will be taken to the both the clinician and patient can...
- Page 18 OmniVR® Equipment User Manual Navigating the OmniVR® III Software – All Exercises All Exercises continued Manage favorite Favorite exercise name or Accept name Name confirmation menu selection Customized exercises and short cuts Select “Accept” button with the A pop-up at the top of the screen...
- Page 19 OmniVR® Equipment User Manual Navigating the OmniVR® III Software – All Exercises All Exercises continued Start button Proper patient positioning Once the exercise is selected with Once the “How-to video” has ended • Camera view access: Left-click • Camera view troubleshooting...
- Page 20 OmniVR® Equipment User Manual Navigating the OmniVR® III Software – All Exercises All Exercises continued Start exercise Countdown Exercise toolbar Prior to starting the exercise, The screen will count down 3-2-1, and Hover over the right margin of the B. Camera view:...
- Page 21 OmniVR® Equipment User Manual Navigating the OmniVR® III Software – All Exercises All Exercises continued Pause exercise Exercise summary report To pause the exercise, either left-click When the exercise is complete, the • Exit exercise: To exit the exercise, on the air mouse or select the “Pause”...
- Page 22 OmniVR® Equipment User Manual Navigating the OmniVR® III Software – All Exercises All Exercises continued Result of exercise QR code The Result of exercise screen After selecting the “Generate QR provides an overview of the selected code” button, a QR code pop-up...
-
Page 23: Advisory Menu
OmniVR® Equipment User Manual Go to Table of Contents Navigating the OmniVR® III Software – Advisory Menu Advisory Menu Advisory menu access Advisory menu Select “Advisory menu” on the bottom The Advisory menu provides four B. Function – Section GG: Exercises toolbar of the OmniVR®... -
Page 24: Anatomy
OmniVR® Equipment User Manual Go to Table of Contents Navigating the OmniVR® III Software – Advisory Menu Anatomy Advisory menu: Anatomy Anatomy Select Anatomy from the Advisory Select the exercise from the menu screen. anatomical region of the body based on the patient’s clinical presentation. - Page 25 OmniVR® Equipment User Manual Navigating the OmniVR® III Software – Advisory Menu Anatomy continued Starting position Movement Visualization The clinician can choose the During navigation, “Add favorite” can be The clinician can choose from The exercise visualization options appropriate exercise starting position.
- Page 26 OmniVR® Equipment User Manual Navigating the OmniVR® III Software – Advisory Menu Anatomy continued Exercise levels Exercise start screen Customize parameters Each exercise will provide three levels The exercise start screen provides an After selecting the “Customize” button NOTE: Many of the parameter screens of difficulty: Easy, Moderate, and Hard.
- Page 27 OmniVR® Equipment User Manual Navigating the OmniVR® III Software – Advisory Menu Anatomy continued Exercise instructions How-to video By selecting the “Instructions” button, By selecting the “How-to video” icon, the clinician will be taken to the both the clinician and patient can...
- Page 28 OmniVR® Equipment User Manual Navigating the OmniVR® III Software – Advisory Menu Anatomy continued Manage favorite Favorite exercise name or Accept name Name confirmation menu selection Customized exercises and short cuts Select “Accept” button with the A pop-up at the top of the screen...
- Page 29 OmniVR® Equipment User Manual Navigating the OmniVR® III Software – Advisory Menu Anatomy continued Start button Proper patient positioning Once the exercise is selected with Once the “How-to video” has ended • Camera view access: • Camera view troubleshooting proper parameter settings and...
- Page 30 OmniVR® Equipment User Manual Navigating the OmniVR® III Software – Advisory Menu Anatomy continued Start exercise Countdown Exercise toolbar Prior to starting the exercise, The screen will count down 3-2-1, and Hover over the right margin of the B. Camera view:...
- Page 31 OmniVR® Equipment User Manual Navigating the OmniVR® III Software – Advisory Menu Anatomy continued Pause exercise Exercise summary report To pause the exercise, either left-click When the exercise is complete, the • Exit exercise: To exit the exercise, on the air mouse or select the “Pause”...
- Page 32 OmniVR® Equipment User Manual Navigating the OmniVR® III Software – Advisory Menu Anatomy continued Result of exercise QR code The Result of exercise screen After selecting the “Generate QR provides an overview of the selected code” button, a QR code pop-up...
-
Page 33: Function - Section Gg
OmniVR® Equipment User Manual Go to Table of Contents Navigating the OmniVR® III Software – Advisory Menu Function – Section GG Advisory menu access Advisory menu: Function – Section GG Function – Section GG Select “Advisory menu” on the bottom Exercises that focus on functional toolbar of the OmniVR®... - Page 34 OmniVR® Equipment User Manual Navigating the OmniVR® III Software – Advisory Menu Function – Section GG continued Functional activity Exercise position Visualization The clinician can choose the The clinician can choose from The exercise visualization options appropriate activity based on the...
- Page 35 OmniVR® Equipment User Manual Navigating the OmniVR® III Software – Advisory Menu Function – Section GG continued Exercise levels Exercise start screen Customize parameters Each exercise will provide three levels The exercise start screen provides an After selecting the “Customize” button NOTE: Many of the parameter screens of difficulty: Easy, Moderate, and Hard.
- Page 36 OmniVR® Equipment User Manual Navigating the OmniVR® III Software – Advisory Menu Function – Section GG continued Exercise instructions How-to video By selecting the “Instructions” button, By selecting the “How-to video” icon, the clinician will be taken to the both the clinician and patient can...
- Page 37 OmniVR® Equipment User Manual Navigating the OmniVR® III Software – Advisory Menu Function – Section GG continued Manage favorite Favorite exercise name or Accept name Name confirmation menu selection Customized exercises and short cuts Select “Accept” button with the A pop-up at the top of the screen...
- Page 38 OmniVR® Equipment User Manual Navigating the OmniVR® III Software – Advisory Menu Function – Section GG continued Start button Proper patient positioning Once the exercise is selected with Once the “How-to video” has ended • Camera view access: • Camera view troubleshooting...
- Page 39 OmniVR® Equipment User Manual Navigating the OmniVR® III Software – Advisory Menu Function – Section GG continued Start exercise Countdown Exercise toolbar Prior to starting the exercise, The screen will count down 3-2-1, and Hover over the right margin of the B.
- Page 40 OmniVR® Equipment User Manual Navigating the OmniVR® III Software – Advisory Menu Function – Section GG continued Pause exercise Exercise summary report To pause the exercise, either left-click When the exercise is complete, the • Exit exercise: To exit the exercise, on the air mouse or select the “Pause”...
- Page 41 OmniVR® Equipment User Manual Navigating the OmniVR® III Software – Advisory Menu Function – Section GG continued Result of exercise QR code The Results of exercise screen After selecting the “Generate QR provides an overview of the selected code” button, a QR code pop-up...
-
Page 42: Cognition
OmniVR® Equipment User Manual Go to Table of Contents Navigating the OmniVR® III Software – Advisory Menu Cognition Advisory menu access Advisory menu: Cognition Cognition Select “Advisory menu” on the bottom Select Cognition from the Advisory Exercises that focus on cognitive toolbar of the OmniVR®... - Page 43 OmniVR® Equipment User Manual Navigating the OmniVR® III Software – Advisory Menu Cognition continued Movement Visualization Exercise levels Exercise start screen The clinician can choose from The exercise visualization options Each exercise will provide three levels The exercise start screen provides an...
- Page 44 OmniVR® Equipment User Manual Navigating the OmniVR® III Software – Advisory Menu Cognition continued Customize parameters Exercise instructions How-to video After selecting the “Customize” button NOTE: Many of the parameter screens By selecting the “Instructions” button, By selecting the “How-to video” icon,...
- Page 45 OmniVR® Equipment User Manual Navigating the OmniVR® III Software – Advisory Menu Cognition continued Manage favorite Favorite exercise name or Enter and accept Name confirmation menu selection Customized exercises and short cuts Using the keyboard, type in the A pop-up at the top of the screen...
- Page 46 OmniVR® Equipment User Manual Navigating the OmniVR® III Software – Advisory Menu Cognition continued Start button Proper patient positioning Once the exercise is selected with Once the “How-to video” has ended • Camera view access: • Camera view troubleshooting proper parameter settings and...
- Page 47 OmniVR® Equipment User Manual Navigating the OmniVR® III Software – Advisory Menu Cognition continued Start exercise Countdown Exercise toolbar Prior to starting the exercise, The screen will count down 3-2-1, and Hover over the right margin of the B. Camera view:...
- Page 48 OmniVR® Equipment User Manual Navigating the OmniVR® III Software – Advisory Menu Cognition continued Pause exercise Exercise summary report To pause the exercise, either left-click When the exercise is complete, the • Exit exercise: To exit the exercise, on the air mouse or select the “Pause”...
- Page 49 OmniVR® Equipment User Manual Navigating the OmniVR® III Software – Advisory Menu Cognition continued Result of exercise QR code The Result of exercise screen provides After selecting the “Generate QR an overview of the selected exercise, code” button, a QR code pop-up...
-
Page 50: Multiple Participants
OmniVR® Equipment User Manual Go to Table of Contents Navigating the OmniVR® III Software – Advisory Menu Multiple Participants Advisory menu access Advisory menu: Multiple participants visualization Multiple participants Select “Advisory menu” on the bottom The seven exercise visualization toolbar of the OmniVR® home screen. - Page 51 OmniVR® Equipment User Manual Navigating the OmniVR® III Software – Advisory Menu Multiple Participants continued Movement Exercise levels Exercise start screen The clinician can choose from Each exercise will provide three levels The exercise start screen provides an available movement patterns for each of difficulty: Easy, Moderate, and Hard.
- Page 52 OmniVR® Equipment User Manual Navigating the OmniVR® III Software – Advisory Menu Multiple Participants continued Customize parameters Exercise instructions How-to video After selecting the “Customize” button After making any parameter changes, By selecting the “Instructions” button, By selecting the “How-to video” icon, on the exercise start screen, the clinician select the “Accept”...
- Page 53 OmniVR® Equipment User Manual Navigating the OmniVR® III Software – Advisory Menu Multiple Participants continued Manage favorite Favorite exercise name or Enter and accept Name confirmation menu selection Customized exercises and short cuts Using the keyboard, type in the A pop-up at the top of the screen...
- Page 54 OmniVR® Equipment User Manual Navigating the OmniVR® III Software – Advisory Menu Multiple Participants continued Start button Proper patient positioning Once the exercise is selected with Once the “How-to video” has ended When the patients are properly • Camera view troubleshooting...
- Page 55 OmniVR® Equipment User Manual Navigating the OmniVR® III Software – Advisory Menu Multiple Participants continued Start exercise Countdown Exercise toolbar Prior to starting the exercise, the The screen will count down 3-2-1, and Hover over the right margin of the B.
- Page 56 OmniVR® Equipment User Manual Navigating the OmniVR® III Software – Advisory Menu Multiple Participants continued Pause exercise Exercise summary report To pause the exercise, either left-click When the exercise is complete, the • Exit exercise: To exit the exercise, on the air mouse or select the “Pause”...
- Page 57 OmniVR® Equipment User Manual Navigating the OmniVR® III Software – Advisory Menu Multiple Participants continued Result of exercise Choose QR code QR code The Result of exercise screen provides A pop-up will present the option to After choosing the appropriate an overview of the selected exercise, choose either the “Left patient”...
-
Page 58: Therapy Tests
OmniVR® Equipment User Manual Go to Table of Contents Navigating the OmniVR® III Software – Therapy Tests Therapy Tests Therapy tests Select “Therapy tests” from the bottom toolbar of the OmniVR® home screen. Hover over intended navigation entry point and color changes from black to green for ease of selection. - Page 59 OmniVR® Equipment User Manual Navigating the OmniVR® III Software – Therapy Tests Therapy Tests continued Therapy tests options Sit to Stand Test: A simple and widely Timed Up and Go (TUG) Test: A simple NOTE: To access more Functional Reach Test:...
-
Page 60: Functional Reach
OmniVR® Equipment User Manual Go to Table of Contents Navigating the OmniVR® III Software – Therapy Tests Functional Reach Test Select dominant arm Start screen The patient’s dominant arm should • Start: Selecting the “Start” button be used for this test. Select the... - Page 61 NOTE: Position the patient so that their dominant arm is on the side furthest from the OmniVR® system. Be sure the • Select the “Start trial” button on the patient keeps the dominant arm, with hand fisted, horizontal bottom right corner of the screen with the floor during the test.
- Page 62 OmniVR® Equipment User Manual Navigating the OmniVR® III Software – Therapy Tests Functional Reach Test continued Trial 1 complete Trial 2 complete Trial 3 complete At the completion of Trial 1, the At the completion of Trial 2, both At the completion of Trial 3, all three of the patient’s patient’s functional reach distance is...
- Page 63 OmniVR® Equipment User Manual Navigating the OmniVR® III Software – Therapy Tests Functional Reach Test continued Result of exercise QR code The Result of exercise screen provides After selecting the “Generate QR an overview of the selected exercise, code” button, a QR code pop-up...
-
Page 64: Sit To Stand
OmniVR® Equipment User Manual Go to Table of Contents Navigating the OmniVR® III Software – Therapy Tests Sit to Stand Test Sit to Stand Test options Start screen Treatment area and patient positioning 1. Single Sit to Stand Test: Assesses •... - Page 65 OmniVR® Equipment User Manual Navigating the OmniVR® III Software – Therapy Tests Sit to Stand Test continued Start trial Armrests Follow the prompts on the bottom of • The patient will then stand up and sit After all five repetitions are the screen.
- Page 66 OmniVR® Equipment User Manual Navigating the OmniVR® III Software – Therapy Tests Sit to Stand Test continued Test completion screen Result of exercise QR code At the completion of the test, the • Redo test: To go back and perform The Result of exercise screen provides After selecting the “Generate QR...
-
Page 67: Timed Up And Go
OmniVR® Equipment User Manual Go to Table of Contents Navigating the OmniVR® III Software – Therapy Tests Timed Up and Go (TUG) Test Select assistive device Start screen Treatment area and patient positioning The TUG Test does not allow for any •... - Page 68 OmniVR® Equipment User Manual Navigating the OmniVR® III Software – Therapy Tests Timed Up and Go (TUG) Test continued Start practice trial Follow the prompts at the bottom of • The patient will stand up, walk 10 feet, • At the completion of the practice trial, the screen.
- Page 69 OmniVR® Equipment User Manual Navigating the OmniVR® III Software – Therapy Tests Timed Up and Go (TUG) Test continued Start test trial Test trial in progress Test completion screen Following the practice trial, reposition The patient will stand up, walk 10 feet, At the completion of the test, the time is •...
- Page 70 OmniVR® Equipment User Manual Navigating the OmniVR® III Software – Therapy Tests Timed Up and Go (TUG) Test continued Result of exercise QR code The Result of exercise screen provides After selecting the “Generate QR an overview of the selected exercise, code”...
-
Page 71: Troubleshooting
Troubleshooting Service Center For repair or service of ACP products and accessories, please call (800) 350-1100 and follow the prompts. Normal hours of operation are 6:00am to 5:00pm Pacific Standard Time. After hours, please leave a message, and a technician will return your call during the next scheduled workday. - Page 72 Camera does not recognize If the camera does not recognize the floor, it will be unable to recognize Call ACP Customer Support as the camera angle may be too high or too low, or a wall patient in a seated position.
- Page 73 No audio from monitor No audio from monitor Check settings in the OmniVR® program. Make sure that the sound is not muted. Use the monitor remote (or buttons on the monitor) to turn the volume up and to unmute the monitor.
- Page 74 OmniVR® that can help determine what is wrong. If selecting the question mark in the camera view, the camera detection troubleshooting screen appears.
- Page 75 Remedy Both the patient and the clinician are displayed white, and nothing The patient is not detected. Make sure the patient is standing in front of the OmniVR® else is displayed green. in the normal position. Briefly cover the lens of the camera with your hand, allowing it to refresh the view of the room.
- Page 76 The distance between the camera and the back of the room is too large. Either place back of the room is displayed green. the system in another room, make it face another direction, or call ACP Customer Support to help you set up the camera for large rooms.
- Page 77 OmniVR® Equipment User Manual Troubleshooting General Camera Tips continued Problem Problem Remedy The patient and the clinician are both displayed green. The clinician is too close to the patient, so they are detected by the camera as a single person. Increase the distance between patient and clinician.
- Page 78 If the camera does not recognize the floor, it will be unable to recognize Call ACP Customer Support as the camera angle may be too high or too low, or a wall a patient sitting in a chair or standing in a Group Therapy program.
- Page 79 OmniVR® Equipment User Manual Troubleshooting Sitting Exercises – The Fox continued Problem Cause Remedy Fox jumps too much: The system is reacting to an upward movement of the hands, even if Instruct the patient to rest their hands completely to their lap when they do not want they are not fully raised.
- Page 80 OmniVR® Equipment User Manual Troubleshooting Sitting Exercises – Picnic Problem Cause Remedy Feet are not recognized or too The system measures the “at rest” position of the feet at the start of Instruct the patient to sit with their feet on the floor and knees bent to approximately far backward or forward: the exercise.
- Page 81 Make sure the patient is sitting on a chair with as few objects around as possible. following another person or object. Check the alignment of the OmniVR® camera. To ensure that the camera is in proper alignment, the camera should be firmly secured to the camera mount (not loose) and the camera aligned, so the patient is centered and highlighted green when using the camera view function.
- Page 82 OmniVR® Equipment User Manual Troubleshooting Sitting Exercises – Bingo Problem Cause Remedy Patient stands but camera does The activity requires that the patient start the sit to stand movement Check if the patient is visible and highlighted in green in the camera view by not recognize the movement: with sufficient trunk flexion.
- Page 83 OmniVR® Equipment User Manual Troubleshooting Sitting Exercises – Carnival Problem Cause Remedy Unintended throws: Any upward or forward movement will trigger an action from the figure Check if the patient is visible and highlighted in green in the camera view by on the screen.
- Page 84 The clinician could be in the camera view. The clinician or another object could be directing the camera focus from the patient. Move the objects that are in the way, place the OmniVR® in a larger open space, or adjust the exercise field in the “Adjustable Parameters.”...
- Page 85 The clinician could be in the camera view. The clinician or another object could be directing the camera focus from the patient. Remove the objects that are in the way, place the OmniVR® in a larger open space, or adjust the playing field in the “Adjustable Parameters.”...
- Page 86 OmniVR® Equipment User Manual Troubleshooting Gait Exercises – The Fox Problem Cause Remedy Fox makes sudden small moves This happens when the patient comes close to an object, wall, or Check if the patient is visible and highlighted in green in the camera view by to left and right: clinician.
- Page 87 Open the Camera View mode to observe if walker, please consider using the Flower Garden exercise as an alternative. Call ACP there is a conflict with the camera view of the patient.
- Page 88 The feet sometimes suddenly Some other object, or a wall, is interfering. When the patient comes Place the OmniVR® in a less constrained space if possible. “jump” out of the screen: close, this object is interpreted by the camera as a leg.
- Page 89 This exercise program requires a larger area, which may bring the Move the objects that are in the way, place the OmniVR® in a larger open space, or patient too close to walls or other objects that can interfere with the adjust the playing field in the “Adjustable Parameters.”...
- Page 90 If their to take a long time: swaying or oscillating on their feet while doing the test, as the OmniVR® base of support is too narrow, there is a higher probability the patient will sway or is looking for the patient to be in a stationary forward reach position for oscillate while reaching forward.
-
Page 91: Standard Limited Product Warranty
• Accessories. All accessories for ACP (30) days after notification to ACP of the number alteration. equipment/products are warranted defect, shall be eligible for repair under the NOTE: Use of the Equipment with against manufacturer’s defects in... - Page 92 OmniVR® Equipment User Manual Standard Limited Product Warranty Continued Service Center ACP is not responsible for any loss or Returned Materials Shipping Address: damage to the Equipment prior to receipt For repair or service of ACP products and Accelerated Care Plus at the ACP Service Center.
- Page 93 4999 Aircenter Circle, Suite 103 0.350.1100 | acplus.com Reno, NV 89502 800.350.1100 | acplus.com 800.350.1100 | acplus.com 800.350.1100 | acplus.com 800.350.1100 | acplus.com © 2022 Accelerated Care Plus Corporation — All Rights Reserved. MNL-0007 (1.3)
Need help?
Do you have a question about the OmniVR and is the answer not in the manual?
Questions and answers