Advertisement
quick start guide
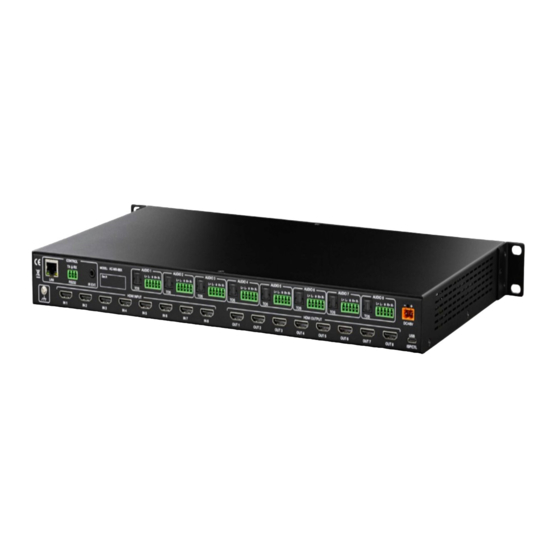
Simply stated, the AVPro Edge AC-MX-88X is a classic
transformed into an icon. Our engineers focused on reimagining
the venerable AC-MX-88, boosting bandwidth to an ultrawide
40Gbps with 8K input and output stages, for a world-first, Next-
Gen 8 input / 8 output matrix switching platform providing a
foundation for all possibilities that follow. The AC-MX-88X, designed with the needs of Next-Gen users in mind,
prepares your clients for tomorrow's over-the-near-horizon signals, while ultrawide bandwidth supplies sure-
footed dynamic headroom for hiccup-free performance with HDMI 2.1a devices. With the unmatched pedigree
of AVPro Edge behind it tradition never fails, as the AC-MX-88X lets you break convention and seek perfection.
This quick start guide will go through:
• Installation
• Front panel control
• EDID Management
• Network Setup
• RS232
• Troubleshooting
QUICK INSTALLATION
1. Connect the HDMI Input Sources to the desired input of the AC-MX-88X.
2. Connect the HDMI Output Devices.
3. Connect the Power Supply to the AC-MX-88X.
4. Turn on Input Devices.
5. Turn on Output Devices.
6. Control via the Front Panel menu arrows plus the Enter/Cancel buttons, or from the
AVPro Edge GUI Interface
FRONT PANEL CONTROL
BUTTONS
• Menu Buttons – Directional Buttons to Navigate the Menu(s)
• Enter – Selects a new Menu or Menu Option
• Cancel –Deselect a Menu Option or return to previous Menu
• Output – Select an HDMI Output
• Input – Select an HDMI Input
ac-MX-88x
8K 40G
HDMI 8
b p s
8 matrix switcher
x
Advertisement
Table of Contents

Related Manuals for AVPro Edge AC-MX-88X


Summary of Contents for AVPro Edge AC-MX-88X
- Page 1 HDMI 2.1a devices. With the unmatched pedigree of AVPro Edge behind it tradition never fails, as the AC-MX-88X lets you break convention and seek perfection. This quick start guide will go through: •...
- Page 2 To Lock Keypad 1. Depress and Hold Input Buttons 2 and 3 for a total of 5 Seconds Switching The AC-MX-88X may be switched using front panel Output and Input buttons. 1. Select the button(s) corresponding to the Output path(s) you would like to send signal to.
- Page 3 4. Press the Enter button to apply changes to the fields. Once the Host IP (the IPv4 Address of the device) is known, the AVPro Edge web GUI may be used toconfigure the switch or use the enhanced diagnostics.
- Page 4 DB9 port, only pins 2,3 and 5 are used. If your control device does not have a DB9 port, a USB-to-DB9 adapter may be required. Cables are available at AVPro Edge (AC-USB-DBP- ADPT) 1. The unit may be controlled using RS-232 by either the 3-pin, wired Phoenix connector or the USBC ISP Port.
Need help?
Do you have a question about the AC-MX-88X and is the answer not in the manual?
Questions and answers