Table of Contents
Advertisement
Quick Links
TM
NOTE: The unit must be traveling at least 3 mph (5 km/h) before motor will engage.
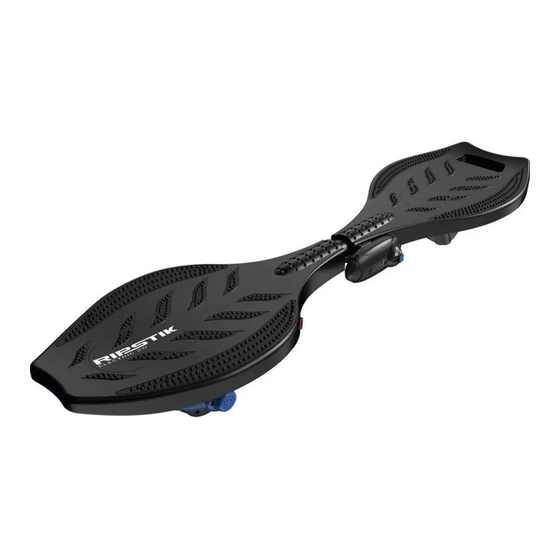
Kick to start to at least 3 mph (5 km/h) while applying the throttle to engage motor.
OWNER'S MANUAL
Read and understand this entire manual before allowing
child to use this product! For assistance contact Razor.
DO NOT RETURN TO STORE.
NOTE: Manual illustrations are for demonstration purposes only.
Illustrations may not reflect exact appearance of actual product.
Specifications subject to change without notice.
Please have your product along with the 19 character product I.D. code with you
before contacting Razor for warranty assistance and/or replacement parts.
Product I.D. Code: _____________ - ____________ - ____________
Advertisement
Table of Contents

Related Manuals for Razor RIPSTIK RUSH


Summary of Contents for Razor RIPSTIK RUSH
- Page 1 Kick to start to at least 3 mph (5 km/h) while applying the throttle to engage motor. OWNER’S MANUAL Read and understand this entire manual before allowing child to use this product! For assistance contact Razor. DO NOT RETURN TO STORE. NOTE: Manual illustrations are for demonstration purposes only.
-
Page 3: Table Of Contents
Razor emphasizes that adults are strongly advised not to disregard Razor’s recommendations or permit younger children to Do not attempt or do stunts or tricks. The RipStik Rush is not made to ride the RipStik Rush. withstand abuse from misuse, such as jumping, curb grinding or any other type of stunts. -
Page 4: Safety Warnings
Need Help? Visit our website for replacement parts, product support, a list of authorized service centers in the US and customer service contact information at www.razor.com. Please have the product I.D. code (located on the white label of your product) available for better assistance. Additional Customer at www.razor.com. -
Page 5: Before You Begin
Rush was 99% assembled and packed at the factory, there should not be any problems, even if the box has a few YOUR RAZOR RipStik Rush. The scars or dents. RipStik Rush has been built to certain Razor design specifications. MAKE SURE POWER BUTTON IS TURNED “OFF” BEFORE CONDUCTING ANY ASSEMBLY OR The original equipment supplied MAINTENANCE PROCEDURES. -
Page 6: Assembly And Set-Up
Remote Pairing Confirmation Note: Your remote should have been paired with your RipStik Rush at the factory. Turn the power switch on the Press power button on the If power button on product is remote to the ON position. - Page 7 Need Help? Visit our website for replacement parts, product support, a list of authorized service centers in the US and customer service contact information at www.razor.com. Please have the product I.D. code (located on the white label of your product) available for better assistance. Additional Customer at www.razor.com.
-
Page 8: Charging The Battery
CHARGING THE BATTERY Your RipStik Rush may not have a fully charged battery; therefore you must charge the battery prior to use. Be sure to WARNING: Use ONLY charge the battery in a clean, dry location away from direct sunlight, flames or sparks. -
Page 9: Usage
Turn power button to the “ON” position for both the RipStik Rush and the remote. Place one foot on the front deck plate and with the other foot, push (kick start) RipStik Rush while holding the lever on the remote in the “GO” position. Place other foot on rear deck plate once motor has engaged. -
Page 10: Repair And Maintenance
Need Help? Visit our website for replacement parts, product support, a list of authorized service centers in the US and customer service contact information at www.razor.com. Please have the product I.D. code (located on the white label of your product) available for better assistance. Additional Customer... - Page 11 Charger used rechargeable batteries to the The charger supplied with the RipStik Rush should be regularly examined for damage to the cord, plug, enclosure and collection and recycling location nearest you. other parts and in the event of such damage, the product must not be charged until it has been repaired or replaced.
-
Page 12: Troubleshooting Guide
Need Help? Visit our website for replacement parts, product support, a list of authorized service centers in the US and customer service contact information at www.razor.com. Please have the product I.D. code (located on the white label of your product) available for better assistance. Additional Customer... - Page 13 NOTICE: INSURANCE YOUR INSURANCE POLICIES MAY NOT PROVIDE COVERAGE FOR ACCIDENTS INVOLVING THE USE OF THIS SCOOTER/ELECTRIC RIDE-ON PRODUCT. TO DETERMINE IF COVERAGE IS PROVIDED, YOU SHOULD CONTACT YOUR INSURANCE COMPANY OR AGENT.
-
Page 16: Warranty And Contact Information
Printed in China for Razor USA LLC. Copyright © 2003-2022 Razor USA, LLC. All rights reserved. RipStik , Razor and the Razor logo design are among the registered trademarks of Razor USA LLC in the United States and/or select foreign countries. RipStik Rush ® ®...
Need help?
Do you have a question about the RIPSTIK RUSH and is the answer not in the manual?
Questions and answers