
Related Manuals for Tapo RV10 Plus


Summary of Contents for Tapo RV10 Plus
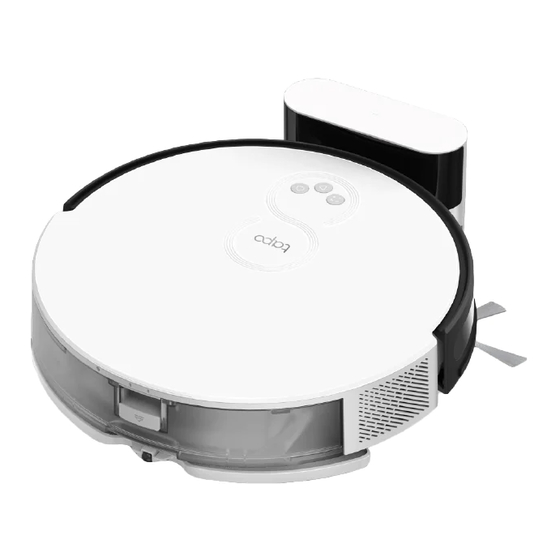
- Page 1 User Manual Robot Vacuum & Mop + Smart Auto-Empty Dock *Images may differ from actual products. ©2022 TP-Link 7106509862 REV1.0.0...
-
Page 2: Package Contents
Package Contents Robot Vacuum* Auto-Empty Dock* + Dust Bag ×1 HEPA Filter ×1 *One side brush and HEPA filter installed *One dust bag installed User Manual Side Brush ×1 Mop Cloth Mount* ×1 User Manual ×1 Cleaning Brush ×1 *One washable mop cloth installed... - Page 3 Overview Power/Clean • Press once: Start/pause cleaning. Robot Vacuum • Press and hold for 5 seconds: Turn on/off the robot vacuum. *For the first use, slide the power switch from OFF to ON to turn on. Dock • Return to the dock to charge. •...
- Page 4 Buttons Filter Latch & LEDs Cover Rubber Plug Recharge Recharge Sensor Sensor Water Tank Latch Bumper Dust Collection Port Charging Contacts Power Switch Dustbin & Water Tank Filter Cliff Sensors Dustbin Caster Wheel Water Tank Side Brush Charging Contacts Main Brush Wheel Main Brush Cover Latch Open Dustbin...
- Page 5 Overview Auto-Empty Dock Top cover Open to install/take out the dust bag. Replace the cover each time you open it. Fan Filter Dust Bag Compartment Charging Contacts Dust Bag Handle Dust Collection Port The debris in the robot vacuum will be Dust Bag collected into the dust bag through the port.
-
Page 6: Remove Protective Film
Position the Dock Remove Protective Strip 1. Place the dock on a level surface, flat against a wall, Before use, remove the protective strips on without obstacles within 1.5m (4.9ft) in front and both sides of the front bumper. 0.5m (1.6ft) on left and right. 2. - Page 7 Power On and Charge Slide the power switch from OFF to ON to turn on Place the robot vacuum on the charging dock your robot vacuum. or tap to send it back to the dock to charge. It will return to the dock at the end of a cleaning Notes job and whenever it needs to recharge.
- Page 8 • Scheduled Cleaning Set an automatic cleaning schedule, then the robot 2. Open the Tapo app, tap + icon, and select vacuum will clean automatically at the set time and your model. Follow the step-by-step return to the dock after cleaning.
- Page 9 Cleaning The robot vacuum will automatically explore and clean your home in neat rows. It will return to the charging station at the end of a cleaning job and whenever it needs to recharge. Press Once Press Once In Spot Cleaning mode, it will sweep the circular area with a diameter of 1.5m (4.9ft) calculated from its own Start/pause cleaning.
- Page 10 2. Empty the water tank. • Fill with cool/room temperature water only. Be careful not to wet the metal contacts. • Use only cleaning agents specified by Tapo. Others may corrode the water tank. 3. Install the washable 3. Remove the washable mop cloth.
-
Page 11: Care And Maintenance
Care and Maintenance To maintain optimal performance, maintain the robot vacuum according to the following guidelines. Part Maintenance Frequency Replacement Frequency* Dustbin Clean/wash as needed 3-6 months Once a week Filter 6-12 months Main Brush Every 2 weeks 3-6 months Side Brush Once a month Dust Bag... -
Page 12: Clean The Filter
Empty the Bin Clean the Filter 1. Remove the dustbin and water tank. 1. Remove the dustbin and open the lid. 2. Remove the filter. 2. Open the dustbin door to empty the dustbin. 3. Clean the filter with a cleaning brush. -
Page 13: Clean The Main Brush
Clean the Main Brush Clean the Side Brush 1. Turn the robot vacuum 1. Pull firmly to remove the side brush and remove any entangled over, then unlatch and debris. Wipe with a damp cloth if needed. remove the main 2. - Page 14 Clean the Caster Wheel Clean Main Wheels 1. Pull firmly to remove the caster wheel and remove hair or dirt. Wipe main wheels with a clean, dry cloth. 2. Re-install the caster wheel and press it firmly in place. Main Wheels...
-
Page 15: Clean The Sensors
Clean the Sensors Clean the Charging Contacts Wipe the sensors with a clean, dry cloth. Wipe the charging contacts with a clean, dry cloth. Recharge Sensor Recharge Sensor Charging Contacts Cliff Sensors Charging Contacts... - Page 16 Replace the Bag Clean Up the Dust Channel 1. Open the top cover and pull up If the LED flashes red after replacing the dust bag, please the handle of the dust bag to check if the dust channel is blocked by foreign objects. remove.
-
Page 17: Troubleshooting
Troubleshooting Issues Solution 1. Check if the power switch on the left side of the robot vacuum is toggled to “ON”. 2. The battery level is low. Please place the robot vacuum on the dock to charge and it will start automatically when it is Setup failure ready. - Page 18 Issues Solution Whether the robot vacuum The power consumption is very low when the robot vacuum is placed on the dock, which helps the battery to maintain consumes power when it is optimal performance. placed on the dock Whether the robot vacuum needs to be charged for 16 Lithium battery has no memory effect when in use, and there is no need to wait when it is fully charged.
- Page 19 READ ALL INSTRUCTIONS. BEFORE USING (THIS APPLIANCE) IMPORTANT SAFETY INSTRUCTIONS WARNING – To reduce the risk of fire, electric shock, or injury: • Do not leave appliance when plugged in. Unplug from outlet when not in use and before servicing. •...
- Page 20 TP-Link hereby declares that the device is in compliance with the essential requirements and other relevant provisions of directives 2014/30/EU, 2014/35/EU, 2009/125/EC, 2011/65/EU and (EU)2015/863. The original EU declaration of conformity may be found at https://www.tapo.com/en/support/ce/ TP-Link hereby declares that the device is in compliance with the essential requirements and other relevant provisions of the Electromagnetic Compatibility Regulations 2016 and Electrical Equipment (Safety) Regulations 2016.
Need help?
Do you have a question about the RV10 Plus and is the answer not in the manual?
Questions and answers