Table of Contents
Advertisement
Quick Links
Advertisement
Table of Contents

Related Manuals for Optics11 Life PIUMA NANOINDENTER

Summary of Contents for Optics11 Life PIUMA NANOINDENTER
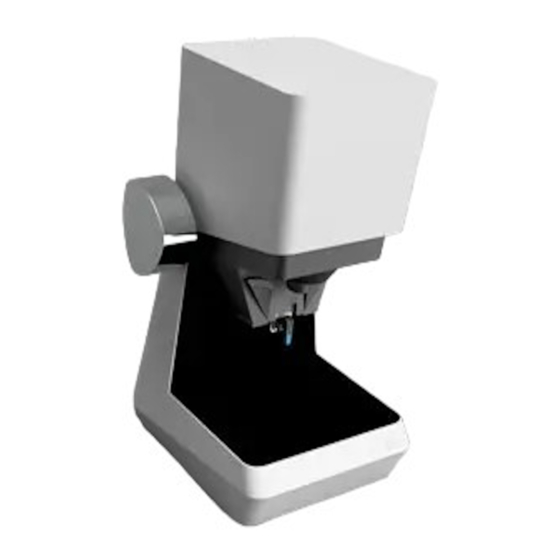
- Page 1 USER MANUAL PIUMA NANOINDENTER...
- Page 2 CONTACT INFORMATION Optics11 Life Please see our website +31 20 598 7917 for more information info@optics11.com about our products. www.optics11life.com www.optics11life.com VISITING ADDRESS Optics11 Life VU University Campus W&N Building room O-236 De Boelelaan 1081 1081 HV Amsterdam The Netherlands...
-
Page 3: Table Of Contents
Connecting components Preparing the setup for measurements Starting the system Powering up the system Starting the software Mounting a probe to the Piuma Nanoindenter Selecting the right probe Installing a probe Connecting the probe Front panel window Configuring the probe in the software... - Page 4 Calibrating the optical signal Automated optical signal calibration Failed optical calibration – “Quadrature Scan failed” Calibrating the probe geometrical factor Saving Calibration Data Using the Piuma Nanoindenter Stage controls Piezo controls The Find surface procedure Approaching the sample using the manual stage...
- Page 5 Solution temperature Air bubble Suitable probe cantilever stiffness Suitable probe tip size Adhesion Working principle of the Piuma Nanoindenter Principle of operation Interferometric displacement sensing The Piuma optical indentation probes The measurement and calculation of the Young’s modulus Oliver and Pharr / Field and Swain Hertzian contact Effective vs.
-
Page 6: Revision History
REVISION HISTORY Version 2.0 New document December 6, 2016 Ernst Breel Version 2.1 Update March 14, 2017 Jakob Pyszkowski Version 2.2 Update March 21, 2017 Jakob Pyszkowski Version 2.3 Update March 29, 2017 Jakob Pyszkowski Version 2.4 Update May 16, 2017 Jakob Pyszkowski Version 2.5 Update... -
Page 7: Safety
SAFETY The OP1550 interferometer, part of the Piuma Nanoindenter, is equipped with a class 1M laser. The laser light is coupled out via a fiber connector on the front panel and has a terminator on the back panel. Do not view directly into the beam with optical instruments. -
Page 8: Introduction
This document describes the installation and operation of the Piuma Nanoindenter instrument, as developed by Optics11 Life. Details of the installation of the Piuma Nanoindenter are provided in Chapter 1. Chapter 2 describes the preparation of the Piuma Nanoindenter for experiments. How to perform a measurement is described in detail in Chapter 3. -
Page 9: Installation
(3) Optics11 Life OP1550 interferometer, (4) the Piuma controller box, (5) the PC running the Piuma Nanoindenter software suite and (6) the Optics11 Life optical nanoindentation probes. Figure 2: Picture of the Piuma Nanoindenter setup showing the Piuma indenter head (right), OP1550 interferometer, Piuma controller and the PC. -
Page 10: Connecting Components
1.2 Connecting components Together with the Piuma Nanoindenter the following cables are provided: 1x BNC connector cable (previous Piuma versions 2x BNC) 1x DVI signal cable 2x Power cable 1x PC power cable including adapter 2x USB (B-type) connector cable 50 Ω... -
Page 11: Preparing The Setup For Measurements
2. OP1550 interferometer 3. Controller box The controller box automatically powers the Piuma Nanoindenter head and the LED illumination in the indenter head will turn on. After initialization, the interferometer will show a live measurement signal on the LCD screen. -
Page 12: Mounting A Probe To The Piuma Nanoindenter
Figure 4: Hardware check. This action initiates the homing of the X-Y stage of the Piuma Nanoindenter: The stage will move to the front-left corner, set the current ‘X’ and ‘Y’ coordinates to ‘0’ and subsequently move to the last coordinate set in the matrix scan parameters. -
Page 13: Installing A Probe
In case of doubt, please do not hesitate to contact Optics11 Life for advice. Installing a probe After powering the Piuma Nanoindenter system and running the software, open the indentation probe box. - Page 14 the OP1550 Interferometer, it needs to be connected to an adapter & patch-chord (Figure 6, left), which needs to be prior mounted to the Piuma head with 2 screws (Figure 7, left). The patch-chord then should be connected to the OP1550 Interferometer Figure 6: Connecting the left end of the patch-chord to the OP1550, a notch (red circle) indicates the preferred orientation To do so, connect first the patch-chord to the OP1550, and keep it always connected, as the probe will be connected to the adapter only.
-
Page 15: Front Panel Window
Front panel window The front panel contains all the controls required to operate the Piuma stages, set up experiments and displays the camera feed and actual status of the system. Figure 8: The home screen of the Piuma Nanoindenter software. -
Page 16: Configuring The Probe In The Software
Configuring the probe in the software It is important to correctly input the probe parameters in the software suite to obtain meaningful measurement results. Probe-specific parameters are used in the software to multiply deflection of the cantilever with calibration factor, convert it into load by multiplying with spring constant k (N/m) and calculate indentation depth which depend on tip radius (um). -
Page 17: Setting The Correct Indenter Head
BMP in addition to the tab-separated text file containing the raw data. This section is only relevant for Piuma Nanoindenter systems acquired before August 2019 Inserting the corresponding XYZ stage values (only necessary when using two indenter heads with... -
Page 18: Calibrating The Optical Signal
2.3 Calibrating the optical signal For each unique medium/probe combination, the optical signal must be calibrated. Once this is done, the next step is to calibrate the geometrical factor (see paragraph 2.4). Optical Geometrical Measurement calibration factor Please note that for correct operation, the optical signal calibration should always be performed before the geometrical factor calibration The calibration of the optical signal is done by the OP1550 interferometer and controlled via the Piuma software. -
Page 19: Automated Optical Signal Calibration
Automated optical signal calibration Once the probe is connected and adapted to the correct medium, click on ‘Calibration’ in the Piuma Software menu to enter the calibration menu. Press ‘Scan OP1550 Wavelength’ to start the optical calibration (Error! Reference source not found.). The calibration window will close automatically, then y ou can observe the wavelength scan process (Figure 14). - Page 20 Figure 14: Automatic optical signal calibration, displayed in the Piuma software (red) A successful wavelength scan should result in a clear sinusoidal signal which can be accessed on the OP1550 interferometer in the ‘Wavelength scan’ tab (Figure 15). This process must be performed for each new medium/probe combination: to measure multiple samples in a solution of which the refractive index is not significantly different, this procedure does not have to be executed again.
-
Page 21: Failed Optical Calibration - "Quadrature Scan Failed
Failed optical calibration – “Quadrature Scan failed” Figure 16: Error message – quadrature scan warning, please check the probe. During the optical calibration procedure, the OP1550 interferometer is simulating an interference pattern and automatically adjusting the gain and offset of the signal. If just a little or no signal is being detected by the OP1550, the system will react with an error message “Quadrature scan failed”... -
Page 22: Calibrating The Probe Geometrical Factor
2.4 Calibrating the probe geometrical factor Optical Geometrical Measurement calibration factor The cantilever displacement of our probes is monitored by optical interferometry. Based on this, the cavity size between the detection fiber and the cantilever is monitored and any changes in the cavity size are due to cantilever displacement. - Page 23 To get into contact with the stiff surface, the Piuma Nanoindenter features an automated find-surface approach. This approach uses a procedure combing both the motorized Z stage and the indentation piezo.
- Page 24 Figure 19: Find surface to calibrate the geometrical factor Now that the probe is in contact, press the ‘Calibrate’ button in the calibration menu to initiate the signal linearization and geometrical factor determination (Figure 20). Figure 20: Calibration of the geometrical factor. After the procedure is finished, the program will ask you whether to use the newly calculated factor or retain the old one.
- Page 25 By pressing ‘Yes’ the software automatically saves the new calibration factor in the probe configuration menu. The calibration factor in the air should not be significantly higher than the value indicated on the probe box. In liquid, the geometrical factor should be lower than the value in air. If not, repeat the optical- (wavelength scan) and geometrical calibration procedure.
-
Page 26: Saving Calibration Data
Figure 23: a displacement-time graph showing a superimposed blue and green line, proving the used calibration factor is correct. Saving Calibration Data The data for the indentations performed as part of the geometrical factor calibration steps are saved on the computer. The location where the data are saved can be set in the calibration menu by changing the ‘calibration save path’... -
Page 27: Using The Piuma Nanoindenter
3. USING THE PIUMA NANOINDENTER This section describes the use of the Piuma Nanoindenter after having prepared the instrument for a measurement (Chapter 2). Optical Geometrical Measurement calibration factor 3.1 Stage controls The motorized stages of the Piuma can be manually positioned in X, Y and Z directions, each having a travel of 12000 µm. -
Page 28: Piezo Controls
3.3 The Find surface procedure The Piuma Nanoindenter features an automated find-surface approach. This approach combines the motorized Z stage and the indentation piezo. -
Page 29: Approaching The Sample Using The Manual Stage
Approaching the sample using the manual stage To approach the sample and perform the experiment with the sample in focus, move the probe completely up using the ‘Z up’ button in the software home screen. After this is completed, position the sample on the Piuma’s sample stage and slowly lower the manual stage until the sample gets in the focal plane as can be observed in the camera image in the Piuma software suite. - Page 30 are. If the stage is regularly stopping farther away from the surface, then changing the speed to a slower speed can improve the performance (Figure 27, green). After finding the surface the tip should now be in focus, together with the sample surface. It is recommended to raise the tip a few micrometers away from the sample surface (in Z direction) to avoid damage of the tip while moving the sample in XY direction.
- Page 31 Information on the automated find-surface function for Piuma Nanoindenter systems installed before August 2019 For older versions of the Piuma hardware (installed before September 2019), the automated find surface routine works in a slightly different method. In this method, the point of contact is determined by monitoring the bending of the cantilever while stepping the motorized Z-stage according to the large and small stepsizes set in the ‘Find Surface’...
-
Page 32: Configure Experiment
3.4 Configure experiment The Piuma Nanoindenter can be used to perform simple indentations or it can be configured to run any sequence of indentations, matrix scans, moves, and to run the find surface procedure. In all cases, indentation sequences are configured using the configure experiment menu. This is found by clicking on the Config exp. - Page 33 Figure 30: The Configure Experiment window shows where the experiment file is saved (yellow), information about the steps in the experiment (blue), information about the highlighted step (green), and it gives the ability to add, remove, or reorder steps (red). To begin creating an experiment, click on the ‘Add’...
-
Page 34: Find Surface
Find Surface still applies while doing this find surface. This means that the parameter ‘Z above surf’ is defined by the value set in the ‘Options’ menu. Users with the automated find-surface function for Piuma Nanoindenter systems installed before August 2019: The ‘large stepsize’... -
Page 35: Move
A Z-direction move is positive if it moves the probe closer to the sample, and it is negative if it moves the probe away from the sample. Users with the automated find-surface function for Piuma Nanoindenter systems installed before August 2019: Due to hardware specifications, ‘Move’... -
Page 36: Single Indentations
Figure 34: A move in either relative (left, green) or absolute (right, blue) coordinates can be specified as a 'Move' step in the Configure Experiment window. All stages move at the same time. Z-direction moves are positive to move closer to the sample and negative to move away from the sample. - Page 37 just click ‘Use stage pos’, and the current location will be filled into the Start X and Start Y boxes. The grid the scan will perform is shown in Figure 35 blue. Here, the maximum grid size is 12 x 12 mm. The red dot represents the position an indentation will be performed.
-
Page 38: Saving Configure Experiment File
The experiment will be then saved as a file with a .dat extension that can be opened by selecting the folder icon next to the Experiment Path dialog box. 3.5 Modes of operation The Piuma Nanoindenter can operate in three different modes: D-mode Piezo displacement control:... -
Page 39: D-Mode
D-mode In D-mode, a piezo displacement profile is defined by the user, resulting in a specific load and corresponding indentation depth. The indentation depth depends on the displacement profile and the ratio of cantilever and sample stiffness. Since the piezo is not receiving any feedback signal from the sample (cantilever bending), it is working in an open loop with the sample. -
Page 40: I-Mode
speeds with the speed of the start and end of the profile to smooth out results. The threshold may need to be changed if a setup is particularly noisy that causes a profile to start before the cantilever is touching the surface. In order to set a load profile, switch to ‘Load control’... -
Page 41: Dynamic Mechanical Analysis - Dma
Figure 38: Mode selection: Indentation control 3.6 Dynamic mechanical analysis - DMA The Piuma Nanoindenter features, besides the quasi-static operation, a dynamic operational mode. This DMA mode allows mechanical oscillations in all three modes of operation while indenting in a sample and can be switched ‘On’... -
Page 42: Maintenance Menu And Pid Settings And Pid Tuner
Piuma Nanoindenter. Please note that changing parameters in the maintenance menu can cause unexpected behavior and potentially break the hardware on the Piuma. Use caution when changing parameters. -
Page 43: Saving Measurements
PID settings can be changed manually. Usually, adjustment of I term is sufficient to improve the precision of the feedback loop. Try slightly increasing or decreasing it to see the effect on the indentation profile or consult with one of our Application Specialists. PID tuner is a new feature that is still under development. -
Page 44: Performing Measurements
be given a different name in the dialog box (as well as a different folder location). The Piuma software will automatically create a subfolder with this name, in which the data will be saved. You should avoid changing the saved file name afterward in the Windows Explorer. This can be different for different indentation or matrix scan steps. -
Page 45: Results
The main window displays a live feed of both the optical cantilever signal as well as the video camera on board of the Piuma Nanoindenter. An image of the video feed can be saved to the hard disc by clicking ‘Save image’. The image can be magnified on the screen by clicking ‘Magnify’. The LED top... -
Page 46: Scan Results Tab
Figure 45: Signal monitoring during find surface. The load-displacement window shows the load-displacement curve of the last indentation, here in Displacement mode (Figure 44). The blue line shows the loading curve and the green line shows the unloading curve. The red line indicates the polynomial fit that is used in the Hertzian model. On the right side of the load-displacement window you can find the time data. - Page 47 indentations, if any. The number of bins can be adjusted manually to gather a better overview of the distribution of the results. Figure 46: Scan results tab, showing a 5x5 2D plot and a histogram.
-
Page 48: Data Processing And Analysis
Figure 47: can results tab showing a 5x5 D plot and a histogram. 3.11 Data processing and analysis For every single indentation and indentation in a matrix scan, all the load-displacement data is stored in a tab-separated text file. By using this text file, the load-displacement data can be imported in any program for post-processing. - Page 49 Figure 48: Typical indentation file showing the header lines and the start of the five data columns describing the indentation curve.
-
Page 50: Optimizing Instrumental Set Up
To minimize the measurement error due to mechanical disturbances, such as ground vibrations from other labs, other equipment or appliances, ensure the Piuma Nanoindenter is mounted on a stable bench. Preferably this bench is not shared with other vibrating machines such as vortexes, pumps, or large fans. -
Page 51: Laminar Flow Cabinet
Laminar flow cabinet Figure 49: Side-view of Piuma Nanoindenter The Piuma Nanoindenter can also be used inside a laminar flow cabinet. For optimal stability, only put the Piuma indenter head in the laminar flow cabinet on a sturdy surface and set up the peripherals outside the flow cabinet. -
Page 52: Sample Immobilization
have a porous surface, selecting a tip diameter that is either much smaller or larger than the average pore size avoids having the tip trapped in the sample. Sample immobilization Next to a stable sample, it is important to immobilize the sample to eliminate lateral and height drift during and between indentations. -
Page 53: Air Bubble
Air bubble As the probe and cantilever are made of glass, it can occur that an air bubble gets trapped between the probe and the cantilever: this will result in a failed probe calibration or excessive noise in the measurements. An air bubble on the probe can be detected by observing the probe through the side of a petri-dish while immersed in a transparent medium (Figure 51). -
Page 54: Suitable Probe Tip Size
Suitable probe tip size Choosing an appropriate tip size is related to the structure of the sample and the kind of experiment one wishes to perform. When measuring the global elasticity of a sample, a larger tip would be more suitable, since the applied and recorded force of each indentation would effectively average over a larger area than for a small tip. -
Page 55: Working Principle Of The Piuma Nanoindenter
5.1 Principle of operation The Piuma Nanoindenter uses proprietary optical probes in combination with the Optics11’s OP1550 interferometer, to precisely detect sample deformation by detecting cantilever bending. The Piuma’s unique probes are at the heart of what makes the Piuma instrument so easy to operate and provide unparalleled precision at the same time. -
Page 56: The Piuma Optical Indentation Probes
The cantilever stiffness and tip size of the probe is calibrated at Optics11 Life and the values are provided on the probe’s container. -
Page 57: The Measurement And Calculation Of The Young's Modulus
Figure 55: Side-view of a probe (left) with a schematic picture and sensitive part (middle, red), as well as indentation probe being pre-wetted before brought into contact with the measuring liquid (right). 5.2 The measurement and calculation of the Young’s modulus The determination of Young’s modulus relies on the measurement of load-indentation curves, which subsequently can be analyzed by different material models. -
Page 58: Oliver And Pharr / Field And Swain
4. When performing indentation mapping, the step size should be at least two times the contact radius a, to avoid oversampling, a=sqrt(hR) where h is indentation depth and R – sphere radius. Regarding the tip size, you should balance between the spatial resolution of the mapping which depends on the heterogeneity of the sample and the scale of the measurement in terms of depth. -
Page 59: Hertzian Contact
the maximum load in the unloading phase (default setting = 60% to 80% of the maximum load on the unloading curve). For more details, please find our whitepaper on nanoindentation on our website. Hertzian contact The calculation of the effective Young’s modulus by considering the Hertzian contact model follows the fit of the loading curve to the following equation: ��... -
Page 60: Dma Analysis
DMA Analysis Dynamic Mechanical Analysis (DMA) uses a cyclic motion with frequency, ��, while controlling displacement or load with an amplitude of ℎ or �� , respectively. The frequency-dependent storage modulus, ��′, and loss modulus, ��′′, are calculated with the following equations: ′... -
Page 61: The Op1550 Interferometer
6. THE OP1550 INTERFEROMETER The interferometer operates as stand-alone device and can be switched on or off any time the Piuma Nanoindenter system is in stand-by. The OP1550 interferometer contains a tunable laser source, modulation options, a high-speed photodiode and data acquisition electronics. The OP1550 interferometer is configured using the five buttons on the front panel that allow to walk through the menus and select and alter menu items. -
Page 62: Using The Op1550 Interferometer
6.1 Using the OP1550 interferometer The Measurement, Wavelength, Demodulation and Settings menu The ‘Measure’ tab displays the actual intensity that reaches the photodiode, which converts this intensity into a voltage. Figure 59: Measurement (a), Wavelength scan (b), Demodulation (c) and Settings menu (d) of the OP1550 interferometer. The ‘Wavelength scan’... -
Page 63: The Laser, Adc, Output, Modulation And Maintenance Menu
Figure 60: Datapoint changing its position after the tip is getting in contact with a surface: probe out of contact (a), noise caused by probe moving during automated find surface procedure or by manually moving the Z-stage (b), probe in contact with surface resulting in datapoint position change (c). The ‘Settings’... -
Page 64: Adjusting Laser Power To Improve The Signal To Noise Ratio
The ‘ADC’ menu displays the photodiode and data acquisition settings. By using the ‘Scan wavelength’ feature in the ‘Wavelength scan’ menu, the Offset and Gain values for the conversion of the raw photodiode voltage to fit the 0-10V range is automatically performed. In case the automatic procedure fails, the ADC menu provides the opportunity to manually adjust the offset and gain settings. - Page 65 Figure 62: Wavelength scan with “Live calibration” should be enabled before starting the calibration procedure. Furthermore, calibration should be done to no more than 3um piezo displacement (you can change that in Options). Do not use “live calibration” if the samples are adhesive as it will cause a reset of scaling factors to an over-bended position.
-
Page 66: Faq & Troubleshoot
7. FAQ & TROUBLESHOOT Q1: The automated find-surface function fails to detect the surface automatically. A1: The Piuma looks for a voltage difference when using the find-surface function. In case any problems occur with the find-surface function, please verify the signal amplitude on the OP1550 is enough (absolute values 3-7 V minimum, or an amplitude of 4V or higher). -
Page 67: Changing Fuses
Figure 64: A 230V plug and a fuse. Flowchart - Calibration Most issues that occur while measuring with the Piuma Nanoindenter are related to the calibration of the instrument. A troubleshooting flowchart is presented on the next page to guide you through possible issues and solutions, to ensure a safe calibration of the Piuma Nanoindenter and therefore a correct functionality of the instrument. - Page 68 www.optics11life.com...
- Page 69 For troubleshooting, support or questions, while working with the Piuma Nanoindenter, please visit us online at www.optics11life.com or contact us at: Tel.: +31 20 5987917 E-mail: support@optics11.com Office hours are between 8h and 18h, CET.
Need help?
Do you have a question about the PIUMA NANOINDENTER and is the answer not in the manual?
Questions and answers