
Related Manuals for multicomp pro MP740867 UK


Summary of Contents for multicomp pro MP740867 UK
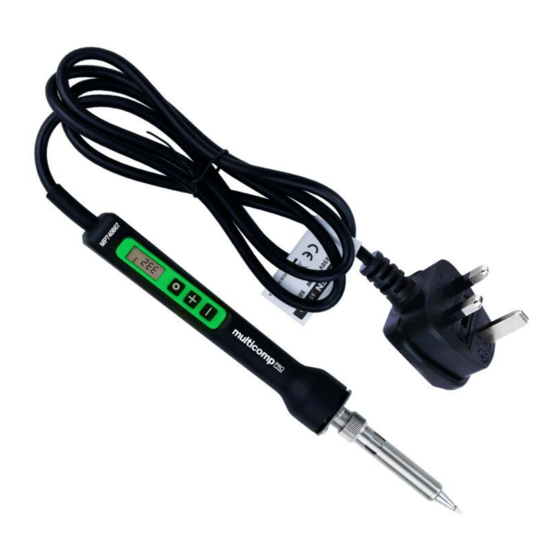
- Page 1 65W Digital Soldering Iron User Manual Part Number: MP740867 UK Newark.com/multicomp-pro Farnell.com/multicomp-pro sg.element14.com/b/multicomp-pro Page <1> 06/04/22 V1.0...
- Page 2 Soldering Iron Tip Replacement • Replacing the soldering iron tip should only be done when the iron Is switched oft and at room temperature. • The tip can be changed or replaced by unscrewing the knurled nut barrel. Caution: Damage could occur if the iron is left on without the tip inserted. • After removing the tip, blow out any remaining oxide dust that may have formed in the tip retaining area of the barrel. Warning: Care should be taken to avoid getting dust in your eyes. • Replace the tip and tighten the knurled nut barrel assembly with your fingers. • Pliers should only be used to tighten the nut if loosening occurs when the iron is hot. • Do not over tighten the nut as the element could be damaged. Cleaning • Cleaning should only be done when the power is switched off and the iron is at room temperature. • Use a damp cloth and a small amount of liquid detergent if necessary. • Do not use any chemicals, abrasives or solvents that could damage the soldering iron. Specification Voltage 20V AC to 240V AC Power Temperature Range 250°C ro 480°C Temperature Accuracy ±10°C Temperature Stability ±2°C Heating Element 4 core PTC heater Heat Indication Blue LED...
- Page 3 • Soldering work must be conducted on a stable, non-combustible surface. • Do not touch any metallic parts near the soldering tip. • The iron must not be left unattended while it is connected to the supply mains. • The soldering iron must be placed in it’s holder when not in use. • Turn the soldering iron off and unplug it when it is not in use. • This device must be earthed through the mains lead and plug. What’s Included • Soldering Iron and holder • User manual Product Overview • Fast heating and precise temperature control. • Ergonomic handle mounted two button temperature adjustment. • Visual display for temperature setting. • LED indicator for heating indication. Operation • Connect to the mains supply and turn on the soldering iron by pressing the mode button. • D efault temperature is set to 325°C and is shown on the display when initially powered on but thereafter the last set temperature is stored and restored after being powered off. • T he mode button LED flashes brightly when the heating element is on and flashes less bright when the set temperature is reached.
- Page 4 Pre-set Temperature Setting • I n the quick temperature setting state, press the mode button to enter the pre-set temperature setting. This allows custom pre-sets to be stored and used. • Press + or - to adjust in 1 degree increments shown on the display. • The adjustment range: ± 50°C / ± 90°F applicable to the last pre-set used. Temperature Unit Switching • In the temperature compensation state, press the mode button to enter Centigrade or Fahrenheit setting mode. • Pressing + or - switches between units displayed. Sleep and Power Off Setting • In the temperature unit switching state, press the mode button to enter sleep setting mode. • Pressing + or - switches sleep mode on or off. 1 indicates mode is on, 0 is off. • After 10 mins inactivity the display shows SLP and the tip maintains 250°C then after a further 20 mins the iron powers off. Shutdown • Press the mode button in normal state to turn the iron off. OFF is displayed. Troubleshooting • I f all 5 temperature indicating LEDs are flashing or if H-E is displayed on the screen and there is no heating, the heating element may have failed. • I f all 5 temperature indicating LEDs are lit solidly or when S-E is displayed on the screen, there is a fault in the temperature sensor.
Need help?
Do you have a question about the MP740867 UK and is the answer not in the manual?
Questions and answers