Table of Contents
Advertisement
Quick Links
Advertisement
Table of Contents

Related Manuals for Romed-Holland BP-1000

Summary of Contents for Romed-Holland BP-1000
- Page 1 USER MANUAL Fully Automatic Blood Pressure Meter : BP-1000...
-
Page 2: Table Of Contents
Contents A. Specifications B. Safety Instructions C. About Blood Pressure D. Parts Identification E. Battery Installation F. Time Adjustment G. Erase Memories H. About the Touch Key I. Applying the Cuff J. Measurement Procedure K. Take a Measurement L. Recalling Memories M. -
Page 3: Specifications
Specifications Measurement Method Oscillometric Measurement Range 30-280mmHg Pulse Range 40 – 199p/min Measurement Accuracy Pressure: ±3 mmHg Pulse: ±5% Cuff Size 52 x 13.5cm (normal cuff) Operating Condition +10°C ~ + 40°C / 30%RH ~ 80%RH Storage Condition -5°C ~ +35° / 30%RH ~ 80%RH Power Supply 4 x AA batteries Dimensions... -
Page 4: Safety Instructions
Safety Instructions 1. This device is for household use only. It is not intended as a substitute for consultation with your physician. 2. For users diagnosed with common arrhythmia (atrial or ventricular premature beats or atrial fibrillation), diabetes, poor blood circulation, kidney problems, or for users who suffered from stroke, or for unconscious users, the device might not be suitable for use. -
Page 5: About Blood Pressure
About Blood Pressure What is Blood Pressure? Blood pressure is the pressure exerted on the artery tube while blood flows through the arteries. The pressure measured when the heart contracts and sends blood out of the heart is systolic (high pressure). The pressure measured when the heart dilates with blood flowing back into the heart is called diastolic (low pressure). - Page 6 About Blood Pressure It is important to consult your physician regularly. Your physician will tell you your normal blood pressure range as well as the point at which you will be considered at risk. Blood Pressure Fluctuation Blood pressure fluctuates all the time! You should not be worried if you get two or three measurements at high levels.
-
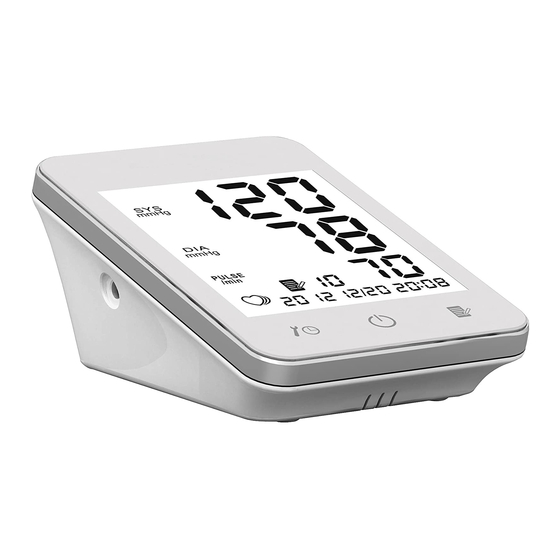
Page 7: Parts Identification
Parts identification 1. Systolic Pressure 2. Diastolic Pressure 3. Pulse Rate 4. Time and date 5. Heart Rate Indicator 6. Low Battery Indicator 7. Memory Number... -
Page 8: Battery Installation
Battery Installation 1. Press down and slide the battery cover in the direction of the arrow to open the battery compartment. 2. Install or replace 4 ‘AA’ batteries in the battery compartment, taking care that the polarities (+) and (-) are correct. -
Page 9: Time Adjustment
Time Adjustment 1. In the shutdown state press key “ ”, to display the time. 2. Press the key “ ” for more than 3 seconds to enter “set” mode. The display will show a blinking number showing the year. Press the key “ ”... -
Page 10: Erase Memories
Erase Memories 1. In the “set” mode, after setting the time, press the key “ ” again to see the symbol “ ” appear on the LCD, blinking. 2. Long press the key “ ” until the LCD shows “CL”, and press the key “... -
Page 11: Applying The Cuff
Applying the Cuff 1. Plug in the cuff connecting tube into the unit and unwrap the arm cuff, leaving the “Index” end of the cuff through the D-ring. 2. Put the cuff on your left arm, make sure the air tube is in the inside of the elbow. 3. -
Page 12: Measurement Procedure
Measurement Procedure Important tips for the most accurate blood pressure measurements Sit comfortably at a table and rest your arm on the table; • Relax for about five to ten minutes before measurement; • Place the centre of the cuff at the same height as your heart; •... -
Page 13: Take A Measurement
Take a Measurement 1. Press the key “ ”. All digits will light up, checking the display functions. The checking process will be completed after about 2 seconds. 2. After all symbols appear, the display will show a blinking “0”. The monitor is now ready to measure and will automatically inflate to a settled pressure value around 180mmHg. -
Page 14: Recalling Memories
Recalling Memories Note: This device stores eighty measurements in the • memory automatically. The data is always retained in the device. This device is able to record systolic, diastolic and • pulse simultaneously with time/data. This device is capable to show average results of •... -
Page 15: Troubleshooting
Troubleshooting Problem Possible Reason Recommended Action Batteries are drained Replace all batteries with new ones Nothing appears on Reinstall the batteries with negative the display, even Battery terminals are not and positive terminals matching when the power is in the correct position those indicated on the battery turned on. -
Page 16: Maintenance
Maintenance 1. Do not drop this monitor or subject it to strong impact. 2. Avoid high temperature and solarization. Do not immerse the monitor in water as this will result in damage to the monitor. 3. If this monitor is stored near freezing, allow it to acclimate to room temperature before use. -
Page 17: Explanation Of Symbols On Unit
Explanation of symbols on unit Probe: Type BF Applied part Serial number Batch code Catalogue number. CE Mark Date of manufacture Manufacturer Keep dry Keep away from sunlight Temperature limit Collect separately from other household waste Refer to user manual Consult instructions for use Caution... -
Page 18: Electromagnetic Compatibility Information
Electromagnetic compatibility information MANUFACTURER’S DECLARATION - ELECTROMAGNETIC EMISSIONS The Romed Automatic Digital Blood Pressure Monitor is intended for use in the electromagnetic environments specified below. The customer or the user of the Romed Automatic Digital Blood Pressure Monitor should assure that it is used in such an environment. Emission test Compliance Electromagnetic environment-guidance... - Page 19 Electromagnetic compatibility information MANUFACTURER’S DECLARATION - ELECTROMAGNETIC IMMUNITY For EQUIPMENT and SYSTEMS that are not LIFE -SUPPORTING The Romed Automatic Digital Blood Pressure Monitor is intended for use in the electromagnetic environment specified below. The customer or the user of The Romed Automatic Digital Blood Pressure Monitor should assure that it is used in such an environment.
- Page 20 Electromagnetic compatibility information MANUFACTURER’S DECLARATION - ELECTROMAGNETIC IMMUNITY For EQUIPMENT and SYSTEMS that are not LIFE -SUPPORTING Recommended separation distances between portable and mobile RF communications equipment and the Romed Automatic Digital Blood Pressure Monitor The Romed Automatic Digital Blood Pressure Monitor is intended for use in an electromagnetic environment in which radiated RF disturbances are controlled.
Need help?
Do you have a question about the BP-1000 and is the answer not in the manual?
Questions and answers