Table of Contents
Advertisement
Quick Links
Advertisement
Table of Contents

Related Manuals for Altimeters VISO II+


Summary of Contents for Altimeters VISO II+
- Page 1 VISO II+™ MANUAL...
- Page 2 VISO II+ is a trademark of LB Altimeters, Denmark. LB Altimeters operates a policy of continuous development. Therefore, we reserve the right to make changes and improvements to any of the products described in this guide without prior notice. REV. 02, SEPTEMBER 2022...
- Page 3 Always ensure your altimeter is adjusted to zero prior to jumping to account for any changes in barometric pressure. Altimeters may give erroneous readings if you are tumbling or the altimeter is in a burble (wake), such as when sit flying or sky surfing. Chest mount altimeters are more vulnerable to this problem.
-
Page 4: Table Of Contents
CONTENTS Introduction ..... 6 Set Current Date Selector ..32 Description ..... . 9 Set Current Time Selector . - Page 5 Freefall Time ....46 Logbook ..... . 63 Max.
-
Page 6: Introduction
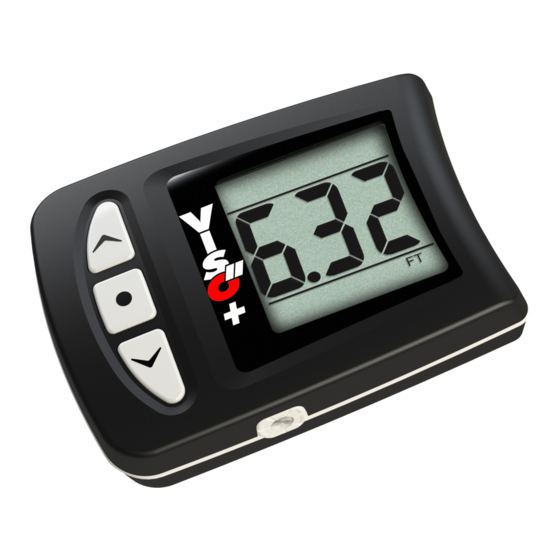
INTRODUCTION Congratulations on purchasing your new VISO II+™! The VISO II+™ design is based upon the latest findings in microcomputer technology and freefall parameters. Please read ALL of the instructions prior to actual skydiving use. The VISO II+™ consists of three instruments: 1 Digital Altimeter Stores detailed altitude information about the last jump for later review 2 Digital Speedometer... - Page 7 4 Daily Jump Counter • Displays number of jumps completed on last date and/or 9 other jump dates. Features • Digital altimeter or speedometer • Electroluminescent backlight for night jumping. Can remain ON for several hours • Automatic calibration to local elevation •...
- Page 8 Software & functions • Stores up to 10 minutes of data from the last jump Displays altitude and speed details from exit to landing • Records and displays jump information about the last 200 jumps including exit altitude, deployment altitude, freefall time, max. speed in freefall and max. speed under canopy •...
-
Page 9: Description
DESCRIPTION UP button 4 LCD display Middle button 5 Reset button (on rear side) DOWN button... -
Page 10: Display
DISPLAY Date/Time Area Altitude/Speed Area Status Area The display has the following characteristics by default (normal usage): Date/Time Area 1 Date icon 2 Time icon... - Page 11 3 Additional information, displaying: - current date/time - time in profile when in Profile Area - date/time when in Logbook Area 4 Battery status Battery Power Level icon – indicates the remaining battery capacity Altitude/Speed Area 5 Main information, displaying: - altitude when VISO II+™...
- Page 12 Status Area True Airspeed (TAS) / Skydiver’s Airspeed (SAS) status Mph/Kmh status OFF icon - Used to manually power OFF the VISO II+™ Speedometer indicator when VISO II+™ is set to Speedometer mode 10 Lock icon Used to indicate and control entrance to ACCESS mode 11 Feet/Meter status 12 Altimeter indicator when VISO II+™...
- Page 13 The VISO II+™ runs a It then displays the ...and switches to a screen configuration self-test and displays firmware version number all icons together with a factory referred to as the “Main reference number... Window”. Main Window This represents the starting point for all further actions and subsequent displays.
-
Page 14: Main Window
MAIN WINDOW Explanation The Main Window is the default window which displays current time, battery status and either Altitude or Speed. Altimeter Mode When the VISO II+™ is set to Altimeter mode, the “ALTI” and “Feet/Meter” icons are ON. The VISO II+™ will display the altitude during climb, in freefall and under canopy. - Page 15 Altimeter Displays In Altimeter mode the LCD may show 3 different displays, depending on what altitude value is shown. If the altitude is below 1000 the altitude is displayed as nor- mal. Altitude resolution is in 10 feet (5 meter) increments. If the altitude is 1000-9999, the altitude is displayed as tens of feet or meter.
-
Page 16: Speedometer Mode
If the altitude is 10000 or higher, the altitude is displayed as hundreds of feet or meter. Altitude resolution is in 100 feet (100 meter) increments. Speedometer Mode When the VISO II+™ is set to Speedometer mode, the SPEED, “Feet/Meter”, “Mph/Kmh” and “TAS/SAS” icons are ON. The VISO II+™... - Page 17 Speedometer Display during the freefall Speed resolution is in 1 Mph (1 Kmh) increments. Important Notice about Speed Recordings Experience has shown that when mounting the VISO II+™ on the hand or belly, different air pressures induced by hand or body movements may result in incorrect recordings of speeds.
-
Page 18: Road Map
ROAD MAP It is recommended that you first familiarize yourself with the VISO II+™ ROAD MAP which is a helpful tool when using the VISO II+™. The ROAD MAP comprises four areas: • Backlight Setup (see page 38) • Profile (see page 50) •... -
Page 19: Customise The Viso Ii+™ Settings
CUSTOMISE THE VISO II+™ SETTINGS The VISO II+™ can be customised to your personal settings. Your settings will be stored and recalled after replacing batteries. When you first get the VISO II+™, we rec- ommend you to go through the SETUP Selector to customise the VISO II+™ settings. SETUP Selector In the Setup Area the following options can be selected: •... - Page 20 • Preset jump counter • Reset jump counter • Turn the VISO II+™ OFF • Lock window Performing ACCESS: to access Jump Profile, use to access Logbook information. 1 Press and release quickly. The lock icon turns ON and OFF 2 When the lock icon turns ON again, immediately press the same button and keep it pressed (lock turns OFF) 3 When the lock icon turns ON again, release immediately...
- Page 21 To enter the Setup Area Press and hold for 5 seconds from any jump profile or logbook information screen. To leave the Setup Area Wait until the display times out, or press repeatedly until the lock window shows. Then press to exit.
-
Page 22: Altimeter/Speedometer Selector
Altimeter/Speedometer Selector Altimeter/Speedometer • Feet/Meter (Altimeter) • Mph/Kmh (Speedometer) • Altitude offset • Dive Type • True Airspeed (TAS)/Skydiver’s Airspeed (SAS) • Set current year • Set current date • Set current time • Preset jump counter • Reset jump counter • Turn the VISO II+™ OFF • Lock window The VISO II+™... -
Page 23: Feet/Meter Selector
Feet/Meter Selector Altimeter/Speedometer • Feet/Meter (Altimeter) • Mph/Kmh (Speedometer) • Altitude offset • Dive Type • True Airspeed (TAS)/Skydiver’s Airspeed (SAS) • Set current year • Set current date • Set current time • Preset jump counter • Reset jump counter • Turn the VISO II+™ OFF • Lock window The VISO II+™... -
Page 24: Mph/Kmh Selector
Mph/Kmh Selector Altimeter/Speedometer • Feet/Meter (Altimeter) • Mph/Kmh (Speedometer) • Altitude offset • Dive Type • True Airspeed (TAS)/Skydiver’s Airspeed (SAS) • Set current year • Set current date • Set current time • Preset jump counter • Reset jump counter • Turn the VISO II+™ OFF • Lock window The VISO II+™... -
Page 25: Altitude Offset
Altitude Offset Altimeter/Speedometer • Feet/Meter (Altimeter) • Mph/Kmh (Speedometer) • Altitude offset • Dive Type • True Airspeed (TAS)/Skydiver’s Airspeed (SAS) • Set current year • Set current date • Set current time • Preset jump counter • Reset jump counter • Turn the VISO II+™ OFF • Lock window If the dropzone landing elevation differs from that of the aircraft take off elevation, offset the VISO II+™... -
Page 26: Dive Type Selector
Dive Type Selector Altimeter/Speedometer • Feet/Meter (Altimeter) • Mph/Kmh (Speedometer) • Altitude offset • Dive Type • True Airspeed (TAS)/Skydiver’s Airspeed (SAS) • Set current year • Set current date • Set current time • Preset jump counter • Reset jump counter • Turn the VISO II+™ OFF • Lock window The Dive Type mode can be used to change parameters when the VISO II+™... - Page 27 Press to scroll forward through the dive type list. Press to scroll backward through the dive type list. Press to save setting and enter the TAS/SAS Selector. Dive type 0 This is the VISO II+™ factory default parameters. Dive Type 1: SLO (Slow) In SLO the exit fall rate and deployment calculation parameters are changed to fit very slow falling types of dives, like wing suit dives, etc.
-
Page 28: True Airspeed (Tas)/Skydiver's Airspeed (Sas)
TAS is a term used in aviation: It is the speed of an object relative to the surrounding air, regardless of the altitude. SAS is a concept developed by LB Altimeters: SAS is the speed of a skydiver calcu- lated from measurements of air pressure and temperature and converted to a fixed air pressure (875.3 mb) and a fixed temperature (+7.080 °C) which corresponds to 4,000... - Page 29 Press to toggle between TAS and SAS. The active selection flashes. Press to save setting and enter the Set Current Year selector. Note: Jump data is continuously stored in both TAS and SAS. Stored information may be displayed in either unit of measurement by selecting the respective mode.
- Page 30 Recommendation When using the VISO II+™ as a speedometer in a big way base it is recommended to set it to SAS. SAS will show the same speed throughout the skydive (at the same body position), whereas TAS will show a different speed throughout the dive (the same body position, different air density).
-
Page 31: Set Current Year Selector
Set Current Year Selector Altimeter/Speedometer • Feet/Meter (Altimeter) • Mph/Kmh (Speedometer) • Altitude offset • Dive Type • True Airspeed (TAS)/Skydiver’s Airspeed (SAS) • Set current year • Set current date • Set current time • Preset jump counter • Reset jump counter • Turn the VISO II+™ OFF • Lock window Press to increase year. -
Page 32: Set Current Date Selector
Set Current Date Selector Altimeter/Speedometer • Feet/Meter (Altimeter) • Mph/Kmh (Speedometer) • Altitude offset • Dive Type • True Airspeed (TAS)/Skydiver’s Airspeed (SAS) • Set current year • Set current date • Set current time • Preset jump counter • Reset jump counter • Turn the VISO II+™ OFF • Lock window Press to increase date. -
Page 33: Set Current Time Selector
Set Current Time Selector Altimeter/Speedometer • Feet/Meter (Altimeter) • Mph/Kmh (Speedometer) • Altitude offset • Dive Type • True Airspeed (TAS)/Skydiver’s Airspeed (SAS) • Set current year • Set current date • current time • Preset jump counter • Reset jump counter • Turn the VISO II+™ OFF • Lock window Press to increase time. -
Page 34: Preset Jump Counter Selector
Preset Jump Counter Selector Altimeter/Speedometer • Feet/Meter (Altimeter) • Mph/Kmh (Speedometer) • Altitude offset • Dive Type • True Airspeed (TAS)/Skydiver’s Airspeed (SAS) • Set current year • Set current date • Set current time • Preset jump counter • Reset jump counter • Turn the VISO II+™ OFF • Lock window The VISO II+™... -
Page 35: Reset Jump Counter Selector
Reset Jump Counter Selector Altimeter/Speedometer • Feet/Meter (Altimeter) • Mph/Kmh (Speedometer) • Altitude offset • Dive Type • True Airspeed (TAS)/Skydiver’s Airspeed (SAS) • Set current year • Set current date • Set current time • Preset jump counter • Reset jump counter •... -
Page 36: Turn Viso Ii+™ Off Selector
Turn VISO II+™ OFF Selector Altimeter/Speedometer • Feet/Meter (Altimeter) • Mph/Kmh (Speedometer) • Altitude offset • Dive Type • True Airspeed (TAS)/Skydiver’s Airspeed (SAS) • Set current year • Set current date • Set current time • Preset jump counter • Reset jump counter • Turn the VISO II+™... -
Page 37: Lock Window
Lock Window Altimeter/Speedometer • Feet/Meter (Altimeter) • Mph/Kmh (Speedometer) • Altitude offset • Dive Type • True Airspeed (TAS)/Skydiver’s Airspeed (SAS) • Set current year • Set current date • Set current time • Preset jump counter • Reset jump counter • Turn the VISO II+™ OFF • Lock window Press to leave the Setup Area and return to... -
Page 38: Backlight Setup Area
BACKLIGHT SETUP AREA Press and hold for 2 seconds to toggle between backlight ON and OFF. Note: Backlight is specifically for night jumps. Note: If the backlight is turned ON while the VISO II+™ is not in Jump Mode, the backlight will automatically turn OFF after 30 minutes, if still not in Jump Mode. -
Page 39: Zeroing The Viso Ii
ZEROING THE VISO II+™ The VISO II+™ continuously adjusts itself to the local elevation and displays 0 FT (MT) in the Altitude/Speed area. If the Altitude/Speed area does not display “0” prior to jumping, the unit has not yet adjusted itself to the local elevation and it must be manually zeroed. -
Page 40: Jump Mode
JUMP MODE Shortly after takeoff the VISO II+™ switches to Jump Mode and displays the altitude or speed in the Altitude/Speed area. - When the VISO II+™ is set to Altimeter, the ALTI and Feet/Meter icons are ON and it will display the altitude during climb, during freefall and under canopy. - When the VISO II+™... -
Page 41: Daily Jump Counter
DAILY JUMP COUNTER The VISO II+™ can display the number of jumps made on last date and on 9 other jump dates. In the Main Window, press and hold for 2 seconds. The unit displays the number of jumps completed on the last date. Scroll using to display number of jumps completed on other jump dates. -
Page 42: Jump Data
JUMP DATA After landing the jump data can be displayed on the LCD by accessing the Logbook Area and Profile Area. Logbook Area The logbook can store up to 200 jumps, and be reset at any time. It is not possible to delete a single jump. Perform ACCESS with to enter the Logbook Area (see page 20 for guide to performing ACCESS). -
Page 43: Jump Number
LOGBOOK AREA Jump Number Jump Number • Exit Altitude • Deployment Altitude • Freefall Time • Max. Speed in Freefall • Max. Speed under Canopy • Lock Window Press to scroll in the jumps. Toggles between date and time Date/Time information will switch Jump number accordingly in the “Date/Time Area”. -
Page 44: Exit Altitude
Exit Altitude Jump Number • Exit Altitude • Deployment Altitude • Freefall Time • Max. Speed in Freefall • Max. Speed under Canopy • Lock Window Exit Jump number Press to scroll through jumps in symbol Exit Altitudes. Press to go to Deployment Altitude information. Note: The LCD may show 3 different displays, depending on what altitude value is shown. -
Page 45: Deployment Altitude
Deployment Altitude Jump Number • Exit Altitude • Deployment Altitude • Freefall Time • Max. Speed in Freefall • Max. Speed under Canopy • Lock Window Deployment Jump number Press to scroll through jumps in symbol Deployment Altitudes. Press to go to Freefall Time information. Note: The LCD may show 3 different displays, depending on what altitude value is shown. -
Page 46: Freefall Time
Freefall Time Jump Number • Exit Altitude • Deployment Altitude • Freefall Time • Max. Speed in Freefall • Max. Speed under Canopy • Lock Window Time Jump number Press to scroll through jumps in Freefall Times. Freefall time is recorded in seconds. Press to go to Max Speed in Freefall information. -
Page 47: Max. Speed In Freefall
Maximum Speed in Freefall Jump Number • Exit Altitude • Deployment Altitude • Freefall Time • Max. Speed in Freefall • Max. Speed under Canopy • Lock Window Max. freefall Jump number Press to scroll through jumps in speed symbol Max Speed in Freefall. -
Page 48: Max. Speed Under Canopy
Maximum Speed under Canopy Jump Number • Exit Altitude • Deployment Altitude • Freefall Time • Max. Speed in Freefall • Max. Speed under Canopy • Lock Window Max. canopy Jump number Press to scroll through jumps in speed symbol Max Speed in Freefall. - Page 49 Lock Window Jump Number • Exit Altitude • Deployment Altitude • Freefall Time • Max. Speed in Freefall • Max. Speed under Canopy • Lock Window Press to leave the Logbook Area and return to the Main Window, or press to return to Logbook Area.
-
Page 50: Profile Area
PROFILE AREA The Profile Area features playback of the altitude/speed profile for the last jump. Note: Speed information is available in playback mode, if freefall has lasted 6 seconds or more. Perform ACCESS with to enter the Profile Area. See page 20 for information about performing ACCESS. -
Page 51: Playback Altitude Versus Time
Playback Altitude versus Time Playback Altitude versus Time • Playback Speed versus Time • Lock Window Press to playback the altitude profile at ¼ speed Time in profile Press twice to playback in real time Press three times to playback at 2x speed Press four times to playback at 5x speed Press... -
Page 52: Playback Speed Versus Time
Playback Speed versus Time Playback Altitude versus Time • Playback Speed versus Time • Lock Window Press to playback the speed profile at ¼ speed Time in profile Press twice to playback in real time Press three times to playback at 2x speed Press four times to playback at 5x speed Press... - Page 53 Important Notice about Speed Recordings Experience has shown that when mounting the VISO II+™ on the hand or belly, different air pressures induced by hand or body movements may result in incorrect recordings of speeds. For more information about using the VISO II+™ as a speedometer, see page 16. Lock Window Playback Altitude versus Time •...
-
Page 54: Air Filter
AIR FILTER The VISO II+™ is water resistant. The Air Filter is the white circular part mounted on the side of the unit. If it becomes wet, let the VISO II+™ dry in a warm place for 48 hours. Note: The Air Filter must be replaced if jumping is resumed quickly or if the VISO II+™ has been submerged into water. -
Page 55: Resetting The Viso Ii
RESETTING THE VISO II+™ Insert a paperclip into the hole on the battery cover of the unit and release. The unit restarts. After battery replacement or resetting, the sys- tem requires 2 minutes to calibrate itself before displaying the correct battery status. While calibrating, the battery icon toggles between full and low. -
Page 56: Battery Replacement
BATTERY REPLACEMENT WARNING KEEP BATTERIES OUT OF REACH OF CHILDREN Swallowing can lead to chemical burns, perforation of soft tissue, and death. Severe burns can occur within 2 hours of ingestion. Seek medical attention immediately. Carefully remove the screw from the battery cover and remove batteries. -
Page 57: Battery Status
BATTERY STATUS Full capacity: Symbol shows two black bars inside the battery icon. Half capacity: Symbol shows one black bar inside the battery icon. Low capacity: Symbol shows no black bars, just an “empty” battery icon. Batteries should be replaced as soon as possible.The “Low bat” flashes once every 15 sec. -
Page 58: Firmware Version
FIRMWARE VERSION Factory reference number Firmware version Perform a reset or turn the unit OFF and then ON. The VISO II+™ runs a self-test and displays all icons. The unit then displays the firmware version together with a factory reference number. For information about how to perform reset, see page 55... -
Page 59: Trouble-Shooting
Press and hold while resetting. The VISO II+™ resets to factory settings and beeps three times. Note: All logbook data will be lost. If the unit is still faulty, please contact your local dealer or LB Altimeters. -
Page 60: Appendix
TAS is a term used in aviation: It is the speed of an object relative to the surrounding air, regardless of the altitude. SAS is a new concept developed by LB Altimeters: SAS is the speed of a skydiver calculated from measurements of air pressure and temperature and converted to a fixed air pressure (875.3 mb) and a fixed temperature (+7.080 °C) which corresponds... - Page 61 4,000 feet ASL. 4,000 feet is chosen as the refer- ence altitude by LB Altimeters since this is the average altitude at which the working time of a skydive is normally ended.
- Page 62 Conclusion Using SAS, skydivers in any body position can express their vertical speed by a number (SAS). This number remains virtually constant regardless of altitude with little or no variance due to temperature differences and can be compared with the airspeeds of other skydivers.
-
Page 63: Specifications
SPECIFICATIONS Mechanical Dimensions: 55 x 40 x 13 mm (2.2” x 1.6” x 0.5”) Weight: 34 g (1.1 oz) LCD area: 5 cm² (0.8 inch²) Logbook Maximum jumps: Logbook information: Exit altitude Deployment altitude Freefall time Max. speed in freefall Max. -
Page 64: Profile Storage
Profile Storage Continued storage of last jump Maximum logging time: 10 minutes Sampling rate: 4/sec. Maximum logging altitude: 39,999 feet (12,191 m) Factory default settings Mode Altimeter Feet/Meter: Feet Mph/Kmh: TAS/SAS: Type of Dive: Date: 2018:01:01 (year, month, date) Time: 12:00:00 (hours, minutes, seconds) -
Page 65: Other
-9900 ft to +9900 ft -3000 meter to +3000 meter Daily Jump Counter: Max 10 dates Battery type: 2 x Renata CR2325 Battery Life Time (at normal use): approximately 2 years LB Altimeters part no.: 205442 NATO Stock no.: 6605-22-613-6341... -
Page 66: Warranty
If within 24 months of the purchase of VISO II+™ a defect or damage is identified by faulty manufacture, LB Altimeters will repair the unit at no cost to the end user. To make a claim under this warranty, send the unit to an authorized dealer or directly to LB Altimeters together with the dated purchase invoice or receipt. - Page 67 Waiver of Liability The buyer and user of the VISO II+™ indemnify the manufacturer and vendor from any liability for damage incurred before, during and after skydiving with the instrument.
- Page 68 Visit lbaltimeters.com Instructional videos for manual and YouTube and support channel...
Need help?
Do you have a question about the VISO II+ and is the answer not in the manual?
Questions and answers