Table of Contents
Advertisement
Quick Links
Advertisement
Table of Contents

Related Manuals for Rush Creek Creations 37-0046


Summary of Contents for Rush Creek Creations 37-0046
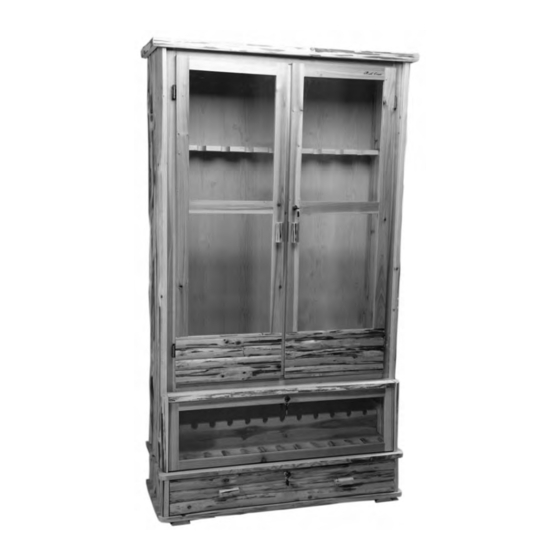
- Page 1 Item # 37-0046 9-GUN, 12 PISTOL CABINET WITH STORAGE...
- Page 2 Tools Needed For Assembly: Screwdriver Drill Assembly Tips: If you are using an electric screwdriver for assembly, set it at low torque and do not over-tighten the hardware. Care: Apply lemon oil with a soft cotton cloth. Do not use products with silicone; these may cause damage to the finish. Do not allow the wood to come in contact with any type of paint remover.
- Page 3 Parts List Side panel for Side panel Top panel for Bottom panel bottom cabinet bottom cabinet Barrel rest Pistol cabinet Back panel Butt plates panel Drawer Front door Door knob Top panel panel Back panel Pistol rest Flat Bolt support head screw Flat...
- Page 4 Step 1: Unpack the carton on a smooth surface. Check carefully to ensure that all parts are included. Attach the side panels (#1) to the top panel for the bottom cabinet (#3) using bolts (#13). Connect the bottom cabinet side panel (#2) to the top panel for the bottom cabinet (#3).
- Page 5 Step 3: Insert the butt plate panel (#7). Step 4: Slide and push the back panel (#8) between the two side panels.
- Page 6 Step 5: Use bolts (#13) to tighten the top panel (#9). Step 6: At least two people are needed to carefully lift the cabinet to an upright position. Use flat head screws (#18) to screw the back panel support (#16) to the back panel. Use flat head screws (#15) to screw the back panel to the cabinet.
- Page 7 Step 7: Install the front door panel (#10) to the cabinet; tighten bolts (#13) into the holes on the door panel. Insert the pistol rest (#14) into the pistol cabinet; insert the drawer (#12) into the bottom section. Use flat head screws (#19) to screw the door knob (#11) to the door. Use flat head screws (#20) with anchors (#21) to secure the cabinet to the wall.
- Page 8 Be sure to check out all the exciting products has to offer. Visit our web site at: www.rushcreeklogfurniture.com Warranty: All of our products come with a one year warranty on all parts. Manufacturer Defects: Defective parts will be replaced at no cost to you. Please send an e-mail to cs@rushcreeklogfurniture.com including photos of the defective part(s) and we will send replacements.
Need help?
Do you have a question about the 37-0046 and is the answer not in the manual?
Questions and answers