Advertisement
Electric Power Cart
Instruction Manual
WARNING:
Read carefully and understand all INSTRUCTIONS before operating. Failure to follow the safety rules
and other basic safety precautions may result in serious personal injury.
Save these instructions in a safe place and on hand so that they can be read when required. Keep
these instructions to assist in future servicing.
REV 07/03/19
Advertisement
Table of Contents

Subscribe to Our Youtube Channel
Related Manuals for Landworks LBB0103


Summary of Contents for Landworks LBB0103
- Page 1 Electric Power Cart Instruction Manual WARNING: Read carefully and understand all INSTRUCTIONS before operating. Failure to follow the safety rules and other basic safety precautions may result in serious personal injury. Save these instructions in a safe place and on hand so that they can be read when required. Keep these instructions to assist in future servicing.
-
Page 2: Specifications
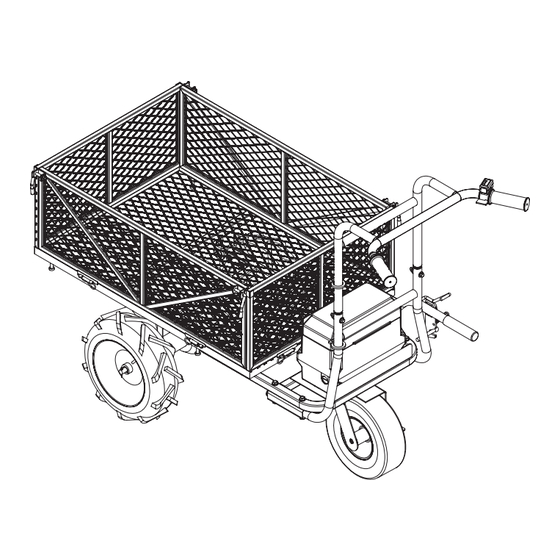
SPECIFICATIONS Item No. LBB0103 Rating 48 Volt DC/500W Loading Capacity 230kgs/500lbs Battery Pack 48V,4Ah,177.6Wh Lithium Battery* Speed Forward: 0-5km/h Variable, Reverse: 0-3.5km/h Variable POWER CART SAFETY USE WARNINGS 1. Keep work area clean and well lit. Cluttered or dark areas invite accidents. - Page 3 OPERATION ON SLOPS WARNINGS 1. Do not cross on slopes. Be sure to decrease speed and exercise caution. 2. Exercise caution when starting or stopping the machine on slopes. 3. As the loads become less stable on slopes, firmly secure the loads with ropes 4.
- Page 4 ASSEMBLY- Wheel 1. Unpack the carton and take everything out. Move the cart base and wheels aside for assembly first 2. Align the wheel (1) groove with the motor drive axle (2) groove, assemble the wheel on and put the flat key(3) entirely into the key groove. Tighten the wheel by nut(4) and lock by Cotter Pin(5) 3.
-
Page 5: Assembly- Frame
ASSEMBLY- Main Handle 1. Place the main handle of bottom part (1) into the base frame (2), fixed by Flange bolt (3) & Flange Nut(4) 2. Insert the main handle of top part (5) into bottom part (1) tube, fixed by Flange bolt (6) and nut (4). - Page 6 ASSEMBLY- Frame 3. Assemble the left & right frame (9), and the front & back frame (10), locked by Pin (11). 4. Locking the entire frame by handle bar (12), the electric cart assembly finished.(See Figure 6) Frame assembly parts list Part No.
-
Page 7: Operation
OPERATION 1. Open the battery box, turn on the power switch (A), there are 2 battery compartments,make sure the battery switch button on the right position (B) (See Figure 9) Figure 9 2. Press the start switch (C) on the right handle, then the battery indicator (D) will light up with all 3 LED lights and machine is ready for working. -
Page 8: Battery Charge
4. Release the lock lever (1) out from the dumping handle holder, push the dumping handle to lift the (See Figure 12) cart for dumping. OPERATION ON SLOPS WARNINGS Figure 12 1. Do not cross on slopes. Be sure to decrease speed and exercise caution. 2. -
Page 9: Troubleshooting
TROUBLESHOOTING Problem(s) Possible Cause Corrective Action The power cart Battery is not charged. Charge the battery pack according to the does not run. instructions included with you model. The wire is loose. Check all the connectors and to see if any part is loose or not. - Page 10 PARTS BREAKDOWN Part No. Description Q’ty Part No. Description Q’ty Handleba rgrips Spring Direction control panel Washer Switch and speed controller Square plug Main Handle-Top Bellows Clamp Washer Flange bolt M8*40 Bolt pin Flange nut M8 Flange bolt M8*70 Bottom wire Plastic plug Left &...
Need help?
Do you have a question about the LBB0103 and is the answer not in the manual?
Questions and answers
battery is good but cart will not move