
Related Manuals for Justfit AB Rowing


Summary of Contents for Justfit AB Rowing
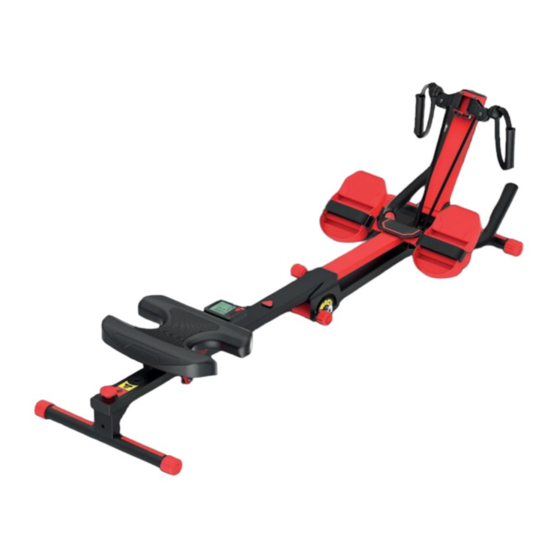
- Page 1 P020 - AB ROWING - USER MANUAL - ENGLISH GENERIC - SIZE: 140 x 210 mm Multi-function rowing machine with tubes "AB Rowing" Read all instructions before use and keep this manual for future reference. INSTRUCTION MANUAL...
-
Page 2: Table Of Contents
Details: Congratulations! You have just purchased a product designed within the standards of quality, safety and functionality. This equipment allows a safe and comfortable exercise in the privacy of your home. Regular physical exercise is one of the best ways to preserve your health. Please read this manual carefully before using it, especially the safety chapter, in order to use this product correctly. -
Page 3: Health Guidelines
1.HEALTH GUIDELINES THE EXECUTION AND DIFFICULTY DEGREE OF EACH EXERCISE DEPENDS DIRECTLY ON THE PARTICULARITY OF EACH PERSON. EACH USER SHOULD EVALUATE HIS PERFORMANCE INDIVIDUALLY.SOME EXERCISES MAY BE EASIER, OTHERS MORE DIFFICULT TO BE PRACTICED. WARNING: IN CASES OF EXTREME DIFFICULTY, STOP IMMEDIATELY. DO NOT PERFORM THE EXERCISE. -
Page 4: Securityinstructions
SECURITYINSTRUCTIONS IT IS THE OWNER'S RESPONSIBILITY TO ENSURE THAT ALL USERS OF THE EQUIPMENT ARE ADEQUATELY INFORMED OF SAFETY PRECAUTIONS. -This equipment is designed for residential use only, for indoor and outdoor areas. It has no therapeutic purposes. -For your safety, make sure that the equipment is properly assembled, adjusted and that the area around it is free of obstructions. -
Page 5: Package Content
P ACKAGE CONTENT PART QUANTITY PICTURE Main chassis Armrest / pedal Seat Handle Screw M8x20 Washer 16x8,5x1,5 Instruction manual Allen 6 mm... -
Page 6: Equipment Assembly
EQUIPMENT ASSEMBLY Follow the guidelines below: Step 3 Lock the arm with the pin and thread it until the set is firmly secure. Step 1 Step 2 Unscrew and pull the Insert the armrest into the locking pin out. main structure and lock in one of the predefined holes. -
Page 7: Interface And Security
SECURITYINTERFACE Seat pin for movementlimitation: Short amplitude: Intended for abdominal exercises. Safety pin for changing the equipment angle. Long amplitude: Intended for paddling exercises and gym mode. To adjust the seat's range of motion: Place the pin for seat movement limitation in the appropriate position according to the exercise to be performed. -
Page 8: Abdominal Mode
ABDOMINAL MODE For the exercises to be performed correctly, you will need to understand the adjustment steps. With simple steps it is easy to get your equipment ready for training with abdominal exercises. Follow the guidelines below: Step 1 Step 2 Supporting the equipment base on Position the equipment at the angles the floor,unlock the rotating frame... - Page 9 ADJUSTMENT ON THE ARMREST EXTENSION The armrest has 4 levels of height, to attempt the particularity of each user. The low relief mark on the tube indicates the maximum length that the armrest can reach. Do not position the structure beyond this limit,in order to avoid the risk of accidents.
-
Page 10: Rowing Mode
ROWING MODE With simple steps it is easy to get your equipment ready for training with rowing exercises. Follow the guidelines below: Step 2 Supporting the base on the floor, unlock the rotating frame of the equipment by unscrewing and pulling the pin out. -
Page 11: Elastics Tensionadjustments
ELASTICS TENSIONADJUSTMENTS The equipment has two elastics tension options: regular strong. Step 1 Turn the equipment to access the elasticpulley easily. Step 2 Elastic STRONG Position the pulley in one of the TENSION REGULAR Pulley tension options. TENSION STRONG TENSION (maximumtension of the elastic) REGULAR TENSION... -
Page 12: Inverted Rowing Mode
INVERTED ROWING MODE For inverted rowing exercises, repeat the equipment adjustment steps on page 8, rowing mode. Step 1 Move the seat to the edge of the equipment. Step 2 Choose one of the two elastic tension options: regular strong tension. Use the back base to support your feet and perform... -
Page 13: Gym Mode
GYM MODE For gym mode exercises, repeat the equipment adjustment steps on page 8, row mode. Step 1 Retract the pedal structure by decreasing the extension to the maximum to give more space for the feet. Step 2 Choose one of the two options of elastic tension: regular strong tension. - Page 14 When exercising using the handles, do not exceed the shoulder height to maintain the integrity of the elastics. Elastic Elastic traction traction path. path Weight ratio bilateral > unilateral Tension distribution of the elastics through the pulley.
-
Page 15: Control Panel
CONTROL PANEL ON/ OFF Thecontrolpanelwillturnon whenpressed the buttonorifstarted anexercise on theequipment. Thecontrolpanelwillautomaticallyturnoffifthe deviceis notinusedfor 4 minutes. Press this button to switch between CONTROL PANEL FUNCTIONS functions. TIME (TMR) - Totaltrainingtime. COUNTER (CNT)- Numberof movementsperformed duringtraining(tocounttheexercise movements, thecart /seat mustpass thesensor located on themainstructureof theequipment- triangularshaped plasticpart). - Page 16 Details PACKAGE CONTENT 1 Main chassis 1 Armrest /pedal 1 Seat 1 Handle 1 Instruction Manual 4 M8 x 20 mm screws 4 Washers 16 x 8.5 x 1.5 mm 1 Allen key 6 mm TECHNICAL DATA Model: Rowing Equipment Approximate Weight: 8.30 kg Box dimensions: 900 x 450 x 280 mm (W x H x D) Composition: Metal, plastic, rubber fabric.
Need help?
Do you have a question about the AB Rowing and is the answer not in the manual?
Questions and answers