Table of Contents
Advertisement
Quick Links
Advertisement
Table of Contents

Related Manuals for Invitrogen iBright CL1500


Summary of Contents for Invitrogen iBright CL1500
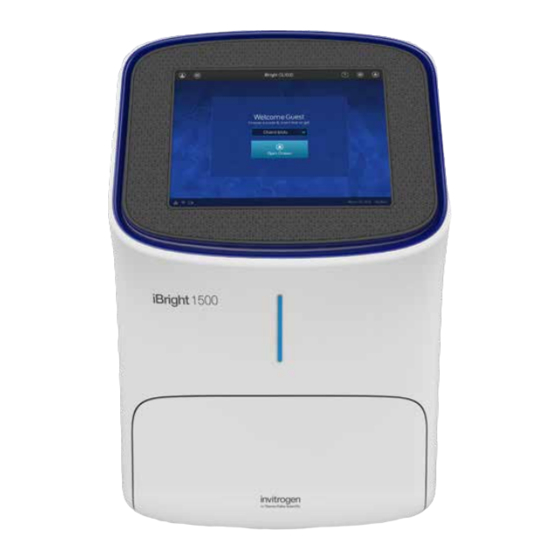
- Page 1 iBright Imaging Systems ™ USER GUIDE For use with the iBright CL1500 Imaging System and the iBright FL1500 ™ ™ Imaging System Catalog Numbers A44114 (CL1500) and A44115 (FL1500) Publication Number MAN0018592 Revision D.0 For Research Use Only. Not for use in diagnostic procedures.
- Page 2 Life Technologies Holdings Pte Ltd | Block 33 | Marsiling Industrial Estate Road 3 | #07-06, Singapore 739256 For descriptions of symbols on product labels or product documents, go to thermofisher.com/symbols-definition. Revision history: Pub. No. MAN0018592 Revision Date Description Updating workflows according to instrument firmware upgrades. •...
-
Page 3: Table Of Contents
Contents ■ CHAPTER 1 Product information ..........7 Product description . - Page 4 ■ iBright SAE Software Solution for 21 CFR CHAPTER 6 Invitrogen ™ ™ Part 11 Support ..............39 Security Audit e-Signature (SAE) for the iBright Imager .
- Page 5 Contents Use the Gallery in SAE mode ........... . 44 File status .
- Page 6 Contents ■ APPENDIX C Documentation and support ........64 Related documentation and references .
-
Page 7: Chapter 1 Product Information
Product information IMPORTANT! Before using this product, read and understand the information in the “Safety” appendix in this document. Product description The iBright CL1500 Imaging System allows users to image chemiluminescent Western blots, DNA and ™ RNA gels stained with fluorescent nucleic acid stains, and visible protein gels. The iBright FL1500 ™... - Page 8 Chapter 1 Product information Contents Table 2 Available accessories Component Part number iBright System Contrast Tray A56597 ™ Sample stage A33829 High-Power USB Wi-Fi Module A26774 A56600 (11/22) iBright E‑Gel Tray Adapter ™ ™ A56599 (48/96) iBright Imaging Systems User Guide ™...
-
Page 9: Chapter 2 Start, Sign On, And Configure The Instrument
Start, sign on, and configure the instrument Create an instrument profile 1. Touch to sign in to your instrument user account. 2. Touch Get started. 3. Touch Create a Profile. 4. Enter a Screen name. 5. Enter and confirm a four-digit pin. 6. -
Page 10: Mobile Device
Chapter 2 Start, sign on, and configure the instrument Create an instrument account and link to Connect using a cloud account Mobile device 1. Touch Mobile Device. 2. Launch instrument Connect mobile app. 3. Sign into your Connect account on the mobile app. 4. -
Page 11: Link To Connect Using An Existing Instrument Account
Chapter 2 Start, sign on, and configure the instrument Link to Connect using an existing instrument account Link to Connect using an existing instrument account Linking to Connect after account creation can only be done during the export process. 1. Click on 2. -
Page 12: If The Unit Is On And In Sleep Mode
Chapter 2 Start, sign on, and configure the instrument If the unit is on and in sleep mode If the unit is on and in sleep mode 1. Touch the screen to wake. 2. Touch to sign in to use or set up a user profile. See “Create an instrument profile” on page 9 instructions on how to create a user profile. -
Page 13: Chapter 3 Operate The Ibright ™ Imager
Operate the iBright imager ™ Choose imaging mode and start image capture On the Welcome screen: 1. Use the drop-down menu to select the desired mode. • Chemi Blots to image chemiluminescent substrates. • Fluorescent Blots to image fluorescent substrates. •... -
Page 14: Chemi Blots
Chapter 3 Operate the iBright imager ™ Chemi Blots Chemi Blots Mode to image chemiluminescent Western blots. Image using Chemi Blots 1. Touch Smart Exposure. The imager acquires a series of short exposures, then renders a preview image and recommends an exposure time. This is not a real image. 2. -
Page 15: Fluorescent Blots (Fl1500 Model Only)
Chapter 3 Operate the iBright imager ™ Fluorescent Blots (FL1500 model only) Fluorescent Blots (FL1500 model only) Mode to image fluorescent Western blots using a single channel or up to 4 channels using excitation wavelengths (FWHM) of approximately 455-485 nm, 515-545 nm, 608-632 nm, 610-660 nm, and 745-765 nm;... - Page 16 Chapter 3 Operate the iBright imager ™ Fluorescent Blots (FL1500 model only) 6. Touch Capture to acquire an image. The captured image is displayed and automatically saves to the gallery. 7. If the image is acceptable, touch Export, Gallery, or Analyze. If the image is not unacceptable, touch More options to optimize the image or touch Trash to remove the image, then return to step 2 to adjust exposure conditions.
-
Page 17: Nucleic Acid Gels
Chapter 3 Operate the iBright imager ™ Nucleic Acid Gels Nucleic Acid Gels Mode to image DNA and RNA gels stained with fluorescent nucleic acid stains such as Ethidium Bromide, SYBR Safe, SYBR Green (I or II), SYBR Gold and similar products. For imaging high- ™... -
Page 18: Protein Gels
Chapter 3 Operate the iBright imager ™ Protein Gels Protein Gels • Protein Gels Visible: USE THE WHITE SCREEN OR CONTRAST TRAY BETWEEN THE SAMPLE AND TRANSILLUMINATOR GLASS for samples including Coomassie-stained protein gels and silver-stained protein gels. • Protein Gels Fluorescent: PLACE SAMPLE DIRECTLY ON THE TRANSILLUMINATOR GLASS for samples including No-Stain -labeled protein gels and SYPRO dye-stained protein gels. -
Page 19: Universal Mode
Chapter 3 Operate the iBright imager ™ Universal Mode Universal Mode Mode to image samples containing one or more signal types (chemi, fluor, and/or visible). Table 3 Illumination sources, excitation filters, and emission filters for the iBright CL1500 ™ Instrument. Illumination Excitation Filters Emission Filters White Epi-LED 455-485 nm 400-700 nm... - Page 20 Chapter 3 Operate the iBright imager ™ Universal Mode Channel refers to the type of signal you want to capture and the imaging conditions you want to use. • Chemi: Channel for measuring chemiluminescent signals. • Fluor [Epi-LED]: Channel for measuring fluorescent signals that are excited using the appropriate Epi-LED/excitation filter combination and the appropriate emission filter.
-
Page 21: Options Available In Modes
Chapter 3 Operate the iBright imager ™ Options available in modes 5. Touch Capture to acquire all of the selected channels with the indicated exposure times. Captured image(s) appears in viewport and automatically saves to the gallery. 6. If the image is acceptable, touch Export, Gallery, or Analyze. If the image is not acceptable, touch More options4Image adjust to optimize image or touch Trash to remove the image, then return to steps 3-5 to adjust exposure conditions. - Page 22 Chapter 3 Operate the iBright imager ™ Options available in modes Table 7 Image adjust Sub option Detail Grayscale differentiation between image features. Can use Auto Contrast contrast (high, medium, low) or view raw image with no contrast. User can manually adjust Gamma, White, Black using slider bars. Allow user to navigate between individual channels associated with a multi-channel image;...
- Page 23 Chapter 3 Operate the iBright imager ™ Options available in modes Table 8 Other options (continued) Sub option Detail After a Smart Exposure or Capture, images are displayed by default in a 2UP view. • Top image displays individual channels in grayscale. Switch between individual channels by touching the channel you want to display and edit.
-
Page 24: Image Gallery
Chapter 3 Operate the iBright imager ™ Image Gallery Image Gallery The Image Gallery is an on-board storage location where your image files are kept for future viewing. In the gallery you can easily retrieve, analyze, and manage your image files. Any image acquired on the imager is automatically saved into a user's individual image gallery. -
Page 25: Chapter 4 Export And Analyze Images
Export and analyze images Export images Export new images From the "Welcome" screen: 1. Capture an image. See “Choose imaging mode and start image capture” page 13. 2. Touch Export. 3. (Optional) Touch Edit to enter a new file name or comments. Touch Save. 4. -
Page 26: Select An Export File Type
Chapter 4 Export and analyze images Export images 5. Choose a Destination. • Connect • • Network Drive • Print Note: The instrument requires a path for connection to a network drive or printer. Consult your IT department for questions regarding your network. The following information may be required to map a network drive: ·... -
Page 27: Archive/Backup G2I Image Files
Chapter 4 Export and analyze images Export images Archive/Backup g2i image files All iBright system users have an individual gallery for viewing and managing their own image files. ™ iBright administrators can manage all user galleries simultaneously or individually. ™ 1. Touch Gallery. -
Page 28: Analyze Images
Chapter 4 Export and analyze images Analyze images Analyze images Analyze new images 1. Capture an image. See “Choose imaging mode and start image capture” page 13. 2. With the desired image open, touch Analyze. The system automatically finds and displays analysis frames, lanes, and bands for the selected image file. - Page 29 Chapter 4 Export and analyze images Analyze images b. (Optional) Touch Next to display the analysis table. At the top of the table, touch to change the table output by: Output Units Description (Lane and Band Table) Volume Intensity Sum of pixel intensities contained in an identified band. Molecular weight estimated for an unknown sample based on the sample's relative mobility in the gel Weight...
-
Page 30: Analyze Gallery Images
Chapter 4 Export and analyze images Analyze images Analyze gallery images On the "Welcome" screen or capture screen Mode drop-down menu: 1. Touch Gallery or . Select one or multiple images. 2. Touch Actions. 3. If more than one image was initially selected, then choose one of the images within the scrollbar. If needed, edit, remove, or delete the selected image. -
Page 31: Analyze Colony Images Taken In Universal Mode Using The Colony
Chapter 4 Export and analyze images Analyze images 6. Touch More options to add, remove, or edit lanes and/or bands. Image adjustments Functions Adjust lanes Add, remove, or edit lanes. Adjust bands Add, remove, or edit bands. Images are by default displayed auto-contrasted (medium). - Page 32 Chapter 4 Export and analyze images Analyze images 9. Touch More options to adjust colonies and image. Image adjustments Functions Adjust colonies Move and resize colonies. Adjust image Adjust contrast, channels, and layers. 10. (Optional) To generate a report, touch Generate report. Select data to include in the report and edit the report name if desired.
-
Page 33: Chapter 5 Maintain The Instrument
Maintain the instrument Settings Access Settings from the Home screen. Instrument Settings Provides all instrument details including serial number and firmware About Instrument version. Select a Time Zone, Date Format, and Time Format for your region. Date and Time Enable or disable a sleep mode by toggling the button. Sleep Mode Security Off = Guest users allowed. - Page 34 Chapter 5 Maintain the instrument Settings Error Log Displays instrument error history with sortable columns for Date, User, and Error Description. The Error Log is exportable. Event Log Displays instrument error history with sortable columns for Date, User, Event Type, and Cloud Status. Software Update Updates the instrument software package by downloading via USB dongle or connection to the cloud.
-
Page 35: Manage Accounts
Chapter 5 Maintain the instrument Settings Service Tools Runs diagnostic testing on the instrument hardware. Provides an end report showing the functional status of hardware items. Instrument Diagnostic Note: Running diagnostics is not required. Contact a service technician for any issues. Allows removal of the turntable for shipping. Ship Prep Mode Note: Instrument can only be powered off once turntable is removed. -
Page 36: Run Instrument Diagnostics
Chapter 5 Maintain the instrument Run instrument diagnostics Run instrument diagnostics Instrument functions can be checked by a user to confirm proper hardware operating conditions. 1. Touch 2. Touch Service Tools. 3. Touch Instrument diagnostic. 4. Touch Start test. The instrument will check the instrument hardware for correct operation and settings. The test will take ~10 minutes to complete. -
Page 37: Replace The Instrument Fuses
Chapter 5 Maintain the instrument Replace the instrument fuses Replace the instrument fuses Materials required • Fuses, 1.6A, Time-Lag T, 250VAC, 5 × 20-mm (2) • Safety glasses • Powder-free gloves • Screwdriver, flathead Replace the fuses CAUTION! FIRE HAZARD. For continued protection against the risk of fire, replace fuses only with listed and certified fuses of the same type and rating as those currently in the iBright imager. -
Page 38: Move The Instrument
Chapter 5 Maintain the instrument Move the instrument Note: Fuse failure can result from fluctuations in the supplied power to the iBright imager. To prevent ™ further failures, consider installing an electrical protective device, such as a UPS or surge protector. Move the instrument CAUTION! PHYSICAL INJURY HAZARD. -
Page 39: Part 11 Support
Invitrogen iBright SAE Software ™ ™ Solution for 21 CFR Part 11 Support Security Audit e-Signature (SAE) for the iBright ™ Imager IMPORTANT! 21 CFR part 11 is a regulation that describes the criteria for acceptance by the U.S. Food and Drug Administration (FDA) for electronic records and electronic signatures. Part 11 is composed of procedural and technical requirements. -
Page 40: Activate Your License Key
Chapter 6 Invitrogen iBright SAE Software Solution for 21 CFR Part 11 Support ™ ™ Activate your license key Activate your license key 1. Log in as Local Admin on the instrument. IMPORTANT! Only the Local Administrator (Local Admin) has the ability to activate the license key on the instrument. -
Page 41: Disable Sae Mode
Chapter 6 Invitrogen iBright SAE Software Solution for 21 CFR Part 11 Support ™ ™ Disable SAE mode 6. If not already done during the license activation, enter the IP address and port of the SAE console location and then touch Next. -
Page 42: Change Your Password In Sae Mode
Chapter 6 Invitrogen iBright SAE Software Solution for 21 CFR Part 11 Support ™ ™ Change your password in SAE mode Change your password in SAE mode 1. Touch User Profile on the left side of the top toolbar. 2. Touch Edit and enter your old password, your new password, and then confirm your new password. -
Page 43: Sae Privileges For Default User Roles
Chapter 6 Invitrogen iBright SAE Software Solution for 21 CFR Part 11 Support ™ ™ SAE privileges for default user roles SAE privileges for default user roles Default Roles Category Function SAE Console iBright iBright ™ ™ Admin Admin Scientist Acquire, Analyze, Adjust, Export, and... -
Page 44: Acquire Images In Sae Mode
Chapter 6 Invitrogen iBright SAE Software Solution for 21 CFR Part 11 Support ™ ™ Acquire images in SAE mode Acquire images in SAE mode Image acquisition in SAE mode is the same as in non-SAE mode. For iBright CL750 instruments, see the "Choose imaging mode and start image capture" section of the ™... -
Page 45: Commit Changes
Chapter 6 Invitrogen iBright SAE Software Solution for 21 CFR Part 11 Support ™ ™ Commit changes 4. Check the Images box for all users to view images from all user galleries. 5. (Optional) Check the Images for all users box, touch Enter ID, and choose the desired username of the individual gallery that you want to manage. -
Page 46: Sign Data
Chapter 6 Invitrogen iBright SAE Software Solution for 21 CFR Part 11 Support ™ ™ Sign data Sign data In SAE mode, committed image files can be e-signed by one or more users to verify data integrity. The SAE Console Admin can dictate what actions require signatures and the number of user roles that are required to e-sign for each action. -
Page 47: Generate An Audit History
Chapter 6 Invitrogen iBright SAE Software Solution for 21 CFR Part 11 Support ™ ™ Generate an audit history Generate an audit history 1. Touch Audit history to review the audit history and the change table for the selected image file. • The audit history contains the following information: Version, Date & Time, Username, Role, Action, Reason and Comment. -
Page 48: Generate And Export Analysis Report
Chapter 6 Invitrogen iBright SAE Software Solution for 21 CFR Part 11 Support ™ ™ Generate and export Analysis Report Generate and export Analysis Report Touch Generate Report under the More options menu to generate a PDF report with image information, channel images, and densitometry data. -
Page 49: Appendix A Instrument Specifications
Instrument specifications Instrument dimensions and specifications Specification iBright Imager ™ Dimensions (L × W × H) 68.0 × 38.2 × 59.8 cm Weight 52 kg (115 lbs) Instrument clearance (Back) 15.25 cm (6 in.) Electrical requirements WARNING! For safety, the power outlet used for powering the instrument must be accessible at all times. -
Page 50: Network Requirements
Appendix A Instrument specifications Network requirements (continued) Condition Acceptable range Altitude Between sea level and 2000 m (6500 ft.) above sea level • Humidity: 15–80% relative humidity (noncondensing) Operating conditions • Temperature: 15 to 30°C (59 to 86°F) Note: For optimal performance, avoid rapid or extreme fluctuations in room temperature. -
Page 51: Instrument And Computer Connections
Appendix A Instrument specifications Instrument and computer connections Required materials to network the instrument: • Wired—Ethernet cable of sufficient length with RJ45 connectors – CAT5 cable for a 100 Mbps network connection –or– • Wireless—High Power USB WiFi Module (Cat. No. A26774, sold separately) Instrument and computer connections iBright Imager front view ™... - Page 52 Appendix A Instrument specifications Instrument and computer connections iBright Imager rear view ™ USB port Ethernet port — RJ45 port for 10/100 Mbps ethernet communication with the instrument Fuse cover Power switch Power port — 100-240 VAC iBright Imaging Systems User Guide ™...
-
Page 53: Appendix B Safety
Safety WARNING! GENERAL SAFETY. Using this product in a manner not specified in the user documentation may result in personal injury or damage to the instrument or device. Ensure that anyone using this product has received instructions in general safety practices for laboratories and the safety information provided in this document. - Page 54 Appendix B Safety Symbols on this instrument (continued) Symbol English Français Do not dispose of this product in unsorted Ne pas éliminer ce produit avec les déchets municipal waste usuels non soumis au tri sélectif. CAUTION! To minimize negative MISE EN GARDE ! Pour minimi‐ environmental impact from disposal ser les conséquences négatives sur of electronic waste, do not...
-
Page 55: Location Of Safety Labels On The Instrument
Appendix B Safety Safety information for instruments not manufactured by Thermo Fisher Scientific Location of safety labels on the instrument Safety information for instruments not manufactured by Thermo Fisher Scientific Some of the accessories provided as part of the instrument system are not designed or built by Thermo Fisher Scientific. -
Page 56: Physical Injury
Appendix B Safety Instrument safety Physical injury CAUTION! Moving Parts. Moving parts can crush, pinch and cut. Keep hands clear of moving parts while operating the instrument. Disconnect power before servicing. LED (Light-Emitting Diode) CAUTION! LED (light-emitting diode) HAZARD. Removing the protective covers and (when applicable) defeating the interlock(s) may result in exposure to the internal LED. -
Page 57: Electrical Safety
Appendix B Safety Instrument safety Electrical safety WARNING! Ensure appropriate electrical supply. For safe operation of the instrument: · Plug the system into a properly grounded receptacle with adequate current capacity. · Ensure the electrical supply is of suitable voltage. · Never operate the instrument with the ground disconnected. Grounding continuity is required for safe operation of the instrument. -
Page 58: Cleaning And Decontamination
Appendix B Safety Instrument safety Cleaning and decontamination CAUTION! Cleaning and Decontamination. Use only the cleaning and decontamination methods specified in the manufacturer's user documentation. It is the responsibility of the operator (or other responsible person) to ensure the following requirements are met: ·... -
Page 59: Safety And Electromagnetic Compatibility (Emc) Standards
Appendix B Safety Safety and electromagnetic compatibility (EMC) standards Safety and electromagnetic compatibility (EMC) standards The instrument design and manufacture complies with the following standards and requirements for safety and electromagnetic compatibility. Safety compliance Reference Description EU Directive 2014/35/EU European Union “Low Voltage Directive” IEC 61010-1 Safety requirements for electrical equipment for measurement, control, and laboratory use –... -
Page 60: Environmental Design
Appendix B Safety Safety and electromagnetic compatibility (EMC) standards (continued) Reference Description ICES-001, Issue 4 Industrial, Scientific and Medical (ISM) Radio Frequency Generators FCC Part 15 Subpart B (47 CFR) U.S. Standard Radio Frequency Devices This equipment has been tested and found to comply with the limits for a Class A digital device, pursuant to part 15 of the FCC Rules. - Page 61 Appendix B Safety Safety and electromagnetic compatibility (EMC) standards (continued) 产品中有害物质的名称及含量 China EEP Hazardous Substances Information 电机组件 Electromechani cal Assemblies 本表格依据 SJ/T11364 的规定编制 This table is compiled according to SJ/T 11364 standard. O: 表示该有害物质在该部件所有均质材料中的含量均在 GB/T26572 规定的限量要求以下. Indicates that the concentration of the hazardous substance in all homogeneous materials for the part is below the relevant threshold of the GB/T 26572 standard.
-
Page 62: Chemical Safety
Appendix B Safety Chemical safety Chemical safety WARNING! GENERAL CHEMICAL HANDLING. To minimize hazards, ensure laboratory personnel read and practice the general safety guidelines for chemical usage, storage, and waste provided below. Consult the relevant SDS for specific precautions and instructions: · Read and understand the Safety Data Sheets (SDSs) provided by the chemical manufacturer before you store, handle, or work with any chemicals or hazardous materials. -
Page 63: Biological Hazard Safety
Appendix B Safety Biological hazard safety · Veiller à utiliser des récipients à déchets primaire et secondaire. (Le récipient primaire contient les déchets immédiats, le récipient secondaire contient les fuites et les écoulements du récipient pri‐ maire. Les deux récipients doivent être compatibles avec les matériaux mis au rebut et conformes aux exigences locales, nationales et communautaires en matière de confinement des récipients.) ·... - Page 64 Documentation and support Related documentation and references Product Details Product Description Webpage URL iBright Analysis Software Cloud-based iBright Analysis Software ™ ™ http://thermofisher.com/ Connect Connect is supplied with one free terabyte of Connect digital data storage. iBright Imager Firmware Firmware updates and patches for all iBright ™...
- Page 65 Appendix C Documentation and support Customer and technical support Customer and technical support Visit thermofisher.com/support for the latest service and support information. • Worldwide contact telephone numbers • Product support information – Product FAQs – Software, patches, and updates – Training for many applications and instruments •...
- Page 66 iBright CL1500_FL1500 Instruments User Guide_UG_MAN0018592-v6- GUID-874C111D-9383-4063-8DE0-0BCCBF2E7A2E-2022/10/31 17:55:21 en 18:00:57.116Z thermofisher.com/support | thermofisher.com/askaquestion thermofisher.com 31 October 2022...
Need help?
Do you have a question about the iBright CL1500 and is the answer not in the manual?
Questions and answers