Westbrook Trailers 48-048-K08 Assembly Instructions Manual
Kit trailer
Hide thumbs
Also See for 48-048-K08:
- Assembly instructions manual (28 pages) ,
- Assembly instructions manual (28 pages)
Advertisement
Quick Links
Advertisement

Subscribe to Our Youtube Channel
Related Manuals for Westbrook Trailers 48-048-K08


Summary of Contents for Westbrook Trailers 48-048-K08
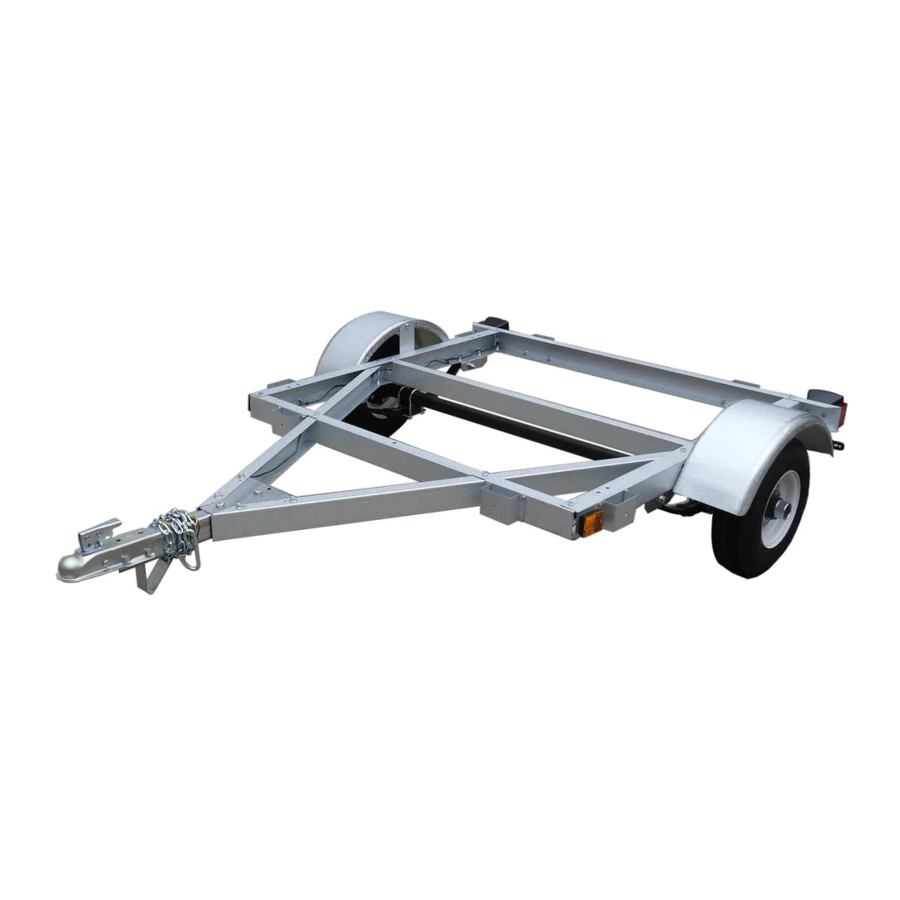
- Page 1 Kit Trailer Assembly Instructions Model: 48-048-K08, 48-072-K08/K12 48-096-K08 & 60-096-K12 Carefully read and follow the assembly instructions in this manual. Before using the trailer, carefully read the owner’s manual. Save both manuals for future reference. www.westbrooktrailers.com...
- Page 2 Assembly instructions for kit trailers...
-
Page 3: Safety Information
Congratulations on the purchase of your kit trailer. Thank you for choosing Westbrook Trailers. Safety Information • It is important to read and understand all the instructions. Failure to follow all assembly instruc- tions may result in serious injury. • The edges of the trailer frame can be very sharp, it is IMPORTANT to ALWAYS wear the provided safety gloves when handling the material during unboxing and the assembly process. - Page 4 Part Listing BOX # 1 TIRE & FENDER (ALSO INCLUDES THE THREE BOXES BELOW) ITEM# ITEM DESCRIPTION 4’ x 4’ 4’ x 6’ 4’ x 8’ 5’ x 8’ 500258 8” FENDER 500841 4.80 X 8 LRC TIRE & WHEEL 504212 12"...
- Page 5 Assembly instructions for kit trailers...
-
Page 6: Part Listing
Part Listing BOX # 2 - FRAME BOX ITEM# ITEM DESCRIPTION 4’ x 4’ 4’ x 6’ 4’ x 8’ 5’ x 8’ 500254 FRONT CHANNEL 500255 CROSS CHANNEL 500256 REAR CHANNEL 500251 4’ DRIVER SIDE CHANNEL (4X4) 500297 4’ PASSENGER SIDE CHANNEL (4X4) 500252 6’... - Page 7 BOX # 3 SPRING (4'x4' & 4'x6' & 4'x8') 500809 750 LB. SLIPPER SPRING BOX # 3 AXLE & SPRING (5' x 8') 500809 750 LB. SLIPPER SPRING 504617 5' STRAIGHT AXLE Assembly Instruction: Before you begin, you need to prepare a large area to work. To facilitate the assembly process the instructions have been broken down in sections, before you begin the assembly of a each section gather all the parts listed and carefully read all the instructions.
- Page 8 STEP 2a- Frame Assembly - 4’x 4’ Kit Trailer Frame ITEM # PARTS DESCRIPTION 501049 3/8 X 3/4” HEX FLANGE BOLT 501033 3/8 X 1 1/2” HEX BOLT 501031 3/8 Lock nut 500254 FRONT CHANNEL 500255 CROSS CHANNEL 500256 REAR CHANNEL 500251 4’...
- Page 9 4’x 4’ Kit Trailer Frame The edges of the trailer can be very sharp. To prevent injury, wear the provided safety gloves Figure 1. Front 500254 *FRAME IS UPSIDE DOWN - SQUARE HOLES FACING UP* ONLY HANDTIGHTEN HARDWARE AT THIS STEP 500255 FOR YOUR SECURITY DO NOT STAND INSIDE...
-
Page 10: Parts Description
Step 1b- Frame Assembly - 4’x 6’ Kit Trailer Frame ITEM # PARTS DESCRIPTION 501049 3/8 X 3/4 HEX FLANGE BOLT 501033 3/8 X 1 1/2 HEX BOLT (FULL THREAD) 501031 3/8 FLANGE LOCK NUT 500254 FRONT CHANNEL 500255 CROSS CHANNEL 500256 REAR CHANNEL 500252... - Page 11 4’x 6’ Kit Trailer Frame The edges of the trailer can be very sharp. To prevent injury, wear the provided safety gloves Figure 1. Front 500254 *FRAME IS UPSIDE DOWN - SQUARE HOLES FACING UP* ONLY HANDTIGHTEN HARDWARE AT THIS STEP 500255 500255 FOR YOUR SECURITY...
- Page 12 Step 1c- Frame Assembly - 4’x 8’ Kit Trailer Frame ITEM # PARTS DESCRIPTION 501049 3/8 X 3/4” HEX FLANGE BOLT 501033 3/8 X 1 1/2” HEX BOLT (FULL THREAD) 501031 3/8 NYLON INSERT HEX FLANGE Lock nut 500254 FRONT CHANNEL 500255 CROSS CHANNEL 500256...
- Page 13 4’x 8’ Kit Trailer Frame - The edges of the trailer can be very sharp. To prevent injury, wear the provided safety gloves Front 500254 Figure 1. *FRAME IS UPSIDE DOWN - SQUARE HOLES FACING UP* ONLY HANDTIGHTEN HARDWARE 500255 500255 FOR YOUR SECURITY DO NOT STAND INSIDE...
- Page 14 Step 1d- Frame Assembly - 5’x 8’ Kit Trailer Frame ITEM # PARTS DESCRIPTION 501049 3/8 X 3/4” HEX FLANGE BOLT 501033 3/8 X 1 1/2” HEX BOLT (FULL THREAD) 501031 3/8 NYLON INSERT HEX FLANGE Lock nut 504599 FRONT CHANNEL 504602 CROSS CHANNEL 504600...
- Page 15 5’x 8’ Kit Trailer Frame - The edges of the trailer can be very sharp. To prevent injury, wear the provided safety gloves Figure 1. Front 504599 ***Start with frame upside down and only hand-tighten hardware, you will tighten them in a futher step*** 504602 504602 504602...
- Page 16 STEP 3 – Axle Assembly ITEM # DESCRIPTION 500047/ 4’ STRAIGHT AXLE or 5' STRAIGHT AXLE 500809 750 LB. SPRINGS 500814 3/8-16 U-BOLT 500259 LEAF SPRING MOUNTING BRACKET 500260 LEAF SPRING AXLE MOUNT PLATE 501031 3/8-16 NYLON INSERT HEX FLANGE Lock nut 501036 3/8 X 3/4”...
- Page 17 STEP 3 – Axle Assembly 1. Secure the leaf spring mounting brackets in the square holes on each side of the trailer with the carriage bolt 3/8 x 3/4 and 3/8 lock nut using 9/16 socket; the round holes of the brackets should be oriented closest to the center. 2.
- Page 18 #10 LOCKING NUT 501049 3/8 X 3/4” HEX FLANGE BOLT 501031 3/8 NYLON INSERT LOCKING NUT 501001 1/2” WHEEL NUTS 48-048-K08, 48-072-K08, 48-096-K08 (8” Wheel) 500258 8” FENDER 500841 4.80 X 8 LRC TIRE & WHEEL 504447 FENDER PLATE - 8”...
- Page 19 Step 5 - Tongue Assembly ITEM # DESCRIPTION 4 FT 5 FT 500257 TONGUE CHANNEL 504623 TONGUE CROSS CHANNEL 504162 5’ - TONGUE CONNECTION BRACKET 501049 3/8 X 3/4” HEX FLANGE BOLT 501033 3/8 X 1 1/2” HEX BOLT (FULL THREAD) 501031 3/8 NYLON INSERT HEX FLANGE Lock nut 501100...
- Page 20 Step 6 - Tongue Connection Support Installation 1. Put the tongue connection bracket with the threaded holes facing up place without sliding it fully into position 2. Feed each wire of the wire harness between the tongue channel and separate your wire as follows. •...
- Page 21 Step 7 – Hitch and Safety Chains ITEM # DESCRIPTION 504163 LONG COUPLER CHANNEL 504198 TONGUE SUPPORT FOOT - CHANNEL TONGUE 500805 1 7/8” COUPLER CLASS I 500804 SAFETY CHAIN - 3/16 X 4’ (CLASS I) 501031 3/8 NYLON INSERT LOCKING NUT 501023 3/8 X 2-1/2”...
- Page 22 STEP 8 – Wiring & Lights ITEM # DESCRIPTION 4’ x 4’ 4’ x 6’ 4’ x 8’ 5' x 8' 500512 4 WAY FLAT 20’ WIRE HARNESS 503079 8” CABLE TIE 500558 WIRE CONNECTOR 500513 TAILLIGHT LEFT/DRIVER SIDE 500514 TAILLIGHT RIGHT/PASSENGER SIDE 500515 AMBER MARKER LIGHT...
-
Page 23: Wiring Diagram
Wiring Diagram • Ground=White Wire • Tail/Running Lights/Marker Lights = Brown • Left Turn/Brake = Yellow • Right Turn/Brake = Green Ground white wire grommet to frame / Amber Marker Light Amber Marker Light Driver’s Taillight & Red Marker Light & License Light Passenger’s Taillight &... - Page 24 Assembly instructions for kit trailers...
- Page 25 4ft x 4ft Plywood Drill Template (Plywood not included) Drill 3/8 holes in plywood using the dimensions outlined below and use the 3/8 x 1-1/2 full thread hex bolts to secure to the frame. Holes for tie down kit optional (Tie downs not included) Assembly instructions for kit trailers...
- Page 26 Assembly instructions for kit trailers...
- Page 27 4ft x 6ft Plywood Drill Template (Plywood not included) Drill 3/8 holes in plywood using the dimensions outlined below and use the 3/8 x 1-1/2 full thread hex bolts to secure to the frame. Holes for tie down kit optional (Tie downs not included) Assembly instructions for kit trailers...
- Page 28 Assembly instructions for kit trailers...
- Page 29 4ft x 8ft Plywood Drill Template (Plywood not included ) Drill 3/8 holes in plywood using the dimensions outlined below and use the 3/8 x 1-1/2 full thread hex bolts to secure to the frame. Holes for tie down kit optional (Tie downs not included) Assembly instructions for kit trailers...
- Page 30 Assembly instructions for kit trailers...
- Page 31 4ft x 8ft Plywood Drill Template (Plywood not included ) Drill 3/8 holes in plywood using the dimensions outlined below and use the 3/8 x 1-1/2 full thread hex bolts to secure to the frame. Holes for tie down kit optional (Tie downs not included) Assembly instructions for kit trailers...
- Page 32 Cut List - Wood Plank Cut List - Plywood (Wood not included) (Wood not included) 4’ x 4’ 4’ x 4’ 8pcs – 2x4 –18” (12ft -2x4 makes 8pcs) 8pcs – 2x4 -18” (12ft -2x4 makes 8pcs) 4pcs – 3/4 x 14-3/4” x 48” 8pcs - 1x6 - 48”...
- Page 33 Assembly instructions for kit trailers...
- Page 34 Trailer Accessories Tongue Jack Ramps 12” Wheel & Fender * Spare Tire U-Bolt Support Wheel Chock Tongue Extension www.westbrooktrailers.com...
Need help?
Do you have a question about the 48-048-K08 and is the answer not in the manual?
Questions and answers