Table of Contents
Advertisement
Advertisement
Table of Contents

Related Manuals for Laser MID-899IPS


Summary of Contents for Laser MID-899IPS
- Page 1 User Manual Laser Android Tablet MID-899IPS...
- Page 2 Thank you for your purchase! Laser Corporation is 100% Australian owned & operated. To get the most out of your product please read the user manual carefully and keep for future use. such as Spare Parts, FAQs, Warranty claims, and more, please scan the following QR code:...
-
Page 3: What's In The Box
WHAT’S IN THE BOX • Laser 8” Android Tablet • USB Type-C Cable • User Manual • Quick Start Guide A USB Power Adapter required to charge the tablet is not included. -
Page 4: Specifications
SPECIFICATIONS MID-899IPS Android 12 (GO Edition) Quad Core 1.5GHz 8-inch IPS touchscreen 1280 x 800 32GB 2.0MP 5.0MP 3.8V 4000mAh 2.4GHz, 802.11 b/g/n USB Type-C, 3.5mm earphone/microphone combo jack, Micro SD Card (max 128GB) Built-in loudspeaker Accelerometer 210 x 127 x 9.5mm... - Page 5 IMPORTANT SAFETY INSTRUCTIONS & PRECAUTIONS • Read all instructions carefully before use. • Retain this manual for future reference. • Use this product only in the manner described. • Only use a water-dampened soft-cloth to clean the surface of this product. •...
-
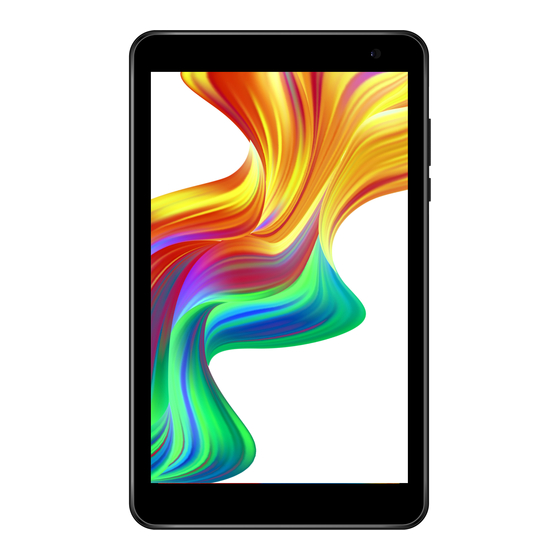
Page 6: Appearance & Buttons
APPEARANCE & BUTTONS... - Page 7 APPEARANCE & BUTTONS continued... USB Type-C interface (Charging and Data Transfer) Micro SD Card Slot (supports cards up tp 128GB) 3.5mm Stereo Earphone and Microphone combo jack Volume Up Volume Down On/Off button (Press and hold to turn ON and OFF) Reset button Front camera Rear camera...
-
Page 8: Turning On And Off
TURNING ON AND OFF • To turn ON, PRESS and HOLD the POWER button until the screen turns ON. To turn OFF, PRESS and HOLD the • POWER button until the power screen appears. Then select Power Off. To restart the tablet press and hold the •... -
Page 9: Battery Charging
BATTERY CHARGING Connect your tablet to any 5V USB charger or USB port on your computer using the supplied USB-C cable. You will be alerted when the battery charge falls below 15%. If the battery is completely depleted your tablet will automatically turn off. - Page 10 RUN TIME Run time of portable devices including your tablet can be extended by reducing the screen brightness, turning off Bluetooth function, turning off the Location function, turning off Wi-Fi when not in use, turning off Apps that are not required and manually turning the screen off using the power button when not in use.
-
Page 11: Point Touch-Screen
5 POINT TOUCH-SCREEN Your tablet has 5 different touch screen behaviours. Tap once to select or start a function, option or 1 -TAP application Tap and hold to select or start a function Tap then drag an item and drop it to a location Double tap to zoom in or select item Tap then slide an item up,... -
Page 12: Sleep Mode
SLEEP MODE During prolonged inactive use where no buttons have been pressed, the screen will turn off automatically to conserve power. Press the POWER button to wake your tablet. Note: This can be adjusted in Display option under Settings. LOCK / UNLOCK When your tablet is in sleep mode, press the POWER button to show the unlock screen. -
Page 13: Home Screen Icons
HOME SCREEN ICONS Function... -
Page 14: View All Apps
VIEW ALL APPS On the home page, swipe up to view all the installed APPs on your tablet. If there is more than one page of APPs, swipe left and right to see more. -
Page 15: App Icons
APP ICONS a smart, light and fast photo and video gallery built by Google. Calculator provides simple and advanced mathematical is an easy-to-use email app. functions. to save time is a lighter, faster way to and make the most of every day. search, with search results optimised. -
Page 16: Notification Menu Bar
NOTIFICATION MENU BAR Swipe down from the top of the screen to bring up the notification menu bar. -
Page 17: Shortcut Menu
SHORTCUT MENU Swipe down from the top of the screen to bring up the notification menu bar. Swipe down again to bring up the shortcut menu. - Page 18 SETTINGS Wi-Fi Note: a Wi-Fi connection is required if connecting to the internet (for email, Google Play App or web browsing) Follow the steps below to connect to Wi-Fi: Settings > Network & Internet > Wi-Fi...
- Page 19 SETTINGS continued... Tap the desired NETWORK name. If this NETWORK connects successfully, “Connected” will appear. If the NETWORK is encrypted, enter the password then tap “Connect”. Your Tablet will indicate when the NETWORK connection is ready for use when the WiFi icon appears on the top right notification bar.
-
Page 20: Connecting To A Computer Via Usb
CONNECTING TO A COMPUTER VIA USB Connect the USB cable to your Tablet and computer, making sure you are using the correct USB Type-C cable supplied. WHY CREATE A GOOGLE ACCOUNT Creating a Google account allows you to talk, chat, share, schedule, store, organize, collaborate, discover, and create when online. -
Page 21: Google Play
GOOGLE PLAY Open the Google Play and set up your account. If you have an existing account select EXISTING, otherwise choose NEW to create a new account and follow the set-up steps. - Page 22 SETTING UP YOUR LASER TABLET FOR KID’S USE Introducing Google Kids Space Google Kids Space is an Android tablet experience with content to help kids discover, create, and grow. Kids can access apps, books, and videos that are targeted to their age and interests.
- Page 23 SETTING UP YOUR LASER TABLET FOR KID’S USE continued... Setting up Google Kids Space 1. Open the Google Kids space APP on the Laser Android Tablet. 2. Create a new Google Kids account or login with an already existing Google Kids account.
- Page 24 SETTING UP YOUR LASER TABLET FOR KID’S USE continued... For more information and troubleshooting visit the following website: https://support.google.com/kidsspace/ Note: Google Kids Space provides a safe environment for your child and does not allow access to other APPs and tablet features.
- Page 25 SETTING UP YOUR LASER TABLET FOR KID’S USE continued... Turn Google Kids Space off 1. From the home screen in Google Kids Space, press and hold the Parent menu 2. Go to Parental controls > Google Kids Space > Turn off Google Kids Space.
- Page 26 SETTING UP YOUR LASER TABLET FOR KID’S USE continued... Tips: • If you turn on Google Kids Space later with your child’s Google Account, your child’s settings will be restored. • If you don’t find Google Kids Space in the Parental Controls menu, update the Google Kids Space app to the latest version and try again.
-
Page 27: Switching Users
SWITCHING USERS After adding a Kid’s Profile or if you have multiple users you can switch users in the lock screen interface. 1. Tap the “power” button on the side of the tablet to enter the lock screen mode. 2. The icon will appear at the top right-hand corner... - Page 28 SWITCHING USERS continued... 3. Tap and the user menu will appear. 4. Select the corresponding user to switch profiles.
- Page 29 RESETTING YOUR LASER ANDROID TABLET Hardware Factory Reset Note: This option will delete all settings and downloaded content (including APPs) and restore your device to original factory settings: 1. Power off your tablet first by pressing and holding the power button for approx.
- Page 30 RESETTING YOUR LASER ANDROID TABLET continued... 3. You will see a menu if done correctly. Use the volume up / down buttons on the tablet to navigate the menu and power button to confirm a selected option. 4. Select the “Wipe data / factory reset...
- Page 31 RESETTING YOUR LASER ANDROID TABLET continued... 5. Confirm the selection. 6. A message “Data wipe complete” should appear on the bottom left corner of the screen once finished. 7. Select the “Power off” option and the factory reset procedure is complete.
-
Page 32: Removing The Screen Lock Password
REMOVING THE SCREEN LOCK PASSWORD 1. Power on your tablet. 2. Once the tablet has finished booting up tap the volume buttons on the side of your tablet in the following order: +-++-- 3. The message “LockPattern clear success!!” will be displayed on the tablet screen. - Page 33 1. Ensure your tablet is charged 2. Connect the power adaptor, and then check again after 3. Reset the device using the reset button 1. Ensure speakers are not table 2. Please ensure volume is turned up 3. Check the another device to make sure it is not damaged 4.
- Page 34 continued... 1. Check the strength of the WiFi signal 2. Check that the WiFi service is available and operating correctly has been removed from the screen screen is 2. En ngers are slow and dry and clean. 3. Restart your tablet 4.
- Page 35 Please Note: As your Tablet is an online device, changes to APPs, icons, functions and compatibility icons, functions and compatibility can change based on software updates either directly from Laser or the respective owners of individual programs.
- Page 36 Visit our website www.laserco.com.au Check us out at www.youtube.com/lasercoau Google, Google Play, Google Drive, Chrome and other marks are trademarks of Google LLC.
Need help?
Do you have a question about the MID-899IPS and is the answer not in the manual?
Questions and answers