Table of Contents
Advertisement
Quick Links
Advertisement
Table of Contents

Subscribe to Our Youtube Channel
Related Manuals for Laser MID-1028


Summary of Contents for Laser MID-1028
- Page 1 QUICK OPERATION GUIDE MID-1028...
-
Page 2: Table Of Contents
QUICK OPERATION GUIDE MID-1028 INDEX IMPORTANT SAFETY INSTRUCTIONS AND PRECAUTIONS ................... 3 APPEARANCE AND BUTTONS ..........................4 ACCESSORIES ..............................5 TURNING ON AND OFF ............................5 BATTERY CHARGING ............................5 RUN TIME ................................. 5 5 POINT TOUCH SCREEN............................ 5 SLEEP MODE ..............................5 LOCK/UNLOCK .............................. -
Page 3: Important Safety Instructions And Precautions
QUICK OPERATION GUIDE MID-1028 IMPORTANT SAFETY INSTRUCTIONS AND PRECAUTIONS - Read all instructions carefully before use. - Retain this manual for future reference. - Use this product only in the manner described. - Only use a water-dampened soft-cloth to clean the surface of this product. -
Page 4: Appearance And Buttons
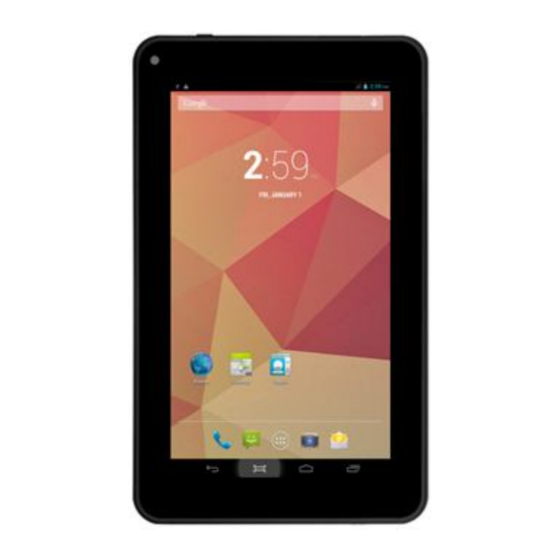
QUICK OPERATION GUIDE MID-1028 APPEARANCE AND BUTTONS Front View: Rear View: 11 12 13 Number Description ON/OFF Power Button Stereo Earphone Socket (3.5mm Jack) OTG (Host) Only (Connect flash drive and other peripherals) USB interface (Data Transfer, Charging and USB Storage flash drive). -
Page 5: Accessories
MID-1028 will automatically turn off. Note: If the battery has been completely exhausted, it may take a few minutes to switch the MID-1028 on once charging has begun. The MID-1028 can be used during charging however this may increase the time needed to fully charge the battery. -
Page 6: Lock/Unlock
MID-1028 LOCK/UNLOCK When the MID-1028 is in sleep mode, press the POWER button to open the unlock screen. TAP and HOLD the LOCKED padlock icon, drag it to the UNLOCKED padlock icon, then release. Note: some of the following images may be different from the actual product supplied. -
Page 7: Desktop Menu Bars
QUICK OPERATION GUIDE MID-1028 Icon Function Open web browser Open App and widget menu Return back to the previous screen Return to the home screen Open a list of recently used applications (Time display) (Battery status) Enter “Wallpaper”, “Manage Applications”, “System Settings”... -
Page 8: Apps And Widgets
QUICK OPERATION GUIDE MID-1028 APPS AND WIDGETS Note: Some of the following images may be different from the actual product supplied. Icon Function Browser: Internet browser Calculator Calendar: Create and manage daily, weekly and monthly events, set alarm clocks. Note: A GOOGLE account is required... -
Page 9: Further App Information
QUICK OPERATION GUIDE MID-1028 FURTHER APP INFORMATION Calendar Tap this icon to open the calendar feature. Enter your Google account E-mail address and password information (note: If you do not yet have a Google account, you can create a new account for free from Google.com). - Page 10 File Manager File manager provides an overview of all files on your MID-1028 or an external storage device. Use the tabs at the top of the screen to view files on your MID-1028; built-in memory, SD card or USB. Note: The last two tabs (developer tabs) may not be visible depending on your user settings.
-
Page 11: Settings
“Connected” (1) will appear. If the NETWORK is encrypted, enter the password then tap “Connect”. Your MID-1028 will indicate when the NETWORK connection is ready for use when the Wi-Fi icon appears on the lower right notification bar (2). -
Page 12: Connecting To A Pc/Mac Via Usb
CONNECTING TO A PC/MAC VIA USB Connect the USB cable to your MID-1028 and PC, making sure you are using the correct MICRO USB cable supplied. The “USB connected” icon (1) will then appear. TAP the icon to show the connection window, and then TAP “USB connected”... -
Page 13: Ebook Drm (Aldiko)
Download Adobe Digital Editions (ADE) to your PC and set up your FREE account. Upon purchasing or borrowing an eBook using ADE, it will then need to be transferred to your MID-1028. From Adobe Digital Editions, right click the eBook you wish to transfer and select “Show File in Explorer”. - Page 14 QUICK OPERATION GUIDE MID-1028 Connect your MID-1028 to the same PC you have loaded ADE on and open Windows Explorer. If connected correctly your MID-1028 will be visible. Select the MID-1028 by double-clicking it. Then contents will appear on the right side of the Windows Explorer screen. Right click this section and select paste.
-
Page 15: Why Create A Google Account
QUICK OPERATION GUIDE MID-1028 WHY CREATE A GOOGLE ACCOUNT Creating a Google account allows you to talk, chat, share, schedule, store, organise, collaborate, discover and create online. A Google account also provides user level access to Gmail, Google+ and YouTube which are all backed up online and accessible online via the cloud. -
Page 16: Full Settings Folder View
QUICK OPERATION GUIDE MID-1028 FULL SETTINGS FOLDER VIEW Wireless and networks Charging WiFi Tablet idle Bluetooth (MID-1040 model only) Wi-Fi Data usage Screen Apps Portable hot spot Downloaded Ethernet On SD card Mobile networks Personal Device Location services Sound Google’s location service... - Page 17 QUICK OPERATION GUIDE MID-1028 Privacy Show GPU view updates Maps & Latitude Show surface updates Search Window animation scale Location Transition animation scale Add account Animator duration scale System Display HW overlays Date and time Force GPU rendering Automatic date and time...
-
Page 18: Faq
1. Try closing Apps or resetting. My MID-1028 is frozen or a 2. Restore or reset the MID-1028 to factory default settings using the reset severe error has occurred. button. 1. Some applications can consume more power than others causing the... -
Page 19: Warranty Against Defects
Users)”). Our business address is at 1/6-8 Byfield Street, North Ryde, NSW 2113 Step 3: Laser will issue you with a Return Authorisation (RA) number within 48 hours. When requested, send us the defective product and a copy of your receipt. Laser will cover the cost of the return delivery. Step 4: Wait for us to contact you.
Need help?
Do you have a question about the MID-1028 and is the answer not in the manual?
Questions and answers