
Related Manuals for Lenovo ThinkCentre M90z 0852


Summary of Contents for Lenovo ThinkCentre M90z 0852
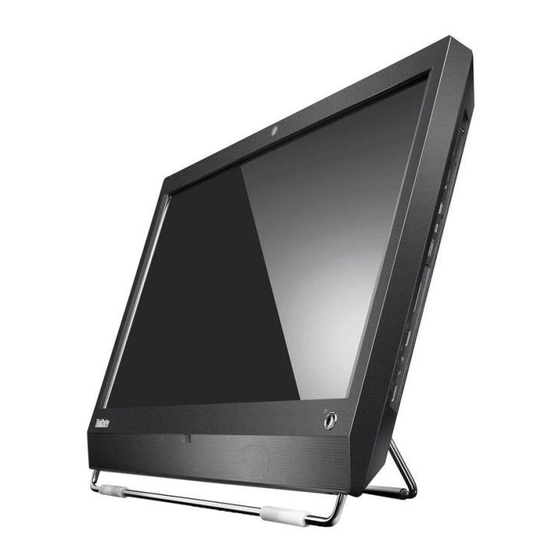
- Page 1 ThinkCentre User Guide Machine Types: 0800, 0852, 0870, 2471, 2557, 3091, 3265, 3373, 3429, 3650, 3678, 4285, 5205, and 5248...
- Page 3 ThinkCentre User Guide...
- Page 4 First Edition (May 2010) © Copyright Lenovo 2010. LENOVO products, data, computer software, and services have been developed exclusively at private expense and are sold to governmental entities as commercial items as defined by 48 C.F.R. 2.101 with limited and restricted rights to use, reproduction and disclosure.
-
Page 5: Table Of Contents
Integrated cable lock . Password protection Erasing lost or forgotten passwords (clearing CMOS) . © Copyright Lenovo 2010 Chapter 3. Recovery information . . . 59 Creating and using recovery media . Creating recovery media . Using recovery media . - Page 6 Safety and warranty Lenovo Web site (http://www.lenovo.com). Help and service Using the documentation and diagnostic programs . Calling for service . Using other services Purchasing additional services . User Guide . 80 Appendix. Notices ..85 .
-
Page 7: Important Safety Information
If you no longer have a copy of the ThinkCentre Safety and Warranty Guide, you can obtain a Portable Document Format (PDF) version from the Lenovo site at: http://www.lenovo.com/support ©... - Page 8 User Guide...
-
Page 9: Chapter 1. Product Overview
One slim Serial Advanced Technology Attachment (SATA) optical drive v One SATA hard disk drive Video subsystem v Integrated graphics card for a Video Graphics Array (VGA) IN connector and a DisplayPort out connector © Copyright Lenovo 2010 ™ i3 microprocessor ® microprocessor... - Page 10 Ability to store the power-on self-test (POST) hardware test results v Advanced Configuration and Power Interface (ACPI) support v Automatic power-on startup v Desktop Management Interface (DMI) v Intel Active Management Technology (AMT) (available in some models) v Intel Rapid Storage Technology...
-
Page 11: Single-Touch And Multi-Touch Feature
1. The operating system(s) listed here are being certified or tested for compatibility at the time this publication goes to press. Additional operating systems might be identified by Lenovo as compatible with your computer following the publication of this manual. This list is subject to change. To determine if an operating system has been certified or tested for compatibility, check the Web site of the operating system vendor. - Page 12 The following table shows the supported touch feature on each operating system edition. Table 1. Operating system edition and supported touch feature Operating system edition Windows 7 Enterprise Windows 7 Home Basic Windows 7 Home Premium Windows 7 Professional Windows 7 Starter Windows 7 Ultimate Windows XP User Guide...
-
Page 13: Specifications
Specifications This section lists the physical specifications for your computer. Computer dimensions (without a stand and frame foot) Width: 560 mm (22.05 inches) Height: 392 mm (15.43 inches) Depth: 79 mm (3.11 inches) or 86 mm (3.39 inches) (varies by configuration) Computer dimensions (with a stand and frame foot) Width: 560 mm (22.05 inches) Maximum height:... -
Page 14: Software Overview
Lenovo. Lenovo Welcome: The Lenovo Welcome program introduces some innovative built-in features of Lenovo to you and guides you through some important setup tasks to help you make the most of your computer. Note: The Lenovo Welcome program is only available on computers preinstalled with the Windows 7 operating system from Lenovo. - Page 15 (ThinkVantage applications, device drivers, BIOS updates, and other third party applications). Some examples of software that you should keep updated are programs provided by Lenovo, such as the Rescue and Recovery program and the ThinkVantage Productivity Center program.
-
Page 16: Locating Computer Controls, Connectors, And Parts
Locating computer controls, connectors, and parts This section provides information to help you locate your computer controls, connectors, and parts. Front view Figure 1 shows the locations of the controls and parts on the front of your computer. Figure 1. Front control and part locations 1 Integrated camera with MIC (microphone) (available in some models) 2 Integrated camera on/off button... -
Page 17: Using Computer In Monitor Mode
Using your computer in monitor mode Your computer can work in two modes: computer mode or monitor mode. This section provides instructions on how to use your computer in monitor mode. To use your computer in monitor mode, you need to have a second computer. Connect one end of the VGA cable to the VGA IN connector on the rear of your computer, and the other end to the VGA connector on the second computer. -
Page 18: Rear View
Rear view Figure 2 shows the locations of the connectors on the rear of your computer. Some connectors on the rear of your computer are color-coded to help you determine where to connect the cables on your computer. Figure 2. Rear connector locations 1 Card reader (available in some models) 2 USB connector... - Page 19 Connector DisplayPort out Used to attach a high-performance monitor, a direct-drive monitor, connector or other devices that use a DisplayPort connector. Ethernet connector Used to attach an Ethernet cable for a local area network (LAN). Note: To operate the computer within FCC Class B limits, use a Category 5 Ethernet cable.
-
Page 20: Component Locations
Component locations Figure 3 shows the locations of the various components in your computer. To remove the computer cover and access the inside of the computer, see “Removing the computer cover” on page 16. Figure 3. Component locations 1 Frame stand 2 Wall mount cover 3 Fan duct 4 Heat sink... -
Page 21: System Board Part And Connector Locations
Notes: 1. * denotes optional parts, which are available in some models. 2. Your computer might come with a frame stand or a lift stand. For more information about the lift stand, see “Removing or reinstalling the lift stand” on page 17. - Page 22 14 ExpressCard connector 28 Power supply connector User Guide...
-
Page 23: Chapter 2. Installing Or Replacing Hardware
You can maintain your computer or expand the capabilities of your computer by installing or replacing hardware. Notes: 1. Use only computer parts provided by Lenovo. 2. When installing or replacing an option, use the appropriate instructions in this section along with the instructions that come with the option. -
Page 24: Removing The Computer Cover
“Important safety information” in the ThinkCentre Safety and Warranty Guide that came with your computer. To obtain a copy of the ThinkCentre Safety and Warranty Guide, go to: http://www.lenovo.com/support This section provides instructions on how to remove the computer cover. CAUTION: Turn off the computer and wait three to five minutes to let the computer cool before removing the computer cover. -
Page 25: Removing Or Reinstalling The Lift Stand
To remove or reinstall the frame stand, do the following: 1. Remove all media from the drives and turn off all attached devices and the computer. Then, disconnect all power cords from electrical outlets and disconnect all cables that are connected to the computer. 2. - Page 26 To remove or reinstall the lift stand, do the following: 1. Remove all media from the drives and turn off all attached devices and the computer. Then, disconnect all power cords from electrical outlets and disconnect all cables that are connected to the computer. 2.
- Page 27 4. To reinstall the lift stand, insert the two tabs 1 on the lift stand into the corresponding holes in the computer wall mount, and then slide the lift stand toward the bottom of the computer. Align the three screw holes in the lift stand with those in the computer wall mount and then install the three screws to secure the lift stand.
-
Page 28: Removing Or Reinstalling The Rear I/O Assembly Cover
Removing or reinstalling the rear I/O assembly cover This section provides instructions on how to remove or reinstall the rear I/O assembly cover. To remove or reinstall the rear I/O assembly cover, do the following: 1. Remove all media from the drives and turn off all attached devices and the computer. -
Page 29: Removing Or Reinstalling The Wall Mount
2. Place a soft, clean towel or cloth on the desk or surface. Hold the sides of your computer and gently lay it down so that the screen is against the surface and the cover is facing up. 3. Remove the computer cover. See “Removing the computer cover” on page 16. 4. - Page 30 2. Place a soft, clean towel or cloth on the desk or surface. Hold the sides of your computer and gently lay it down so that the screen is against the surface and the cover is facing up. 3. Remove the computer cover. See “Removing the computer cover” on page 16. 4.
-
Page 31: Installing Or Replacing A Memory Module
Warranty Guide that came with your computer. To obtain a copy of the ThinkCentre Safety and Warranty Guide, go to: http://www.lenovo.com/support This section provides instructions on how to install or replace a memory module. Your computer has two slots for installing or replacing DDR3 SODIMMs (small outline dual inline memory modules). -
Page 32: Replacing The Battery
Warranty Guide that came with your computer. To obtain a copy of the ThinkCentre Safety and Warranty Guide, go to: http://www.lenovo.com/support This section provides instructions on how to replace the battery. Your computer has a special type of memory that maintains the date, time, and settings for built-in features, such as parallel-port assignments (configuration). - Page 33 To replace the battery, do the following: 1. Remove all media from the drives and turn off all attached devices and the computer. Then, disconnect all power cords from electrical outlets and disconnect all cables that are connected to the computer. 2.
-
Page 34: Replacing The Hard Disk Drive
Warranty Guide that came with your computer. To obtain a copy of the ThinkCentre Safety and Warranty Guide, go to: http://www.lenovo.com/support This section provides instructions on how to replace the hard disk drive. To replace the hard disk drive, do the following: 1. - Page 35 6. To install the new hard disk drive into the bracket, flex the bracket and align pin 1 , pin 2 , pin 3 , and pin 4 on the bracket with the corresponding holes in the hard disk drive. Do not touch the circuit board 5 on the bottom of the hard disk drive.
-
Page 36: Replacing The Optical Drive
Warranty Guide that came with your computer. To obtain a copy of the ThinkCentre Safety and Warranty Guide, go to: http://www.lenovo.com/support This section provides instructions on how to replace the optical drive. Note: The optical drive is available only in some models. - Page 37 To replace the optical drive, do the following: 1. Remove all media from the drives and turn off all attached devices and the computer. Then, disconnect all power cords from electrical outlets and disconnect all cables that are connected to the computer. 2.
-
Page 38: Replacing The Heat Sink
“Important safety information” in the ThinkCentre Safety and Warranty Guide that came with your computer. To obtain a copy of the ThinkCentre Safety and Warranty Guide, go to: http://www.lenovo.com/support This section provides instructions on how to replace the heat sink. CAUTION: The heat sink might be very hot. - Page 39 3. Remove the computer cover. See “Removing the computer cover” on page 16. 4. Locate the heat sink on the system board. See “Component locations” on page 5. Remove the fan duct by pressing the two tabs 1 inward and then pivoting the fan duct upward.
- Page 40 6. Follow this sequence to remove the four screws that secure the heat sink to the system board: a. Partially remove screw 1 , then fully remove screw 2 , and then fully remove screw 1 . b. Partially remove screw 3 , then fully remove screw 4 , and then fully remove screw 3 .
-
Page 41: Replacing The Microprocessor
“Important safety information” in the ThinkCentre Safety and Warranty Guide that came with your computer. To obtain a copy of the ThinkCentre Safety and Warranty Guide, go to: http://www.lenovo.com/support This section provides instructions on how to replace the microprocessor. CAUTION: The heat sink and microprocessor might be very hot. - Page 42 5. Lift the small handle 1 and open the retainer 2 to access the microprocessor 3 . Lift the microprocessor straight up and out of the socket. See Figure 24 on page 35. Notes: a. Your microprocessor and socket might look different from the one illustrated.
- Page 43 Figure 24. Removing the microprocessor 7. Make sure that the small handle is in the raised position and the microprocessor retainer is fully open. 8. Hold the new microprocessor and align the notches 2 on it with the alignment keys in the microprocessor socket, or align the small triangle 1 on one corner of the new microprocessor with the corresponding beveled corner of the microprocessor socket.
-
Page 44: Replacing The Wi-Fi Card
Warranty Guide that came with your computer. To obtain a copy of the ThinkCentre Safety and Warranty Guide, go to: http://www.lenovo.com/support This section provides instructions on how to replace the WI-FI card. Note: The WI-FI card is available only in some models. -
Page 45: Replacing The Bluetooth Module
“Important safety information” in the ThinkCentre Safety and Warranty Guide that came with your computer. To obtain a copy of the ThinkCentre Safety and Warranty Guide, go to: http://www.lenovo.com/support This section provides instructions on how to replace the Bluetooth module. Chapter 2. Installing or replacing hardware... - Page 46 Note: The Bluetooth module is available only in some models. To replace the Bluetooth module, do the following: 1. Remove all media from the drives and turn off all attached devices and the computer. Then, disconnect all power cords from electrical outlets and disconnect all cables that are connected to the computer.
-
Page 47: Replacing The Multi-Touch Board
Warranty Guide that came with your computer. To obtain a copy of the ThinkCentre Safety and Warranty Guide, go to: http://www.lenovo.com/support This section provides instructions on how to replace the multi-touch board. Note: The multi-touch board is available only in some models. -
Page 48: Replacing The Ambient Light Sensor
Warranty Guide that came with your computer. To obtain a copy of the ThinkCentre Safety and Warranty Guide, go to: http://www.lenovo.com/support This section provides instructions on how to replace the ambient light sensor. Note: The ambient light sensor is available only in some models. -
Page 49: Replacing The Expresscard
Warranty Guide that came with your computer. To obtain a copy of the ThinkCentre Safety and Warranty Guide, go to: http://www.lenovo.com/support This section provides instructions on how to replace the ExpressCard. Note: The ExpressCard is available only in some models. - Page 50 1. Remove all media from the drives and turn off all attached devices and the computer. Then, disconnect all power cords from electrical outlets and disconnect all cables that are connected to the computer. 2. Place a soft, clean towel or cloth on the desk or surface. Hold the sides of your computer and gently lay it down so that the screen is against the surface and the cover is facing up.
-
Page 51: Replacing The Internal Speakers
Warranty Guide that came with your computer. To obtain a copy of the ThinkCentre Safety and Warranty Guide, go to: http://www.lenovo.com/support This section provides instructions on how to replace the internal speakers. To replace the internal speakers, do the following: 1. -
Page 52: Replacing The Integrated Camera With Microphone
Do not open your computer or attempt any repair before reading and understanding the “Important safety information” in the ThinkCentre Safety and Warranty Guide that came with your computer. To obtain a copy of the ThinkCentre Safety and Warranty Guide, go to: http://www.lenovo.com/support User Guide... - Page 53 This section provides instructions on how to replace the integrated camera with microphone. Note: The integrated camera with microphone is available only in some models. To replace the integrated camera with microphone, do the following: 1. Remove all media from the drives and turn off all attached devices and the computer.
-
Page 54: Replacing The Microprocessor Fan Assembly
“Important safety information” in the ThinkCentre Safety and Warranty Guide that came with your computer. To obtain a copy of the ThinkCentre Safety and Warranty Guide, go to: http://www.lenovo.com/support This section provides instructions on how to replace the microprocessor fan assembly. -
Page 55: Replacing The Card Reader
Do not open your computer or attempt any repair before reading and understanding the “Important safety information” in the ThinkCentre Safety and Warranty Guide that came with your computer. To obtain a copy of the ThinkCentre Safety and Warranty Guide, go to: http://www.lenovo.com/support Chapter 2. Installing or replacing hardware... - Page 56 This section provides instructions on how to replace the card reader. Note: The card reader is available only in some models. To replace the card reader, do the following: 1. Remove all media from the drives and turn off all attached devices and the computer.
-
Page 57: Replacing The Rear I/O Assembly
Warranty Guide that came with your computer. To obtain a copy of the ThinkCentre Safety and Warranty Guide, go to: http://www.lenovo.com/support This section provides instructions on how to replace the rear I/O assembly. To replace the rear I/O assembly, do the following: 1. - Page 58 6. Remove the four screws 1 that secure the rear I/O assembly and then remove the rear I/O assembly from the computer. Figure 35. Removing the rear I/O assembly 7. To install the new rear I/O assembly into the computer, connect the new rear I/O assembly to the rear I/O assembly connector on the system board, and then align the four screw holes with those in the computer main bracket.
-
Page 59: Replacing The Right I/O Assembly
Warranty Guide that came with your computer. To obtain a copy of the ThinkCentre Safety and Warranty Guide, go to: http://www.lenovo.com/support This section provides instructions on how to replace the right I/O assembly. To replace the right I/O assembly, do the following: 1. -
Page 60: Replacing The Power Supply
Warranty Guide that came with your computer. To obtain a copy of the ThinkCentre Safety and Warranty Guide, go to: http://www.lenovo.com/support This section provides instructions on how to replace the power supply. To replace the power supply, do the following: 1. - Page 61 7. Remove the four screws 1 that secure the power supply and then remove the two screws 2 that secure the power cord connector bracket. Note the routing of the power cord connector cable 3 . Lift the power supply up to remove it from the computer main bracket.
-
Page 62: Replacing The Keyboard
ThinkCentre Safety and Warranty Guide that came with your computer. To obtain a copy of the ThinkCentre Safety and Warranty Guide, go to: http://www.lenovo.com/support This section provides instructions on how to replace the keyboard. To replace the keyboard, do the following: 1. -
Page 63: Completing The Parts Replacement
Note: Your mouse might be connected to a PS/2 mouse connector 1 or a USB connector 2 . Figure 39. Mouse connectors 4. Disconnect the failing mouse cable from the computer. 5. Connect a new mouse cable to the appropriate connector on the computer. 6. -
Page 64: Obtaining Device Drivers
Setup Utility program. Refer to Chapter 4, “Using the Setup Utility program,” on page 67. Note: In most areas of the world, Lenovo requires the return of the defective Customer Replaceable Unit (CRU). Information about this will come with the CRU or will come a few days after the CRU arrives. -
Page 65: Integrated Cable Lock
See “Rear view” on page 10 for the location of the integrated cable lock slot. This is the same type of lock used with many notebook computers. You can order an integrated cable lock from Lenovo by searching for Kensington at: http://www.lenovo.com/support... -
Page 66: Erasing Lost Or Forgotten Passwords (Clearing Cmos)
Erasing lost or forgotten passwords (clearing CMOS) This section provides instructions on how to erase lost or forgotten passwords, such as a user password. To erase a lost or forgotten password, do the following: 1. Remove all media from the drives and turn off all attached devices and the computer. -
Page 67: Copyright Lenovo
″creating Product Recovery discs.″ v To create recovery media on the Windows 7 operating system, click Start → All Programs → Lenovo ThinkVantage Tools → Factory Recovery Disks. Then, follow the instructions on the screen. © Copyright Lenovo 2010... -
Page 68: Using Recovery Media
v To create Product Recovery discs on the Windows XP operating system, click Start → All Programs → ThinkVantage → Create Recovery Media. Then, follow the instructions on the screen. Using recovery media This section provides instructions on how to use recovery media on different operating systems. -
Page 69: Performing Backup And Recovery Operations
To perform a backup operation using the Rescue and Recovery program on the Windows 7 operating system, do the following: 1. From the Windows desktop, click Start → All Programs → Lenovo ThinkVantage Tools → Enhanced Backup and Restore. The Rescue and Recovery program opens. -
Page 70: Using The Rescue And Recovery Workspace
To perform a recovery operation using the Rescue and Recovery program on the Windows XP operating system, do the following: 1. From the Windows desktop, click Start → All Programs → ThinkVantage → Rescue and Recovery. The Rescue and Recovery program opens. -
Page 71: Creating And Using A Rescue Medium
To create a rescue medium on the Windows 7 operating system, do the following: 1. From the Windows desktop, click Start → All Programs → Lenovo ThinkVantage Tools → Enhanced Backup and Restore. The Rescue and Recovery program opens. -
Page 72: Using A Rescue Medium
To create a rescue medium on the Windows XP operating system, do the following: 1. From the Windows desktop, click Start → All Programs → ThinkVantage → Create Recovery Media. The Create Rescue and Recovery Media window opens. 2. In the Rescue Media area, select the type of the rescue medium you want to create. -
Page 73: Solving Recovery Problems
Other device drivers are on the software media that come with individual devices. To install or reinstall the device driver for a factory-installed device, do the following: 1. Turn on the computer. - Page 74 User Guide...
-
Page 75: Chapter 4. Using The Setup Utility Program
You do not have to set a password to use your computer. However, using a password improves computing security. If you decide to set a password, read the following sections. © Copyright Lenovo 2010 displayed until you type the correct password. For more information, see “Using passwords.”... -
Page 76: Password Considerations
Password considerations A password can be any combination of up to 64 (1 to 64) alphabetic and numeric characters. For security reasons, it is recommended to use a strong password that cannot be easily compromised. To set a strong password, use the following guidelines: Note: The Setup Utility program passwords are not case sensitive. -
Page 77: Enabling Or Disabling A Device
Note: A password can be any combination of up to 64 (1 to 64) alphabetic and Enabling or disabling a device This section provides instructions on how to enable or disable user access to a device. USB Support SATA Controller To enable or disable a device, do the following: 1. -
Page 78: Viewing Or Changing The Startup Device Sequence
1. Turn off your computer. 2. Repeatedly press and release the F12 key when turning on the computer. When the Startup Device Menu opens, release the F12 key. 3. Select the desired startup device on the Startup Device Menu and press Enter to begin. -
Page 79: Chapter 5. Updating System Programs
Lenovo might make changes and enhancements to the POST and BIOS. When updates are released, they are available as downloadable files on the Lenovo Web site at http://www.lenovo.com. Instructions for using the POST and BIOS updates are available in a TXT file that is included with the update files. -
Page 80: Updating (Flashing) The Bios From Your Operating System
Updating (flashing) the BIOS from your operating system Note: Because Lenovo makes constant improvements to its Web sites, the Web page contents are subject to change without notice, including the contents referenced in the following procedure. - Page 81 Note: The recovery session will take two to three minutes. During this time you will hear a series of beeps. 8. After the recovery session is completed, the series of beeps will end, and the system will automatically turn off. Remove the disc from the optical drive before the system completely turns off.
- Page 82 User Guide...
-
Page 83: Chapter 6. Troubleshooting And Diagnostic Programs
You can also get the latest service and support telephone numbers from the Lenovo Support Web site at http://www.lenovo.com/support/phone Symptom... -
Page 84: Diagnostic Programs
To run the Lenovo ThinkVantage Toolbox program on the Windows 7 operating system, click Start → All Programs → Lenovo ThinkVantage Tools → System Health and Diagnostics. -
Page 85: Pc-Doctor For Rescue And Recovery
PC-Doctor for Rescue and Recovery The PC-Doctor for Rescue and Recovery diagnostic program is part of the Rescue and Recovery workspace on your Lenovo computer. Use the PC-Doctor for Rescue and Recovery program if you are unable to start the Windows operating system. -
Page 86: Cleaning An Optical Mouse
2. Repeatedly press and release the F12 key when turning on the computer. When the Startup Device Menu opens, release the F12 key. 3. Insert the diagnostic disc into the optical drive. 4. Select the optical drive with the diagnostic disc as the startup device and press Enter. -
Page 87: Chapter 7. Getting Information, Help, And Service
PDF file and you will be guided through the Adobe Reader installation. 2. The publication is available in other languages on the Lenovo Support Web site http://www.lenovo.com/support 3. If you want to install a different language version of the Adobe Reader... -
Page 88: Thinkvantage Productivity Center
Windows 7 operating system from Lenovo. The Lenovo Welcome program introduces some innovative built-in features of Lenovo to you and guides you through some important setup tasks to help you make the most of your computer. Access Help... -
Page 89: Lenovo Web Site (Http://Www.lenovo.com)
Engineering Change management - There might be changes that are required after a product has been sold. Lenovo or your reseller will make selected Engineering Changes (ECs) that apply to your hardware available. -
Page 90: Using Other Services
You must retain your proof of purchase to obtain warranty service. For a list of the Lenovo Support phone numbers for your country or region, go to http://www.lenovo.com/support and click Support phone list or refer to the ThinkCentre Safety and Warranty Guide that is provided with your computer. -
Page 91: Purchasing Additional Services
Service availability and service name might vary by country or region. For more information about these services, go to the Lenovo Web site at: http://www.lenovo.com Chapter 7. Getting information, help, and service... - Page 92 User Guide...
-
Page 93: Appendix. Notices
Web sites. The materials at those Web sites are not part of the materials for this Lenovo product, and use of those Web sites is at your own risk. -
Page 94: Television Output Notice
Macrovision Corporation. Reverse engineering or disassembly is prohibited. European conformance CE mark Trademarks The following terms are trademarks of Lenovo in the United States, other countries, or both: Lenovo The Lenovo logo Personal System/2... -
Page 95: Index
5 Ethernet 2 Ethernet connector 11 exiting, Setup Utility program 70 expansion 2 ExpressCard, replacing 41 external options, installing 15 © Copyright Lenovo 2010 features 1 flashing the BIOS 71 frame stand 16 removing 16 getting help 79... - Page 96 memory module installing 23 system board 23 Microphone connector 11 microprocessor fan assembly, replacing 46 mouse connector 11 mouse, replacing 54 multi-touch board, replacing 39 notice, television output 86 notices 85 Online Books folder 79 operations, backup and recovery 61 optical drive, replacing 28 optical mouse cleaning 78...
- Page 97 82 passwords 67 Setup Utility program 67 VGA IN connector 11 video subsystem 1 viewing and changing settings 67 wall mount Removing 21 warranty information 80 Web site, Lenovo 81 WI-FI card, replacing 36 workspace, backup and recovery 62 Index...
- Page 98 User Guide...
- Page 100 Part Number: 89Y8034 Printed in USA (1P) P/N: 89Y8034...
Need help?
Do you have a question about the ThinkCentre M90z 0852 and is the answer not in the manual?
Questions and answers