Advertisement
Available languages
Available languages
Quick Links
Advertisement

Subscribe to Our Youtube Channel
Summary of Contents for Manta MM309N
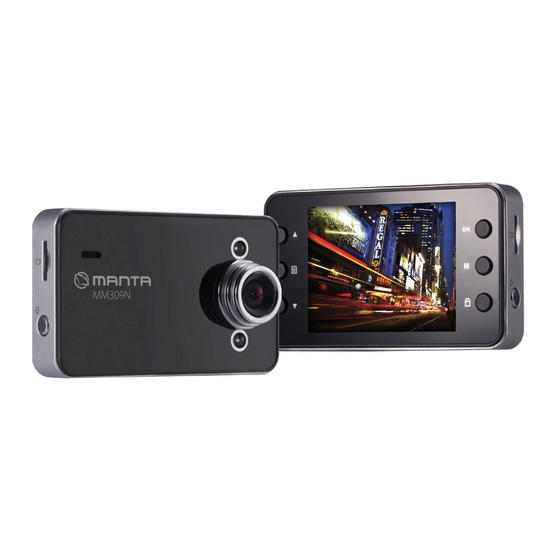
- Page 1 Car DVR Camera Model: MM309N Instrukcja obsługi User’s Manual...
- Page 2 Instrukcja Obsługi Opis produktu 1)Przycisk „góra” 2)Przycisk „menu” 3)Przycisk „dół” 4)Gniazdo USB 5) Gniazdo mocowania uchwytu 6) Przycisk zasilania 7)Gniazdo kart TF 8)Przycisk blokady 9)Przycisk trybu pracy 10) Przycisk OK...
- Page 3 Instrukcja Obsługi Opis działania przycisków funkcyjnych 1) Przycisk „góra” Nawigowanie po menu, zwiększanie wartości parametrów 2) Przycisk „menu” Naciśnij krótko, żeby wyświetlić opcje menu. 3) Przycisk „dół” Nawigowanie po menu, zmniejszanie wartości parametrów 4)Gniazdo USB ① Pozwala przesyłać dane z urządzenia do komputera. ② Używane do podłączenia zewnętrznego źródła zasilania lub do ładowania akumulatora 5)Gniazdo mocowania uchwytu...
- Page 4 Instrukcja Obsługi Nagrywanie / robienie zdjęć 1)Włączanie i wyłączanie Naciśnij raz przycisk zasilania , żeby włączyć urządzenie. Zostanie to zasygnalizowane zapaleniem się czerwonej diody. Naciśnij ponownie przycisk zasilania , żeby wyłączyć urządzenie. Spowoduje to zgaszenie diody. Uwaga: Gdy poziom baterii spadnie poniżej wartości granicznej, urządzenie wyświetli komunikat o braku zasilania i automatycznie zakończy pracę.
- Page 5 Instrukcja Obsługi przycisk , żeby wybrać następny plik. Naciśnij krótko , żeby odtworzyć nagranie / obejrzeć zdjęcia. 5)Ustawienia menu Naciśnij krótko przycisk , żeby wyświetlić okno ustawień nagrywania. Naciśnij przycisk ponownie, żeby przejść do kolumny „System settings” (Ustawienia systemowe). Następnie naciśnij przycisk .
- Page 6 Instrukcja Obsługi 1)Za pomocą ładowarki samochodowej 2)Przez podłączenie do portu USB w komputerze 3)Za pomocą ładowarki sieciowej Jeśli urządzenie wykona nieprawidłową operację i w efekcie przestanie odpowiadać na polecenia, należy je zresetować przez wyjęcie akumulatora lub naciśnięcie przycisku reset. Uruchomione ponownie będzie działać normalnie.
- Page 7 User’s Manual Product description 1) The up key 2) Menu key 3) The down key 4) USB connector 5) Bracket mounting hole 6) Power key 7) TF card slot 8) Hold key 9) Mode key 10) OK confirm key...
- Page 8 User’s Manual Key function description: 1) the up key Menu options, the downward adjustment function keys 2) Menu key Short press this button can adjust function setup menu 3)the down key Menu options, downward selection function keys 4)USB connector ①For the transmission of the data connection PC, ②Used to connect an external power supply to charge the battery or power supply 5)Bracket mounting hole Connect the vehicle bracket, mounting screw holes...
- Page 9 User’s Manual Vedio recording / photographing basic instructions 1)startup and shutdown Press the power button once to boot, the red indicator exhibit of lanterns lit up at boot time; Press the power button again is off, this time the red indicator crushes out. Note: video instrument will prompt automatic shutdown when the battery voltage is low in the low battery 2)Video mode...
- Page 10 User’s Manual 5)menu settings , At this time the pop-up video output settings , Short press again ,Switch to the "system settings" column,then short press ,Quit setting mode In the settings pop-up, through a short press ,In the select switch up and down on the short press the key item ,short press ,Enter the setting item...
- Page 11 User’s Manual During using this product, there will be a crash phenomenon caused by improper operation, then, We can remove the battery or press the reset button after the boot, and , at this time, the product is returned to normal Please purchase the original 4GB(up to 32GB) memory card, and format in the machine for the first time...
- Page 12 INFOLINIA SERWISOWA tel: +48 22 332 34 63 lub e-mail: serwis@manta.com.pl od poniedziałku do piątku w godz. 9.00-17.00 Producent zastrzega sobie możliwość wprowadzenia zmian w specyfikację produktu bez uprzedzenia. Strona główna www.manta.com.pl Strona wsparcia technicznego www.manta.info.pl SERVICE INFOLINE tel: +48 22 332 34 63 or e-mail: serwis@manta.com.pl from Monday to Friday.


Need help?
Do you have a question about the MM309N and is the answer not in the manual?
Questions and answers