
Related Manuals for Slamtec RPLIDAR S2E


Summary of Contents for Slamtec RPLIDAR S2E
-
Page 1: Contents
RPLIDAR Low Cost 360 Degree Laser Range Scanner Development Kit User Manual Model:S2E S h a n g h a iS l a m t e c.C o ., L t d... -
Page 2: Table Of Contents
Contents CONTENTS ..............................1 OVERVIEW ..............................3 TEMS IN THE EVELOPMENT ........................3 CONNECTION AND USAGE ........................4 ONNECTION ..............................4 NETWORK CONFIGURATION ........................4 PPLICATION ..........................6 ROUBLESHOOTING ............................10 OTOR PEED DJUSTMENT ........................... 10 SDK INTRODUCTION AND USAGE ...................... 11 SUPPLY SPECIFICATION ........................ -
Page 3: Overview
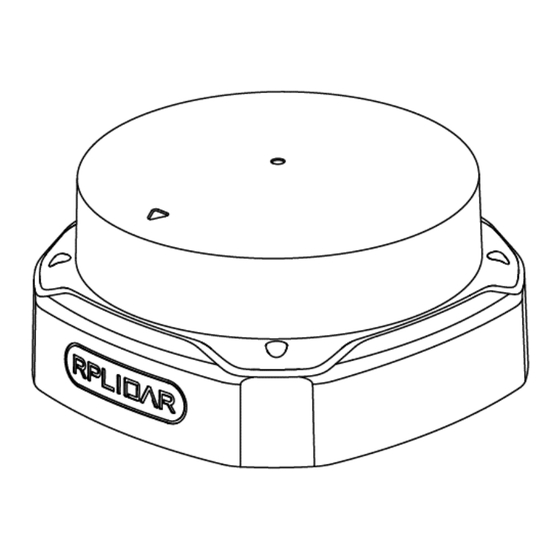
Figure 1-1 Items in the RPLIDAR Development Kit The standard version of the RPLIDAR S2E module is included in the RPLIDAR S2E development kit. The default IP address of RPLIDAR S2E is 192.168.11.2. The user Ethernet address cannot be the same as that of RPLIDAR S2E. -
Page 4: Connection And Usage
Connection and Usage Device Connection 1) Connect the network port line of RPLIDAR S2E module provided in the development kit to the PC, and connect the power cord to the power supply through the power adapter and power adapter. Power Supply Cable (5557-4R)... - Page 5 Change the port name based on the actual situation. Figure 2-3 IP Address Setting After the network configuration is complete, ping 192.168.11.2 to check whether the network configuration is successful. 5 / 17 Copyright (c) 2009-2017 RoboPeak Team Copyright (c) 2013-2017 Shanghai Slamtec Co., Ltd.
-
Page 6: Run Demo Application
Run Demo Application SLAMTEC provides a Lidars plugin in RoboStudio for users in test and evaluation. You can view the scan result directly in the UI and save the scan result to files for further processing. Currently the software needs to run on Windows, but for Linux and MacOS users, additional sample programs are available with the SDK. - Page 7 3) Click on " Manual Connect to Lidar.. ", select "Udp Server" connection mode in the dialog box, configure the Lidar IP address (192.168.11.2) and port (8089), and then click "Connect". 7 / 17 Copyright (c) 2009-2017 RoboPeak Team Copyright (c) 2013-2017 Shanghai Slamtec Co., Ltd.
- Page 8 4) Or click on " Auto Discovery to Lidar... "Use the device discovery function of RPLIDAR S2E to find the automatic detection lidar, and the lidar connected to PC will appear in the list. Click the lidar icon to expand the...
- Page 9 Right click in the major working area to choose a range so as to zoom in or out the view. The scan frequency is also showed in the above interface. (eg:10.07Hz(604rpm)) 9 / 17 Copyright (c) 2009-2017 RoboPeak Team Copyright (c) 2013-2017 Shanghai Slamtec Co., Ltd.
-
Page 10: Troubleshooting
For instance, the actual rotating speed in the following screenshot is 15.14Hz. Figure 2-10 The Motor Speed Adjustment Dialogue of RPLIDAR in RoboStudio 10 / 17 Copyright (c) 2009-2017 RoboPeak Team Copyright (c) 2013-2017 Shanghai Slamtec Co., Ltd. -
Page 11: Sdk Introduction And Usage
SDK Introduction and Usage Power Supply Specification The RPLIDAR S2E uses a unique external power supply to drive both the range core and a motor system that makes the range core rotate. The external system needs to ensure the current output capacity and ripple characteristics of the power supply to ensure the normal operation of the lidar. - Page 12 3)If Bonjour has been installed on Windows (the SDK directory contains the installation package bonjour.rar), you can use the device Discovery function of RPLIDAR S2E, click "Auto-Discovery", wait for 2 to 3 seconds, double-click the corresponding lidar device as shown in the figure, and click "OK".
- Page 13 Figure 3-5 Point Cloud Display Interface 5)The RPLIDAR S2E supports three scan modes. The Sensitivity mode can output range, angle and intensity information, as well as internal lidar time stamps for each 96 point cloud data. For details, please refer to the communication protocol documents on the official website.
- Page 14 ROS2 , and 2) Please refer to https://github.com/Slamtec/sllidar_ros2 run ros2 launch sllidar_ros2 view_sllidar_a3_launch.py to perform visual tests. 14 / 17 Copyright (c) 2009-2017 RoboPeak Team Copyright (c) 2013-2017 Shanghai Slamtec Co., Ltd.
-
Page 15: Operation Recommendation
Improper use may even damage the sensor. Please avoid using RPLIDAR in extreme high temperature (>50℃) and too low temperature (<-10 ℃). Ambient Light Compared with RPLIDAR A series, RPLIDAR S2E performs better to resist ambient light interference, which supports it to work properly in outdoor environment. -
Page 16: Revision History
Revision History Date Version Description 2022-06-01 RPLIDAR S2E initial version 16 / 17 Copyright (c) 2009-2017 RoboPeak Team Copyright (c) 2013-2017 Shanghai Slamtec Co., Ltd. -
Page 17: Appendix
OINT LOUD ISPLAY NTERFACE 3-6 S ........................13 IGURE ELECTION 3-7 L ........................11 IGURE IDAR PEED EGULATION 3-8 IP C ..........................14 IGURE ONFIGURATION 17 / 17 Copyright (c) 2009-2017 RoboPeak Team Copyright (c) 2013-2017 Shanghai Slamtec Co., Ltd.
Need help?
Do you have a question about the RPLIDAR S2E and is the answer not in the manual?
Questions and answers