
Related Manuals for AirPlus RMAP-7001

Summary of Contents for AirPlus RMAP-7001
- Page 1 DRAAGBARE AIRCONDITIONER RMAP-7001 Lees deze gebruikshandleiding voorafgaand aan het gebruik van dit product en bewaar het ter referentie.
- Page 2 I. Aandachtspunten Veiligheidswaarschuwingen: 1. Gebruik geen andere middelen voor het versnellen van het ontdooiingsproces of om te reinigen dan als aanbevolen door de fabrikant. 2. Het apparaat moet worden opgeslagen in een ruimte zonder continu werkende ontstekingsbronnen (bijvoorbeeld: open vuur, een werkend gasapparaat of een werkende elektrische verwarming.) 3.
- Page 3 * Nadat de airconditioning is geïnstalleerd, zorgt u ervoor dat de stekker intact is en stevig is aangesloten op het stopcontact. Leg het netsnoer ordelijk om te voorkomen dat iemand struikelt of de stekker eruit trekt. * Plaats geen object in de luchtinlaat en -uitlaat van de airconditioning. Houd de luchtinlaat en -uitlaat vrij van obstructies.
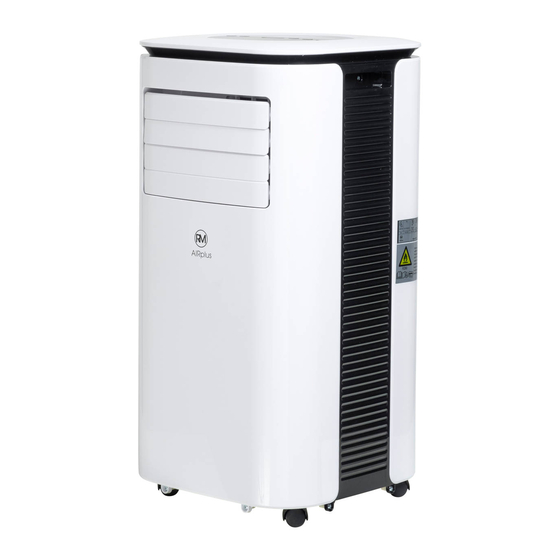
- Page 4 II. Functies en componenten Eigenschappen Eigenschappen 1: Modern uiterlijk, compacte constructie, vloeiende lijn, eenvoudig in gebruik.. 2: Functies van koeling, ontvochtiging, luchttoevoer en continue circulatie. 3: De meegeleverde afdichtplaat zorgt voor makkelijke raam montage en het onderhouden van een soepele stroming van de luchtafvoerpijp 4: Modern LED verlicht bedieningspaneel, met gebruiksvriendelijke afstandsbediening.
- Page 5 II. Functies en componenten Component Controleer dat alle accessoires in de doos zitten en lees de instructiehandleiding voorafgaand aan het monteren van de eenheid.
- Page 6 III. Bedieningsinstelling A. Bedieningsinstructies bedieningspaneel Bedieningsinterface: 1: Timer-toets 2: Ventilatortoets 3: Omhoog-toets 4: Omlaag-toets 5: Toets Slaapmodus 6: Modustoets 7: Aan/uit-toets Wanneer de machine voor de eerste keer wordt ingeschakeld, gaat de machine naar de stand-bystatus. 1. TIMER-toets: Wanneer het apparaat is ingeschakeld, drukt u op de toets om timing te sluiten; wanneer het apparaat is uitgeschakeld, drukt u op de toets om timing te openen.
- Page 7 7. Aan/uit-toets: Druk op deze toets om het apparaat in en uit te schakelen. Opmerking: GEHEUGENFUNCTIE: Het apparaat behoudt de instellingen tijdens een stroomstoring. U kunt de slaapmodus niet inschakelen in de ontvochtigings- of ventilatormodus. B. Bedieningsinstructies van afstandsbediening De airconditioner kan worden bediend met de afstandsbediening. Twee AAA-batterijen zijn nodig voor het gebruiken van de afstandsbediening.
- Page 8 V. Installatie Waarschuwing: houd het apparaat ten minste twee uur rechtop voordat u het gebruikt. Het apparaat kan eenvoudig worden verplaatst in de kamer. Zorg er bij het verplaatsingsproces voor dat het apparaat rechtop staat en op een vlak oppervlak is geplaatst. Installeer en gebruik het apparaat niet in de badkamer of andere vochtige omgevingen.
- Page 9 Afbeelding 2 Afbeelding 3 3) Plaats het apparaat met geïnstalleerde luchtafvoerslang en fittingen voor het raam, de afstand tussen het apparaat en wanden of andere objecten moet tenminste 50 cm zijn (als getoond in Afb. 4). Afbeelding 4 4) Verleng de uitlaatpijp en klik het platte uiteinde van de uitlaatpijp in de opening van de afdichtplaat in het raam (als getoond in Afb.
- Page 10 VI. Instructies voor het legen van het waterreservoir Het apparaat heeft twee aftapmethoden: handmatig aftappen en continu aftappen. 1. Handmatig aftappen: 1.1 Wanneer het apparaat stopt nadat het water gevuld is, schakelt u het apparaat uit en haalt u de stekker uit het stopcontact.
- Page 11 VII. Onderhoud Reiniging: voorafgaand aan reiniging en onderhoud, schakelt u het apparaat uit en haalt u de plug eruit. 1.Reinig het oppervlak Reinig het oppervlak van het apparaat met een natte, zachte doek. Gebruik geen chemicaliën, zoals benzeen, alcohol, benzine, enz.; anders wordt het oppervlak van het apparaat beschadigd of wordt zelfs de gehele eenheid beschadigd.
-
Page 12: Problemen Oplossen
IX. Problemen oplossen Repareer of demonteer de airconditioning niet zelf. Door ongekwalificeerde reparatie komt de garantiekaart te vervallen. Daarnaast kan dit leiden tot schade aan gebruikers of hun eigendommen. Problemen Redenen Oplossingen Schakel het apparaat in nadat u het hebt Er is geen elektriciteit. - Page 13 Dit symbool op het product of in de instructies betekent dat uw elektrische en elektronische apparatuur apart van het huishoudelijke afval moet worden weggegooid aan het einde van de levensduur. Er zijn aparte inzamelsystemen voor recycling in de EU. Neem voor meer informatie contact op met de lokale instantie of de verkoper waar u het product hebt gekocht.
- Page 14 I. Attention Matters Safety warnings: 1. Do not use means to accelerate the defrosting process or to clean, other than those recommended by the manufacturer. 2. The appliance shall be stored in a room without continuously operating ignition sources (for example: open flames, an operating gas appliance or an operating electric heater.) 3.
- Page 15 * Do not install and use the appliance in the bathroom or other humid environments. * Do not pull the plug to turn off the appliance. * Do not place cups or other objects on the body to prevent water or other liquids from spilling into the air conditioning.
-
Page 16: Features And Components
II. Features and Components Component Check that all accessories are in the box and please read the instruction manual before assembling the unit. -
Page 17: Control Setting
III. Control Setting 1.Control panel operation instructions Operation interface: 1.Timer Key 2. Speed Key 3. Up Key 4. Down Key 5. Fan Sleep Key 6. Mode key 7. Power Key When the machine is powered on for the first time, and then the machine will get into standby status. 1: TIMER Key: When the unit is on, press the key to close timer;... -
Page 18: Protection Function
The air conditioner can be controlled with the remote control. Two AAA-batteries are required to use the remote control. POWER : Press the POWER button to turn the unit on and off. MODE : Press the MODE button to switch between cooling, dry, fan modes. : Press the UP button to increase the desired temperature and set the duration of the timer. - Page 19 1.Installation: Warning: before using the unit, keep it upright for at least two hours. The unit can be easily moved in the room. In the moving process, ensure that the unit is in the upright position and should be placed on a flat surface. Do not install and use the unit in the bathroom or other humid environments.
-
Page 20: Drainage Instructions
Figure 4 4) Elongate the exhaust pipe and snap the flat end of the exhaust pipe joints into the hole of the window sealing plate assembly (as shown in Fig.5 and Fig.6). Notes:1: The flat end of the exhaust pipe joints must be snapped into place. 2: The pipe cannot be distorted nor has substantial turning (greater than 45 °). -
Page 21: Maintenance
This unit has two drainage methods: manual drainage and continuous drainage. 3. Manual drainage: 1) When the unit stops after the water is full, turn off the unit power and unplug the power plug. Notes:Move the unit carefully, so as not to spill the water in the water pan at the bottom of the body. 2) Place the water container below the side water outlet behind the body. -
Page 22: Unit Storage
4.Clean the surface Clean with surface of unit with a wet soft cloth. Don't use chemicals, such as benzene, alcohol, gasoline, etc; otherwise, the surface of the unit will be damaged or even the whole unit will be damaged. 5.Clean the filter screen If the filter screen is clogged with dust, and the effectiveness of the unit is reduced, be sure to clean the filter screen once every two weeks. - Page 23 that the risk of ignition is minimized. For repair to the refrigerating system, the following precautions shall be complied with prior to conducting work on the system. Work procedure Work shall be undertaken under a controlled procedure so as to minimize the risk of a flammable gas or vapour being present while the work is being performed.
- Page 24 – Marking to the equipment continues to be visible and legible. Markings and signs that are illegible shall be corrected; – Refrigeration pipe or components are installed in a position where they are unlikely to be exposed to any substance which may corrode refrigerant containing components, unless the components are constructed of materials which are inherently resistant to being corroded or are suitably protected against being so corroded.
- Page 25 Detection of flammable refrigerants Under no circumstances shall potential sources of ignition be used in the searching for or detection of refrigerant leaks. A halide torch (or any other detector using a naked flame) shall not be used. Leak detection methods The following leak detection methods are deemed acceptable for systems containing flammable refrigerants.
- Page 26 • Extreme care shall be taken not to overfill the refrigeration system. Prior to recharging the system, it shall be pressure tested with OFN. The system shall be leak tested on completion of charging but prior to commissioning. A follow up leak test shall be carried out prior to leaving the site.
-
Page 27: Troubleshooting
that is at hand and shall be suitable for the recovery of flammable refrigerants. In addition, a set of calibrated weighing scales shall be available and in good working order. Hoses shall be complete with leak-free disconnect couplings and in good condition. Before using the recovery unit, check that it is in satisfactory working order, has been properly maintained and that any associated electrical components are sealed to prevent ignition in the event of a refrigerant release. - Page 28 The water-full indicator will light. Discharge the water inside. temperature of 7-35 ℃. The ambient temperature is too low or too Recommend to use the machine in at the high In cooling mode, the room temperature is lower than the set temperature; in heating Change the set temperature.
- Page 29 Capillary Condense Compressor Evaporat This symbol on the product or in the instructions means that your electrical and electronic equipment should be disposed at the end of its life separately from your household waste. There are separate collection systems for recycling in the EU. For more information, please see contact the local authority or your retailer where you purchased the product.
Need help?
Do you have a question about the RMAP-7001 and is the answer not in the manual?
Questions and answers