
Related Manuals for Outwater OI-775.ECD


Summary of Contents for Outwater OI-775.ECD
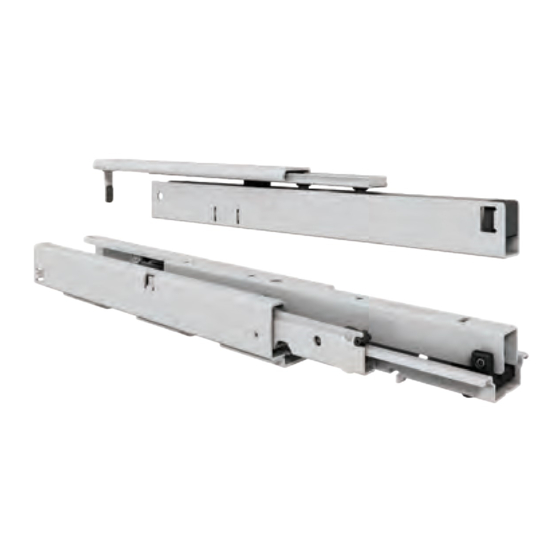
- Page 1 MOUNTING INSTRUCTIONS OI-775.ECD: Progressive Action Full-Extension Pantry Pull-Out, Floor Mount 75 kg (175 lbs.) Capacity with Matching Top Guide 1.800.631.8375 | www.outwater.com...
- Page 2 Slide mounts in cabinet as per drawing 2, 2a and according to the hole locaions using #7 screws. + The Top Guide mounts as per drawings 1, 1a and 1b and the hole locations using #7 screws. Outwater Industries, Inc. assumes no liability for improper installation. Page 2...
- Page 3 + The U-Profile of the Top Guide mounts as per drawing 4 and 1b and the hole locations using #7 screws. + Easy Close of the Top Guide clips in place as per drawing 5 and 5a. Outwater Industries, Inc. assumes no liability for improper installation. Page 3...
- Page 4 Top Guide is open (fig. A). millimeters because of the snap-in mounting method. You should hear a “click” when you pushed the pull-out all the way in. Outwater Industries, Inc. assumes no liability for improper installation. Page 4...
- Page 5 + The default setting of the tilt adjustment as per drawing 9 is neutral. Adjustable range is ± 3mm (fig. D) to adjust the front tilt vertically (fig. 9). Outwater Industries, Inc. assumes no liability for improper installation. Page 5...
- Page 6 + Use the Allen screws in the bottom slide (fig. F) for the lateral adjustment of the pull-out as per drawing 10. NOTE: Tighten scews firmly. + Do not lubricate any part of the OI-775. Outwater Industries, Inc. assumes no liability for improper installation. Page 6...
- Page 7 750 29.53 735 28.94 261 10.28 485 19.09 709 27.91 325 12.78 645 25.39 197 7.76 9.02 357 14.06 389 15.32 402 15.83 8.95 19.69 4208 Packing Unit: 1 Set per box with mounting instructions Outwater Industries, Inc. assumes no liability for improper installation. Page 7...
- Page 8 + Push the stop piece down and push the top guide slide completely in to clear the adapter (Fig. G). Pull the pull out forward and up to release from the black hooks as shown in drawing 11. Outwater Industries, Inc. assumes no liability for improper installation. Page 8...
- Page 9 Outwater Industries, Inc. assumes no liability for improper installation. Page 9...
Need help?
Do you have a question about the OI-775.ECD and is the answer not in the manual?
Questions and answers