Creative SXFI CARRIER - Dolby Atmos Speaker System Soundbar Manual
- User manual (177 pages) ,
- User manual (56 pages)
Advertisement
Unpacking


Ensure shipping box faces the correct direction
Carefully remove both soundbar and subwoofer from the box


Note: Ensure all parts and accessories are available before setting up. Be sure to retain the box and packaging materials. In the event of a defect or malfunction, the product must be returned along with its original box and packaging materials.


HEAVY OBJECT
Two person lift required
Package Contents
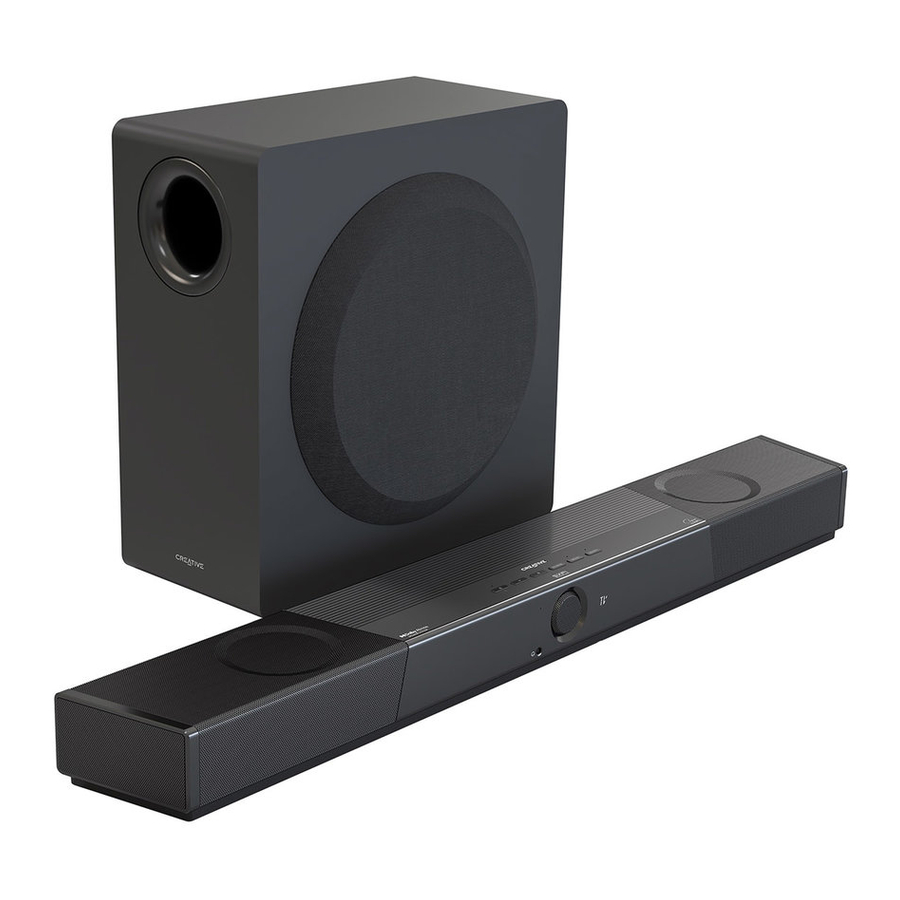
Soundbar

Subwoofer

*Several geographical-dependent power cables may be included in the box
Overview

- Power Button / Bluetooth ® Pairing
- Power Button LED
- Solid Red: Standby Mode
- Solid Yellow: Network Standby
- Solid White: Power On
- Solid Blue: Bluetooth Connected
- Flashing Blue: Bluetooth Pairing
- Flashing White: User Acknowledgment Required for Mobile App Pairing
- Volume –
- 3.5 mm Headphone-out
- Volume +
- Input Sources
- Mode Selection
Press once to cycle through available Sound modes (Movie > Music > Night > Neutral > SuperWide). Press and hold for 5s to enter subwoofer's Pairing mode - Mode Selection LED
- Flashing Green: Subwoofer Pairing
- Built-in LED Display
- Super X-Fi ®
- Super X-Fi LED
Headphone Mode:
Speaker Mode:
- Solid Green: Super X-Fi Headphone Holography Enabled
- Solid Amber: Super X-Fi Headphone Holography Disabled
- Flashing Red: Super X-Fi Profile Transfer in Progress
- OFF
Rear Connectivity – Soundbar

- SXFI OUT
SXFI-enabled USB Audio Output - USB AUDIO IN
USB Audio-in - HDMI 1
HDMI-in 1 - HDMI 2
HDMI-in 2 - HDMI OUT
Output to TV - OPTICAL IN
Optical-in (Dolby Audio / 24-bit 96 kHz Stereo PCM) - AUX
3.5 mm AUX-in - SUB OUT
3.5 mm Subwoofer Analog-out - 24V
![]() 4A
4A
24V![]() 4A DC-in
4A DC-in - Mounting Brackets
 4A
4ARear Connectivity – Subwoofer

- SUB IN
3.5 mm Subwoofer Analog-in - SERVICE
Strictly used for firmware updates only - Status LED
- Solid Red: Standby Mode
- Solid Green: Powered On and Connected
- Blinking Green: Pairing Mode
- RESET
- Wireless Connection Reset: Press and hold for 8s or until LED blinks twice in red
- AC IN
Remote Control

- Power Button: Press once to turn on soundbar. Press once again to enter Standby mode
- Mute Button: Press once to mute / unmute audio playback
- TV: Press once to manually switch TV ARC / eARC
- Source Selection Buttons (HDMI 1, HDMI 2, USB, Optical, AUX): Switch to corresponding input source
- Bluetooth Button: Press once to switch to Bluetooth mode. Press and hold for 2s to enter Bluetooth Pairing mode
- Previous Button: Press once to return to previously selected source
- Info Button: Press to display the following: Audio format information (Dolby encoded / PCM), Sound mode, and current source
- LED Display Button: Press to toggle between Bright mode, Dark mode, and OFF
- Bright Mode: 100% brightness
- Dark Mode: 50% brightness
- OFF: Lights up only when there is an interaction; turns off after 5s
- Volume + Button: Increases volume.1 Press and hold to continuously increase the volume
- Volume – Button: Decreases volume.1 Press and hold to continuously decrease the volume
- Play / Pause Button: Press once to play / pause audio source (For USB audio and Bluetooth modes only)
- Previous Track Button: Press once to return to previous track (For USB audio and Bluetooth modes only)
- Next Track Button: Press once to skip to next track (For USB audio and Bluetooth modes only)
- Menu Button: Press once to enter device's settings menu
- Back Button: Press once to go back to parent menu or exit device's settings2 menu
- Mode Button: Press once to cycle through available Sound modes (Movie > Music > Night > Neutral > SuperWide)
- Bass – / + Button: Press once to adjust subwoofer's bass level
- Speaker Button: Press once to switch to speaker-out
- SXFI Button: Press once to turn on / off Super X-Fi Headphone Holography when in Headphone-out3 mode
- HP Button: Press once to switch to Headphone-out mode
- Custom (C1-C6) Buttons: Custom buttons are customizable using the Creative app
1 Does not control volume setting of devices connected to SXFI-out. Please adjust device's volume directly on the connected SXFI-enabled device
2 When in Device Settings' menu,
- Press the Play / Pause button once to enter the menu or apply selected settings
- Press the Volume - / Next Track button to go to the next menu selection
- Press the Volume + / Previous Track button return to the previous menu selection
- Press the Menu or Back button to exit device's Settings menu
3 For SXFI-enabled devices connected via rear SXFI-out, please use the Super X-Fi button located on the device to enable / disable Super X-Fi Headphone Holography and the Volume Control Dial / Buttons to control playback volume. Super X-Fi Headphone Holography is available via Headphone-out only. When switched to Speaker Mode, Super X-Fi Headphone Holography, as well as the corresponding LED(s) will be turned off
Sound Modes
| Sound Modes | Effects |
 | Puts you at the heart of action with added realism and enhanced cinematic landscape. Recommended for all movie, games, and video content. |
 | Intelligently improves tonal balance of music, while reducing the loudness difference between audio tracks. Recommended for most music content. |
 | Minimizes loud sounds and makes soft passages easier to hear. Recommended for low volume playback of movie and video content. |
 | Recommended for the purest playback performance of music recorded with wide dynamic range, such as Classical, Jazz, and titles from audiophile labels. Required volume setting may differ from Movie, Music, and Night modes. |
 | Enhances the spatial reproduction of movies and music which were recorded in stereo. Required volume setting may differ from Movie, Music, and Night modes. |
Setup and Care
Creative SXFI CARRIER is designed to be placed on top of a console in front of a TV or to be wall mounted. For optimum performance, please observe the setup recommendation below. Wall mount information for professionals are also included in this quick start guide.
- In order to reproduce an immersive sound experience, the soundbar radiates sound from the front, top, and sides. To yield the best sound experience, please ensure that these sound waves are not obstructed by objects placed in their path. Do not place the soundbar within an enclosed fixture (cabinet, shelving unit, etc.), and ensure that nothing is obstructing the sides. The top firing speakers require a clear line of sight to the ceiling as well.
- The best sound quality is achieved if the height of the soundbar is as close as possible to the level of your ear when seated at the listening position. Avoid positioning the soundbar too low that you are looking down at the top of the main unit, as this will disrupt the audio and surround sound performance. If you are wall mounting the soundbar, install it with 15 cm (6") of space between the top of the soundbar and the bottom of the TV to avoid obscuring the top firing speaker.
- Avoid placing the soundbar on metal cabinets, as they tends to audibly ring, and could prevent reliable wireless communication between the soundbar and subwoofer.
- For the best listening experience, the listening position should be at least 1.2–1.5m (4–5 ft) away from the soundbar.
- The subwoofer unit is best placed at the corner of the room closest to the soundbar. This placement tends to yield the maximum output and smoothest response in most rooms. The cloth grille covered subwoofer driver should be at least 10 cm (4") away from the nearest wall.
- If a corner placement of the subwoofer is not possible, then placement close to the wall, and close to the soundbar will be a good compromise.
- Room acoustics has a major influence on sound quality. The ear is particularly troubled by standing waves and echoes which can be identified by moving around your room and loudly clapping your hands. Parallel surfaces such as opposite walls, floor, and ceiling encourage this issue. However, rearranging curtains, thick carpets, rugs, furniture, and bookcases can make major improvements as the sound waves are partially absorbed and diffused. The soundbar should be setup, as far as possible, with equal distance from the left and right wall.
- The ceiling surface is an important contributor to how overhead (height) effects perform. The ideal ceiling height is between 2.3–4.3m (7.5–14 ft). Ceiling should be constructed of an acoustically reflective material, such as wall board, plaster, hardwood, or any rigid, non-sound absorbing material. Avoid treating ceilings with acoustic damping materials. For optimal playback, the ceiling should be flat. A shallow vaulted ceiling will provide an acceptable performance.
- The soundbar comes pre-paired out of the factory with the included wireless subwoofer, and this is achieved through a pair of low latency wireless transceivers operating in the 2.4 GHz region. To avoid interference with other equipment operating at the same frequency, the transceivers operate at relatively low transmission power, and adaptively avoid frequency bands used by other equipment. For reliable operation, place the soundbar and subwoofer within a distance of 10m (33 ft), and avoid placing other equipment operating in the same frequency region, such as routers and microwave ovens, within the same area.
- When the shortest possible audio delay is required for gaming, or if the soundbar is unable to reliably connect to the subwoofer wirelessly due to adverse wireless interference, a wired connection could be used. A standard 3.5 mm stereo mini jack cable can be used to connect the soundbar (via the Sub-out port) to the subwoofer (to the Sub-in port). The wired connection will take precedence over the wireless connection.
Follow the instructions below to properly care for and clean Creative SXFI CARRIER:
- Dust lightly with a soft lint-free cloth, and avoid abrasives and spirit-based cleaners. If necessary, wipe gently and carefully with a cloth that is slightly dampened with glass cleaner to remove stubborn soil and marks.
- The acoustically transparent fabric grille protects the subwoofer driver unit, and must not be removed. This could be carefully cleaned using a lint brush. Be careful not to press and deform the drivers under the grille.
Setting up
Connecting a Power Source

- Connect the long mains cable to the subwoofer
- Connect the short mains cable to the soundbar adapter
- Connect the DC barrel plug of the soundbar adapter to the 24V / 4A DC input on the rear panel of the soundbar
- Press
![]() to turn the system on
to turn the system on
 to turn the system on
Note: To minimize power consumption, the soundbar will enter Network Standby Mode after 15 minutes of inactivity if no digital source device is connected. The soundbar will exit Network Standby Mode upon receiving user's input or with audio playback. You may encounter a few seconds of silence from the subwoofer while the wireless connection between the soundbar and the subwoofer is re-established. After 28 hours of inactivity, the soundbar will enter Standby Mode. To turn the soundbar on again, press the Power button on the Soundbar or Remote Control. If a connected HDMI CEC-compliant TV or source device is connected to the soundbar, the soundbar will turn on and enter standby mode in sync with the connected device. Standby timing, power synchronization over HDMI, and more are customizable using the Creative app.
Setting Up the Soundbar

Connecting the Soundbar to your TV*
- Creative SXFI CARRIER supports HDMI Audio Return Channel (ARC) and enhanced Audio Return Channel (eARC). This allows the soundbar to play lossless multichannel audio from the TV, or audio from sources connected to the TV. For convenience, we recommend that you connect all HDMI input sources to the TV, as this allows most of the interaction you would have with the system (Source Switching, Volume Control) to be carried out with the TV's remote control.
- Creative SXFI CARRIER supports HDMI 2.1 with 8K passthrough. If 8K capable sources are connected to the soundbar, please use a HDMI-certified ultra-high speed cable (48 Gbps) to establish the connection between the soundbar and TV.
- Connect Creative SXFI CARRIER'S HDMI-out to the HDMI-in of the TV marked with ARC (or eARC). Typically, only one of the TV's HDMI-ins will support ARC. If you cannot find the port, please consult your TV user manual.
Note: If your TV does not support HDMI ARC, connect the TV's Optical Digital-out to the Optical-in, and configure the TV's audio-out to Optical-out. - For certain TVs, you will need to manually configure its audio settings to enable ARC (or eARC). Ensure that Creative SXFI CARRIER is turned on and connected to the TV while the settings are being configured.
Note: The HDMI ARC-in may be manually selected by pressing the TV's button on the remote control if necessary
*We recommend that the wired connections to the soundbar are made before wall mounting the soundbar or deciding on the final placement of the soundbar in the cabinet
Connecting External Devices to the Soundbar

- (i) SXFI-OUT
Creative SXFI CARRIER features a separate USB port catered specially for devices that support Super X-Fi Headphone Holography, such as SXFI THEATER, a low-latency wireless USB headphones.
(ii) USB Audio
Creative SXFI CARRIER also features a USB-C audio-in port that serves as an alternate audio connection for big-screen gaming, or to achieve high quality music playback.
Note: We recommend setting the audio output of your PC to 7.1 channel for gaming, or to 2.0 channel for audio playback

- HDMI sources
Creative SXFI CARRIER features two Dolby Vision Compatible HDMI 2.1 inputs, with 8K support, HDR10, and HDR10+.

- Optical-in (Dolby Audio / PCM)
Creative SXFI CARRIER features an Optical-in for use with personal assistant devices, streaming audio devices, or CD players. This input also works as a recommended alternative connection to the TV if you experience HDMI ARC / eARC compatibility issues.

- Bluetooth Mode LED Indicator:
- Solid White: Not Connected
- Flashing Blue: Bluetooth Pairing
- Solid Blue: Bluetooth Paired / Connected
- Bluetooth
- Press the Bluetooth button once to switch to Bluetooth Mode
- Press and hold the Bluetooth button on the soundbar or remote control until the Power Button LED flashes in Blue or until the soundbar displays "BT PAIRING"
- Select "CREATIVE SXFI CARRIER" from the list of discovered Bluetooth devices to pair
- Press the Bluetooth button once again to exit Bluetooth Pairing mode
Setting Up the Subwoofer

Creative SXFI CARRIER soundbar and subwoofer are pre-paired at the factory; they will automatically and wirelessly connect to each other when connected to a power source and the status light on the subwoofer will light up in green. If the subwoofer's status light is not lit, please ensure that the subwoofer is plugged in and the power source is turned on.
If the subwoofer's status light remains in red when the soundbar is turned on, interference could have prevented the subwoofer from responding wirelessly to soundbar.

Alternatively, you may also use a standard 3.5 mm stereo mini jack cable* to establish a wired connection between the soundbar and subwoofer.
*Cable not included
Mobile App - Creative

The Creative app provides you with various configuration options to enhance the performance of your product, as well as to customize and personalize your audio settings. Available on both Apple's App Store and Google Play Store, the app allows you to customize and control your SXFI CARRIER, such as seamless device pairing, Super X-Fi setup, custom buttons configurations, speaker setup and calibration settings, and the ability to run diagnosis for technical support.
To start using the app, follow the on-screen instructions to connect to the soundbar.
Download Creative app from:


With Creative app, enjoy the following:
- A complete, fuss-free SXFI CARRIER setup, including a calibration process, to fully optimize the placement and settings of both the soundbar and subwoofer in the user's home environment
- Direct access to basic controls of SXFI CARRIER's functions wirelessly; such as source selection, volume adjustment, and Sound Mode selection, without having to reach for the IR remote control
- Instant access to SXFI CARRIER's advanced settings, including custom-mapping buttons for IR remote control, subwoofer bass adjustment, auto standby and display brightness configuration, additional input / output setup, firmware update, and more
Note: For a complete Super X-Fi experience, please download the SXFI App from Apple's App Store or Google Play Store.
Wall Mounting (Optional)

Improper installation could lead to damage of the wall and equipment, and might lead to injury. The following information does not constitute a complete set of wall mounting instruction, and are provided for use by qualified installers only.
Preparation Materials
Creative SXFI CARRIER can be wall mounted from a pair of keyhole mounts located on the back of the soundbar. A variety of mounting hardware are compatible with these mounts, and could be selected according to the type of wall construction, as well as local availability. An example of a suitable hanger for drywalls is the double-headed bear claw hanger from Hangman products, as illustrated.

A double-headed bear claw hanger
Please ensure that the mounting hardware is suitable for the type of wall you have, and that the mounting hardware and the wall is able to bear the weight of the soundbar with adequate safety margins before proceeding. Please refer to the following drawing of the keyhole to assess the required specifications of the mounting hardware.

- Determine the mounting position of the soundbar. Ensure that it is properly centered relative to the TV and leveled horizontally
- Note and mark out the recommended hanger locations according to the diagram below. Ensure that they do not intersect with buried pipes, conduits, or cabling within the wall


Technical Specifications
| Soundbar Model | MF8345 |
| Weight | 3.6 kg / 7.9 lbs |
| Dimensions | 880 x 76 x 128 mm / 34.6 x 3 x 5 inches |
| Operating Temperature Range | 0–40°C |
| Amplifier Rated Output Power | 36W x 7 |
| Supported Formats | LPCM 8 Ch, Dolby Digital, Dolby Atmos (TrueHD / Digital Plus) |
| Input Rating | 24V  4A 4A |
| Bluetooth Version | 5.0 (BR / EDR / LE) |
| Operating Range | 10m (33 ft), measured in open space |
| Frequency Operating Range | 2402–2480 MHz |
| RF Output Power | Bluetooth: 9.77 dBm; Bluetooth Low Energy: 8.35 dBm; 2.4G SRD: -2.04 dBm (For Europe) |
| Subwoofer Model | MF8370 |
| Weight | 12.8 kg / 28.2 lbs |
| Dimensions | 225 x 450 x 430 mm / 8.9 x 17.7 x 16.9 inches |
| Rated Amplifier Output Power | 200W |
| Operating Temperature Range | 0–40°C |
| Input Rating | 100–240V 50 / 60 Hz 0.8A |
| Operating Range | 10m (33 ft), measured in open space |
| RF Output Power | 2.4G SRD: -6.04 dBm (For Europe) |
| Frequency Operating Range | 2402–2480 MHz |
| Adapter Model | DYS9002-240400W |
| Input | 100–240V AC 50 / 60 Hz 1.5A Max |
| Output | 24V 4A |
Support Information
Product Registration
Registering your product ensures you receive the most appropriate service and product support available. You can register your product during installation or at creative.com/register.
Technical & Customer Support Services
Visit creative.com/support/sxficarrier to resolve and troubleshoot technical queries at Creative's 24-hour self-help Knowledge Base. You can also find customer support services and other helpful information here.
Other Information
Please visit creative.com/compliance/sxficarrier for the user guide, safety and regulatory information, and ErP information where applicable. Please visit creative.com/support for all other support related to your product.
In the event of a defect or malfunction, contact Creative for return authorization. The product must be returned along with its original box and packaging materials. Packing materials may be purchased from Creative if necessary.

VideosCreative SXFI Carrier Review Video
Documents / Resources
References
![apps.apple.com]() Creative on the App Store
Creative on the App Store![play.google.com]() Google Play
Google PlayCreative Technology - Online Product Registration
Creative Worldwide Support
Creative Worldwide SupportSXFI Carrier
Creative Worldwide Support
Download manual
Here you can download full pdf version of manual, it may contain additional safety instructions, warranty information, FCC rules, etc.
Download Creative SXFI CARRIER - Dolby Atmos Speaker System Soundbar Manual
Advertisement


Need help?
Do you have a question about the SXFI CARRIER and is the answer not in the manual?
Questions and answers