Chapters
Table of Contents

Related Manuals for XCLEA H30 Plus

Summary of Contents for XCLEA H30 Plus
- Page 1 Robot Vacuum and Mop Cleaner Operation Manual Read this operation manual carefully before using the product, and store the manual safely. Scan the QR code for manuals in multiple languages...
- Page 2 EN ................................. Page 1 - 20 FR ................................Page 21 - 40 DE ................................Seite 41 - 60 IT ................................Pagina 61 - 80 ES ............................... Página 81 - 100 PL ............................... Strona 101 - 120 RU ................................121 - 140 JA ................................
-
Page 3: Table Of Contents
CONTENTS Safety instructions ....................................... 2 Warning ........................................................2 Caution ........................................................3 Product overview ......................................4 Main unit ........................................................4 Dust box + water tank (2 in 1) and mopping module ........................................4 Dust collector (optional) ..................................................5 Charging dock (optional) ..................................................5 Installation ........................................ -
Page 4: Safety Instructions
Safety instructions Read this operation manual before using the product Warning: To avoid injury to yourself and others, and to avoid unnecessary property damage, read carefully before using the product and observe the following “Safety instructions”. The safety instructions are divided into two sections, “Warning” and “Caution”. The “Warning” and “Caution” sections contain important information for safe use of the product and must be followed. -
Page 5: Caution
20. The adapter is for indoor use only, do not expose it to rain. 21. If the exterior is damaged, do not use the adapter to avoid risk of electric shock. 22. This adapter is only intended for use with designated robot vacuum and mop cleaners. 23. -
Page 6: Product Overview
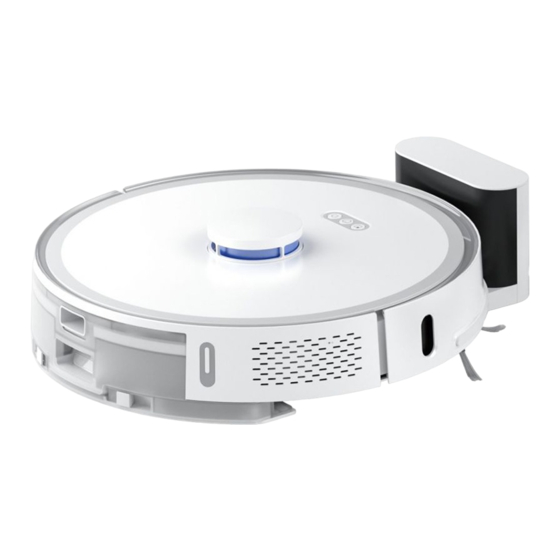
Product overview Main unit Laser head pressure sensor Function buttons Panel Laser sensor Dust box release button Infrared docking sensor Dust inlet Bumper Mop holder release button Infrared docking sensor/Wall detection Charging contact (x2) sensor Infrared sensor TOF wall tracking sensor Spot button Universal wheel •... -
Page 7: Dust Collector (Optional)
Mop holder Mop holder release button Disposable mop Dust collector (optional) Flip cover LED display Air outlet Infrared lens Transparent cover of dust channel Charging contact Dust inlet Charging port Charging dock (optional) Charging dock indicator Signal emission area Charging port Cord storage slot Charging contact... -
Page 8: Installation
Installation Installing the dust collector (optional) Step 1: Find a suitable location to place the dust collector; Step 2: Press and hold the Power button on the main unit to turn on the robot vacuum and mop cleaner, then press the Dock button for the robot to search for the dust collector to charge. Dock button >0.5 m >0.5 m... -
Page 9: Installing The Mopping Module
Step 3: Press and hold the Power button on the main unit to turn on the robot vacuum and mop cleaner, then press the Dock button for the robot to search for the charging dock to charge. Dock button Caution 1. -
Page 10: App Downloads
2. Open the Huawei SmartHome app. At first use, register an account and log in to the app as per the 1. Search for “Xclea” in the app store or scan the QR code below to download and install the app. -
Page 11: Use
Turning on/off and cleaning modes 1. Turning on/off Spot button Press and hold the Power button, the Power button indicator is ON and the main unit enters • Short press to clean a localized area. The robot automatically docks after cleaning. Standby mode. -
Page 12: Turning On/Off And Operating The Dust Collector (Optional)
Caution 1. It is recommended to start cleaning when the main unit is on the charging dock or the dust collector. 2. When power is insufficient during cleaning, the main unit will automatically dock on the charging dock or the dust collector and charge itself. It will return to where it left off and resume cleaning after charging is completed. -
Page 13: Cleaning And Maintenance
Cleaning and maintenance Always turn off the product before any maintenance! Disassembling and installing the main brush Step 1: Disassemble the main brush Step 2: Clean the main brush Turn the robot vacuum and mop cleaner over, press the main brush cover release button to remove Use the cleaning brush to pick up and cut away the hair and fibers entangled on the main brush. -
Page 14: Disassembling And Installing The Dust Box And Filter
Caution 1. Only replace with a side brush supplied by XCLEA, otherwise, it may lead to damage to the main unit. 2. To avoid scratching yourself, be careful when using a screwdriver to replace the side brush. 3. Install the left and right side brushes correctly onto their respective pins. -
Page 15: Disassembling And Installing The Mop
Caution 1. Only replace with a mop supplied by XCLEA, otherwise, it may lead to ineffective cleaning. 2. Be sure to remove and clean the mop to prevent dirty water flowing back. 3. It is recommended to replace the mop every 3-6 months to ensure effective cleaning. -
Page 16: Clean The Charging Dock (Optional)
Step 3: Clean the filter Rinse the dust box filter with clean water. Air-dry completely before reinstalling to prevent dust from clumping during the next use. Clean the charging dock (optional) Step 1: Clean the charging contact Check whether there is dirt on the charging contacts. Wipe and clean the charging contacts with a soft clean cloth to keep it clean and free of debris. Caution 1. -
Page 17: Troubleshooting
Step 2: Clean the dust channel Step 3: Clean the infrared lens and charging contacts If the dust collector does not work while powered on and the dust bag is not full, firstly disconnect Wipe and clean the infrared lens and charging contacts with a soft clean cloth to keep it clean and it from the power supply and check whether the dust channel is blocked. - Page 18 Error message Solution If the bumper is stuck, remove the debris and briskly tap the bumper several times to dislodge any debris that may be trapped underneath. Error 2: Check if the bumper is stuck. If the product is trapped because of insufficient space, move it to a new location and start it. If the alert continues, contact the customer service.
-
Page 19: Faqs
Error message Solution Error 20: Clean the filter. Remove the filter and clean it. Tip: Resetting the system can fix some errors. FAQs Question type Solution If the battery power is insufficient, dock the main unit on the charging dock and fully charge it before next use. If the Cannot power on battery temperature is too low or too high, use the product at temperatures of 0-40 °C. -
Page 20: Technical Data
Technical data Product name Robot vacuum and mop cleaner Product model QYSDJ01 Rated operating voltage 14.4 V Rated power 50 W Lithium battery capacity 5200mAh Rated charging voltage 24 V Net weight ca. 3.5 kg Dimensions 355 x 355 x 100 mm Charging time ca. -
Page 21: Disposal
Disposal Correct disposal of this product This marking indicates that this product should not be disposed with other household wastes throughout the EU. To prevent possible harm to the environment or human health from uncontrolled waste disposal, recycle it responsibly to promote the sustainable reuse of material resources. To return your used device, please use the return and collection systems or contact the retailer where the product was purchased. -
Page 22: Warranty Card
Robot vacuum and mop cleaner: EN 60335-1:2012/A2:2019, EN 60335-2-2:2010/A1:2013, EN 62233:2008, (EC) 1275/2008: 2008-12-17, Amended by (EC) 278/2009:2009-04-06, (EC) 642/2009:2009-07-22, (EU) 617/2013:2013-06-26, (EU) 801/2013:2013-08-22, EN 301 489-1 V2.2.3:2019, Draft EN 301 489-17 V3.2.2:2019, EN 55014-1:2017, EN 55014-2:2015, EN IEC 61000-3-2:2019, EN 61000-3-3:2013/A1:2019, EN 300 328 V2.2.2:2019, EN 62311:2008, EN 50665:2017 Service email: service@xclea.com Website: www.xclea.com Version: V2.0 11.2020... - Page 23 TABLE DES MATIÈRES Consignes de sécurité ............................. 22 Avertissement ............................................22 Mise en garde ............................................23 Présentation du produit ............................24 Unité principale ............................................. 24 Bac à poussière + réservoir d'eau (2 en 1) et module de nettoyage ............................ 24 Collecteur de poussière (en option) ......................................
-
Page 24: Consignes De Sécurité
Consignes de sécurité Lisez ce manuel d'utilisation avant d'utiliser l'appareil Avertissement : Pour éviter d'occasionner des blessures à vous-même ou à toute autre personne, ainsi qu'éviter des dommages matériels inutiles, lisez attentivement ce manuel avant d'utiliser l'appareil et respectez les « Consignes de sécurité » suivantes. Les consignes de sécurité sont divisées en deux sections : «... -
Page 25: Mise En Garde
17. La batterie est scellée et ne représente aucun risque pour la sécurité dans des circonstances normales. En cas de fuite du liquide de la batterie dans des conditions extrêmes, ce liquide peut causer des irritations ou des brûlures. Si vous venez accidentellement en contact avec le liquide, suivez les instructions suivantes : 1) En cas de contact avec la peau : lavez avec de l'eau et du savon;... -
Page 26: Présentation Du Produit
Présentation du produit Unité principale Capteur de pression de tête laser Boutons de fonction Panneau Capteur laser Bouton de dégagement du Capteur infrarouge de mise sur socle bac à poussière Entrée de poussière Pare-chocs Bouton de dégagement du support de balai Capteur infrarouge de mise sur socle/ Contact de charge (x2) capteur de détection de mur... -
Page 27: Collecteur De Poussière (En Option)
Balai Support de balai Bouton de dégagement du support de balai Balai jetable Collecteur de poussière (en option) Rabat Sortie d'air Lentilles infrarouges Couvercle transparent du canal à poussière Contact de charge Port de chargement Entrée de poussière Socle de charge (en option) Voyant de socle de charge Zone d'émission du signal Port de chargement... -
Page 28: Installation
Installation Installation du collecteur de poussière (en option) Étape 1 : Trouvez un emplacement adéquat pour le positionnement du collecteur de poussière. Étape 2 : Maintenez enfoncé le bouton d'alimentation de l'unité principale pour mettre en marche l'aspirateur robot avec balai, puis appuyez sur le bouton de socle pour que le robot recherche le Bouton de socle >0,5 m >0,5 m... -
Page 29: Installation Du Module De Nettoyage
Étape 3 : Maintenez enfoncé le bouton d'alimentation de l'unité principale pour mettre en marche l'aspirateur robot avec balai, puis appuyez sur le bouton de socle pour que le robot recherche le socle de Bouton de socle Mise en garde 1. -
Page 30: Utilisation
Android et iOS. 2. Lancez l’application Huawei SmartHome. À la première utilisation, enregistrez un compte et 1. Recherchez « Xclea » dans l’App Store ou scannez le code QR ci-dessous pour télécharger et connectez-vous à l’application conformément aux instructions. installer l’application. -
Page 31: Activer / Désactiver Les Modes De Nettoyage
Activer / désactiver les modes de nettoyage 1. Allumer / éteindre Bouton de repérage Maintenez enfoncé le bouton d'alimentation; le voyant du bouton d'alimentation est ALLUMÉ et • Appuyez brièvement pour nettoyer une zone localisée. Le robot se déplace automatiquement sur le socle après le nettoyage. l'unité... -
Page 32: Allumer / Éteindre Et Utiliser Le Collecteur De Poussière (En Option)
Mise en garde 1. Il est recommandé de démarrer le nettoyage lorsque l'unité principale est sur le socle de charge ou le collecteur de poussière. terminée, elle retourne à l'endroit où elle a quitté son trajet pour reprendre le nettoyage. 3. -
Page 33: Nettoyage Et Entretien
Nettoyage et entretien Désassemblage et installation de la brosse principale Étape 1 : Désassemblez la brosse principale Étape 2 : Nettoyez la brosse principale Retournez l'aspirateur robot avec balai, puis appuyez sur le bouton de dégagement du couvercle de brosse principale pour retirer le couvercle de brosse principale. Enlevez la brosse principale et brosse principale. - Page 34 Mise en garde 1. Remplacez-la uniquement par une brosse latérale fournie par XCLEA, sinon, vous pourriez endommager l'unité principale. 2. Pour éviter de vous égratigner, soyez prudent lorsque vous utilisez un tournevis pour remplacer la brosse latérale. 3. Installez les brosses latérales gauche et droite correctement sur les tiges respectives.
-
Page 35: Désassemblage Et Installation Du Balai
Désassemblage et installation du balai Étape 1 : Désassemblez le balai Étape 2 : Nettoyez le balai Retirez le module de nettoyage du bac à poussière + réservoir d'eau (2 en 1), puis retirez le balai Rincez le balai avec de l'eau propre. Laissez sécher complètement à l'air avant de réinstaller, pour du module de nettoyage. -
Page 36: Nettoyez Le Socle De Charge (En Option)
Nettoyez le socle de charge (en option) Étape 1 : Nettoyez le contact de charge Mise en garde des dommages. 2. Pour éviter de vous égratigner, soyez prudent lorsque vous utilisez un tournevis pour remplacer les pièces de remplacement. Nettoyez le collecteur de poussière (en option) Étape 1 : Remplacez le sac à... -
Page 37: Dépannage
Étape 2 : Nettoyez le canal à poussière Étape 3 : Nettoyez les lentilles infrarouges et les contacts de charge Si le collecteur de poussière ne fonctionne pas pendant qu'il est en marche et que le sac à si le canal à poussière est bloqué. S'il est bloqué, utilisez un tournevis pour ouvrir son couvercle transparent, puis dégagez l'obstruction. - Page 38 Message d'erreur Solution Si le pare-chocs est coincé, retirez les débris et tapotez vivement sur le pare-chocs à plusieurs reprises pour déloger tout débris pouvant être coincé en-dessous. Si l'alerte continue, communiquez avec le service à la clientèle. Si l'unité principale est suspendue dans les airs, déplacez-la à un nouvel emplacement et démarrez-la. Erreur 3 : Essuyez le capteur de bordure, éloignez l'unité...
-
Page 39: Questions Fréquemment Posées
Message d'erreur Solution Erreur 19 : Nettoyez le bac à poussière + réservoir d'eau (2 en 1) s'il n'a pas été nettoyé depuis longtemps. Conseil : La réinitialisation du système permet de résoudre certains problèmes. Questions fréquemment posées Type de question Solution Mise en marche impossible la prochaine utilisation. -
Page 40: Données Techniques
Données techniques Nom du produit Aspirateur robot avec balai Modèle du produit QYSDJ01 Tension de fonctionnement nominale 14,4 V Puissance nominale Capacité de la batterie au lithium 5 200 mAh Tension de charge nominale 24 V Poids net env. 3,5 kg Dimensions 355 x 355 x 100 mm <75dB(A)... -
Page 41: Mise Au Rebut
Mise au rebut Mise au rebut correcte de cet appareil Ce marquage indique que cet appareil ne doit pas être éliminé avec d'autres déchets ménagers dans toute l'UE. Pour éviter tout dommage possible à l'environnement ou à la retourner votre appareil usagé, veuillez utiliser les systèmes de retour et de collecte ou contacter le revendeur où l'appareil a été acheté. Ils peuvent prendre cet appareil pour un recyclage sans danger pour l'environnement. -
Page 42: Carte De Garantie
617/2013:2013-06-26, (UE) 801/2013:2013-08-22, EN 301 489-1 V2.2.3:2019, Version EN 301 489-17 V3.2.2:2019, EN 55014-1:2017, EN 55014-2:2015, EN CEI 61000-3-2:2019, EN 61000-3-3:2013/A1:2019, EN 300 328 V2.2.2:2019, EN 62311:2008, EN 50665:2017 E-mail : service@xclea.com Version : V2.0, 11.2020 Applicable uniquement au modèle d'aspirateur robot avec balai QYSDJ01... - Page 43 INHALT Sicherheitshinweise ....................................42 Warnung ........................................................42 Vorsicht ........................................................43 Bedienelemente ......................................44 Saug- und Wischroboter ..................................................44 Staubbehälter + Wassertank (2 in 1) und Wischmodul ......................................44 Staubsammelbehälter (optional) ..............................................45 Ladestation (optional) ..................................................45 Installation ........................................46 Staubsammelbehälter installieren (optional) ..........................................46 Ladestation installieren (optional) ..............................................
-
Page 44: Sicherheitshinweise
Sicherheitshinweise Lesen Sie dieses Benutzerhandbuch, bevor Sie das Produkt verwenden. Warnung: Um Verletzungen, auch Dritter, sowie unnötige Sachschäden zu vermeiden, lesen Sie das Benutzerhandbuch vor der Verwendung des Produkts aufmerksam durch und beachten Sie die nachstehenden „Sicherheitshinweise“. Die Sicherheitshinweise sind in zwei Abschnitte unterteilt, „Warnung“... -
Page 45: Vorsicht
17. Der Akku ist ein versiegeltes Gerät und stellt unter normalen Umständen kein Sicherheitsrisiko dar. Wenn unter extremen Bedingungen Flüssigkeit aus dem Akku austritt, kann dies zu Reizungen oder Verbrennungen führen. Falls Sie versehentlich mit der Flüssigkeit in Kontakt kommen, befolgen Sie die nachstehenden Anleitungen: 1) Bei Hautkontakt - mit Wasser und Seife waschen;... -
Page 46: Bedienelemente
Bedienelemente Saug- und Wischroboter Laserkopf-Drucksensor Funktionstasten Obere Blende Lasersensor Entriegelungstaste für Staubbehälter Infrarot-Andocksensor Staubeinlass Stoßfänger Entriegelungstaste für Mopphalter Infrarot-Andocksensor/ Ladekontakt (x2) Wanderkennungssensor Infrarotsensor TOF-Wandverfolgungssensor Spot-Taste Universalrad • Kurz drücken, um einen begrenzten Bereich zu reinigen. Der Kantensensor (x 4) Roboter dockt nach der Reinigung automatisch an. •... -
Page 47: Staubsammelbehälter (Optional)
Wischmopp Mopphalter Entriegelungstaste für Mopphalter Einweg-Wischmopp Staubsammelbehälter (optional) Klappdeckel LED-Display Luftaustritt Infrarotlinse Transparente Abdeckung des Staubkanals Ladekontakt Staubeinlass Ladeanschluss Ladestation (optional) Anzeige der Ladestation Signalausgabebereich Ladeanschluss Kabelaufbewahrung Ladekontakt... -
Page 48: Installation
Installation Staubsammelbehälter installieren (optional) Schritt 1: Finden Sie einen geeigneten Standort zum Aufstellen des Staubsammelbehälters. Schritt 2: Halten Sie die Ein/Aus-Taste am Saug- und Wischroboter gedrückt, um den Saug- und Wischroboter einzuschalten und drücken Sie dann die Andocktaste, damit der Roboter nach dem Staubsammelbehälter zum Laden sucht. -
Page 49: Wischmodul Installieren
Schritt 3: Halten Sie die Ein/Aus-Taste am Saug- und Wischroboter gedrückt, um den Saug- und Wischroboter einzuschalten und drücken Sie dann die Andocktaste, damit der Roboter nach der Ladestation zum Aufladen sucht. Andocktaste Vorsicht 1. Installieren Sie beim Aufladen nicht das Wischmodul, damit kein Wasser aus dem nassen Wischmopp austritt und den Boden beschädigt. 2. -
Page 50: Gebrauch
2. Öffnen Sie die Huawei SmartHome-App. Registrieren Sie bei der ersten Verwendung ein Konto und 1. Suchen Sie im App Store nach „Xclea“ oder scannen Sie den QR-Code unten, um die App melden Sie sich gemäß den Anleitungen bei der App an. -
Page 51: Ein-/Ausschalten Und Reinigungsmodi
Ein-/Ausschalten und Reinigungsmodi 1. Ein-/Ausschalten Spot-Taste • Kurz drücken, um einen begrenzten Bereich zu reinigen. Der Roboter Halten Sie die Ein/Aus-Taste gedrückt, die Anzeige der Ein/Aus-Taste leuchtet und der Saug- dockt nach der Reinigung automatisch an. und Wischroboter begibt sich in den Standby-Modus. Wenn sich der Saug- und Wischroboter im •... -
Page 52: Ein-/Ausschalten Und Betrieb Des Staubsammelbehälters (Optional)
Vorsicht 1. Wir empfehlen, mit der Reinigung zu beginnen, wenn sich der Saug- und Wischroboter an der Ladestation oder am Staubsammelbehälter befindet. 2. Wenn die Leistung während der Reinigung nicht ausreicht, dockt der Saug- und Wischroboter automatisch an der Ladestation oder am Staubsammelbehälter an und lädt sich selbst auf. Er kehrt dorthin zurück, wo er aufgehört hat, und setzt die Reinigung nach Abschluss des Ladezyklus fort. -
Page 53: Reinigung Und Pflege
Reinigung und Pflege Schalten Sie das Produkt vor jeder Wartung aus! Hauptbürste demontieren und installieren Schritt 1: Hauptbürste demontieren Schritt 2: Hauptbürste reinigen Drehen Sie den Saug- und Wischroboter um und drücken Sie den Entriegelungsknopf für das Verwenden Sie die Reinigungsbürste, um Haare und Fasern, die sich an der Hauptbürste verfangen Hauptbürstengehäuse, um die Abdeckung zu entfernen. -
Page 54: Staubbehälter Und Filter Demontieren Und Installieren
Vorsicht 1. Ersetzen Sie sie nur durch eine von XCLEA gelieferte Seitenbürste, da es sonst zu Schäden am Saug- und Wischroboter kommen kann. 2. Um sich nicht zu verletzen, seien Sie vorsichtig, wenn Sie zum Auswechseln der Seitenbürste einen Schraubendreher verwenden. -
Page 55: Wischmopp Demontieren Und Installieren
Vorsicht 1. Ersetzen Sie den Wischmopp nur durch einen von XCLEA gelieferten Wischmopp, da es sonst zu einer unwirksamen Reinigung kommen kann. 2. Achten Sie darauf, den Wischmopp zu entfernen und zu reinigen, um zu verhindern, dass Schmutzwasser zurückfließt. -
Page 56: Ladestation (Optional) Reinigen
Schritt 3: Filter reinigen Spülen Sie den Filter des Staubbehälters mit sauberem Wasser aus. Lassen Sie ihn vor dem Wiedereinbau vollständig an der Luft trocknen, um zu verhindern, dass der Staub beim nächsten Gebrauch verklumpt. Ladestation (optional) reinigen Schritt 1: Ladekontakt reinigen Überprüfen Sie, ob die Ladekontakte verschmutzt sind. -
Page 57: Störungsbehebung
Schritt 2: Staubkanal reinigen Schritt 3: Infrarotlinse und Ladekontakte reinigen Wenn der Staubsammelbehälter bei eingeschaltetem Gerät nicht funktioniert und der Staubbeutel Wischen Sie die Infrarotlinse und die Ladekontakte mit einem weichen, sauberen Tuch ab, um sie nicht voll ist, trennen Sie ihn zunächst von der Stromversorgung und prüfen Sie, ob der Staubkanal sauber und frei von Rückständen zu halten. - Page 58 Fehlermeldung Lösung Wenn der Stoßfänger festsitzt, entfernen Sie die Fremdkörper und klopfen Sie mehrmals auf den Stoßfänger, um eventuell darunter eingeklemmte Fremdkörper zu entfernen. Fehler 2: Prüfen Sie, ob der Stoßfänger festsitzt. Wenn das Produkt aufgrund von Platzmangel eingeklemmt ist, bringen Sie es an einen neuen Ort und starten Sie es. Wenn die Warnung weiterhin besteht, wenden Sie sich an den Kundendienst.
-
Page 59: Faqs
Fehlermeldung Lösung Wenn der Staubbeutel voll ist, ersetzen Sie ihn durch einen neuen. Wenn der Staubbeutel nicht voll ist, überprüfen Sie, ob der Kanal des Staubsammelbehälters verstopft ist. Wenn er Fehler 18: Der Staubbeutel ist voll. verstopft ist, reinigen Sie den Staubkanal. Wenn die Warnung weiterhin besteht, wenden Sie sich an den Kundendienst. -
Page 60: Technische Daten
Fragetyp Lösung Nach der Reinigung eines begrenzten Bereiches oder dem Umsetzen erstellt der Saug- und Wischroboter eine neue Karte. Der Saug- und Wischroboter kehrt nicht zur Ladestation zurück, nachdem er Wenn die Ladestation weit entfernt ist, kann der Saug- und Wischroboter nicht automatisch andocken. Bringen Sie in einen begrenzten Bereich gereinigt hat oder umgesetzt wurde. -
Page 61: Entsorgung
Entsorgung Korrekte Entsorgung dieses Produkts Dieses Symbol weist darauf hin, dass dieses Produkt in der gesamten EU nicht zusammen mit anderen Haushaltsabfällen entsorgt werden darf. Um eine mögliche Schädigung der Umwelt oder der menschlichen Gesundheit durch unkontrollierte Abfallentsorgung zu vermeiden, müssen Sie es verantwortungsbewusst recyceln, um die nachhaltige Wiederverwendung von Materialressourcen zu fördern. -
Page 62: Garantiekartekarte
Saug- und Wischroboter: EN 60335-1:2012/A2:2019, EN 60335-2-2:2010/A1:2013, EN 62233:2008, (EC) 1275/2008: 2008-12-17, geändert durch (EC) 278/2009:2009-04-06, (EC) 642/2009:2009-07-22, (EU) 617/2013:2013-06-26, (EU) 801/2013:2013-08-22, EN 301 489-1 V2.2.3:2019, Entwurf EN 301 489-17 V3.2.2:2019, EN 55014-1:2017, EN 55014-2:2015, EN IEC 61000-3-2:2019, EN 61000-3-3:2013/A1:2019, EN 300 328 V2.2.2:2019, EN 62311:2008, EN 50665:2017 E-Mail: service@xclea.com Website: www.xclea.com Version: V2.0, 11.2020 Gilt nur für den Saug- und Wischroboter Modell QYSDJ01... - Page 63 INDICE Avvertenze per la sicurezza ..................................62 Avvertenza ......................................................62 Attenzione ....................................................... 63 Panoramica sul prodotto ..................................64 Unità principale ..................................................... 64 Contenitore della polvere + serbatoio dell'acqua (2 in 1) e modulo mocio ............................... 64 Raccoglipolvere (opzionale) ................................................65 Base di ricarica (opzionale) ................................................
-
Page 64: Avvertenze Per La Sicurezza
Avvertenze per la sicurezza Leggere questo manuale di istruzioni prima di utilizzare il prodotto. Avvertenza: per evitare lesioni a se stessi e ad altri e per prevenire inutili danni alla proprietà, leggere attentamente prima di utilizzare il prodotto e osservare le seguenti "Istruzioni di sicurezza". Le istruzioni di sicurezza sono suddivise in due sezioni: "Avvertenza" e "Attenzione". Tali sezioni contengono informazioni importanti per un uso sicuro del prodotto e devono essere seguite. -
Page 65: Attenzione
19. Tenere il robot aspirapolvere e mocio lontano da apparecchiature elettromagnetiche negli ospedali. Questo prodotto non è un giocattolo. Non permettere ai bambini di giocarci. Utilizzare questo prodotto solo con gli accessori forniti con esso. 20. L'adattatore è solo per uso in ambienti al chiuso, non esporlo alla pioggia. 21. -
Page 66: Panoramica Sul Prodotto
Panoramica sul prodotto Unità principale Sensore di pressione della testa laser Pulsanti funzione Pannello Sensore laser Pulsante di rilascio del Sensore base a infrarossi contenitore della polvere Ingresso polvere Paraurti Pulsante di rilascio del supporto mocio Sensore base a infrarossi/ Contatto di ricarica (x2) Sensore di rilevamento a parete Sensore a infrarossi... -
Page 67: Raccoglipolvere (Opzionale)
Mocio Supporto mocio Pulsante di rilascio del supporto mocio Mocio monouso Raccoglipolvere (opzionale) Coperchio sollevabile Display a LED Uscita dell'aria Lente a infrarossi Copertura trasparente del canale della polvere Contatto di ricarica Ingresso polvere Porta di ricarica Base di ricarica (opzionale) Indicatore della base di ricarica Area di emissione del segnale Porta di ricarica... -
Page 68: Installazione
Installazione Installazione del raccoglipolvere (opzionale) Passaggio 1: Trovare una posizione adatta per posizionare il raccoglipolvere. Passaggio 2: Tenere premuto il pulsante di accensione sull'unità principale per accendere il robot aspirapolvere e mocio, quindi premere il pulsante Base in modo che il robot cerchi il raccoglipolvere da ricaricare. -
Page 69: Installazione Del Modulo Mocio
Passaggio 3: Tenere premuto il pulsante di accensione sull'unità principale per accendere il robot aspirapolvere e mocio, quindi premere il pulsante Base in modo che il robot cerchi la base di ricarica da ricaricare. Pulsante Base Attenzione 1. Durante la ricarica, non installare il modulo mocio per evitare che l'acqua penetri dal mocio bagnato e danneggi il pavimento. 2. -
Page 70: Utilizzo
3 secondi per ripristinarlo. Fare clic su "+" in alto a destra sulla home page dell'app per aggiungere il 1. Cercare "Xclea" nell'app store o scansionare il codice QR qui sotto per scaricare e installare l'app. dispositivo. 2. Accedere all'app. Premere a lungo i pulsanti sull'aspirapolvere robot contemporaneamente Se non vengono trovati dispositivi, fare clic su "Aggiungi manualmente"... -
Page 71: Accensione/Spegnimento E Modalità Di Pulizia
Accensione/Spegnimento e modalità di pulizia 1. Accensione/Spegnimento Pulsante Localizzata • Premere brevemente per pulire un'area localizzata. Il robot si collega Tenere premuto il pulsante di alimentazione, l'indicatore del pulsante di alimentazione si accende e automaticamente alla base di ricarica dopo la pulizia. l'unità... -
Page 72: Accensione/Spegnimento E Funzionamento Del Raccoglipolvere (Opzionale)
Attenzione 1. Si consiglia di iniziare la pulizia quando l'unità principale si trova sulla base di ricarica o sul raccoglipolvere. 2. Quando l'alimentazione è insufficiente durante la pulizia, l'unità principale si collega automaticamente alla base di ricarica o al raccoglipolvere e si ricarica autonomamente. Tornerà al punto in cui ha interrotto l'attività... -
Page 73: Pulizia E Manutenzione
Pulizia e manutenzione Spegnere sempre il prodotto prima di qualsiasi operazione di manutenzione. Smontaggio e installazione della spazzola principale Passaggio 1: Smontare la spazzola principale. Passaggio 2: Pulire la spazzola principale. Capovolgere il robot aspirapolvere e mocio, premere il pulsante di rilascio del coperchio della Usare la spazzola per la pulizia per raccogliere e tagliare i capelli e le fibre impigliate nella spazzola spazzola principale per rimuoverne il coperchio. -
Page 74: Smontaggio E Installazione Del Contenitore Della Polvere E Del Filtro
Attenzione 1. Sostituire solo con una spazzola laterale fornita da XCLEA, altrimenti l'unità principale potrebbe danneggiarsi. 2. Per evitare di graffiarsi, fare attenzione quando si usa un cacciavite per sostituire la spazzola laterale. 3. Installare correttamente le spazzole laterali sinistra e destra sui rispettivi perni. -
Page 75: Smontaggio E Installazione Del Mocio
Attenzione 1. Sostituire solo con un mocio fornito da XCLEA, altrimenti potrebbe verificarsi una pulizia inefficace. 2. Assicurarsi di rimuovere e pulire il mocio per evitare che l'acqua sporca rifluisca. 3. Si consiglia di sostituire il mocio ogni 3-6 mesi per garantire una pulizia efficace. -
Page 76: Pulire La Base Di Ricarica (Opzionale)
Passaggio 3: Pulire il filtro. Risciacquare il filtro del contenitore della polvere con acqua pulita. Asciugare completamente all'aria prima di reinstallarli per evitare che la polvere si accumuli durante l'uso successivo. Pulire la base di ricarica (opzionale) Passaggio 1: Pulire il contatto di ricarica Verificare se è... -
Page 77: Risoluzione Dei Problemi
Passaggio 2: Pulire il canale della polvere. Passaggio 3: Pulire la lente a infrarossi e i contatti di ricarica. Se il raccoglipolvere non funziona mentre è acceso e il sacchetto per la polvere non è pieno, Strofinare e pulire la lente a infrarossi e i contatti di ricarica con un panno morbido e pulito per scollegarlo prima dall'alimentazione e controllare se il canale della polvere è... - Page 78 Messaggio di errore Soluzione Se il paraurti è bloccato, rimuovere i detriti e picchiettare energicamente diverse volte su di esso per rimuovere eventuali detriti che potrebbero essere intrappolati al di sotto. Errore 2: controllare se il paraurti è bloccato. Se il prodotto è intrappolato a causa di spazio insufficiente, spostarlo in una nuova posizione e avviarlo. Se l'avviso continua, contattare il servizio clienti.
-
Page 79: Faq
Messaggio di errore Soluzione Errore 19: pulire il contenitore della polvere + il serbatoio dell'acqua (2 in 1) Se c'è troppa polvere nel contenitore della polvere + serbatoio dell'acqua (2 in 1), pulirlo e pulire il filtro. se non è stata effettuata la pulizia per molto tempo Errore 20: pulire il filtro. -
Page 80: Dati Tecnici
Dati tecnici Nome del prodotto Robot aspirapolvere e mocio Modello prodotto QYSDJ01 Tensione operativa nominale 14,4 V Potenza nominale 50 W Capacità della batteria al litio 5200 mAh Tensione di ricarica nominale 24 V Peso netto circa. 3,5 kg Dimensioni 355 x 355 x 100 mm Tempo di ricarica ca. -
Page 81: Smaltimento
Smaltimento Smaltimento corretto di questo prodotto Questo marchio indica che il prodotto non deve essere smaltito con altri rifiuti domestici in tutta l'UE. Per evitare eventuali danni all'ambiente o alla salute causati dall'inopportuno smaltimento dei rifiuti, riciclare in maniera responsabile per favorire il riutilizzo sostenibile delle risorse materiali. Per restituire l'apparecchio usato, utilizzare i sistemi di restituzione e raccolta o contattare il rivenditore dove è... -
Page 82: Certificato Di Garanzia
617/2013:2013-06-26, (UE) 801/2013:2013-08-22, EN 301 489-1 V2.2.3:2019, Bozza EN 301 489-17 V3.2.2:2019, EN 55014-1:2017, EN 55014-2:2015, EN IEC 61000-3-2:2019, EN 61000-3-3:2013/A1:2019, EN 300 328 V2.2.2:2019, EN 62311:2008, EN 50665:2017 E- del servizio assistenza: service@xclea.com Sito web: www.xclea.com Versione: V2.0, 11.2020... - Page 83 CONTENIDO Instrucciones de seguridad ..................................82 Advertencia ......................................................82 Precaución ....................................................... 83 Descripción del producto ..................................84 Unidad principal ..................................................... 84 Recipiente guardapolvo + tanque de agua (2 en 1) y módulo trapeador ................................84 Recolector de polvo (opcional) ................................................. 85 Base de carga (opcional) ..................................................
-
Page 84: Instrucciones De Seguridad
Instrucciones de seguridad Lea este manual de uso antes de utilizar el producto Advertencia: Para evitar lesiones propias y a terceros, y para evitar daños innecesarios a sus bienes, antes de usar el producto lea atentamente y cumpla las siguientes “Instrucciones de seguridad”. La instrucciones de seguridad se dividen en dos secciones: "Advertencias" y "Precauciones" Las secciones "Advertencias"... -
Page 85: Precaución
19. Mantenga el aparato alejado de equipos electromagnéticos en hospitales. Este producto no es un juguete. No permita que niños jueguen con él. Use este producto solo con los accesorios provistos con él. 20. Este adaptador es solo para uso en interiores, no lo exponga a la lluvia. 21. -
Page 86: Descripción Del Producto
Descripción del producto Unidad principal Sensor de presión del cabezal láser Botón de Función Panel Sensor laser Botón de liberación del recipiente Sensor infrarrojo de acoplamiento guardapolvo Entrada del polvo Paragolpes Botón de liberación del soporte del trapeador Sensor infrarrojo de acoplamiento/ Contacto de carga (x2) Sensor de detección de paredes Sensor infrarrojo... -
Page 87: Recolector De Polvo (Opcional)
Trapeador Soporte del trapeador Botón de liberación del soporte del trapeador Trapeador deshechable Recolector de polvo (opcional) Tapa giratoria Pantalla LED Salida de aire Lente infrarrojo Tapa transparente del canal de polvo Contacto de carga Entrada del polvo Puerto de carga Base de carga (opcional) Indicador de la base de carga Área de emisión de señales... -
Page 88: Instalación
Instalación Instalación del recolector de polvo (opcional) Paso 1: Encuentre un lugar apropiado para colocar el recolector de polvo; Paso 2: Presione y sostenga el botón Encendido en la unidad principal para encender el robot aspirador y trapeador, luego presione el botón Acoplar para que el robot busque el recolector de polvo y cargue. -
Page 89: Instalación Del Módulo Trapeador
Paso 3: Presione y sostenga el botón Encendido en la unidad principal para encender el robot aspirador y trapeador, luego presione el botón Acoplar para que el robot busque la base de carga y cargue. Botón Acoplar Precaución 1. Al cargar, no instale el módulo trapeador a fin de evitar que caiga agua del trapeador húmedo y dañe el piso. 2. -
Page 90: Uso
Este producto se puede controlar mediante la aplicación Xclea, compatible con sistemas Android e iOS. 2. Abra la aplicación Huawei SmartHome. Cuando use la aplicación por primera vez, registre una 1. Busque “Xclea” en la App Store o escanee el código QR siguiente para descargar e instalar la aplicación. cuenta siguiendo las instrucciones. -
Page 91: Encendido Y Apagado De Los Modos De Limpieza
Encendido y apagado de los modos de limpieza 1. Encendido y apagado Botón Focalizar Presione y sostenga el botón Encendido hasta que el indicador marque Encendido y la unidad • Presione y suelte rápidamente para limpiar un área focalizada. El robot se acopla automáticamente después de limpiar. -
Page 92: Cómo Apagar/Encender Y Operar El Recolector De Polvo (Opcional)
Precaución 1. Se recomienda comenzar la limpieza cuando la unidad principal esté en la base de carga o en el recolector de polvo. 2. Si la energía es insuficiente durante la limpieza, la unidad principal se acoplará automáticamente en la base de carga o en el recolector de polvo y se cargará automáticamente. Después de completar la carga, regresará... -
Page 93: Limpieza Y Mantenimiento
Limpieza y mantenimiento ¡Siempre apague el producto antes del mantenimiento! Cómo desmontar e instalar el cepillo principal Paso 1: Desmonte el cepillo principal Paso 2: Limpie el cepillo principal Voltee el robot aspirador y trapeador, presione el botón de liberación de la tapa del cepillo principal Use el cepillo de limpieza para coger y cortar los cabellos y fibras enredados en el cepillo principal. -
Page 94: Cómo Desmontar E Instalar El Recipiente Guardapolvo Y El Filtro
Precaución 1. Solo use repuestos de XCLEA, de lo contrario, puede ocasionar daños a la unidad principal. 2. Para evitar lesiones personales, tenga cuidado cuando use el destornillador para remplazar el cepillo lateral. 3. Instale correctamente los cepillos principal y lateral en sus respectivas clavijas. -
Page 95: Cómo Desmontar E Instalar El Trapeador
Precaución 1. Solo use repuestos de XCLEA, de lo contrario, la limpieza puede ser deficiente. 2. Asegúrese de retirar y limpiar el trapeador para evitar el reflujo del agua sucia. -
Page 96: Limpie La Base De Carga (Opcional)
Paso 3: Limpie el filtro Enjuague el filtro del recipiente guardapolvo con agua limpia. Deje secar completamente al aire antes de reinstalarlo, a fin de evitar que el polvo se aglomere cuando vuelva a usar el aparato. Limpie la base de carga (opcional) Paso 1: Limpie los contactos de carga Verifique que los contactos de carga no estén sucios. -
Page 97: Solución De Problemas
Paso 2: Limpie el canal de polvo Paso 3: Limpie los lentes infrarrojos y los contactos de carga. Si el recolector de polvo no funciona al encenderse y la bolsa para polvo no está llena, primero Limpie los restos de basura en los lentes infrarrojos y los contactos de carga con un paño suave y desenchufe el aparato y verifique si el canal de polvo está... - Page 98 Mensaje de error Solución Si el paragolpes está trancado, retire los restos de basura y toque enérgicamente varias veces el paragolpes para desalojar los restos de basura que estén atrapados por debajo. Error 2: Verifique si el paragolpes está trancado. Si el producto está...
-
Page 99: Preguntas Frecuentes
Mensaje de error Solución Error 19: Limpie el recipiente guardapolvo + tanque de agua (2 en 1) si no lo Si hay un exceso de polvo en el recipiente guardapolvo + tanque de agua (2 en 1), límpielo y también el filtro. ha hecho por largo tiempo. -
Page 100: Datos Técnicos
Datos técnicos Nombre del producto Robot aspirador y trapeador Modelo de producto QYSDJ01 Voltaje de funcionamiento nominal 14.4 V Potencia nominal 50 W Capacidad de la batería de litio 5200 mAh Voltaje de carga nominal 24 V Peso neto ca. 3.5 kg Dimensiones 355 x 355 x 100 mm Tiempo de carga... -
Page 101: Eliminación De Residuos
Eliminación de residuos Eliminación correcta de este producto Esta marca indica que este producto no debe eliminarse junto con otros residuos domésticos en toda la UE. Para evitar posibles daños al medio ambiente o la salud humana debido a la eliminación incontrolada de residuos, recíclelo de forma responsable para promover la reutilización sostenible de recursos materiales. Para devolver su artefacto usado, utilice los sistemas de devolución y recolección o contacte al vendedor donde compró... -
Page 102: Tarjeta De Garantía
(EU) 617/2013:2013-06-26, (EU) 801/2013:2013-08-22, EN 301 489-1 V2.2.3:2019, Borrador EN 301 489-17 V3.2.2:2019, EN 55014-1:2017, EN 55014-2:2015, EN IEC 61000-3-2:2019, EN 61000-3-3:2013/A1:2019, EN 300 328 V2.2.2:2019, EN 62311:2008, EN 50665:2017 Correo eléctronico de servicio: service@xclea.com Sitio web: www.xclea.com Versión: V2.0, 11.2020... - Page 106 • • • • • • •...
- Page 110 2. Uruchomić aplikację Huawei SmartHome. Podczas pierwszego użycia należy zarejestrować konto i systemem Android jak i iOS. zalogować się w aplikacji zgodnie z instrukcjami. 1. Aby pobrać i zainstalować aplikację, należy wyszukać nazwę „Xclea” w sklepie z aplikacjami lub 3. Równocześnie przytrzymać (przez ponad 3 sekundy) przyciski oraz na robocie sprzątającym,...
- Page 111 • • • • • • Gdy przycisk nie reaguje lub nie można go włączyć, spróbuj zresetować system; po zresetowaniu standa rdowe ustawienia czyszczenia i ustawienia trybu czyszczenia hosta zostaną wyczyszczone, a WiFi zosta nie zresetowane.
- Page 112 Dotknij wyswietlacza LED, aby właczyc funkcje zbierania kurzu. Gdy funkcja zbierania kurzu zintegrowanej stacji działa normalnie, zewnetrzny pierscien wskaznika pokazuje stan kontrolki biezacej wody, a wskaznik dezodorantu generatora jonów jest zawsze właczony przez 30 minut, a nastepnie gasnie. Wyswietlacz LED wyswietli równiez pozostała moc; jesli worek na kurz nie jest zainstalowany, zostanie wyswietlony kod błedu;...
- Page 120 < 75 dB (A) Około 250 ml Typ baterii bateria litowa Chiny: DBS036A-2401200C; Wielka Brytania: DBS036A-2401200B; Chiny: KA3601A-2401200CN; Wielka Brytania: KA3601A-2401200BS; Korea: DBS036A-2401200K; Stany Zjednoczone: DBS036A-2401200U; Korea: KA3601A-2401200KR; Stany Zjednoczone: KA3601A-2401200US; Japonia: DBS036A-2401200J; Unia Europejska: DBS036A-2401200G; Japonia: KA3601A-2401200JP; Australia: KA3601A-2401200AU; Unia Europejska: KA3601A-2401200EU;...
- Page 122 Scan the QR code for manuals functional earthing class Ⅱequipment in multiple languages Feito na china...
- Page 126 • • • • • • •...
- Page 130 1. Подключите телефон к домашней сети Wi-Fi. оперативные системы Android и iOS. 2. Откройте приложение Huawei SmartHome. При первом использовании зарегистрируйте 1. Для загрузки и установки приложения найдите Xclea в магазине приложений или учетную запись и войдите в приложение в соответствии с инструкциями. отсканируйте QR-код ниже.
- Page 131 • • • • • • Wi-Fi...
- Page 132 Коснитесь светодиодного дисплея, чтобы включить функцию сбора пыли. Когда функция пылеулавливания встроенной станции нормальная, индикатор внешнего кольца показывает состояние индикатора проточной воды, а индикатор генератора ионов дезодоранта всегда горит в течение 30 минут, а затем гаснет. На светодиодном дисплее также будет отображаться оставшийся...
- Page 140 Тип батареи литиевая батарея Китай: DBS036A-2401200C; : DBS036A-2401200B; Китай: KA3601A-2401200CN; : KA3601A-2401200BS; Корея: DBS036A-2401200K; США: DBS036A-2401200U; Корея: KA3601A-2401200KR; США: KA3601A-2401200US; Япония: DBS036A-2401200J; Европейский Союз: DBS036A-2401200G; Япония: KA3601A-2401200JP; Австралия: KA3601A-2401200AU; Европейский Союз: KA3601A-2401200EU; CMIIT: 2020DP11783...
- Page 142 Scan the QR code for manuals functional earthing class Ⅱequipment in multiple languages...
- Page 143 ...................................... 142 ........................................................142 ........................................................143 ........................................144 ........................................................144 ..................................144 ............................................145 ................................................145 ........................................146 ) ......................................... 146 ........................................... 146 ..............................................147 ........................................148 ..................................................148 ................................................149 ....................................... 150 ON/OFF ......................................... 150 ....................................151 ............................................151 ............................................
- Page 146 (x2) • (x4) • (x2) • (x2) • • • •...
- Page 148 >0.5 m >0.5 m >1.5 m >0.5 m >0.5 m >1.5 m...
- Page 150 QR コードをスキャンするか、App Store で「Huawei SmartHome」を検索して、アプリをダウン * 以下のいずれかのアプリをインストールして使用できます。 ロードしてインストールします。 スマートフォンに Huawei SmartHome アプリがインストールされている場合は、最新バージョン Xclea アプリのインストール であることを確認してください。 1. スマートフォンをご自宅の WiFi に接続します。 本製品は Android と iOS システムに対応する Xclea のアプリを使って制御できます。 2. Huawei SmartHome アプリを開きます。初めて使用する時は、説明書の通りにアカウントを登録し 1. アプリストアで「Xclea」を検索するか、下の QR コードをスキャンしてアプリをダウンロード てアプリにログインします。 してインストールしてください。 3. ロボットクリーナーの ボタンを同時に 3 秒以上長押しするとリセットされます。...
- Page 151 • • • • • • 1.6m × 1.6m 1.6 m 9. WiFi WiFi WiFi...
- Page 152 ON/OFF LEDディスプレイをタッチすると、集塵機能がオンになります。 統合ステーションの集塵機能が正常な場合、外輪インジケーターが流水灯の状態を表示し、消臭イオン発生器インジケーターが30分間点灯 してから消灯します。 LEDディスプレイには残りの電力も表示されます。 ダストバッグが取り付けられていない場合は、障害コードが表示されます。 また、ディスプレイには、脱臭イオン発生器の動作を 促す機能、集塵ステーションとホストの通信灯プロンプト、全粉塵のプロンプトなどがあります。 においイオン発生器 味イオンインジケーター 集塵時の通常の吸引 集塵時の吸引異常 /APP...
- Page 154 1. XCLEA...
- Page 155 1. XCLEA...
- Page 158 1.5m...
- Page 159 WiFi WiFi WiFi WiFi WiFi WiFi WiFi WiFi Large Do Not Disturb...
- Page 160 QYSDJ01 14.4 V 50 W 5200 mAh 24 V ca. 3.5 kg 355 x 355 x 100 mm ca. 250 <75 dB(A) 300 ml ca. 250 電池の種類 リチウム電池 ca. 250 ml QYJCZ01 850 W 200-240 V~, 50-60 Hz 24 V , 1.2 A 358 x 300 x 174 mm ca.
- Page 161 • • • • • • • • • • • IMEI • • •...
- Page 162 , (EC) 642/2009:2009-07-22, (EU) 617/2013:2013-06-26, (EU) 801/2013:2013-08-22, EN 301 489-1 V2.2.3:2019, Draft EN 301 489-17 V3.2.2:2019, EN 55014-1:2017, EN 55014-2:2015, EN IEC 61000-3-2:2019, EN 61000-3-3:2013/A1:2019, EN 300 328 V2.2.2:2019, EN 62311:2008, EN 50665:2017 : service@xclea.com : www.xclea.com V2.0 11.2020 QYSDJ01...
- Page 163 ........................................162 ........................................................162 ........................................................163 ........................................164 ........................................................164 ............................................164 (2 in 1) ) .................................................. 165 ) ............................................................................................166 ) ..............................................166 ) ................................................. 166 ..................................................167 ..........................................168 ....................................................... 168 ..............................................169 ) ......................................170 ................................................. 170 ....................................
- Page 165 3. ( 4. ( 5. ( 6. ( 7. (...
- Page 166 (x2) • (x4) • (x2) • (x2) • • • • (2 in 1) (2 in 1) (2 in 1) (2 in 1)
- Page 168 >0.5 m >0.5 m >1.5 m >0.5 m >0.5 m >1.5 m...
- Page 170 QR 코드를 스캔하거나 앱 스토어에서 “Huawei SmartHome”을 검색하여 앱을 다운로드 및 설치합니다 . 휴대전화에 Huawei SmartHome 앱이 설치되었을 경우 , 최신 버전인지 확인하십시오 . 이 제품은 Android 및 iOS 시스템을 모두 지원하는 Xclea 앱을 사용하여 제어할 수 있습니다 . 1. 휴대전화를 가정용 Wi-Fi 에 연결합니다 .
- Page 171 • • • • • • 1.6m x 1.6m 1.6 m (2 in 1) 9. WiFi WiFi WiFi...
- Page 172 LED 디스플레이를 터치하여 집진 기능을 켭니다. 통합 스테이션의 집진 기능이 정상이면 외륜 표시등이 흐르는 물 표시등의 상태를 표시하고 탈취제 이온 발생기 표시등이 항상 30 분 동안 켜진 후 꺼집니다. LED 디스플레이에는 남은 전력도 표시됩니다. 먼지 봉투가 설치되지 않은 경우 오류 코드가 표시됩니다. 또한 디스플레이에는 탈취 이온 발생기의 작동, 집진 스테이션 및 호스트의 통신 표시 등 프롬프트 및 가득...
- Page 173 . 3~6...
- Page 174 1. XCLEA (2 in 1) (2 in 1) (2 in 1) (2 in 1) (2 in 1) (2 in 1) (2 in 1)
- Page 175 (2 in 1) 1. XCLEA...
- Page 178 (2 in 1) (2 in 1) 1.5m...
- Page 179 (2 in 1) (2 in 1) 0~40° C WiFi WiFi WiFi WiFi WiFi WiFi WiFi WiFi...
- Page 180 QYSDJ01 14.4 V 50 W 5200 mAh 24 V ca. 3.5 kg 355 x 355 x 100 mm ca. 250 <75 dB(A) 300 ml ca. 250 리튬 배터리 배터리 유형 ca. 250 ml QYJCZ01 850 W 200-240 V~, 50-60 Hz 24 V , 1.2 A 358 x 300 x 174 mm...
- Page 181 ) 12 • • • • • • • • • • • IMEI • • •...
- Page 182 , (EC) 642/2009:2009-07-22, (EU) 617/2013:2013-06-26, (EU) 801/2013:2013-08-22, EN 301 489-1 V2.2.3:2019, Draft EN 301 489-17 V3.2.2:2019, EN 55014-1:2017, EN 55014-2:2015, EN IEC 61000-3-2:2019, EN 61000-3-3:2013/A1:2019, EN 300 328 V2.2.2:2019, EN 62311:2008, EN 50665:2017 : service@xclea.com : www.xclea.com : V2.0 11.2020...
Need help?
Do you have a question about the H30 Plus and is the answer not in the manual?
Questions and answers
сбросили до заводских настроек теперь не можем снова установить не видит Wi-Fi отдавали в сервис нам сказала нужен телефон в Китае чтоб его снова запустить. подскажите пожалуйста что можно сделать
To reconnect the XCLEA H30 Plus to Wi-Fi after a factory reset:
1. Open the app and tap the "+" icon in the top right corner of the main page.
2. Select the robot vacuum from the list of devices. If not found, tap "Add manually" and follow the prompts.
3. Make sure your phone is connected to a 2.4 GHz Wi-Fi network.
4. Enter the Wi-Fi password as prompted.
5. Follow the in-app instructions to complete the connection.
Note: The device supports only 2.4 GHz Wi-Fi and must be compatible with the HUAWEI HiLink protocol.
This answer is automatically generated
XCLEA H30 unable to connect , app does not work, what to do??
To fix connection issues with the XCLEA H30 Plus and its app, follow these steps:
1. Check WiFi Connection: Ensure your phone is connected to your home WiFi network.
2. Install the Correct App: Download and install the XCLEA app or Huawei SmartHome app from the app store.
3. Update the App: If you already have the Huawei SmartHome app, ensure it is updated to the latest version.
4. Sign In: Open the app, register an account if needed, and log in.
5. Reset the Robot Cleaner: Long press the required buttons on the robot cleaner as instructed in the app.
6. Try Reconnecting: Follow the app's instructions to pair the robot cleaner with your phone.
If issues persist, restart your router and try again.
This answer is automatically generated